WebAPI Integration Setup & How-to
This page builds an integration that answers an HTTP request, from the endpoint to the response, in the Designer. The sample integrations follow the same sequence against Sage 200, Sage 300 and Sage X3.
Recommended reading
Two pages first:
- Anatomy of an HTTP request & response, for the terms.
- User Property & Request Relationship, for how a request finds its caller.
Endpoint Setup & Integration Design
A WebAPI integration has five parts, and they are built in this order.
- Define the endpoint, and its security, under Setup.
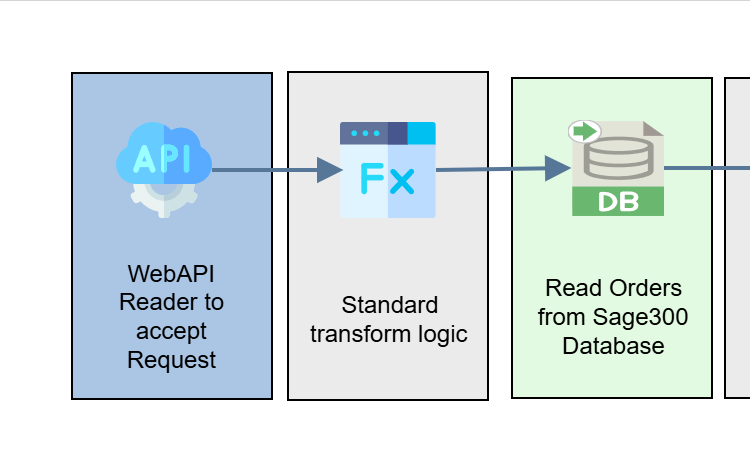
- Create an integration whose first transform is a WebAPI Reader, and select the endpoint on it. The WebAPI Reader is the entry point of every WebAPI integration.
- Add a reader beneath it to act on the request: a database or HTTP read for a query, a reader on the request's body for a create or update.
- Add the transform logic the job needs.
- Add a writer on the WebAPI target to send the response.
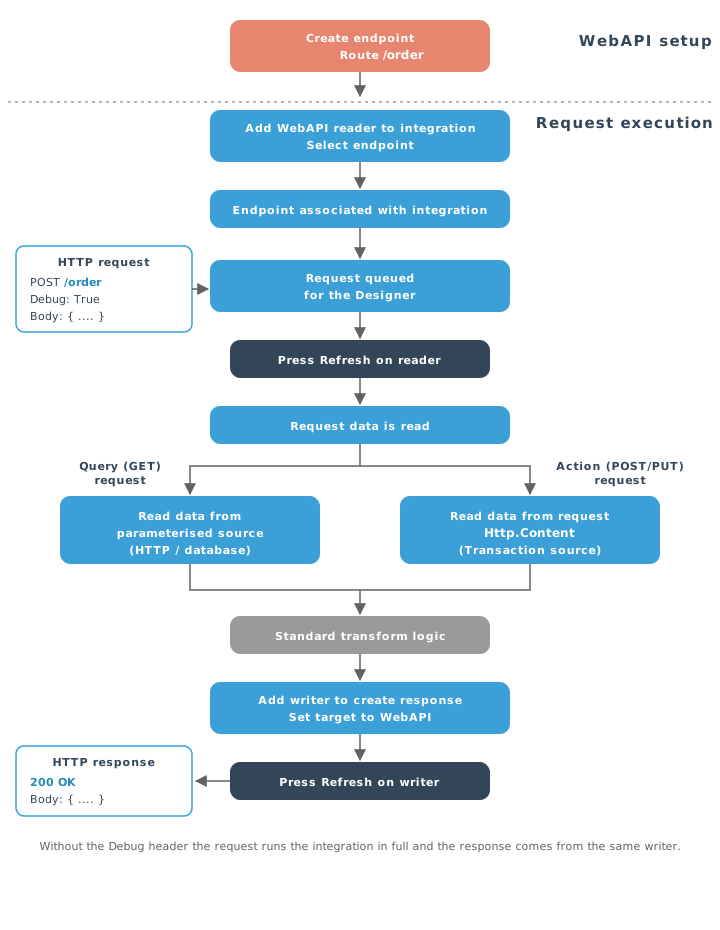
Which is an ordinary, linear integration.
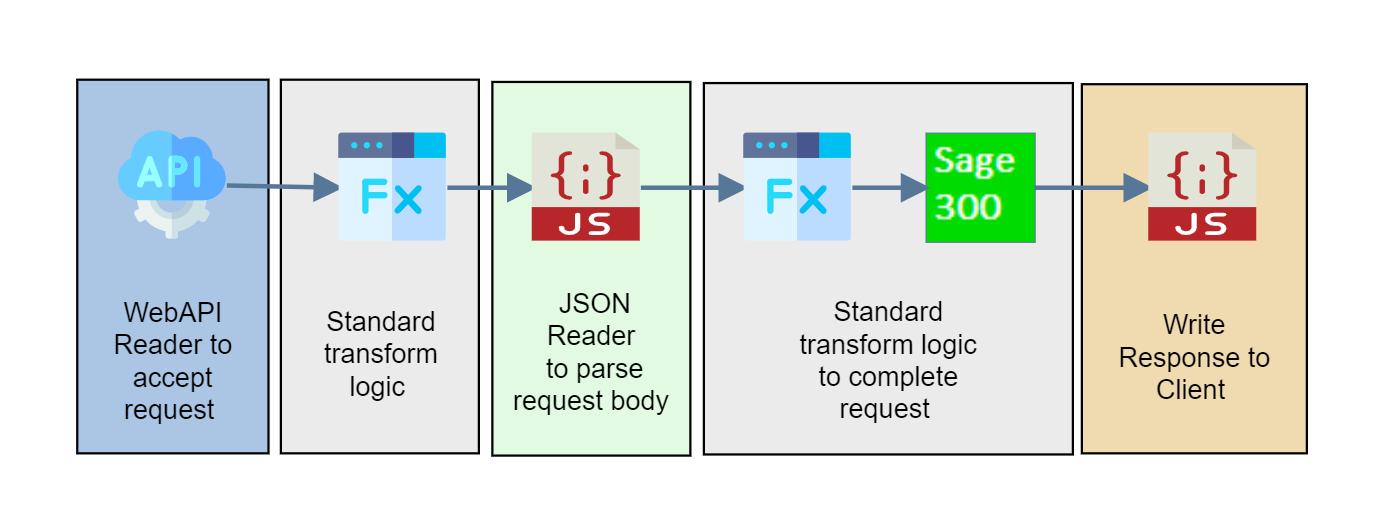
Postman, or another REST client
You need a client to send requests and read the responses. This guide uses Postman; any client that lets you set a request header will do.
Endpoint Setup
-
Create a WebAPI endpoint. While designing, tick Allow Anonymous Requests: security is added once the integration works, and until then it is one thing fewer in the way of the first request.
-
In the client, set up a request to the endpoint: the method the endpoint answers, its URL, and the Debug header.
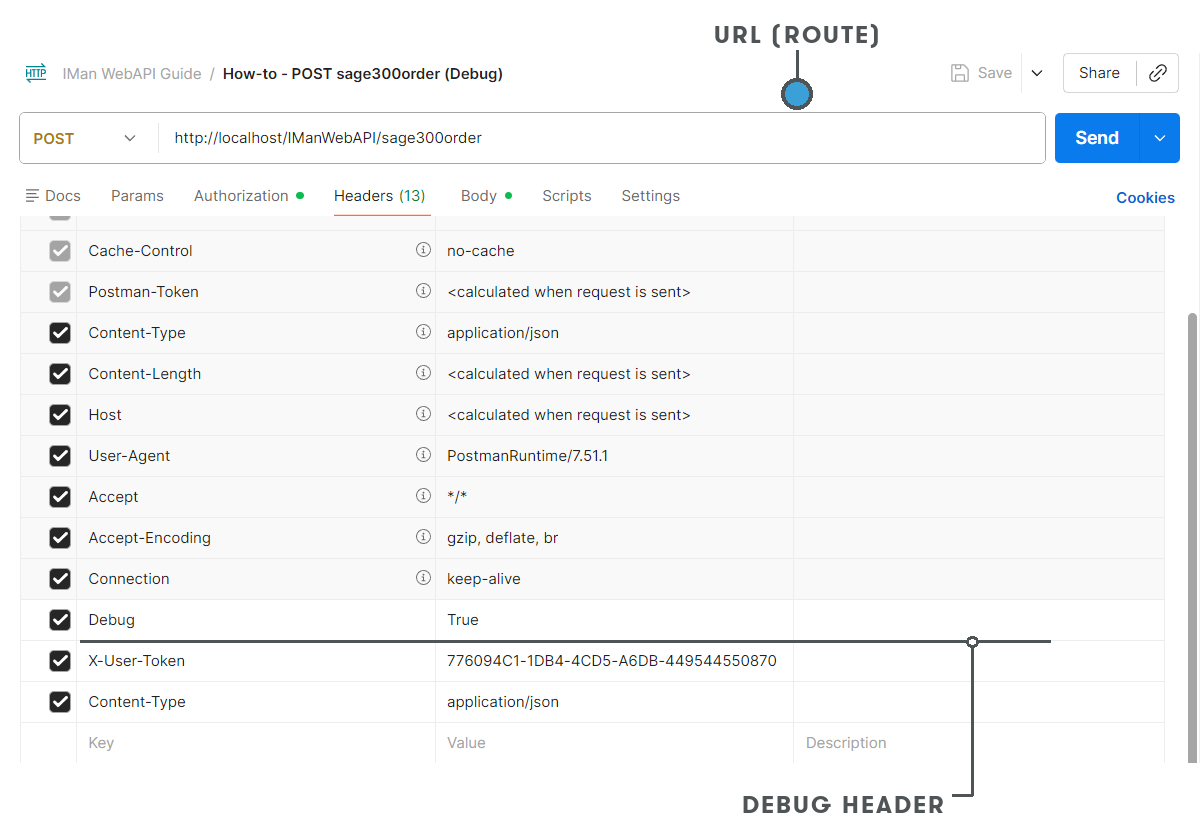
The URL
The URL has three parts.
- Scheme and server. On the IMan server itself,
http://localhost. From another machine, the server's name or address, andhttpsonce a certificate is bound. - The WebAPI application path, the segment after the server, set
when IMan was installed. By default it is
IManWebAPI. - The endpoint's route, with a value in place of each token and query parameter.
A route of
sage300orders/{location}?startDate={startDate}is called ashttp://localhost/IManWebAPI/sage300orders/1?startDate=2022-01-01.The Debug header
A request with the header
Debug: Trueis routed to the Designer instead of running the integration: it waits in a queue for the WebAPI Reader's Refresh Schema, and its response is whatever a writer's Refresh sends. Everything on this page up to Running the Integration in Full is done with the header set.The Authorization header
If the endpoint does not allow anonymous requests, the request also needs the
X-User-Tokenheader and, for Basic authentication, anAuthorizationheader with the web user's username and password. Without them it is answered 401 before it reaches the queue. The sample requests show both. - Scheme and server. On the IMan server itself,
-
Send the request. Until a WebAPI Reader has selected the endpoint, the WebAPI answers 500 with a body saying the endpoint has no job associated. That confirms the server, the application path and the route are right. Endpoint changes take effect as soon as they are saved, so the request can be sent the moment the endpoint exists.
![Postman's response pane showing 500 Internal Server Error and a JSON body whose error reads The endpoint [NOJOB] has no job associated. A callout marks the 500](../../assets/Documentation/Resources/Images/WebAPI/howto-04-postman-no-integration.png)
Integration Design
Add the WebAPI Reader
The first transform of a WebAPI integration is the
WebAPI Reader. It ties the endpoint
to the integration and presents each request as one record of Http.*
fields.
-
Create a new integration and drop a WebAPI Endpoint reader from the Readers palette.
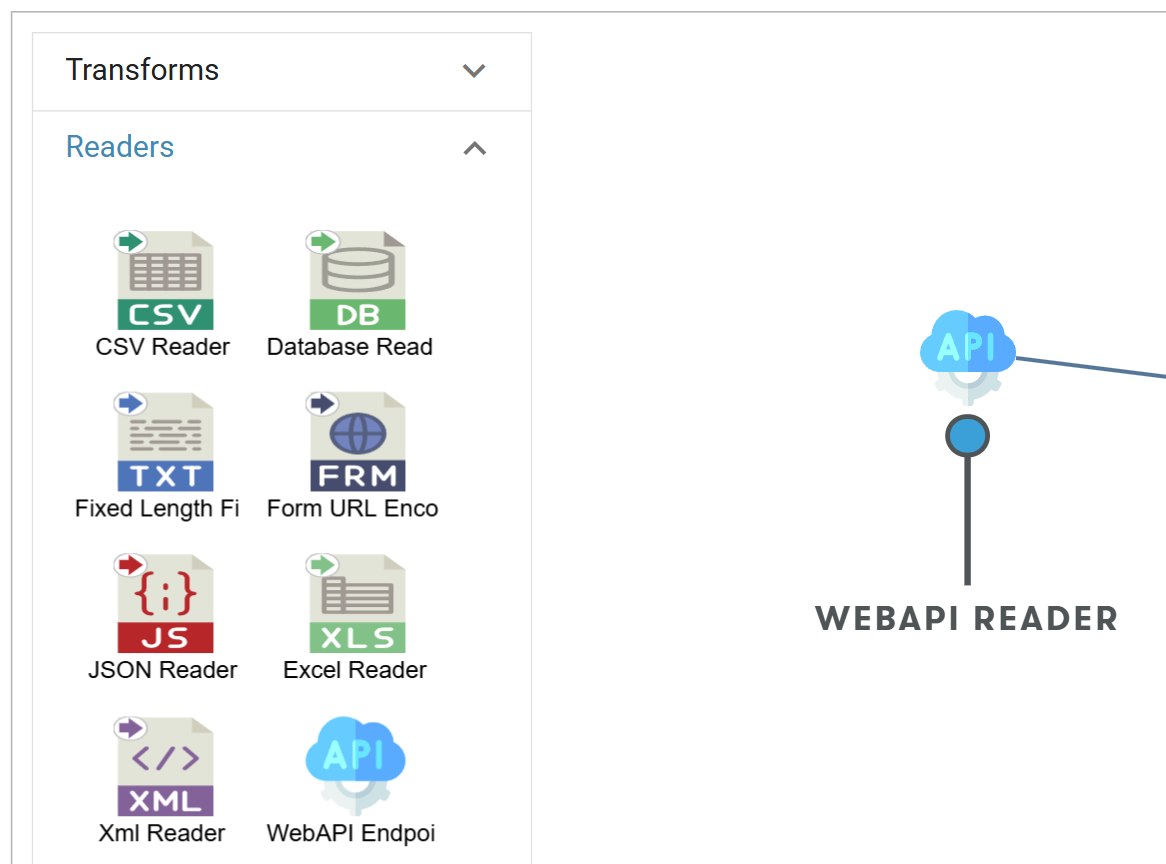
-
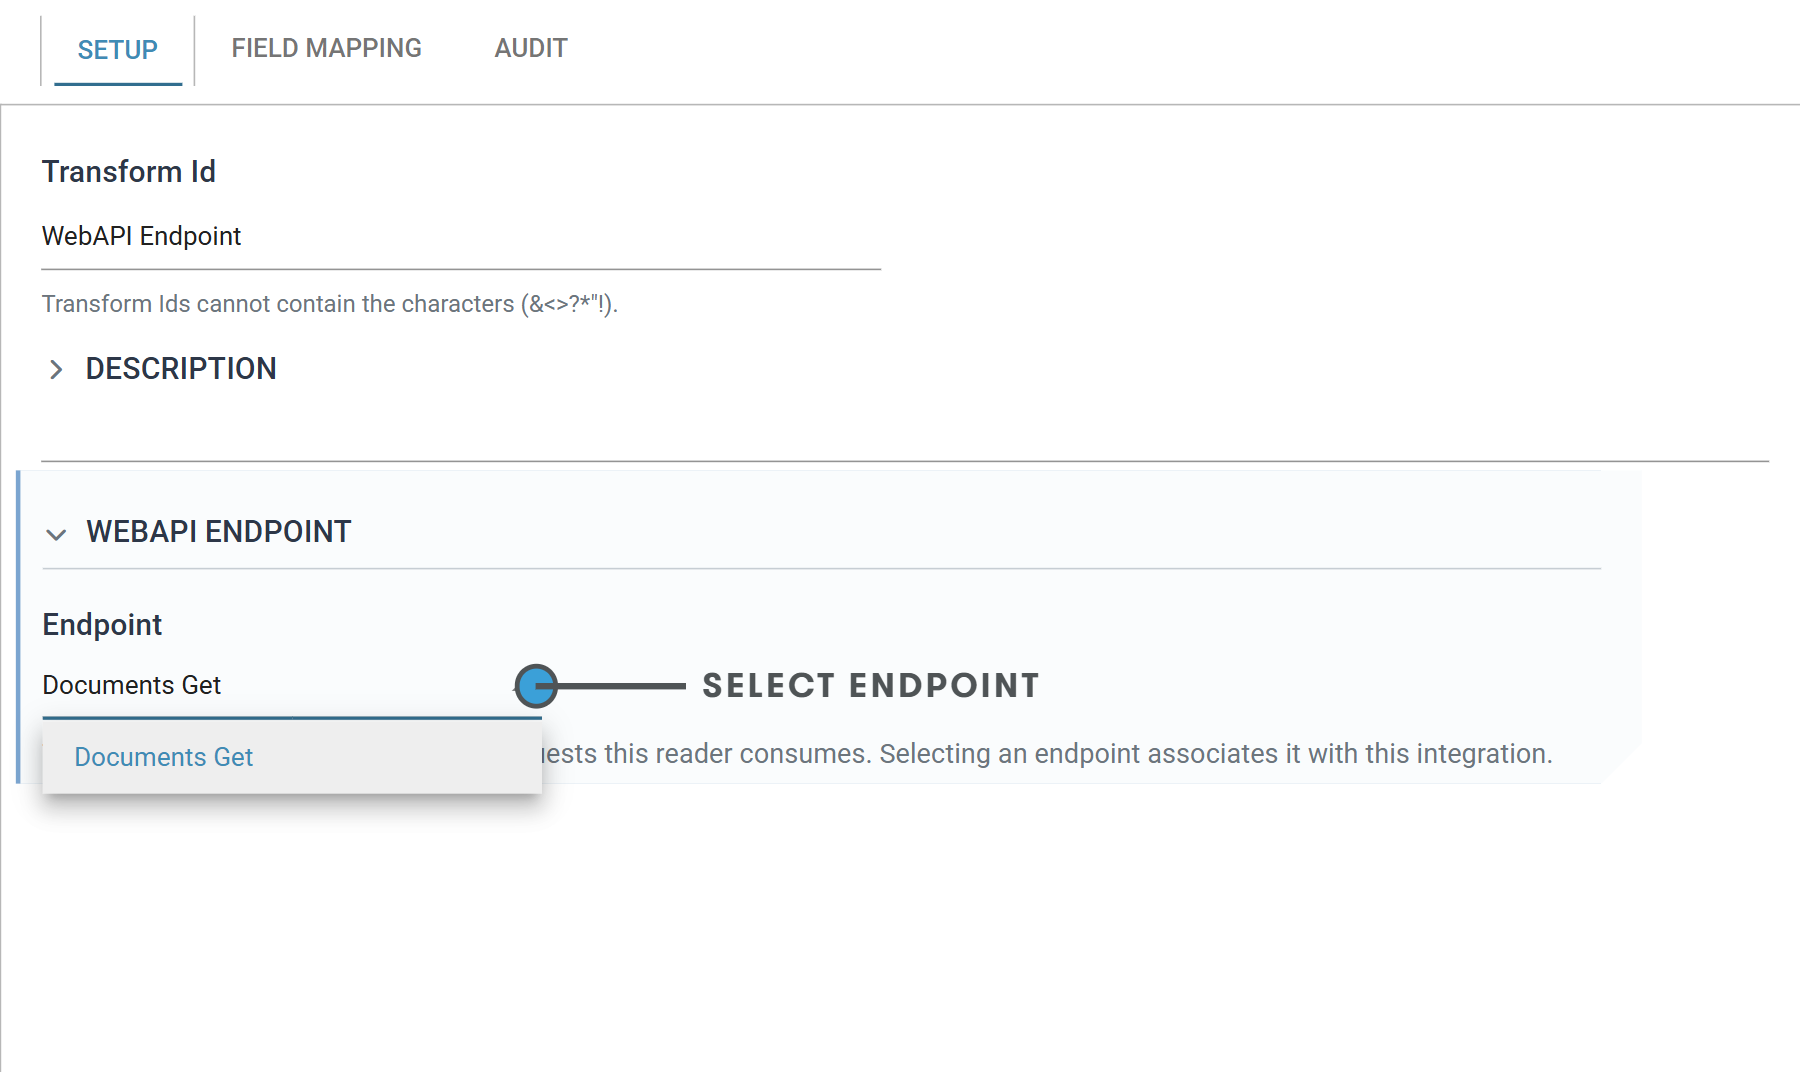
Open the reader and select the endpoint under Endpoint. Selecting it associates the endpoint with this integration at once: from here the WebAPI routes the endpoint's requests to it, and the endpoint is no longer offered to other readers.
-
Send the request from the client, with the Debug header. The client waits: the request is queued for the Designer, and nothing answers it until a writer does.

-
On the reader's Field Mapping tab press Refresh Schema. The reader takes the queued request, lists its fields, and Preview shows the request as one record: the method, the route, each parameter as
Http.Param.<name>, each header asHttp.Hdr.<name>, the user and its properties, and the body inHttp.Content.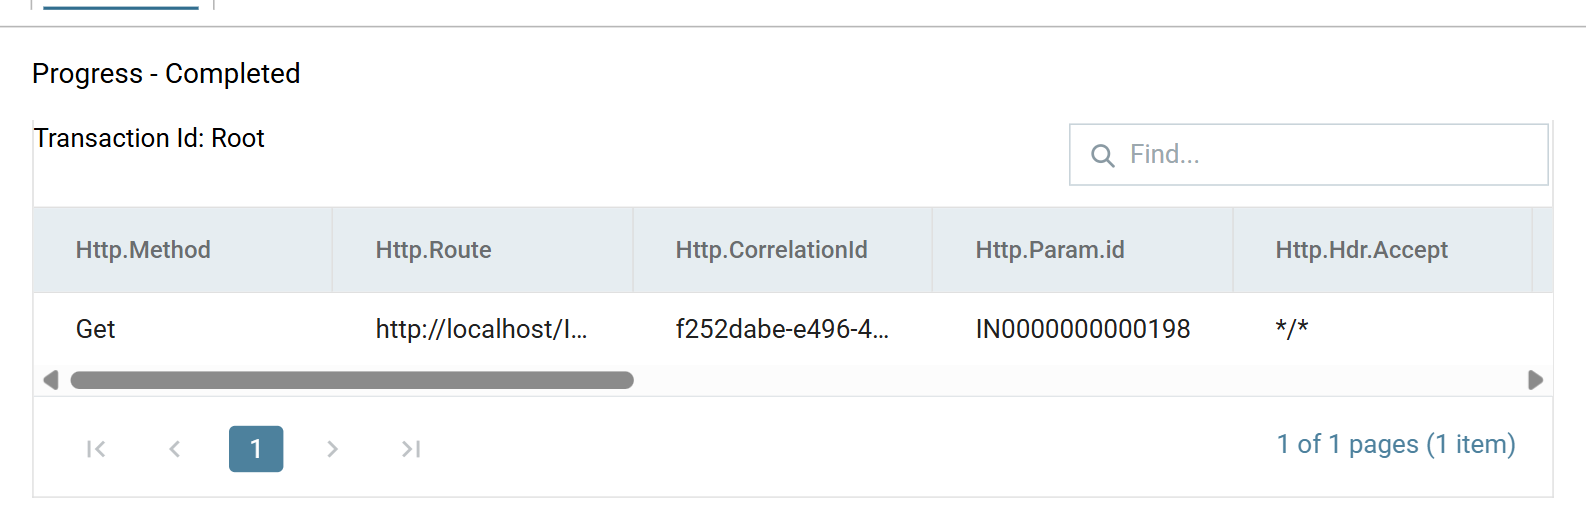
The client gives up before the Designer does
The endpoint's Request Timeout, 20 seconds on a new endpoint, runs on a debug request too. When it passes the client receives 408 Request Timeout, but the request stays queued for five minutes and the reader's Refresh Schema still finds it. Raise the timeout on the endpoint while designing, or send the request again before each refresh.
Processing the request
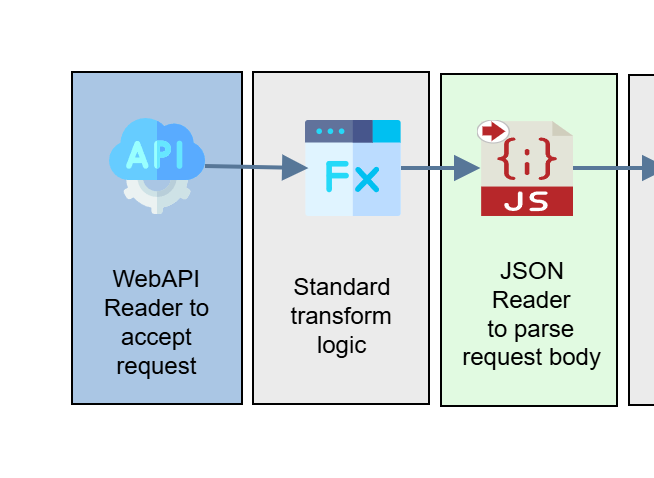
The request's method decides what comes next. Either way, a second reader beneath the WebAPI Reader consumes the request.
GET requests: querying a resource
A GET asks for a resource or a set of them, and the route's parameters say which. Both the Database Reader and a reader on the HTTP controller take those parameters from the fields above them.
Database queries
-
Add a Database Reader beneath the WebAPI Reader.
-
Refer to the request's parameters in the SQL as field references, in the form
%[Record.Http.Param.customerId].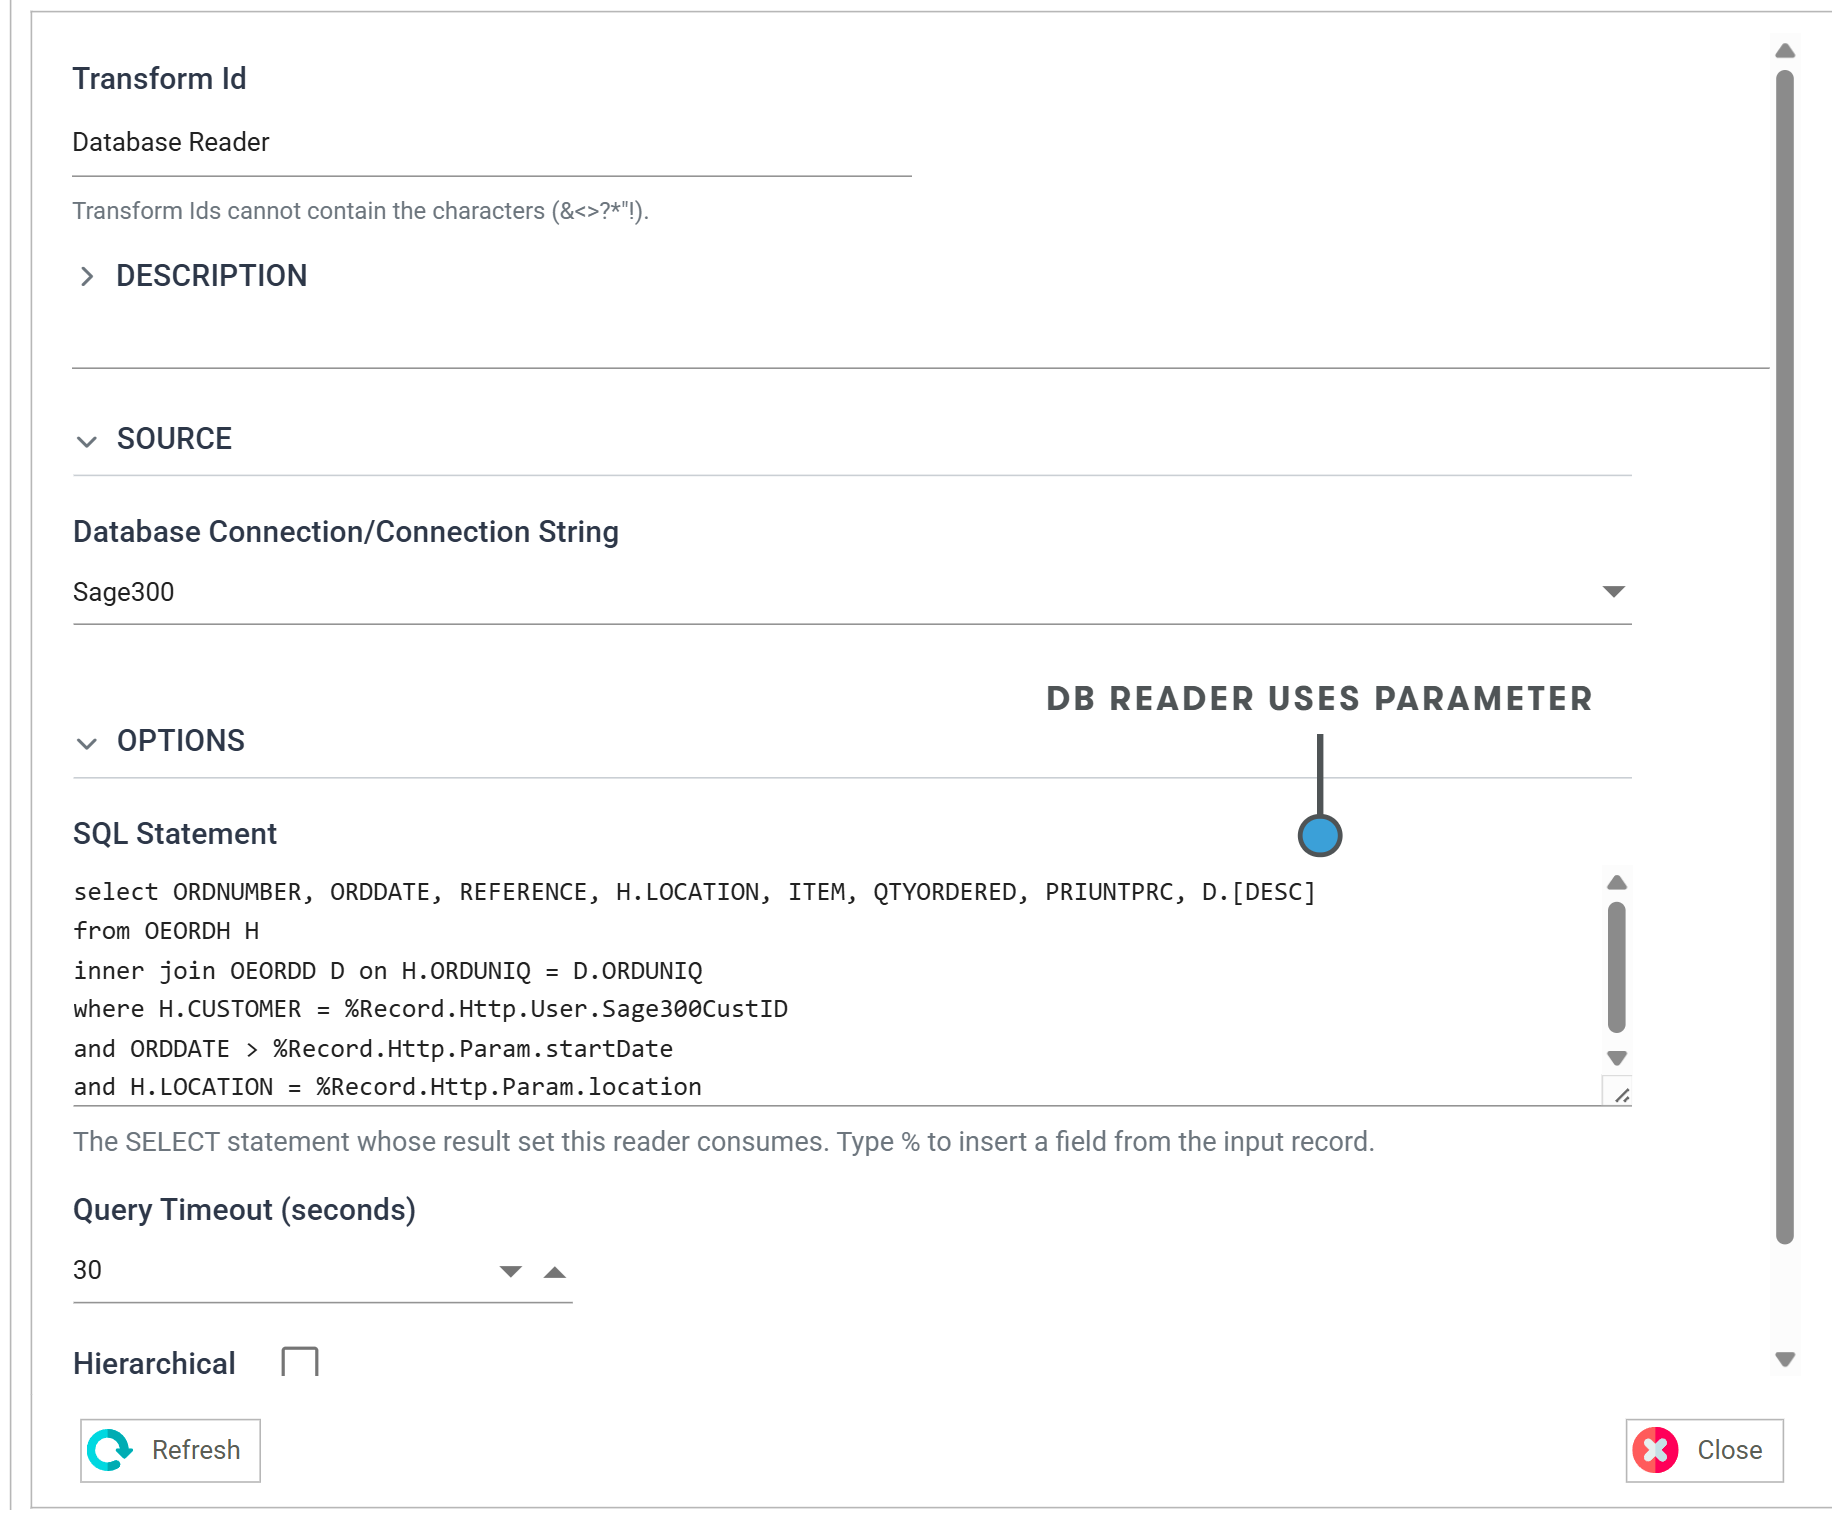
Http requests
-
Add the reader for the format the other service answers in, a JSON Reader for JSON, beneath the WebAPI Reader.
-
Set its Source to http(s) Url, tick Evaluate Url and build the URL from the request's parameters. The editor's live check marks the
%[…]reference as an error; it resolves when the reader runs.![The JSON Reader's Setup tab with Source set to http(s) Url, Evaluate Url ticked and the Query Url reading "https://api.example.com/orders/" & %[Http.Param.orderNo]. Callouts say HTTP source and URL built from the request parameter](../../assets/Documentation/Resources/Images/WebAPI/howto-10-json-reader-url.png)
-
Set the reader up as usual from there.
POST/PUT requests: creating or updating a resource
A POST or PUT carries the resource in its body, and the WebAPI Reader
delivers the body as one text field, Http.Content. A reader beneath it
parses that field.
-
Add the reader for the body's format: a JSON Reader for JSON, an XML Reader for XML, a Form URL Reader for a posted form.
-
Set its Source to Transaction and its Field to
Http.Content.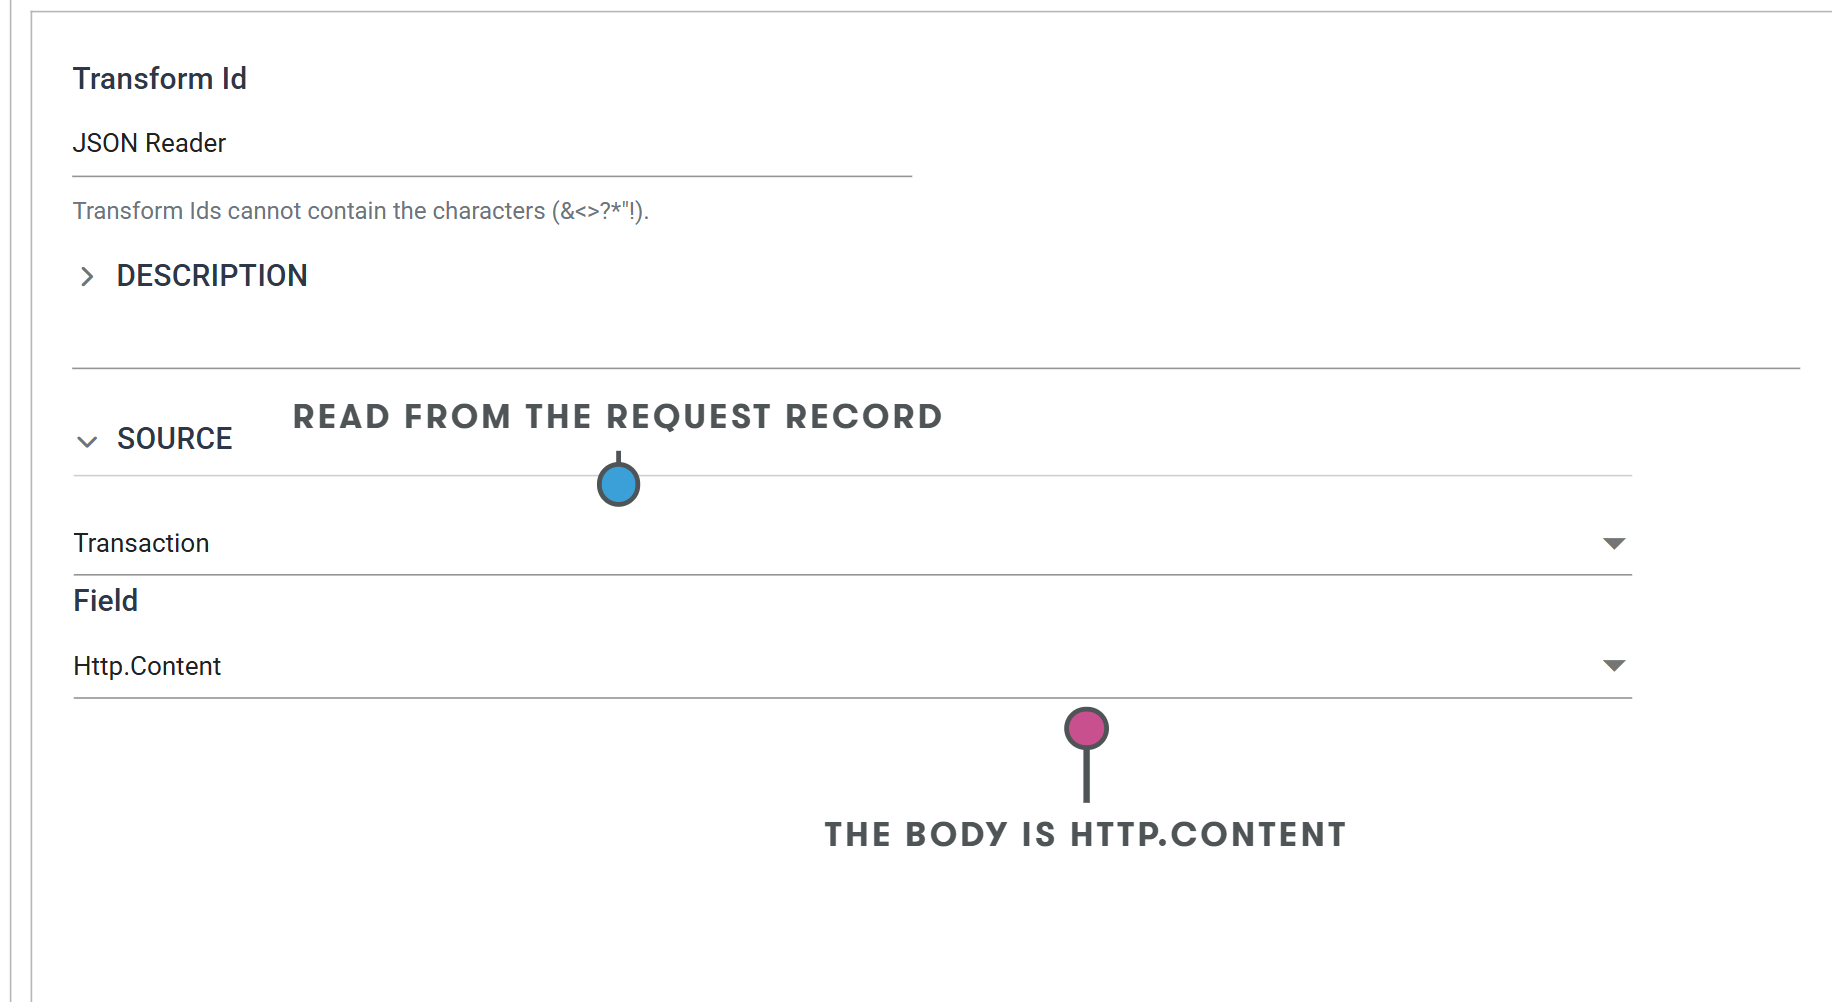
-
Set the reader up as usual. Its Refresh Schema detects the body's fields from the queued request.
Normal Transform Logic
Add whatever the job needs between the reader and the writer: Maps, a connector, a database write.
Sending the Response
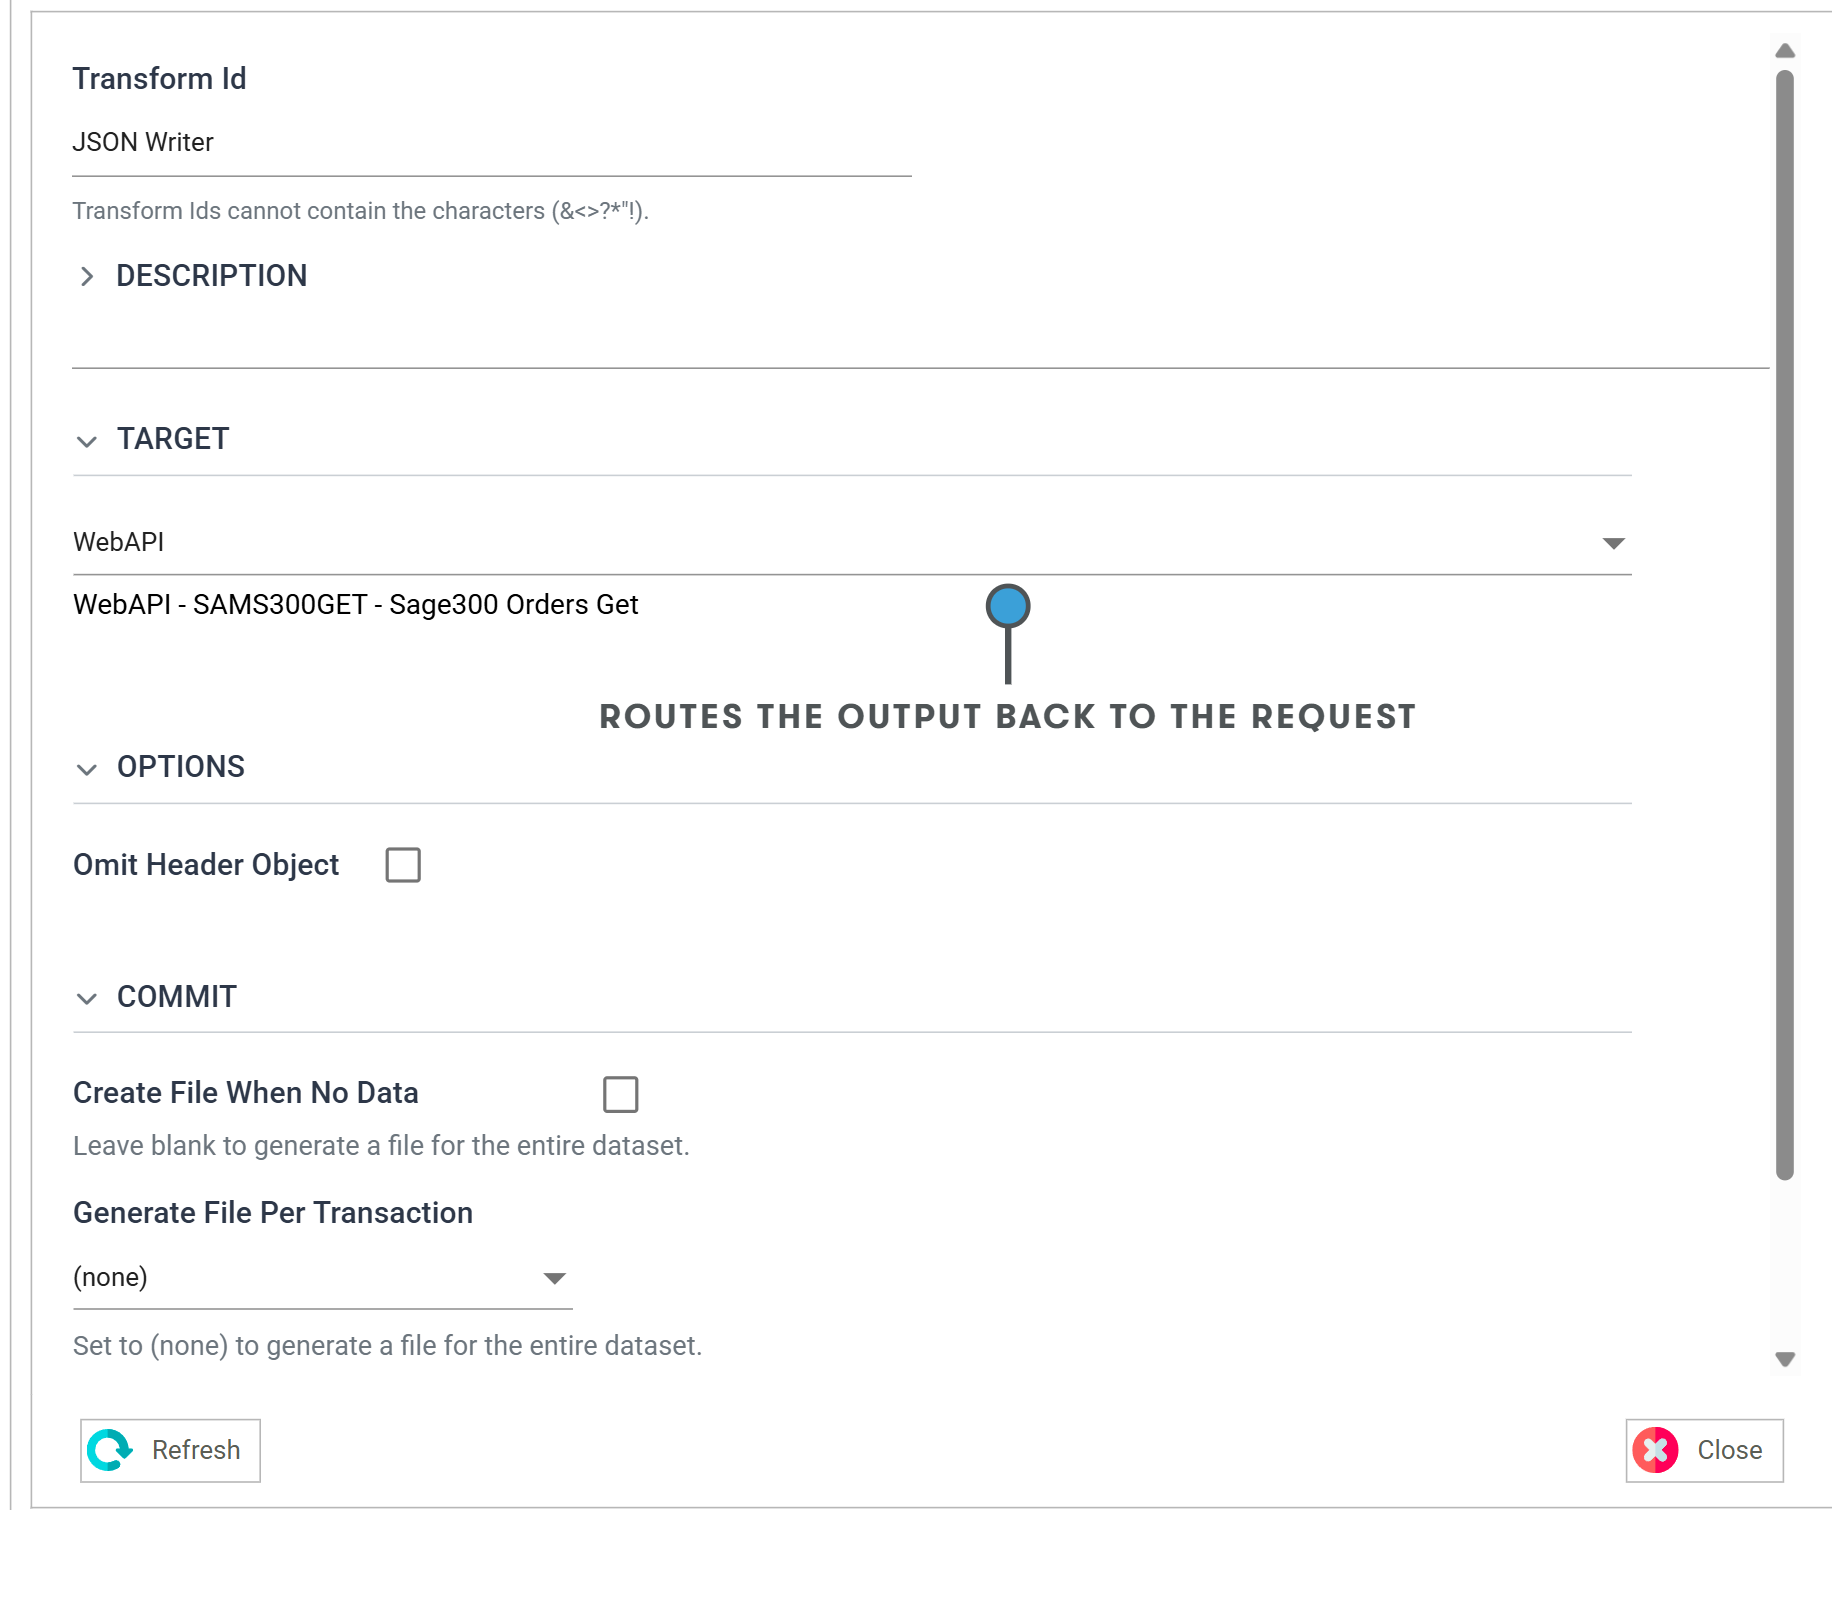
The last transform is a writer whose Target is WebAPI. Its output is the response body: a JSON Writer for JSON, an XML or CSV Writer for those, the Form URL Writer to return a file, and the Http Redirect Writer to answer with a redirect instead of a body.
-
Add the writer and set its Target to WebAPI. The line beneath the drop-down names the endpoint the integration answers.
-
Set the writer up as you would for a file.
-
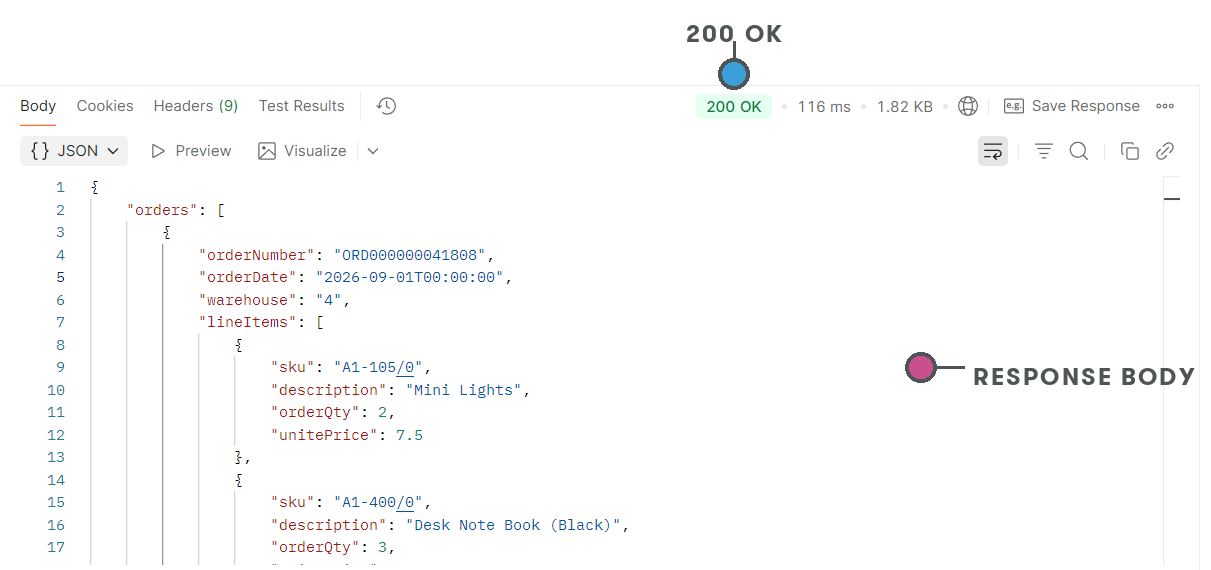
Press Refresh on the writer. If the client is still waiting, the response arrives in it at once.
-
If the client had timed out, the response is held for the next debug request to the endpoint: send the request again and the held response is returned to it, without the integration running again. Change the writer, Refresh, send again: that loop is how the response is shaped.
Running the Integration in Full
- Save the integration.
-
Remove the Debug header, or untick it.

-
Send the request. The WebAPI runs the integration and returns the writer's output, with the endpoint's Result Status Code, 200 unless it was changed. The first request after a save takes a little longer while the integration is loaded and cached.
An error in the integration is answered 500, or the status a
Check
function raised, with a JSON body naming the error and the request's
correlation id; every response carries that id in its X-Correlation-Id
header, and Request Logging says
where to find it.