This article describes how to configure the SMTP Server settings in IMan to work with Office365.
Please note this article is not exhaustive, your instance of Office365 may have policies and restrictions which prevent successful connecton or sending of emails.
SMTP Server Setup
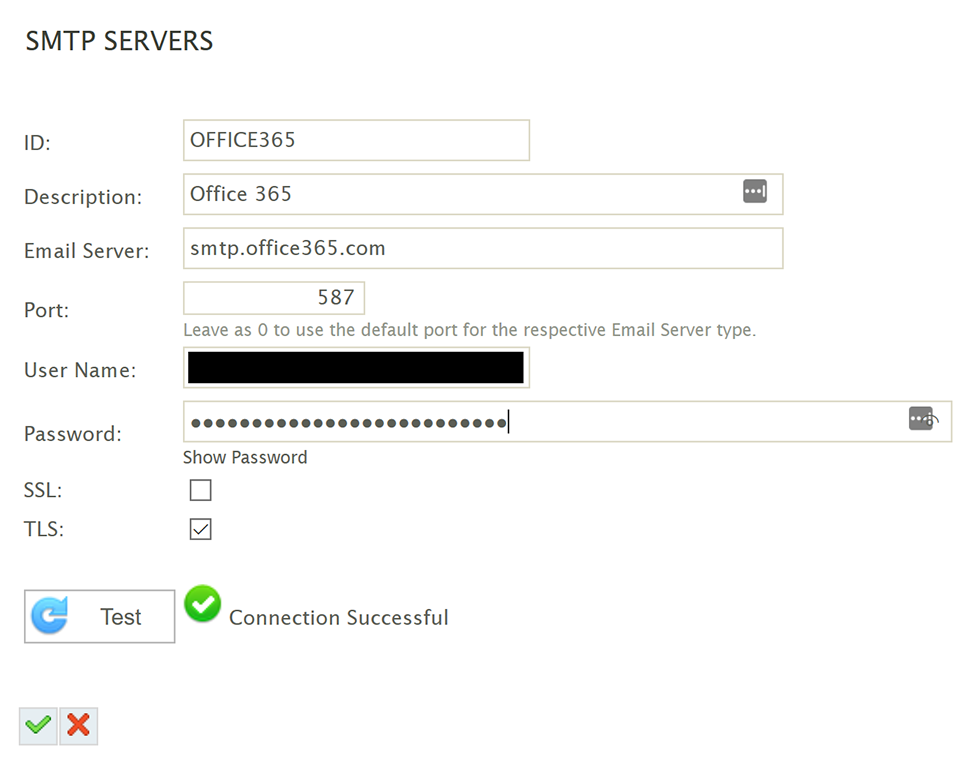
Create a new SMTP Server with the following settings:
Server – smtp.office365.com
Port – 587
User – Your Office365 Login (this can be different to your email)
Password – The password for the user above.
TLS – Checked
Press the Test button to ensure the connection can be successfully made.
Email Group Setup
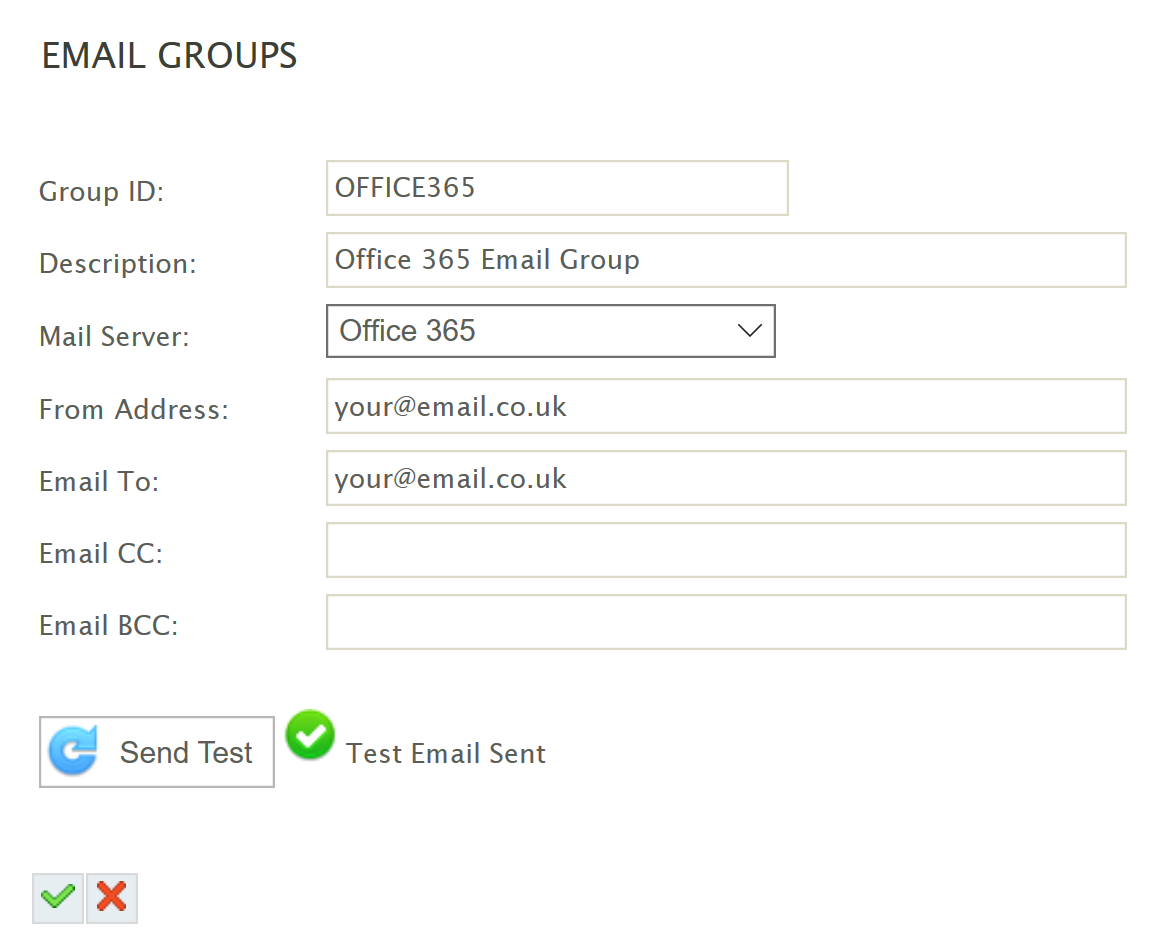
Create an Email Group with the following settings:
Mail Server – Select the Office365 Server created in the step above.
From – Enter a valid email address which the user specified in the SMTP Server has the rights to send on behalf of. It is probable the sender email will be the same as this user.
To, CC, Bcc – These will be recipients of the email. Dependent on your email policies these may only be addresses within your organisation.
Press the Test button to ensure a test email can be successfully sent. Again this will be dependent on your policies, if an error is displayed, somewhere within the error will point you to the issue.
This article applies only to versions 3.2 and below. Version 4.0 and above can use the latest MySQL drivers.
Install
Due to issues with the latest MySQL ODBC drivers and IMan, to use IMan and MySQL ODBC you must use the 3.5.1 driver. Detailed below are the steps you need to take to perform a successful install.
The methods used to install and configure ODBC support for MySQL are slightly different. These methods mostly depend on if you have a 32 bit or a 64 bit system.
Note that this FAQ has been written with the assumption that IMan is running on a dedicated server with no other requirements for ODBC connection.
32 Bit
Download the 32 bit ODBC connector from the MySQL website.
Run the msi installer
And that’s it, install complete.
64 Bit
Here is where things get a little stickier. Firstly we’ll need to check if you have the 64bit version of the connector installed. Even if you click the 32bit ODBC control panel icon:
The likelihood is that it will display the the 64bit version of the connector! To ensure you are using the correct driver you will need to uninstall any previous version and re-install the 32bit connector only.
Go to Start > Control Panel > Uninstall a program and uninstall any existing MySQL ODBC connector
Download the 32 bit ODBC connector from the MySQL website.
Run the msi installer
Verify install
The cleanest method of checking your 32bit ODBC drivers is to run C:WindowsSysWOW64odbcad32.exe from the command line.
Whilst we are being diligent it is worth making sure there are no old ODBC references in the registry. NOTE: If you are not fully comfortable with the use of the windows registry this step is best skipped.
Open the registry editor and navigate to HKLMSOFTWAREODBCODBCINST.INI and ensure there are no key entries for MySQL drivers. Also check under the ODBC Drivers key and remove any entries for those drivers.
Connection strings
The connection string to be used for connecting to MySQL will be familiar to seasoned IMan users:
One key item to note here is the charset attribute. Columns of type text can have their own encoding. Specifying the encoding in the connection string will ensure that the field content will be translated to the client correctly. There are several settings available and charsets in the MySQL are discussed in more detail here.
Pre-requisites
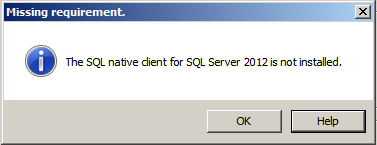
IMan requires the installation of the SQL Server Native Client. This message is typically received when testing the database connection from the Administration console.
You will need to install the client available from the Microsoft website listed below:
Expand “install instructions” and download the appropriate file for your processor architecture.
Software Download
Please logon to our website and download the relevant version of software from the form on our home page.
Backup
Backup the IMan database.
Take a copy of the IMan shared data directory. This directory contains several folders: Cache, Config, Debug, & JobConf. The ‘JobConf.’ folder is critical and contains the Xml configuration files.
Note the username in which IMan is running under, by clicking the Permissions button at the bottom of the screen.
License Key
If you are moving from one major version to another i.e. from v3.x, v4.x or v5.x, please contact Realisable to obtain your new license key.
Obtain New Connectors
If you are use any of the non-bundled connectors (Magento, Salesforce, Shopify, etc) please contact Realisable to obtain new connectors.
Updating Existing IMan Instance
Deactivate any licenses.
Uninstall existing version.
Install new version. When prompted, ensure the ‘IIS Application Pool’ is the IMan Application Pool. Also, double check that the IMan shared data directory is the same directory as in step two of the ‘Backup’ section above.
After installing you will need to update both the database and each integration job, due to all the enhancements & changes. To do this, follow the steps detailed below.
Updating the Database
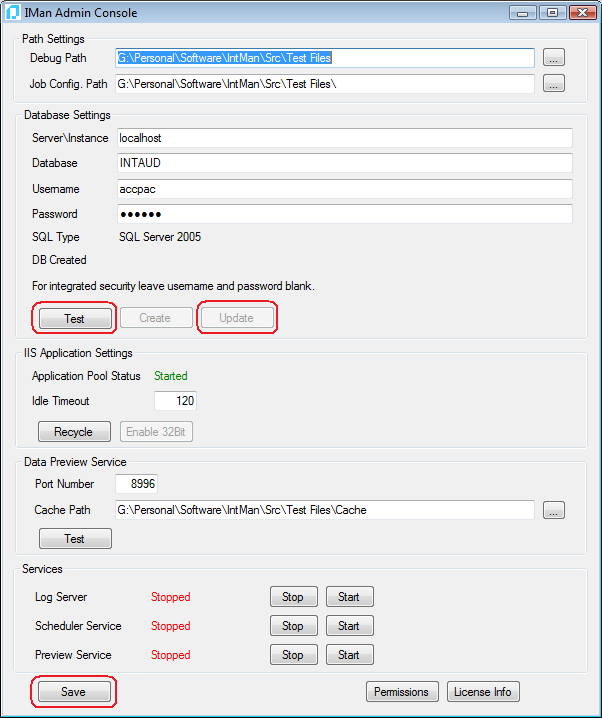
Open the IMan Admin Console.
Press the ‘Test’ button in the database settings. The ‘DB Created’ status should display ‘Requires Update’.
Press the ‘Update’ button.
When the update is complete, press ‘Save’ and select ‘Yes’ to restart the services and IMan Application Pool. This will allow the update to come into effect
User Migration
During the upgrade any existing IMan users will be migrated, including the existing Admin user.
The existing admin user will now have the password: R3alisabl432!
We recommend the following procedure:
Login to IMan using the Admin user and the default password.
Gp Setup, Users..
For each user, amend the username and email fields, to the user’s actual email (make them the same), and then press the Reset Password.
Updating the License
Press the ‘License Info’ button on the Admin Console.
Enter your company contact details and correct serial number.
Press ‘Activate’.
Updating Integration Jobs
Due to possible schema changes within the job configurations it is necessary to update each integration job to the latest schema version.
Login to IMan, and load an integration job from the drop down.
A prompt will indicate if the schema has been updated.
Close the prompt and repeat the above steps for each integration.
This FAQ describes the procedure for migrating IMan from one server [source] to another [target].
The FAQ assumes competency with SQL server as well as knowledge of the IMan install procedure and pre-requisites. The target server is assumed to have all the pre-requisites installed.
A lot of this document borrows from the Copy and Upgrade FAQs.
Installing IMan onto New Server
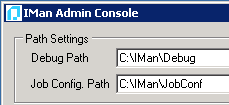
Install IMan onto the new server, taking note of the IMan shared data folder (typically C:\IMan).
Backing Up Jobs & IMan Database
If you’re moving the IMan database to another server, open SQL Server Management Studio and take a backup of the IMan database. Restore the database onto the new server.
Take a copy of the IMan job configuration folder. In this case C:\IMan\JobConf
Restore the IMan job configuration files to the IMan shared data folder (C:\IMan\JobConf) on the new IMan server.
Note the username in which IMan is running under, by clicking the Permissions button at the bottom of the screen.
Configuring New IMan Instance
Open the IMan Console, set the Database settings according to where the IMan database is located. Test and update the database if required.
If IMan was set to run under non Default Permissions (step 4 above), press the Permissions button, setting the permissions accordingly. This may involve creating up a local user, dependent on the user setup.
Press Save to commit the settings.
Checking All Existing Dependencies
This section describes how the various settings should be checked, after the database & job migration has been completed. Essentially, you need to ensure all the various dependencies (Database connections, File Locations, Email & FTP Servers) can all be connected with.
If you have installed a new version of IMan, open each job in the designer, to ensure the configuration version is current.
Database Connections – Depending on whether all database connections have been setup in Setup, Database Connections or specified individually within the integration configurations themselves will dictate how you test. If setup with the Database Connections screen, simply edit each connection and press the Test button. If the database has been specified within the configuration, you will need to open the integration configuration, open either the Database Reader or Writer and check connectivity by hitting Refresh.
SMTP, POP3 & FTP Servers – Go to the respective configurations within the Setup tab of IMan, edit each record and press the Test button.
File Locations – Any Reader, Writer or Task which has a file path should be checked to ensure the path exists on the new server.
CSV, Xml, Fixed With Text or Excel Readers/Writers
File Task
Un-install Old Server
Before un-installing the server, launch the IMan Admin console and click the License Info button.
Make a note of the Serial Number and other details.
Uninstall the software, and when prompted to unregister the license, select Yes.
Licence New Server
Open Admin Console on the new IMan server, press License Info, enter the details per the step above, press Activate and follow the steps as you would normally to license IMan.
FTP/SSH Setup
To authenticate with an SSH server using keys you must create a private/public key using either RSA or DSA type keys in OpenSSH format.
The server you are connecting with will hold the public key and you enter the unencrypted private key into IMan.
The FAQ describes the various steps required to copy a job configuration either from one IMan system to another, or to make a copy of an integration on same IMan system. A common requirement is to copy a job configuration from a test system to a production environment.
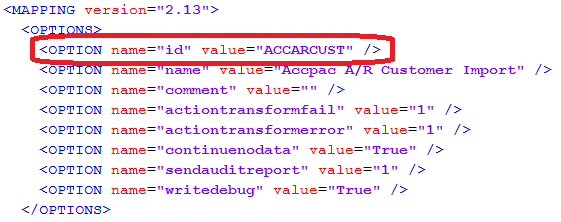
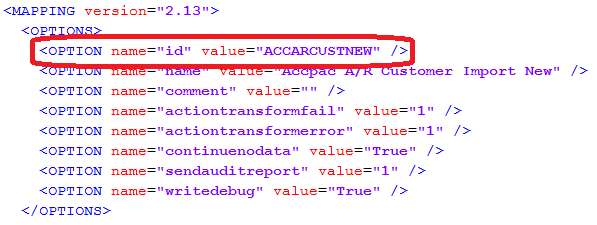
Identify the job ID
Copy the configuration file
Located in jobconf (usually C:\IMan) to another folder:
(Optional) If you are copying on the same installation
The “jobid” attribute within the configuration file must be unique. In this case for example, change:
FROM:
TO (it is also recommended that you alter the “name” attribute to make the copy, once imported, easier to identify):
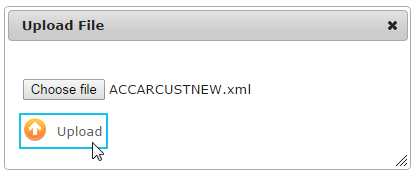
Upload the new job configuration
Click the Upload button (Orange Up Arrow) found on the 1st tab of the Design area.
And browse to the copied configuration file.
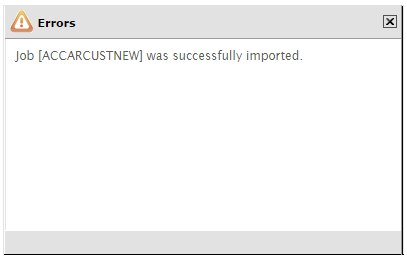
Press the Upload button, and if successful you will receive a corresponding confirmation:
(Optional) If you are moving from the configuration from an older version of IMan server to a newer one. You will need to open the job to ensure the configuration file is up to date.
Change Dependencies Following Import
Dependencies – VERY IMPORTANT
Dependencies such as those listed in the following section, will all need re-configuring, depending on the reason for copying the configuration:
Copy To New IMan Instance:
If you are copying the configuration to a new IMan instance you may need to recreate each of the dependencies defined in the Setup tab, such as System Connectors, Database Connections, Lookups, FTP Servers, in addition to reconfiguring file paths, etc to use the new environment.
Copy To Same IMan Instance:
Alternatively, when making copies of an integration on the same IMan instance it will probably be necessary to reconfigure various dependencies depending on the scenario for the copied integration. For example, when making a copy for test & production purposes, this may mean creating a test & production set of dependencies.
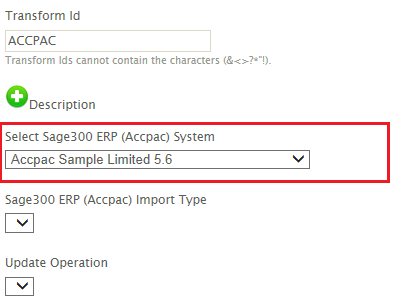
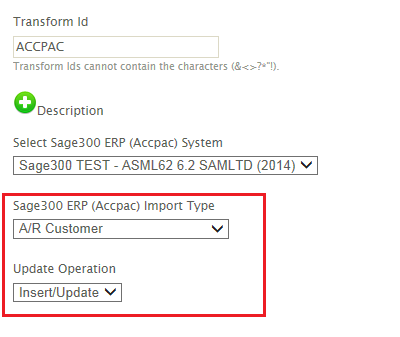
System Connector Settings:
Open each System Connector (Sage200, Sage300, SageX3, etc) and change the System Connector.
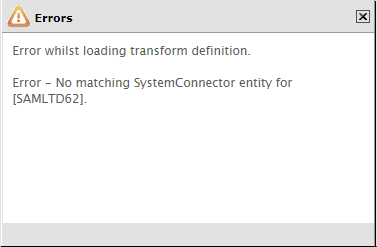
When copying from one instance to another you may receive an error indicating the System Connector settings cannot be loaded.
To resolve, simply select the connector settings from the drop down. If the connector settings is already selected, simply press Refresh.
If successful (and this may take a moment whilst IMan attempts the connection), the Import Type, Update Operation & various controls on the Field Mapping tab will all be populated.
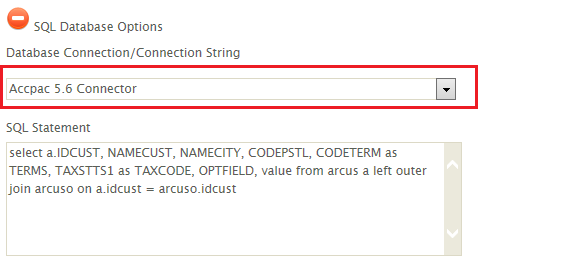
Database Settings
Each Database Reader or Data Writer may need to be re-pointed to the relevant database connection string as defined in Setup, Database Connections or set by explicitly stating the connection string.
File Dependencies
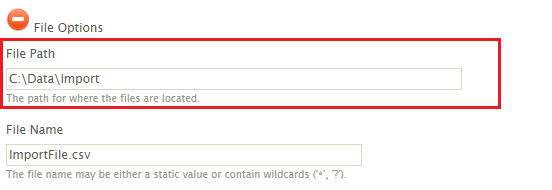
It may be necessary to change any file paths used in the copied configuration to point to intended locations.
This is relevant for transform or task working with files:
CSV, Excel, Xml, Fixed Width Text Reader & Writers
Change the File Path if necessary.
File Task
Change Source & Destination directories.
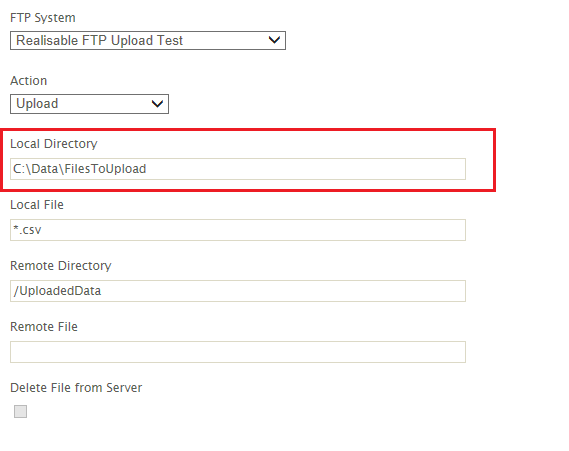
FTP Task
Change the Local Directory.
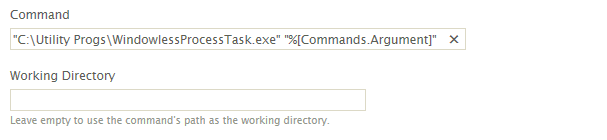
Process Task
You may need to alter the Command & Working Directory.
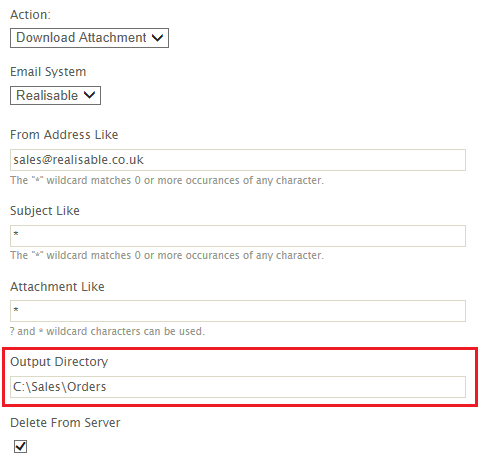
Email Task
If you have an Email Task to “Download Attachment” you may need to change the Output Directory.
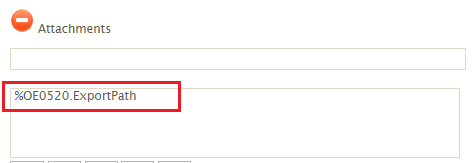
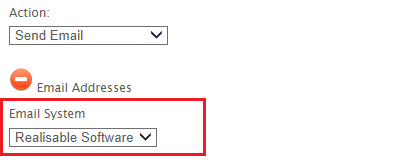
For “Send Email” ensure the Attachments are set accordingly.
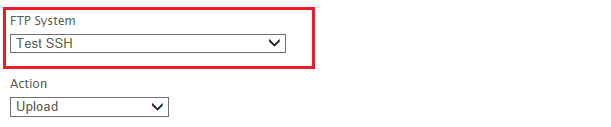
FTP Task
If FTP Tasks are used within the integration, the FTP Server Setting may need recreating and/or re-configuring.
Email Task, Email Controller
It will be necessary to reconfigure any Email Tasks or any Read Transforms with an Email controller to point to the correct Email Server.
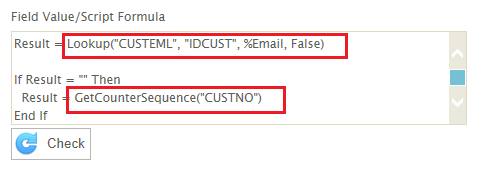
Lookups & Counters
If the job uses any Lookups or Counters (Lookup & GetCounterSequence functions) you may need to either recreate these on the target IMan installation. Alternatively, where you have copied a job configuration onto the same server you may need to re-point to a new Lookup or Counter accordingly.
8.7 Miscellaneous File Functions
Other file related functions such as BuildPath, FileName, ReadTextFile, WriteTextFile, if used, may need re-configured accordingly.
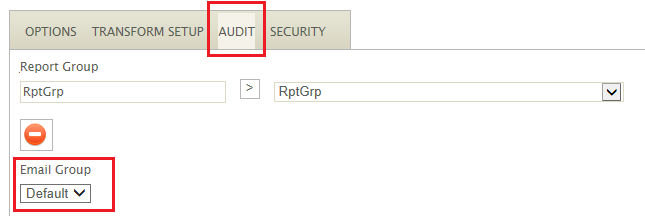
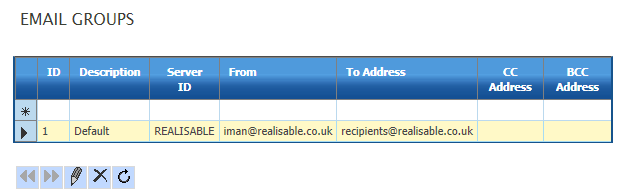
Email Groups
The Email Group(s) used to send the Audit Report may need re-creating or resetting. Email Groups are created in Setup, Email Group.
The job’s Email Group is assigned on the Audit Tab of the Job Design.
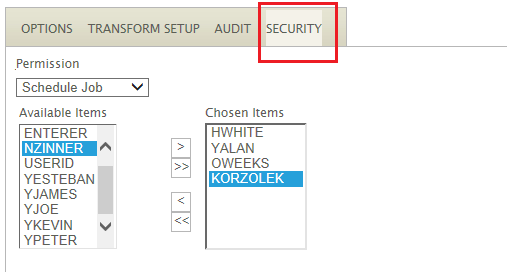
8.9 Job Security
If job security is required, it will need to be redefined on the Security tab of the job design.
From time to time new functionality or bug fixes may require IMan to be patched. This often means replacing file(s) either within the main installation folder or the addins folder for connectors.
Please use the following steps to apply patches. It is important that you follow the different steps for connector or core files as they are different.
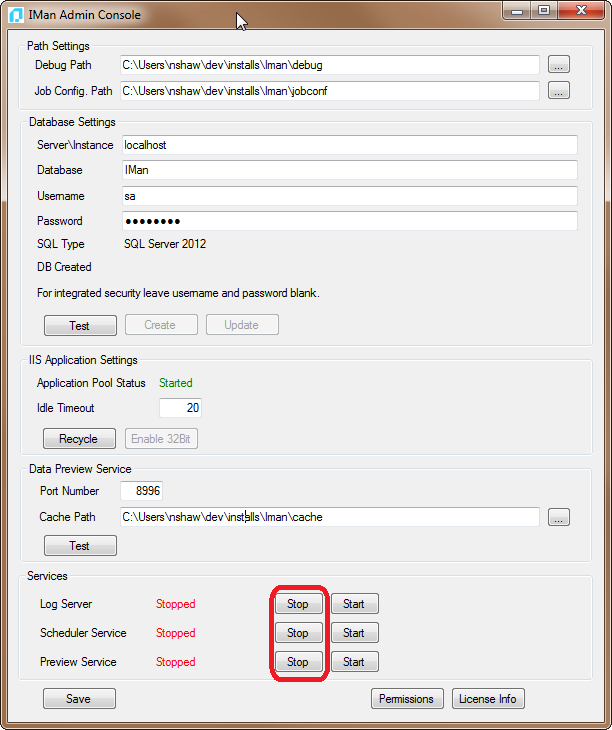
Stopping IMan
Start the administration console and stop all the IMan services.
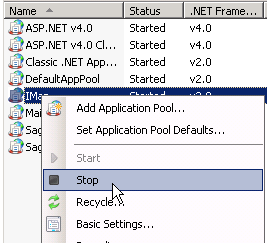
Stop the IMan IIS App Pool.
Steps for Connectors
What Are Connectors?
Connectors provide the integration with a specific application such as Sage, Magento, Salesforce, Concur, etc.
Connectors files have file names which are in the form .Connectors*...dll e.g.
Realisable.Connectors45.Sage300.dll
Realisable.Connectors45.Sage200.2017.dll
RealSW.Connectors45.Amazon.dll
ECInternet.Connectors.Magento.dll
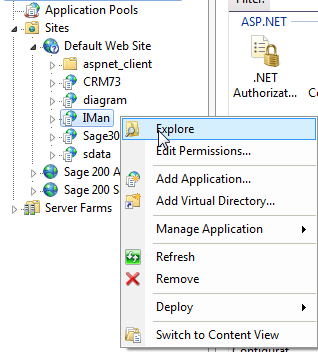
Navigate to the addins folder for the IMan shared data. This is typically c:\IMan\addins
Copy the existing file to an external directory as a backup. Do NOT rename files, move them out of the directory.
Core files are files which are not ‘connector’ files. These are common files are used by different aspects of IMan from UI to processing.
Core files have file names which are NOT in the form of connector files, basically everything else.
Please note the different directions for v4.1 vs v4.0 and earlier.
Version 4.1
Navigate to your IMan install folder C:\Program Files (x86)\Realisable Software\IMan\Web\bin
Copy the existing file to an external directory as a backup.
Copy the new file to the bin folder replacing the original file. Do NOT rename files, move them out of the C:\Program Files (x86)\Realisable Software\IMan\Web\bin folder or sub folders.
Navigate to your IMan install IIS folder e.g. C:\inetpub\wwwroot\IMan\bin
Copy the existing file to an external directory as a backup.
Copy the new file to the bin folder replacing the original file. Do NOT rename files, move them out of the \inetpub\wwwroot\IMan folder or sub folders.
Realisable Software Ltd provides code-free, cost-effective applications integration solutions for SMEs. Our core IMan product is designed to integrate almost any application with a number of Sage solutions and online payment processors.
Looking to purchase IMan, please see our resellers here.
Realisable Software Ltd provides code-free, cost-effective applications integration solutions for SMEs. Our core IMan product is designed to integrate almost any application with a number of Sage solutions and online payment processors.
Looking to purchase IMan, please see our resellers here.
Realisable Software Ltd provides code-free, cost-effective applications integration solutions for SMEs. Our core IMan product is designed to integrate almost any application with a number of Sage solutions and online payment processors.
Looking to purchase IMan, please see our resellers here.


 .
.


 The job’s Email Group is assigned on the Audit Tab of the Job Design.