6.1 – Map Transform
Adding Fields to the Dataset
An Aggregate transform can create records, but it cannot add fields. Every field the shipment charge records need must exist on the dataset before the Aggregate runs. The Map transform adds them.
Here you add seven fields: three on the order header and four on the order
lines. Step 7 maps every one of them into the Sage 200
order. The field that carries the Sage 200 order number back out already exists:
you created Sage200OrderNo in Step 4.
Transform > Field Mapping
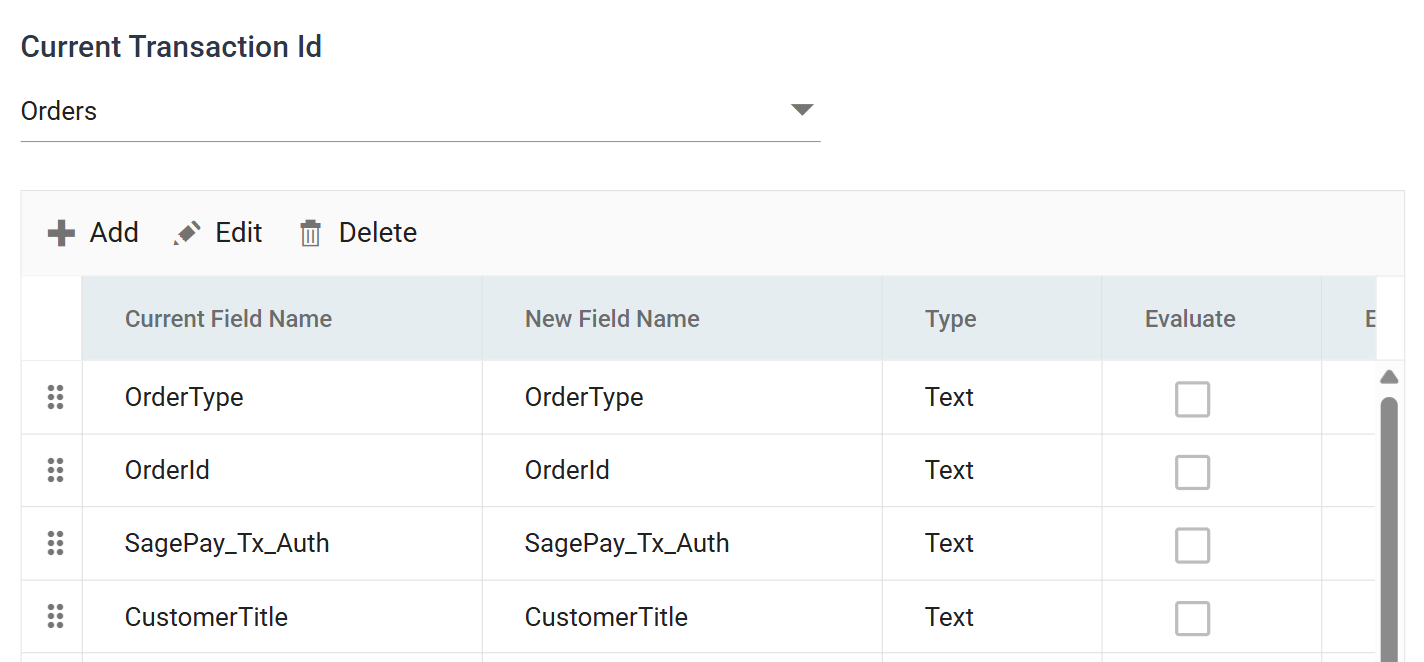
- Double click the Map transform to re-open it, then press the Field Mapping tab.
-
Make sure Orders is selected in the Current Transaction Id drop-down above the grid.
-
Press Add and create the field that tells Sage 200 which warehouse the order is fulfilled from:
- New Field Name
- Warehouse
- Type
- Text
- Evaluate
- Unticked.
WAREHOUSEis a literal, not a formula.
- Unticked.
- Evaluate String
- WAREHOUSE
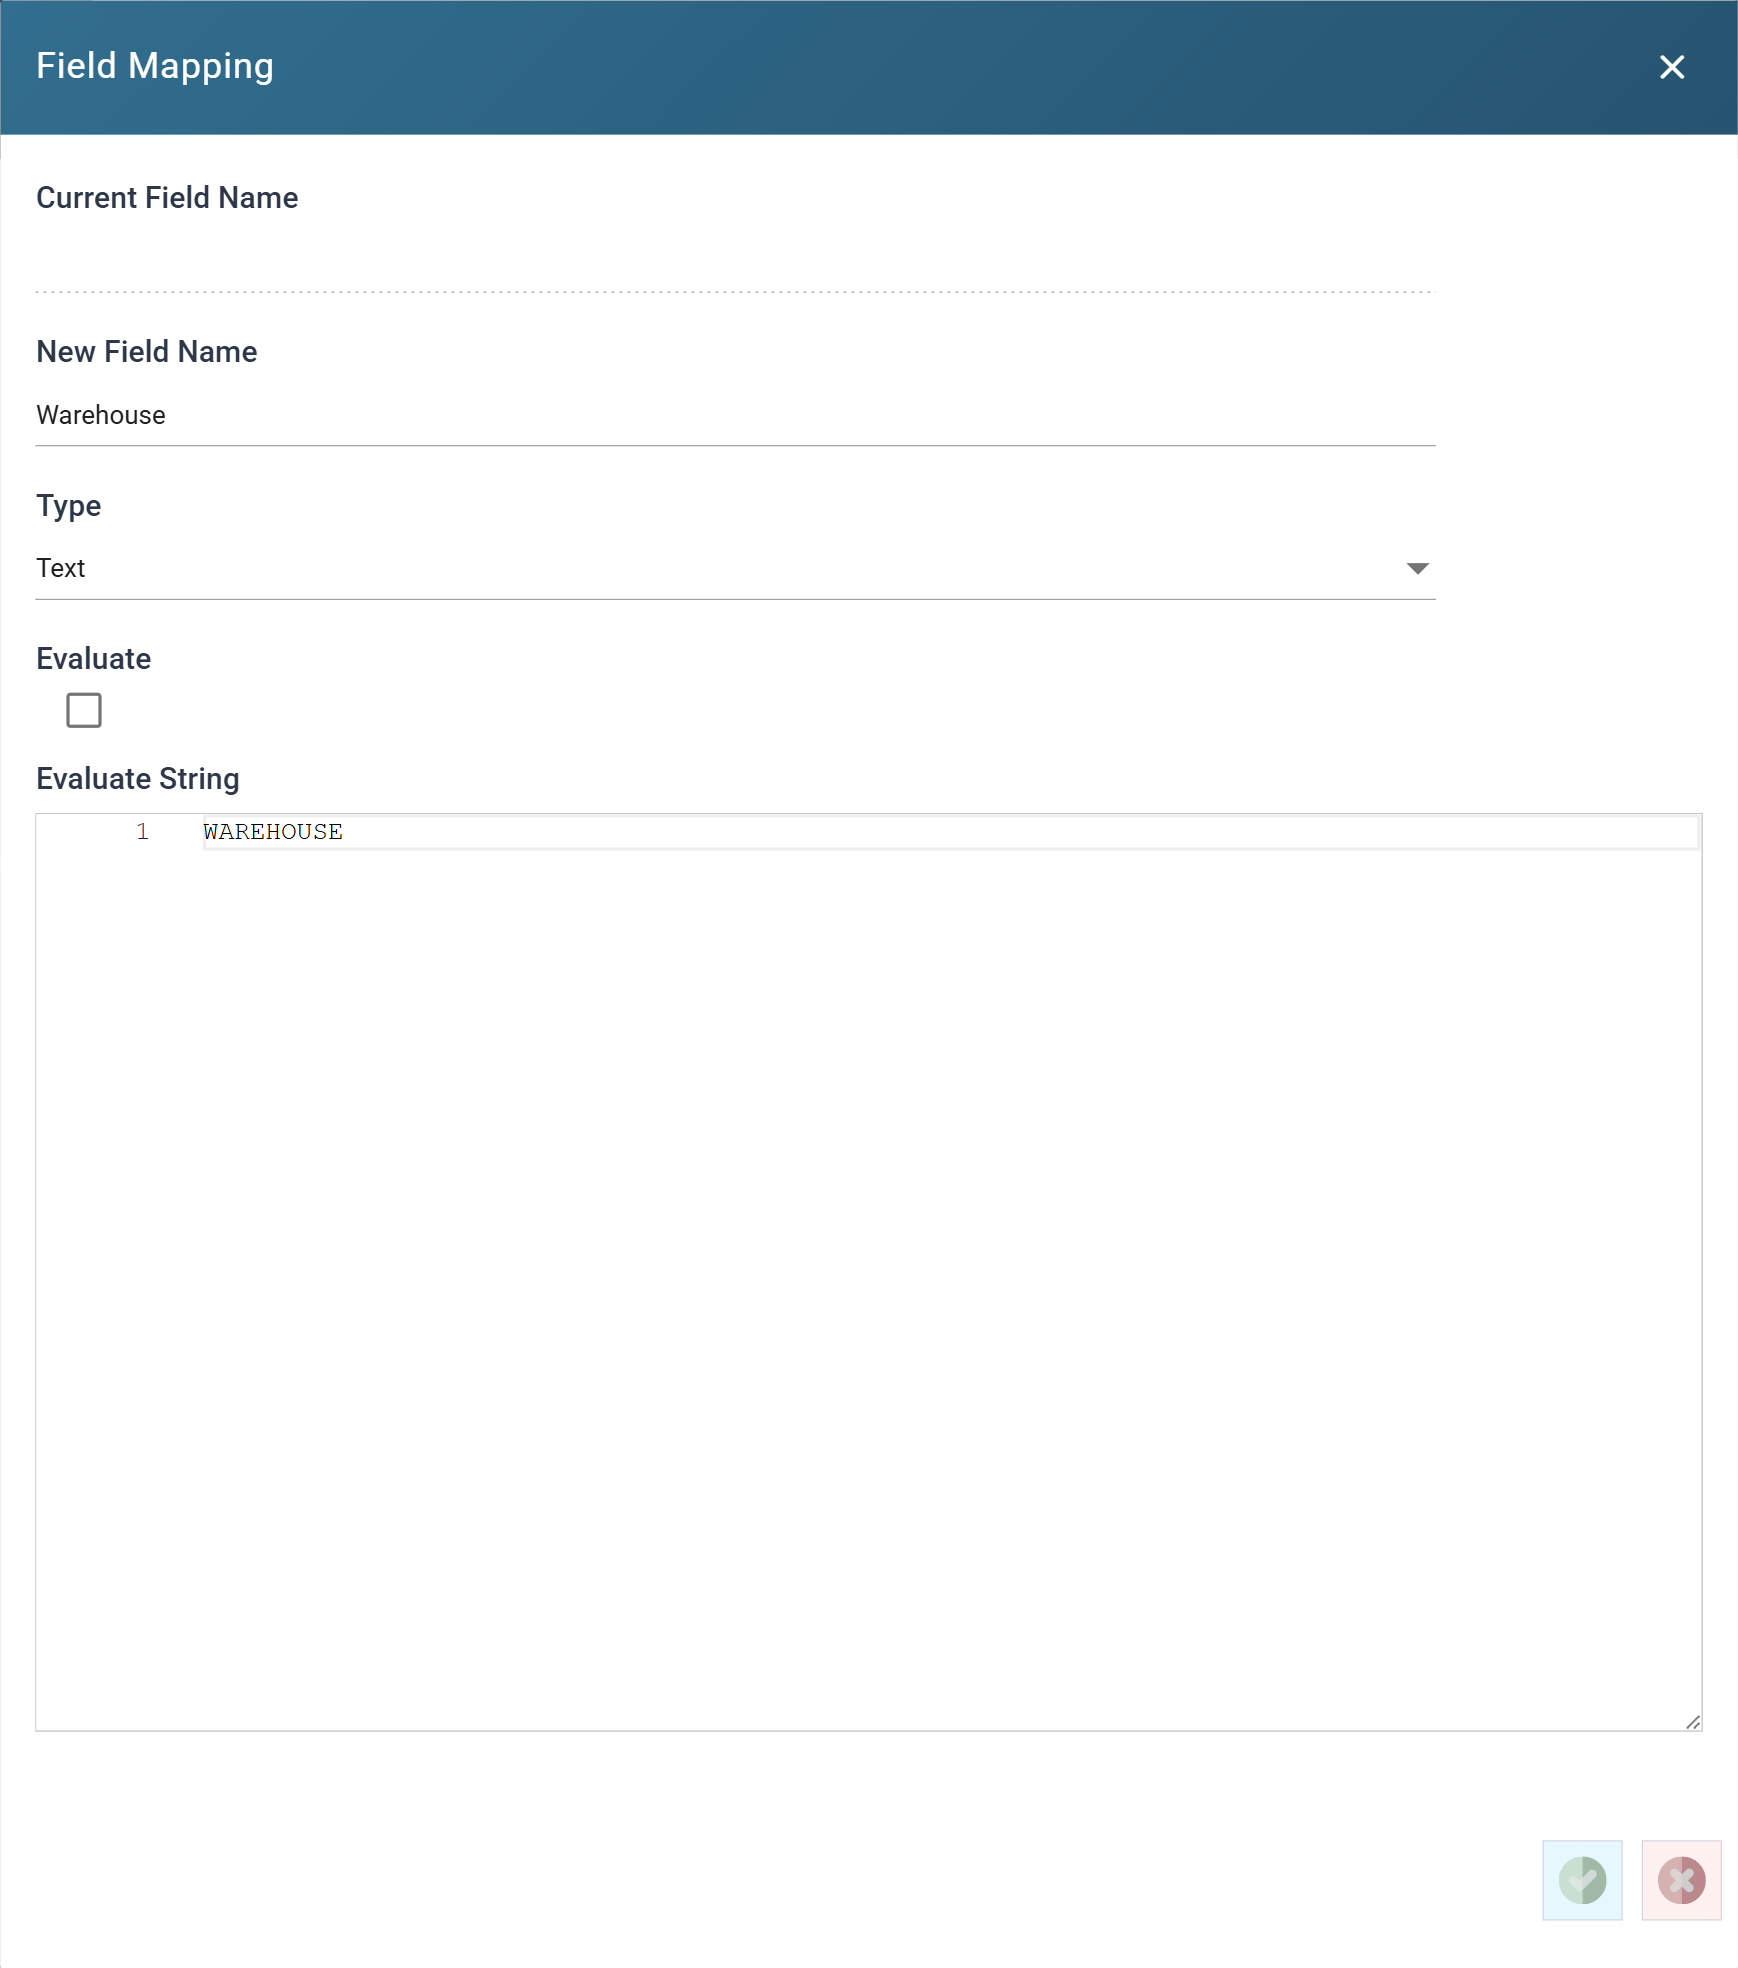
WAREHOUSEis the name of a warehouse in the Sage 200 demo company, listed in Stock Control > Warehouse Names. Every order in this training goes to the same warehouse, so a static value is enough. A real integration would usually derive it. - New Field Name
-
Press the tick to save the field, then press Add again for:
- New Field Name
- UseInvoiceAddress
- Type
- Boolean
- Evaluate
- Unticked
- Evaluate String
- False
The workbook has its own delivery address (
ShipName,ShipAddress1and the rest), and Step 7 maps it onto the order.Falsetells Sage 200 to keep that address instead of replacing it with the customer's invoice address. - New Field Name
-
Press Add once more for:
- New Field Name
- OverrideCreditLimit
- Type
- Boolean
- Evaluate
- Unticked
- Evaluate String
- True
The customers you created in Step 5 have no credit limit, so every order this training imports exceeds it. Sage 200 then refuses the order with The customer has exceeded their credit limit. Do you want to override placing the order on hold? Nobody can answer that question during an unattended run, so
Trueanswers it in advance. - New Field Name
-
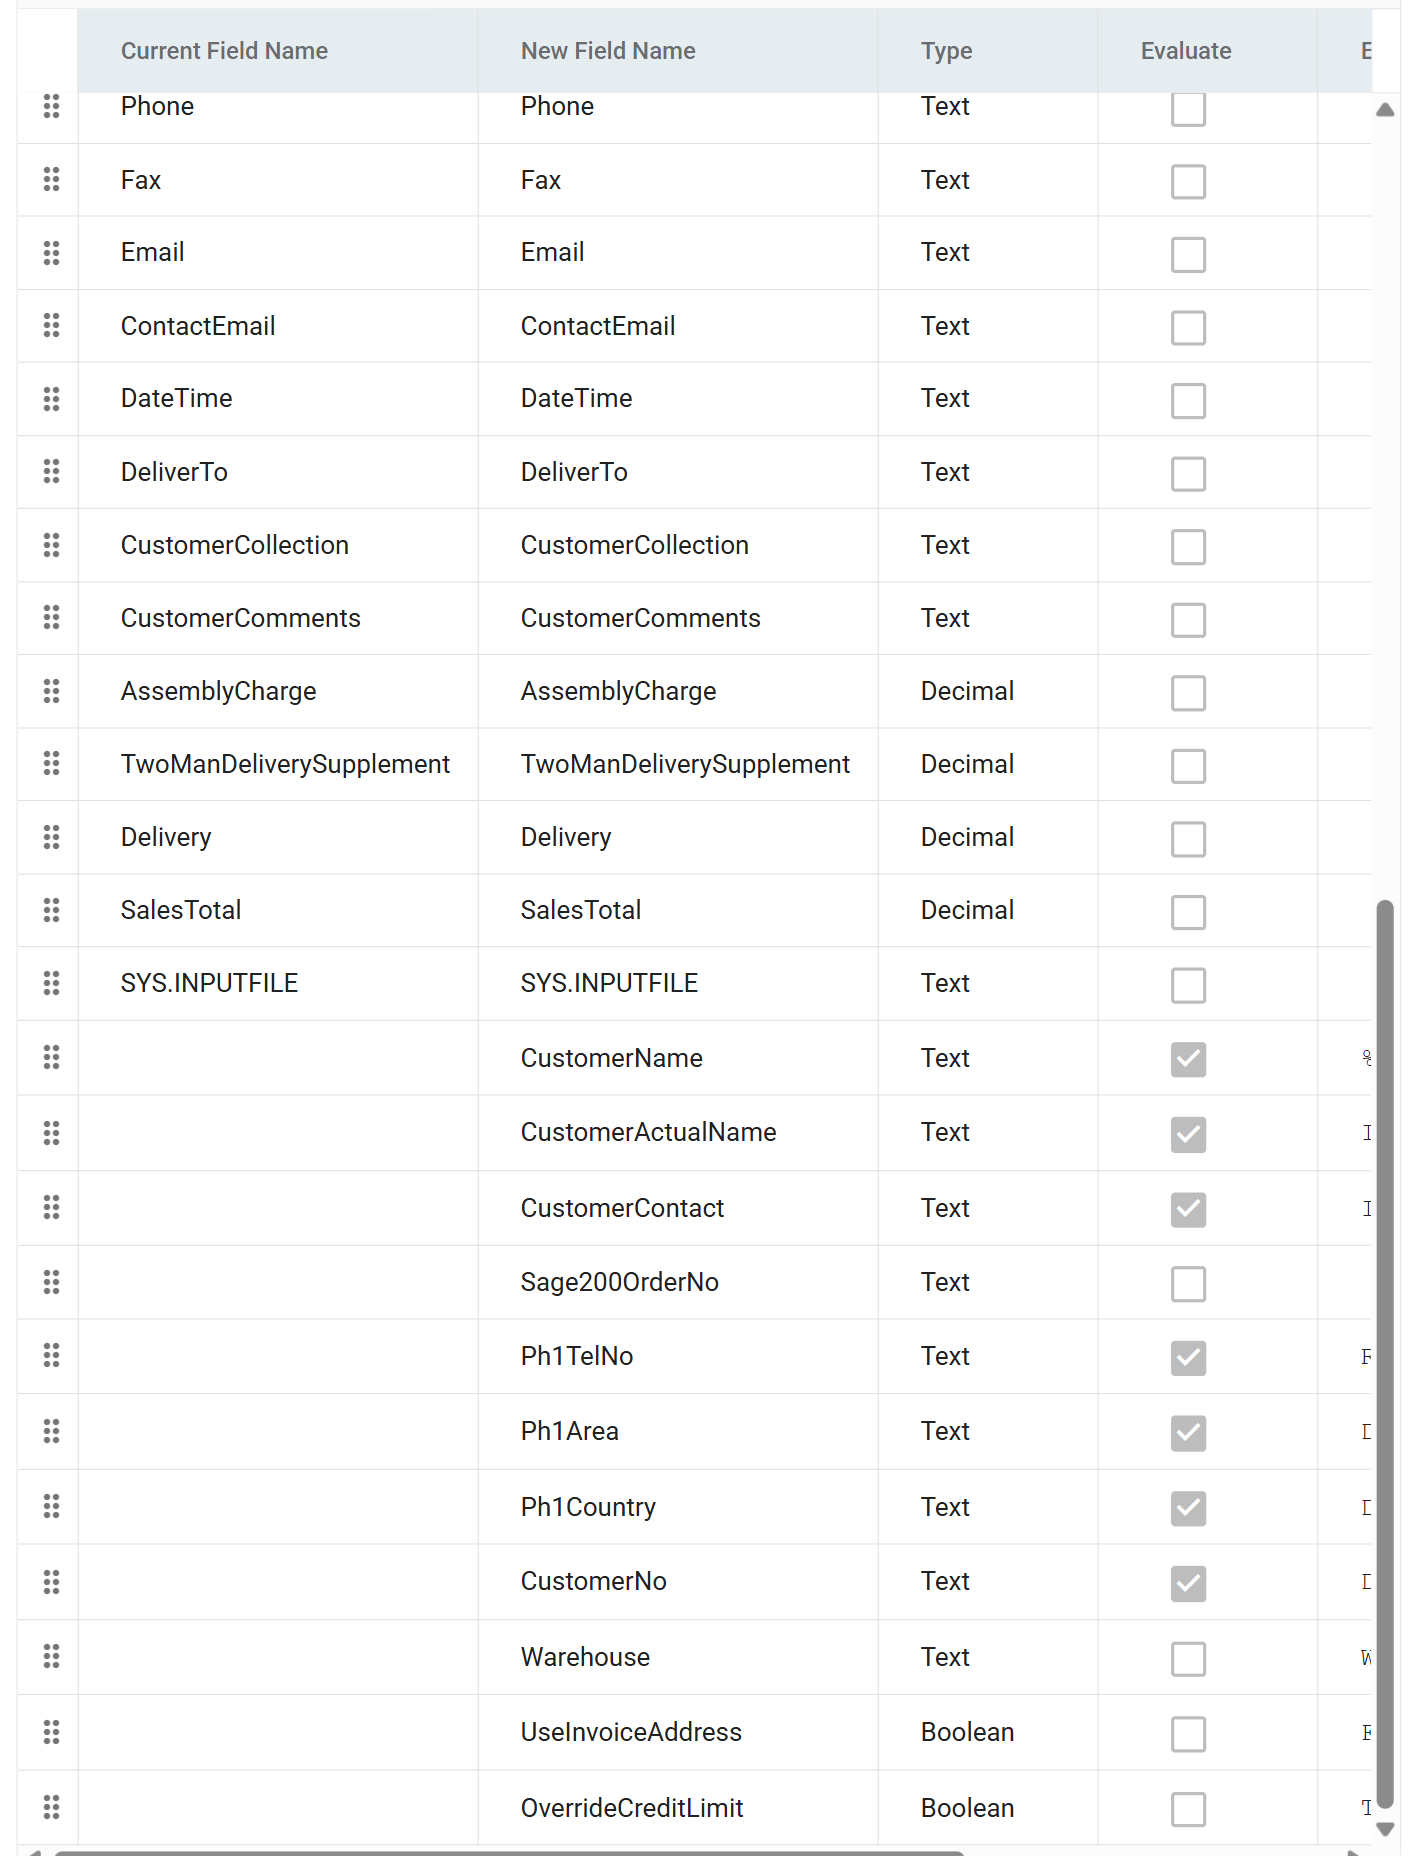
IMan adds all three fields to the end of the Orders list.
The order line fields
The charge and comment lines that 6.2 creates are order detail records, so the fields they need belong to the OrderDetails transaction, not to Orders.
- Change the Current Transaction Id to
OrderDetails. -
Press Add for each of the following four fields:
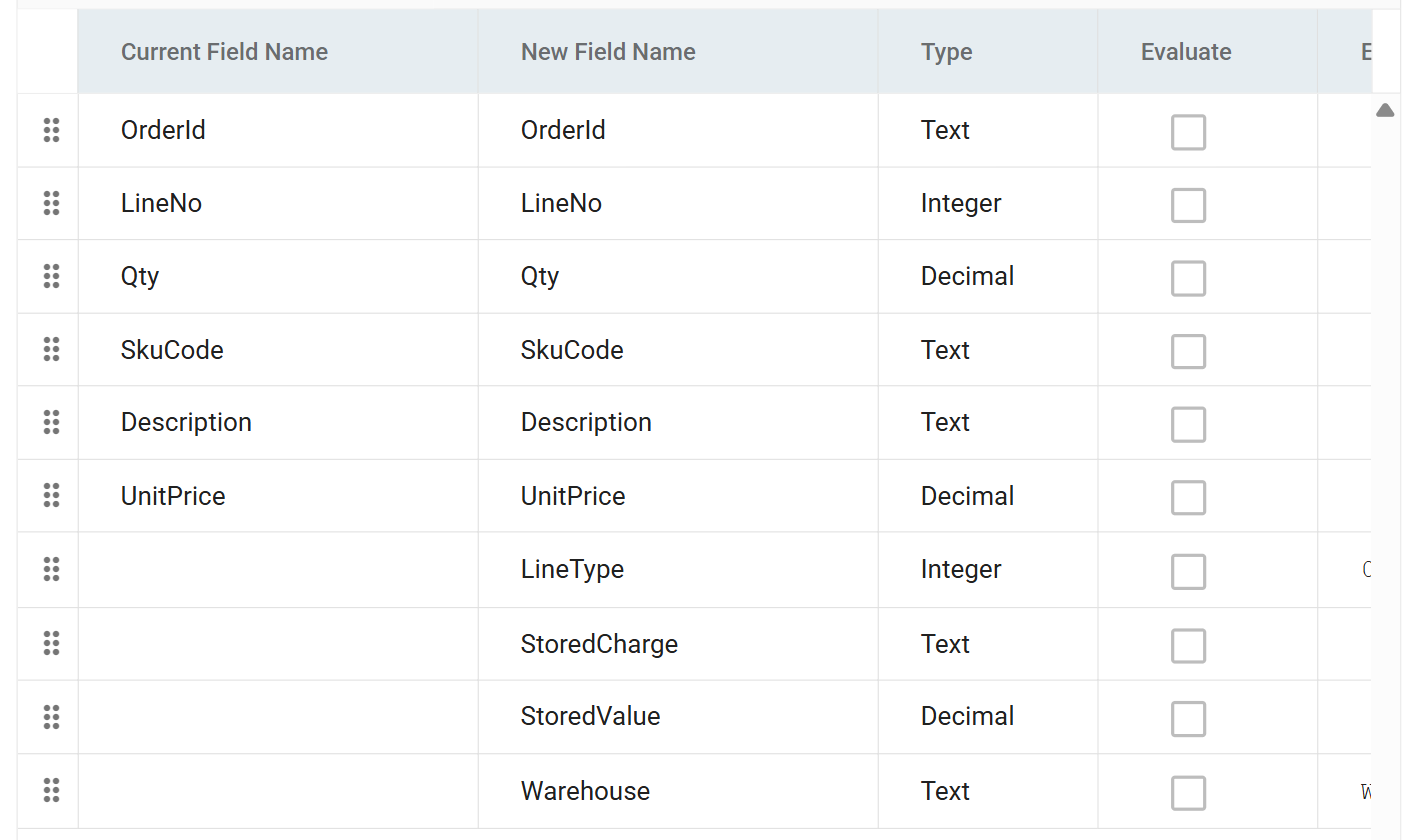
New Field Name Type Evaluate Evaluate String LineType Integer ✘ 0StoredCharge Text ✘ leave blank StoredValue Decimal ✘ leave blank Warehouse Text ✘ WAREHOUSE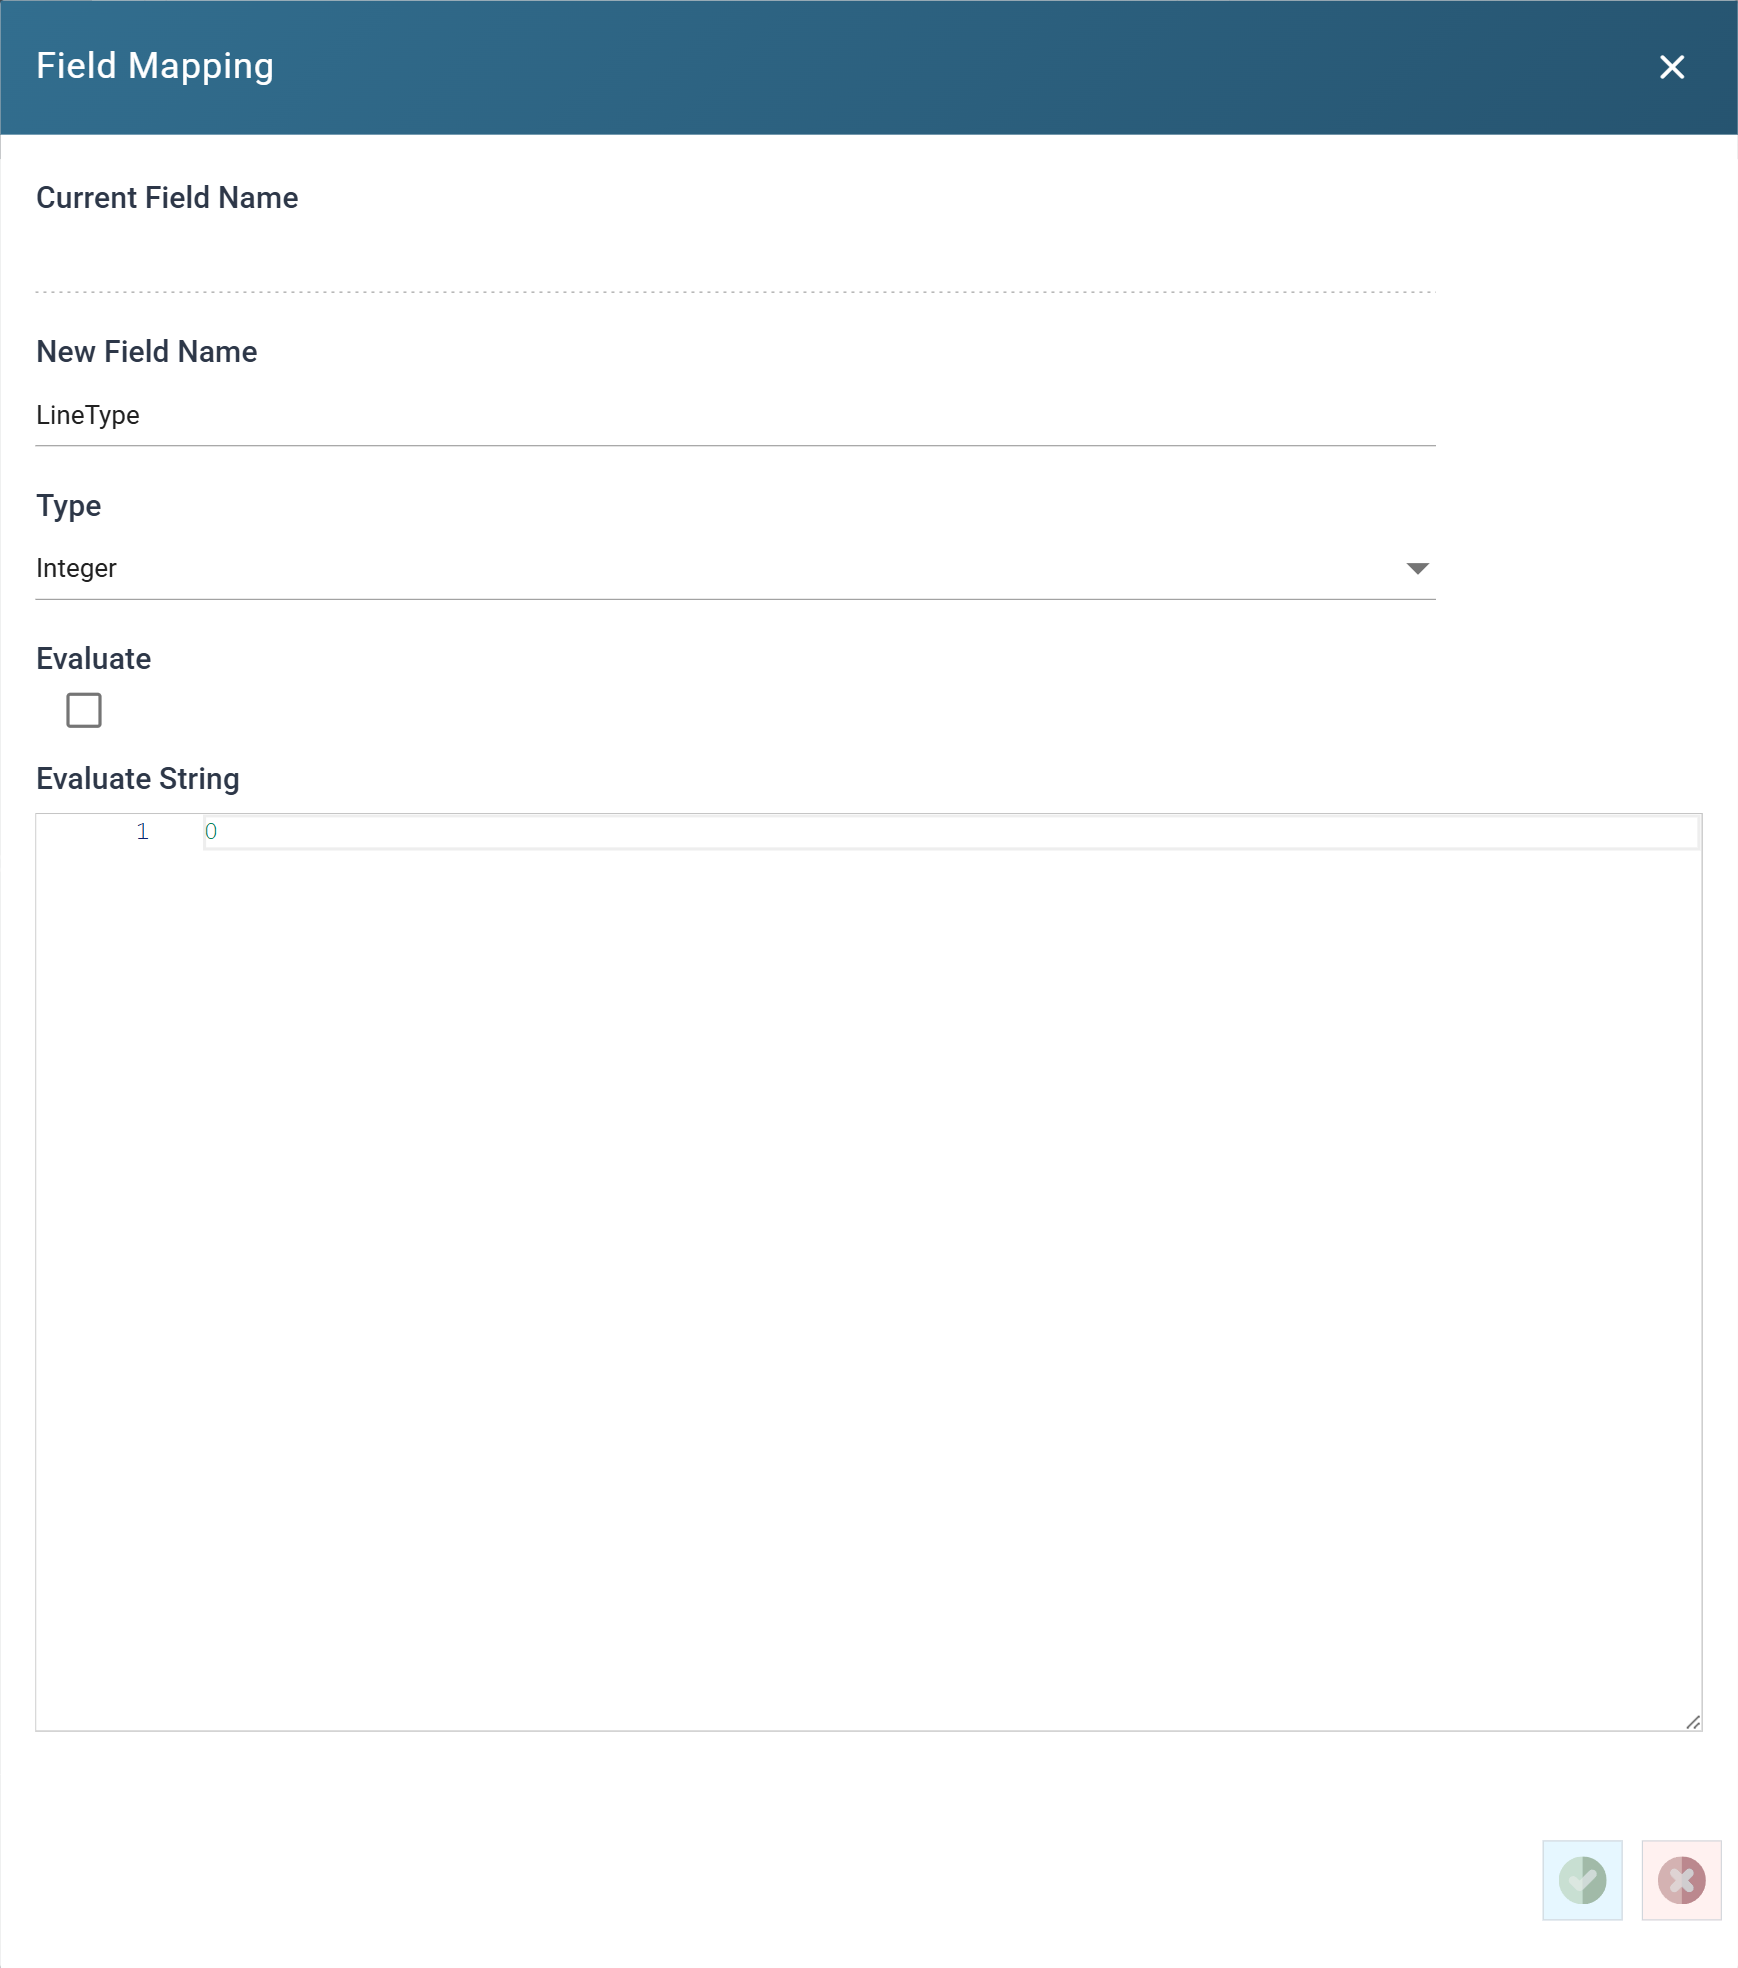
- Type matters here more than it did for the customer fields in
Step 4.
LineTypeis a whole number andStoredValueis a money amount. Sage 200 rejects a value it cannot convert. LineTypeis the Sage 200 SOP line type:0for a standard item line,2for a charge and3for a comment. Every line read from the workbook is an item, so the static value is0. The records created in 6.2 set theirs to2and3.StoredChargenames one of the additional charges set up in Sage 200 (Carriage, Air Freight or Express Delivery in the demo company), so its type is Text.StoredValueis the amount that goes with it.- Leave both empty here. They carry a value only on the charge records, and 6.3 uses the empty value to filter out the charges that do not apply.
Warehouseis on the line as well as on the header, and it is required. Sage 200 allocates stock per line, and without it the import stops with The field [Warehouse] does not exist. It takes the same value as the header field.
- Type matters here more than it did for the customer fields in
Step 4.
-
With all four added, the OrderDetails list ends with the new fields and their types.
-
Press Refresh.
- Press Close at the bottom of the transform, then Save the integration.
A transform pane has no Save of its own
A transform pane has no Save of its own. Close commits the transform to the integration held in the designer, and Save then writes the integration to the server. If you close the transform without saving the integration, you lose the work.