6.2 – Aggregate Transform
The Aggregate transform can:
- Create records derived from other records in a node.
- Create records that are not part of the original dataset.
Examples of use
- Create a balancing detail line for a POS sales journal, as the negative sum of the other records.
- Create a VAT record that sums the VAT amount fields of the other records.
- Consolidate many lines of an invoice or journal into a single record.
- Create shipping charge or comment lines from values held, for example, in a header record.
This step does the last of these. The workbook holds the assembly, two-man delivery and carriage charges, and the customer's comment, as columns on the order header. Sage 200 needs them as order lines. The Aggregate moves them.
Design > Transform Setup
- Open the Transforms group in the palette and drag an Aggregate transform onto the design surface.
-
Drag a Connector from the same group, then drag its ends onto the Map transform and the Aggregate to join them.
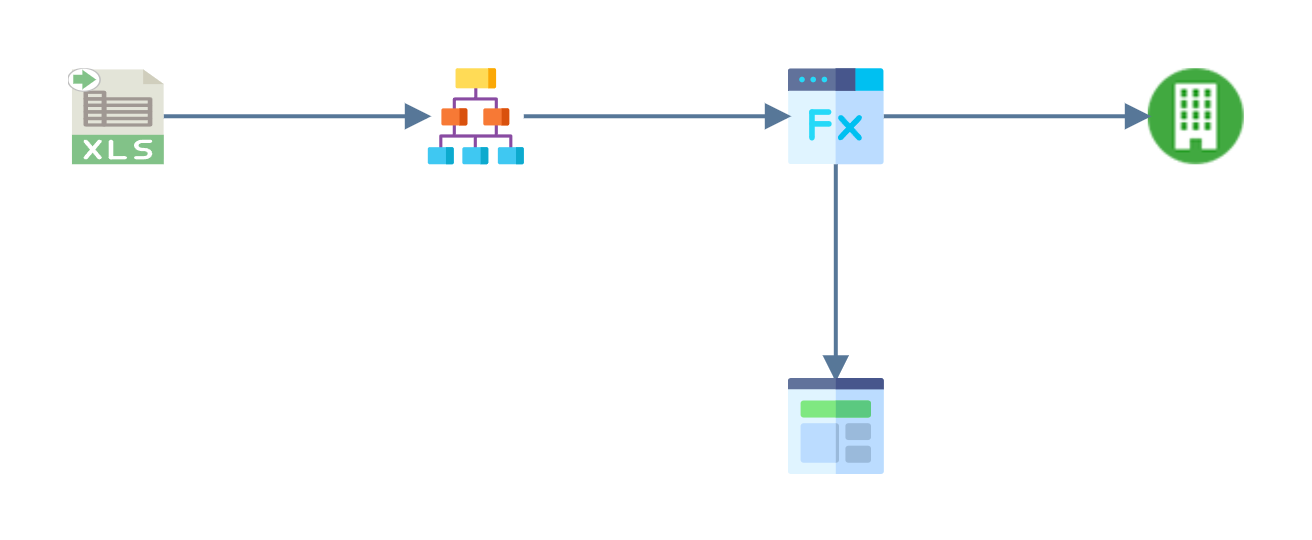
The Map now feeds two transforms: the Sage 200 customer import you built in Step 5, and this Aggregate.
-
Save the integration before opening the Aggregate.
Transform > Setup
-
Double click the Aggregate to open it.
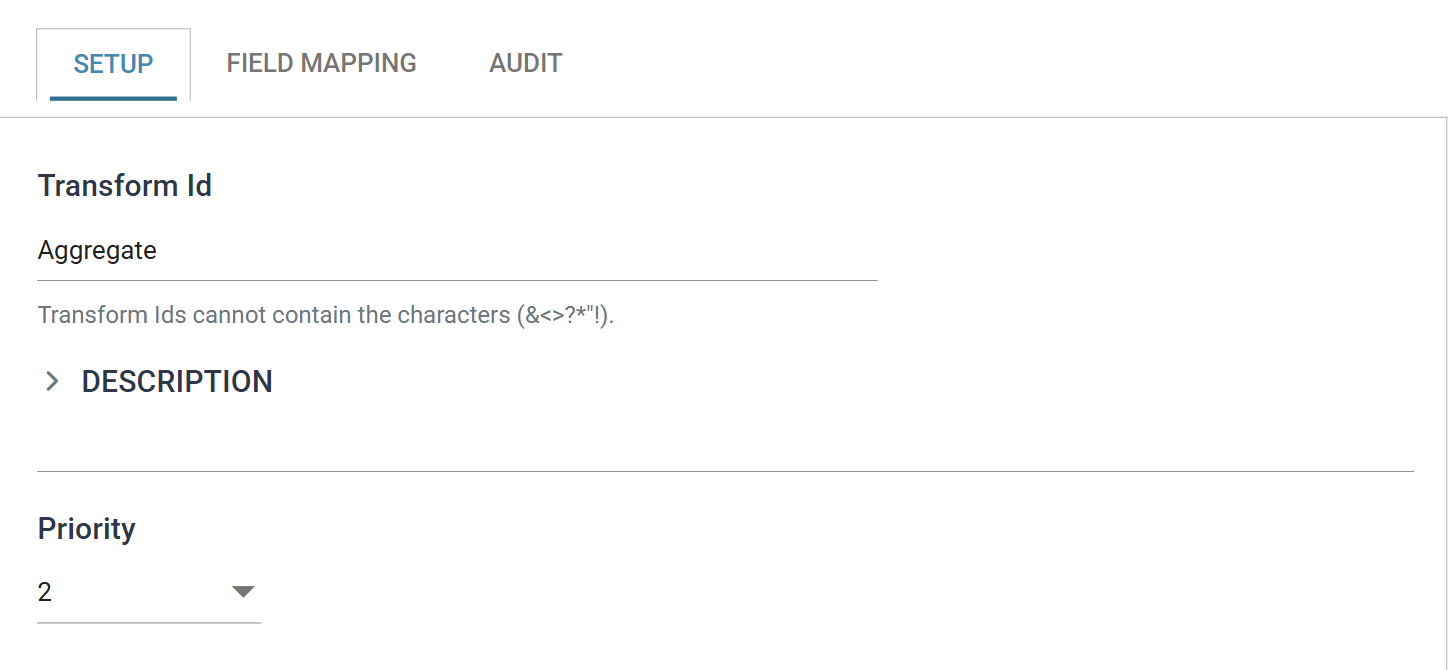
Priority appears only once a transform has a sibling
Priority Field
IMan shows the Priority field only when two or more transforms are connected to the same parent transform. Priority sets the order in which they are processed.
It appears here because the Map transform now has two children. It was not on the Map's own Setup tab in Step 4, when the Map was the only transform connected to the Hierarchise.
Transform > Field Mapping
- Press the Field Mapping tab and change the Current Transaction Id to
OrderDetails.- The charge and comment lines are order details, so you build them on the OrderDetails transaction, using the fields you added in 6.1.
- Press the + button beside Calc Records to create a record.
-
Give it a recognisable name in Description.
- For training, enter: Assembly
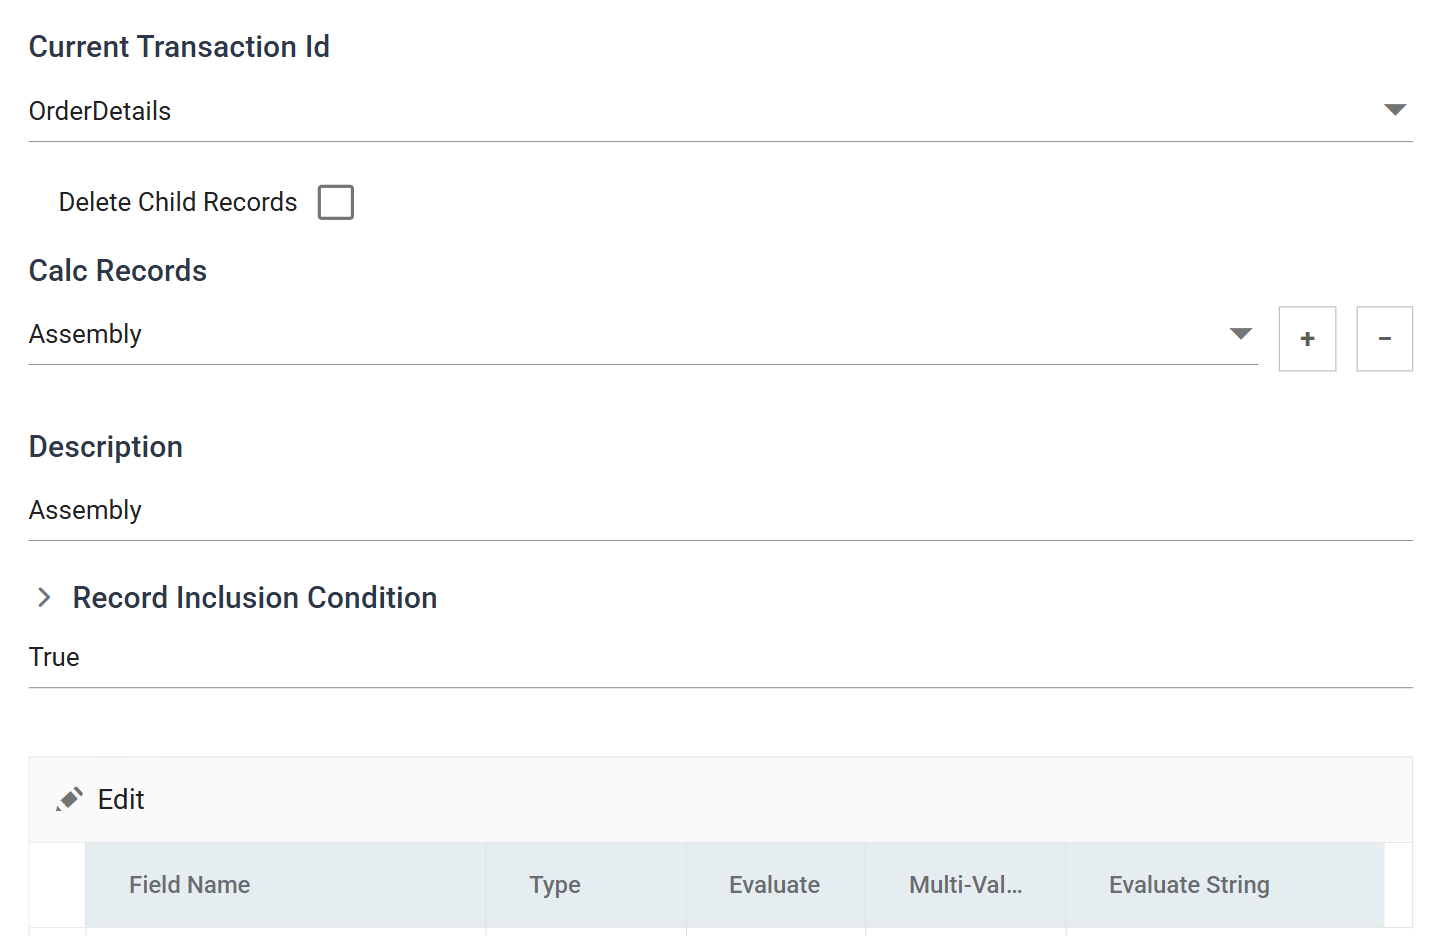
- Delete Child Records
- Removes the records the calc records are derived from, and keeps only the created ones. For training: leave unticked. You need the order lines as well as the charges.
- Calc Records
- Every record this transform creates. + adds one, and − deletes the selected one after asking you to confirm.
- Description
- The name of the selected calc record. It identifies the record in the list. Make it recognisable.
- Record Inclusion Condition
- A formula that decides whether the record is derived. It defaults to
True. Leave it alone on the three charge records: every order gets all three, and 6.3 removes the ones with no value. The comment record in step 7 below uses it. - The chevron beside the heading opens the formula editor. When the section is collapsed, it shows the condition as read-only text.
- A formula that decides whether the record is derived. It defaults to
-
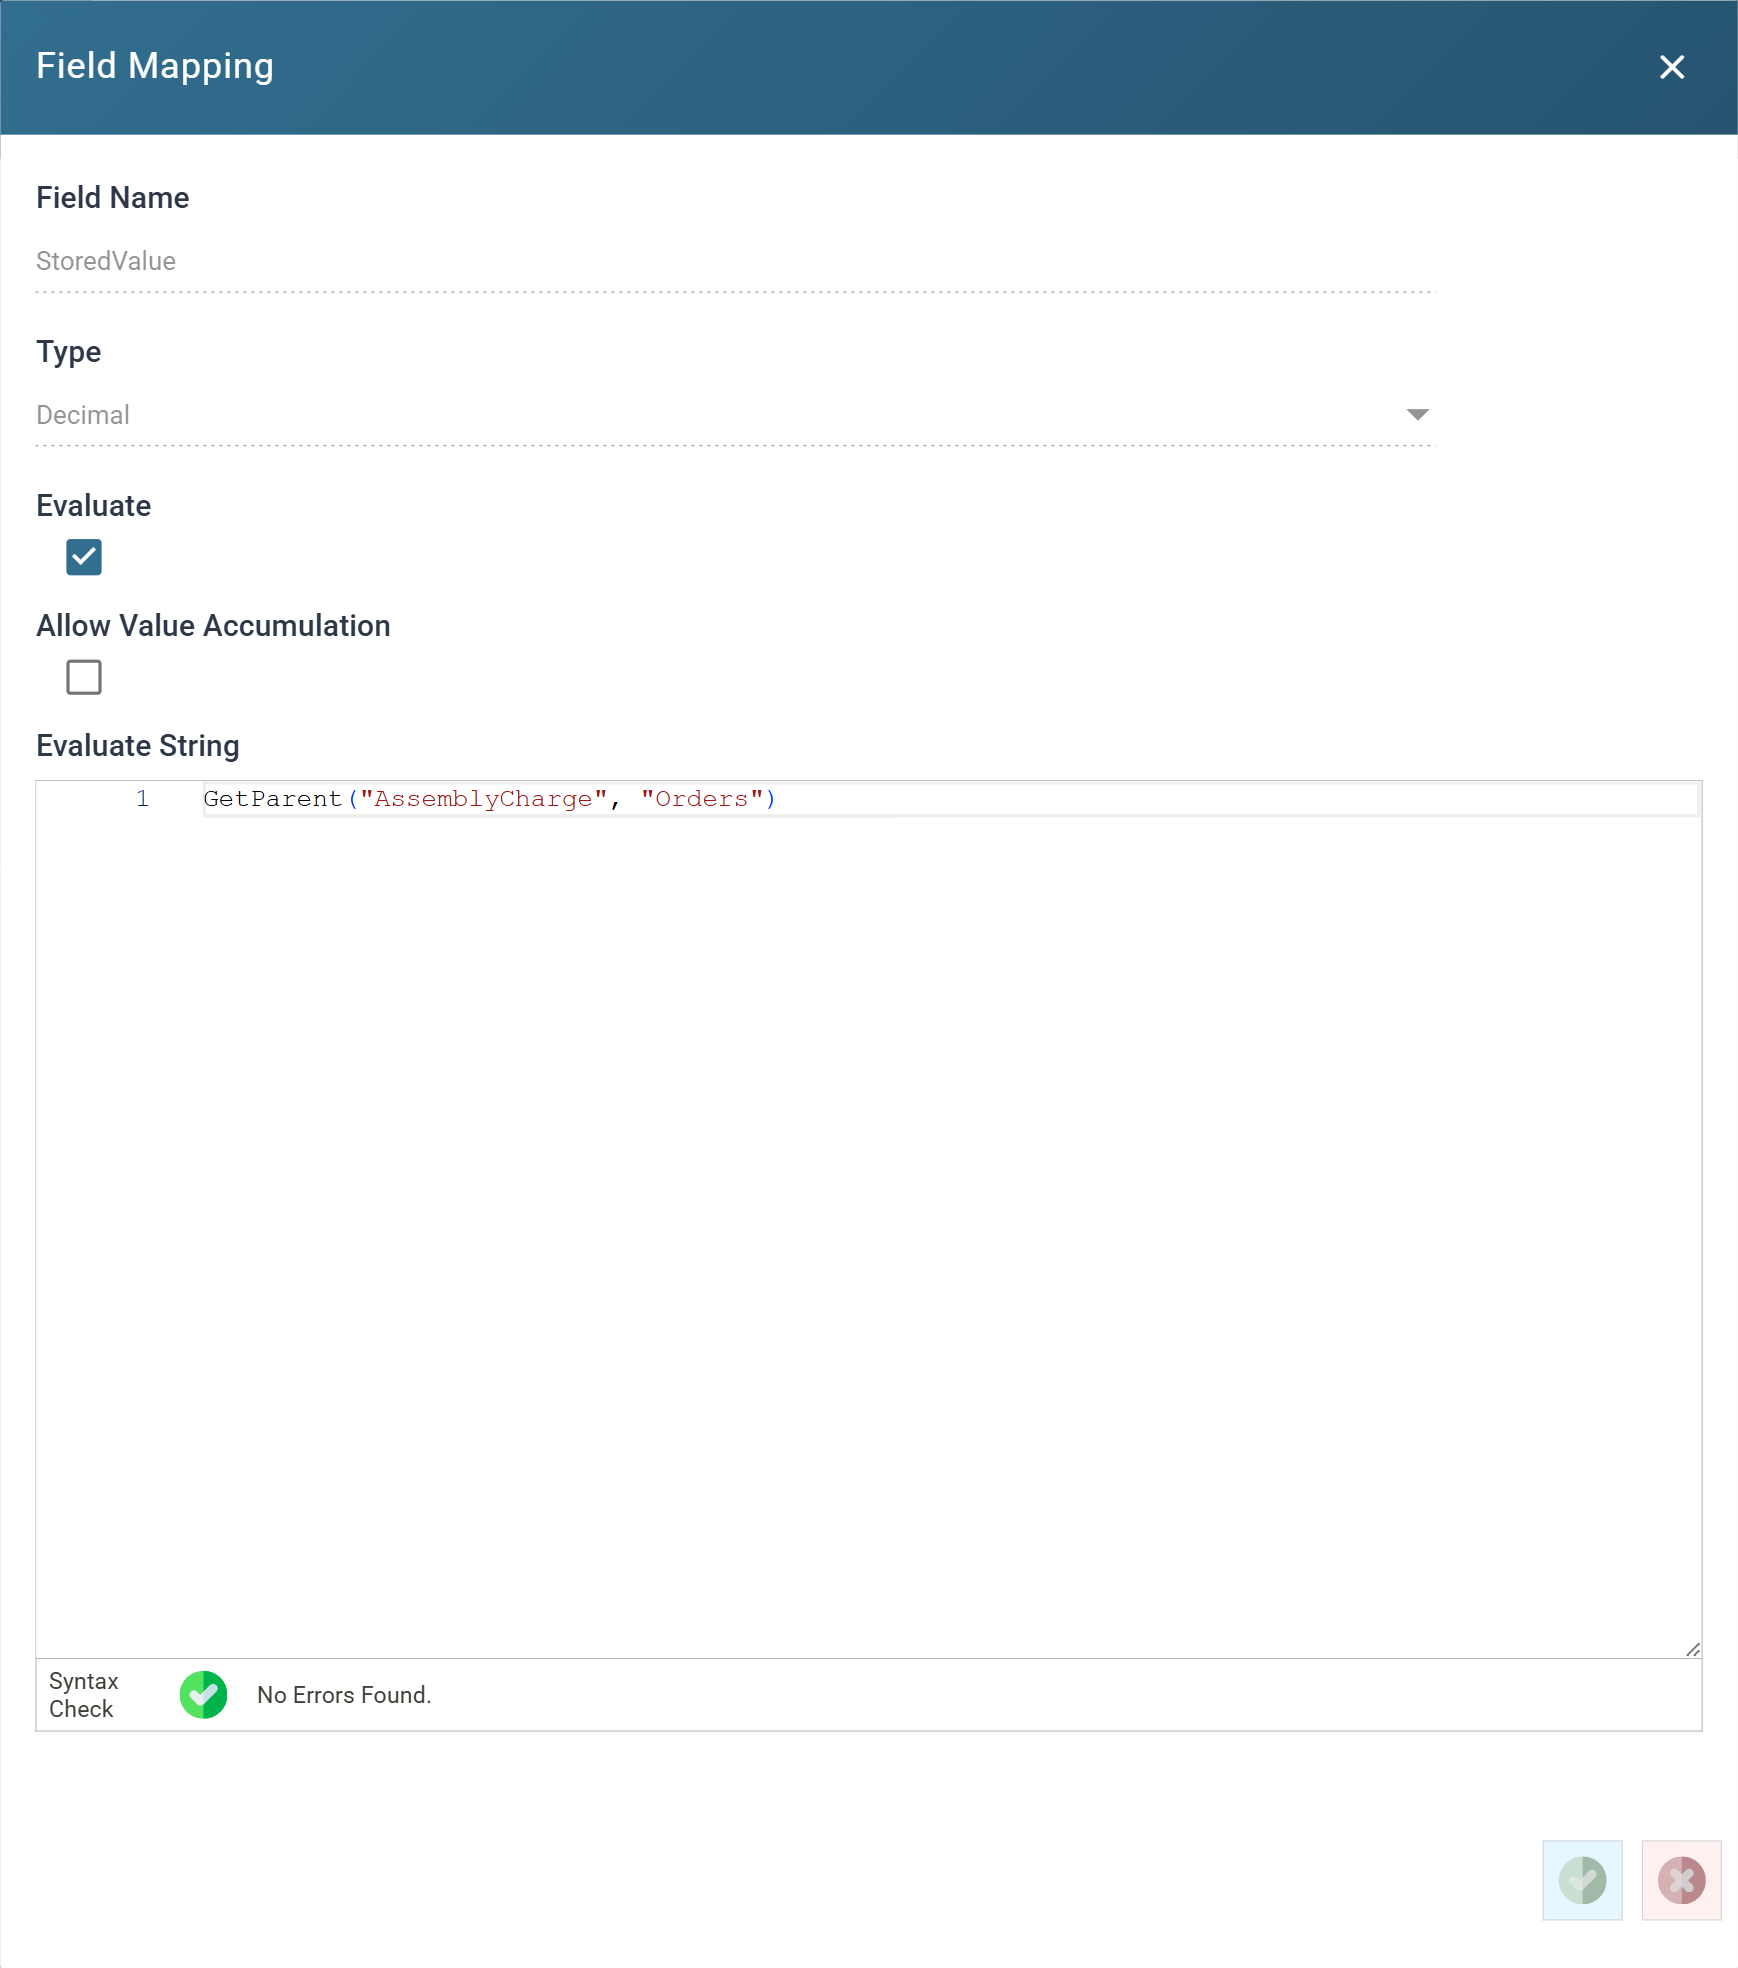
Set the fields by double clicking the relevant row in the grid. For the
Assemblyrecord:Field Name Evaluate Evaluate String LineType ✘ 2Description ✘ AssemblyStoredCharge ✘ CarriageStoredValue ✔ GetParent("AssemblyCharge", "Orders")LineTypeis2, the Sage 200 SOP line type for a charge. The item lines from the workbook carry0.StoredChargenames one of the additional charges set up in Sage 200. The demo company has three:Carriage,Air FreightandExpress Delivery. All three charge lines useCarriage, the demo company's delivery charge. Each line's Description says which charge it is.StoredValueis the only evaluated field.GetParentreads a field on the parent order of the line being created. The workbook holds the charge there.
-
Press the tick to save each field. With all four set the record reads:
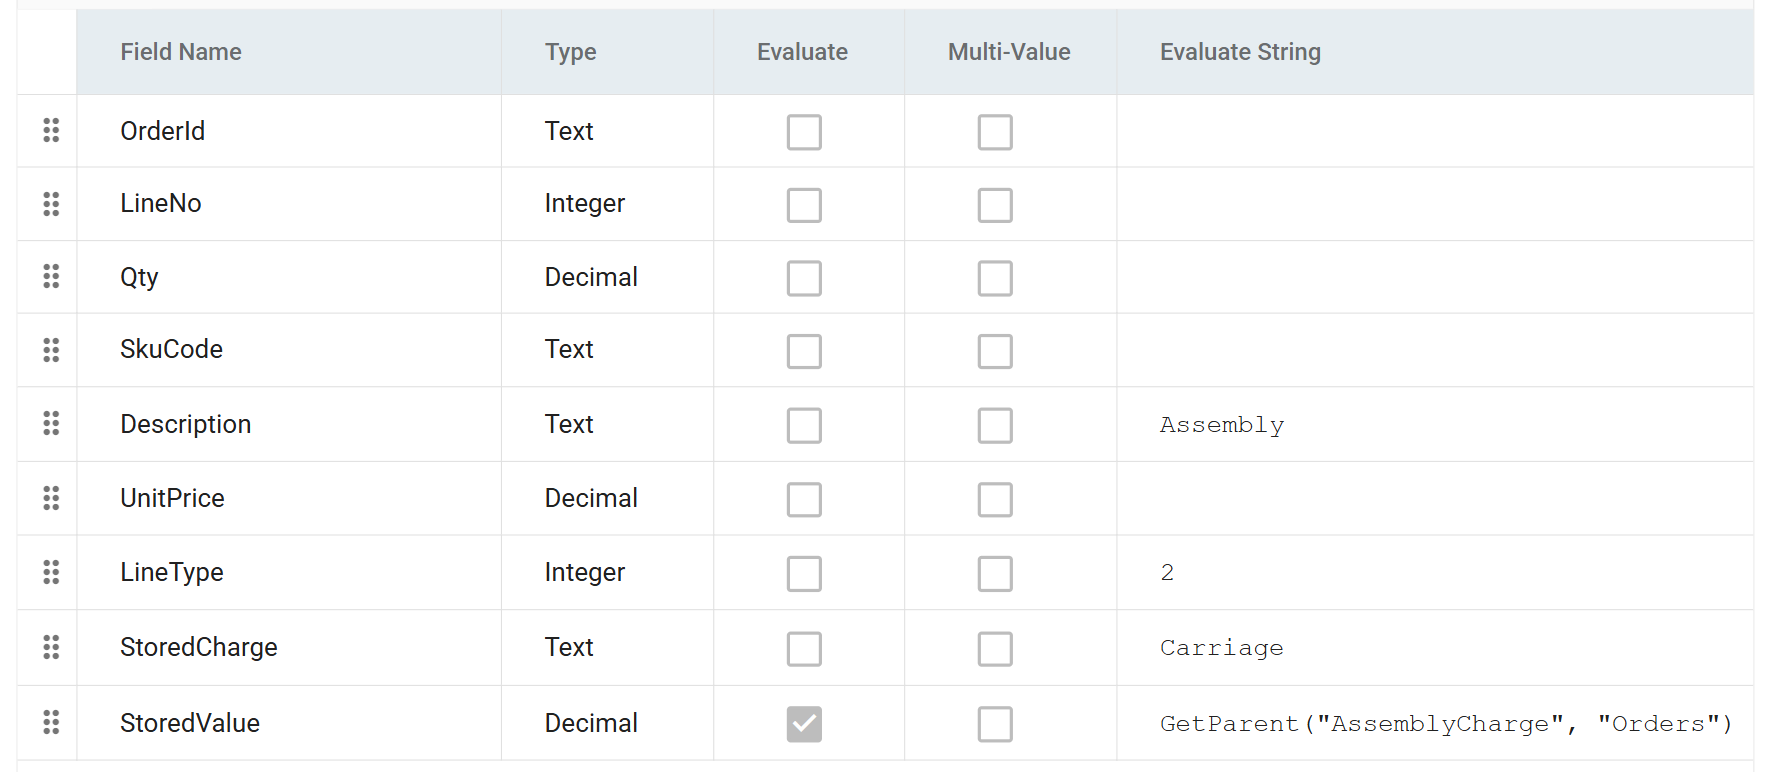
Leave every other field blank. A calc record is derived from the records already in the node, so any field not set here takes its value from the order's first detail line. A charge line therefore arrives holding that line's
SkuCode,QtyandUnitPriceas well as its ownOrderId. -
Press + again and build the other two charge records the same way:
Description LineType Description field StoredCharge StoredValue (evaluated) TwoManSupplement 2Two Man SupplementCarriageGetParent("TwoManDeliverySupplement", "Orders")Delivery 2DeliveryCarriageGetParent("Delivery", "Orders") -
The last record moves the customer's comment from the order header onto its own line. Press +, name it
Comment, and set only two fields:Field Name Evaluate Evaluate String LineType ✘ 3Description ✔ GetParent("CustomerComments", "Orders")3is the Sage 200 SOP line type for a comment. A comment line carries no charge and no value, so leaveStoredChargeandStoredValuealone.
-
This record needs a Record Inclusion Condition. Open it with the chevron and replace
Truewith:- Not every order has a comment:
FBRN-309244in the workbook has none. - Without the condition, that order still gets a comment line, and the line
is not blank. A derived field whose formula returns an empty string
keeps the value it inherited. The comment line therefore arrives reading
Gold Mixer, the description of the order's first item. - With the condition, the record is not derived and the line arrives empty. It still arrives, and 6.3 removes it.
- Not every order has a comment:
-
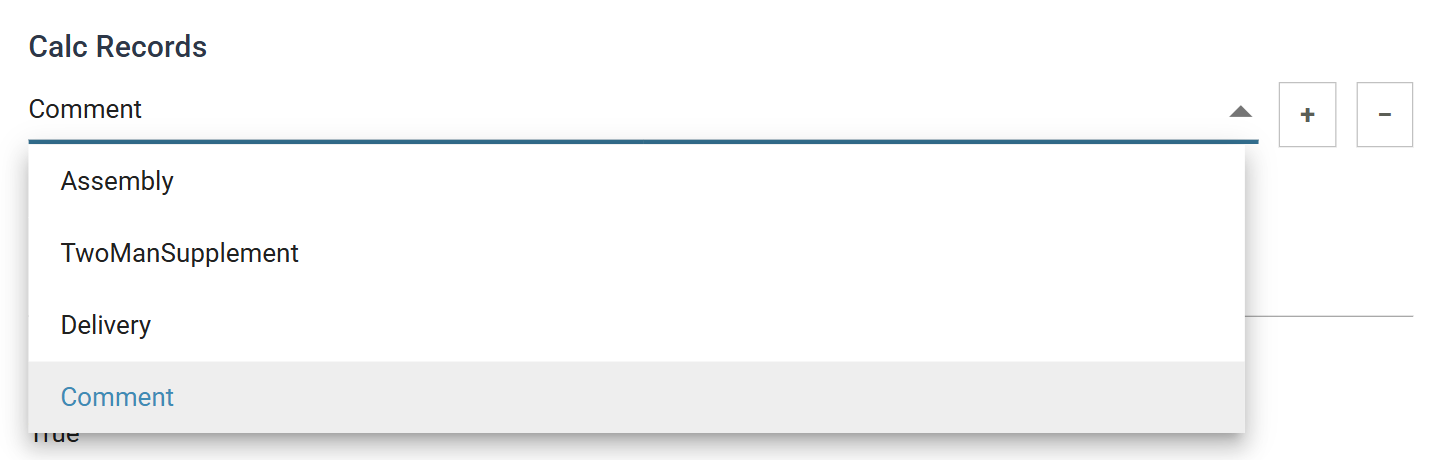
When you finish, the Calc Records drop-down has four entries.
-
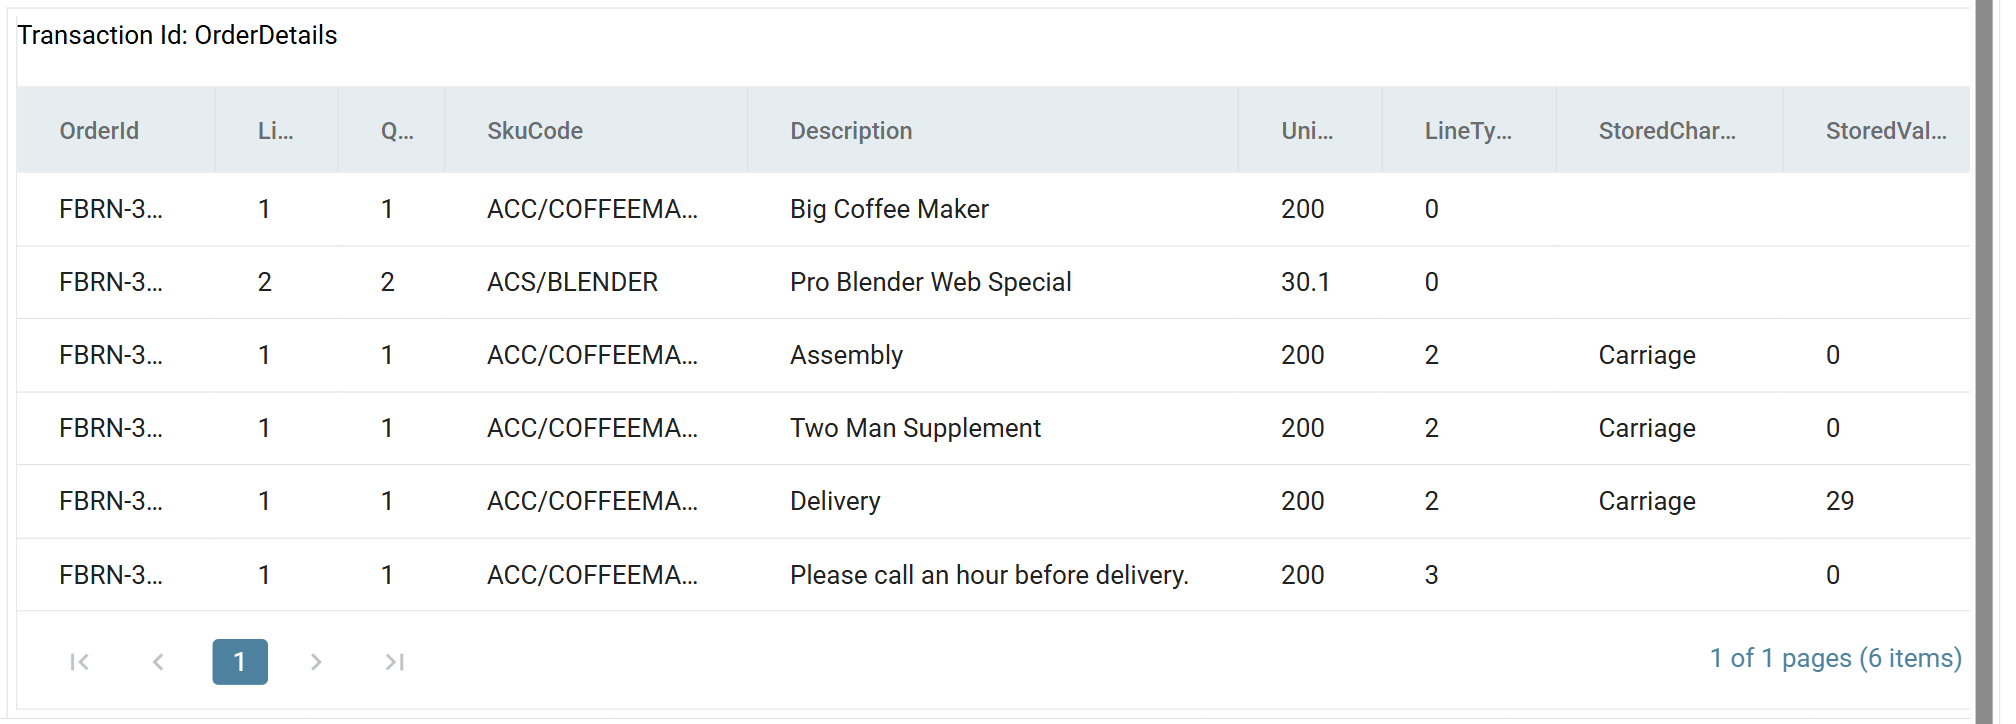
Press Refresh, then expand an order in the preview.
- Beneath its two item lines the order now has three charge lines:
Assembly,Two Man SupplementandDelivery. Each hasLineType2 and the charge from the order header. The order also has a comment line withLineType3 and the text fromCustomerComments. - On the first order only
Deliveryhas a value. The other two charges are0, and 6.3 filters them out.
- Beneath its two item lines the order now has three charge lines:
Tip
An expanded child grid is much wider than the pane, so at first it shows a single column down the rows. Drag the columns narrower to see them all, as in the screenshot above.
- Press Close at the bottom of the transform, then Save the integration.