Step 7 – Sage 200 SOP Import
Connectors
Connectors perform destructive mapping
A connector changes the dataset it passes on.
Note two things about connectors:
- Only the fields you map 'flow' out the other side of a connector. A field
you do not map leaves the dataset, and no transform after the connector can
use it.
- Log keys work around this. See Step 8 – Auditing for how to set them up.
- Connectors rename the fields and transaction ids to the internal names used
within IMan.
OrdersbecomesSOPOrder,OrderDetailsbecomesSOPOrderLine, andSage200OrderNocomes out the other side asDocumentNo.
Design > Transform Setup
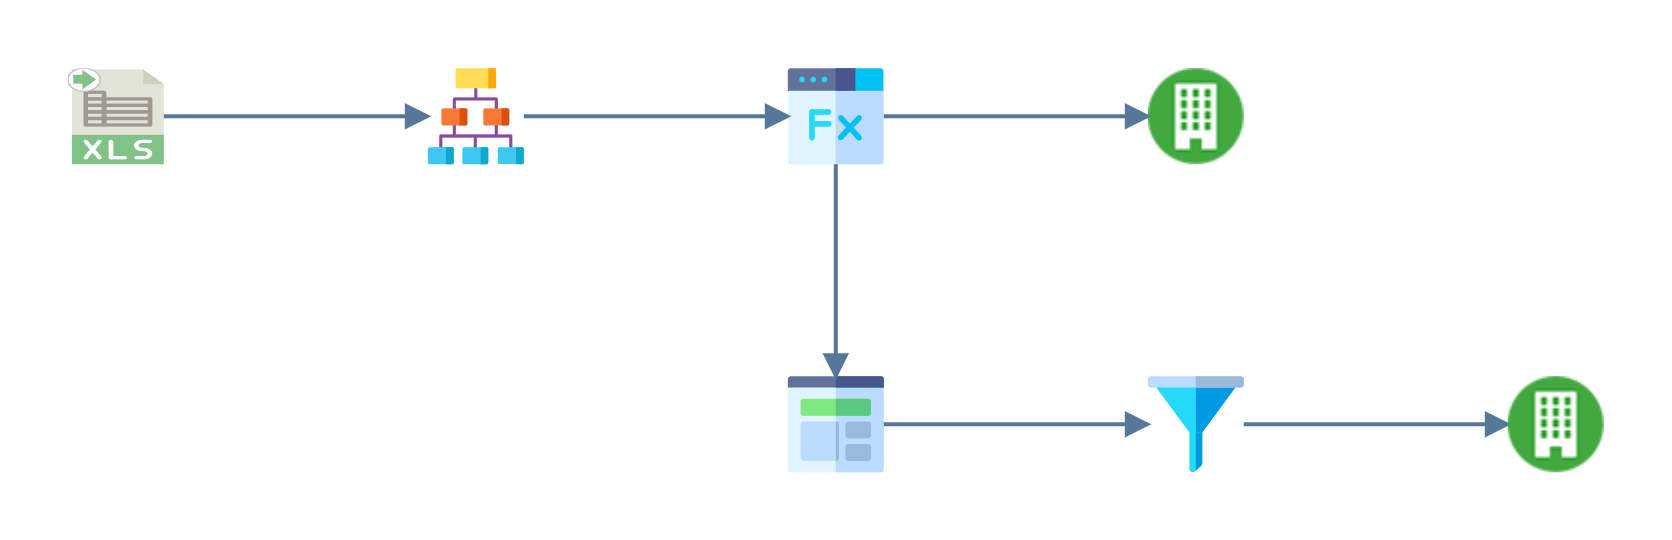
- Open the Connectors group in the palette and drag a Sage 200 connector onto the design surface.
-
Drag a Connector from the Transforms group and join the Filter transform to it.
-
Save the integration before opening the connector.
Connector > Setup
-
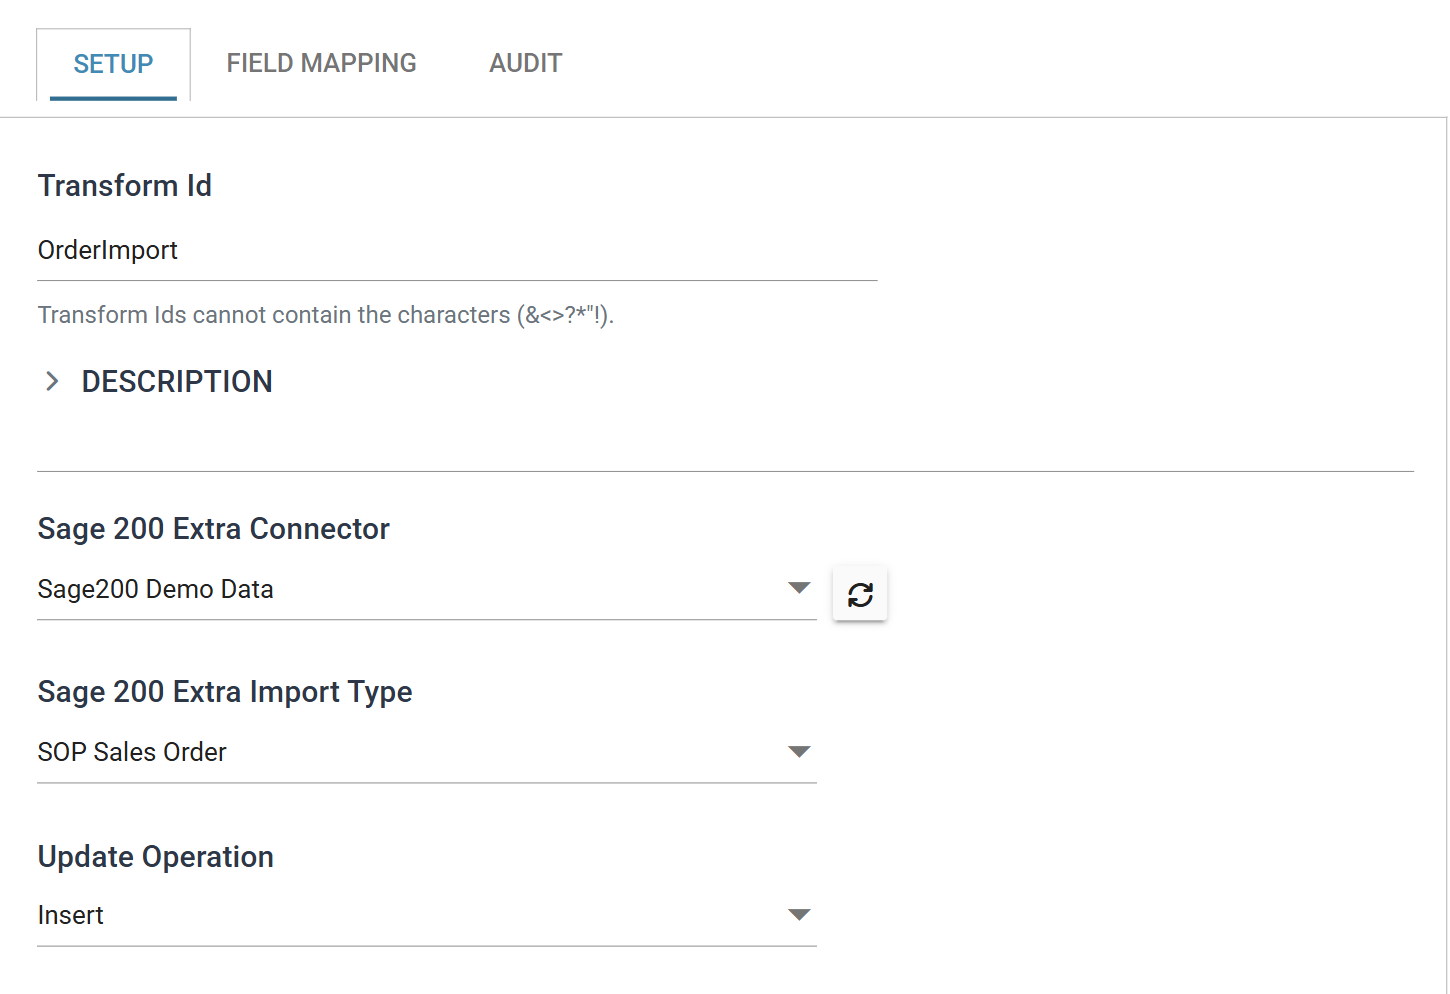
Double click the connector to open it.
- Transform Id
- Identifies the transform in the audit report. Give this one a name:
a second connector is named
Connector_1, which means nothing in a report that lists several. - For training, enter: OrderImport
- Identifies the transform in the audit report. Give this one a name:
a second connector is named
- Sage 200 Extra Connector
- For training, choose: Sage200 Demo Data
- Sage 200 Extra Import Type
- For training, choose: SOP Sales Order
- Update Operation
- For training, leave as: Insert
- Transform Id
Connector > Field Mapping — the order
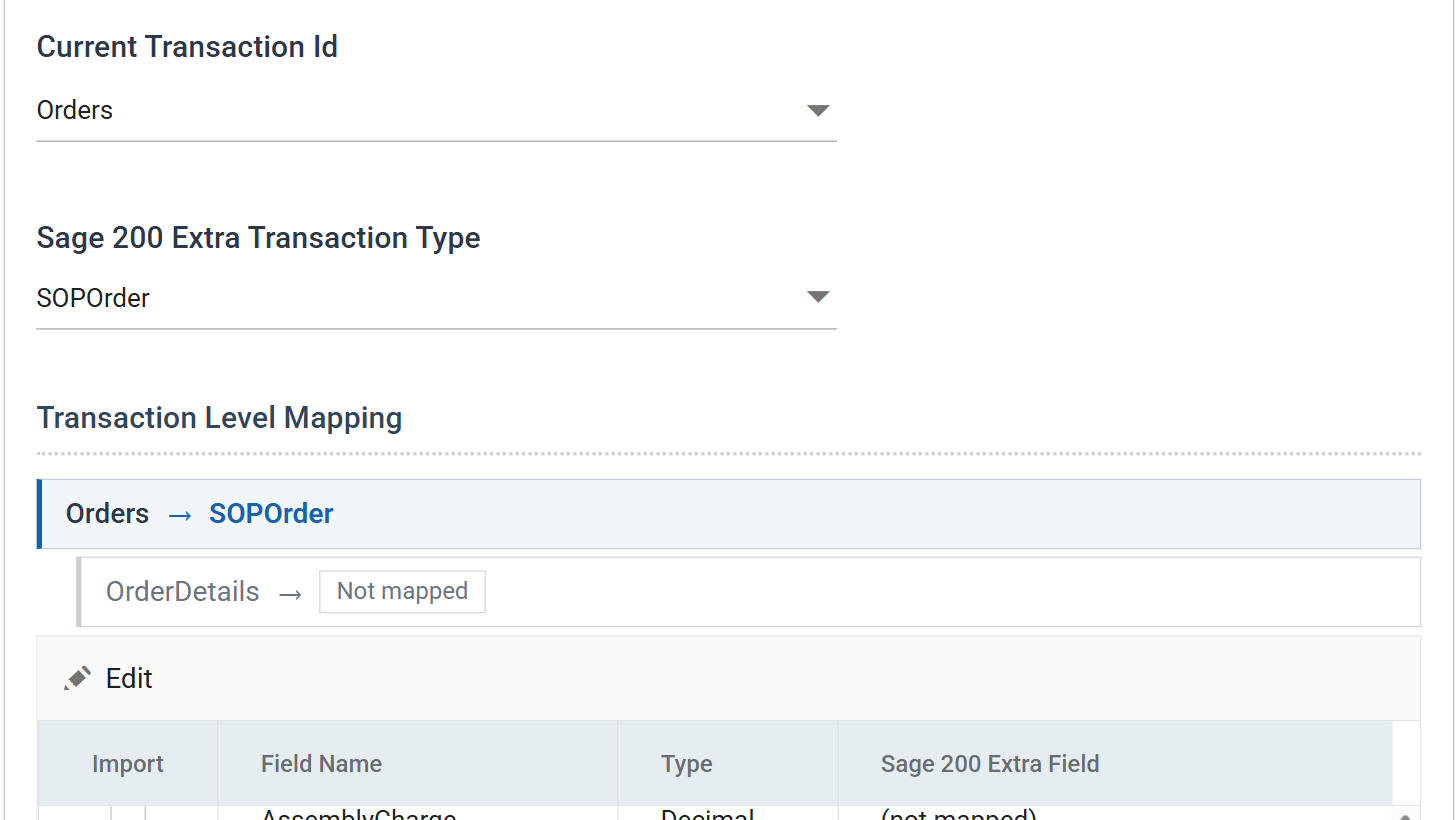
- Press the Field Mapping tab.
- Make sure Orders is selected in Current Transaction Id.
-
Choose SOPOrder from Sage 200 Extra Transaction Type.
The two drop-downs do different jobs
To switch the Field Mapping grid on display, change the top drop-down (Current Transaction Id). Changing the bottom drop-down (Transaction Type) changes the Sage 200 record that the top one maps to.
-
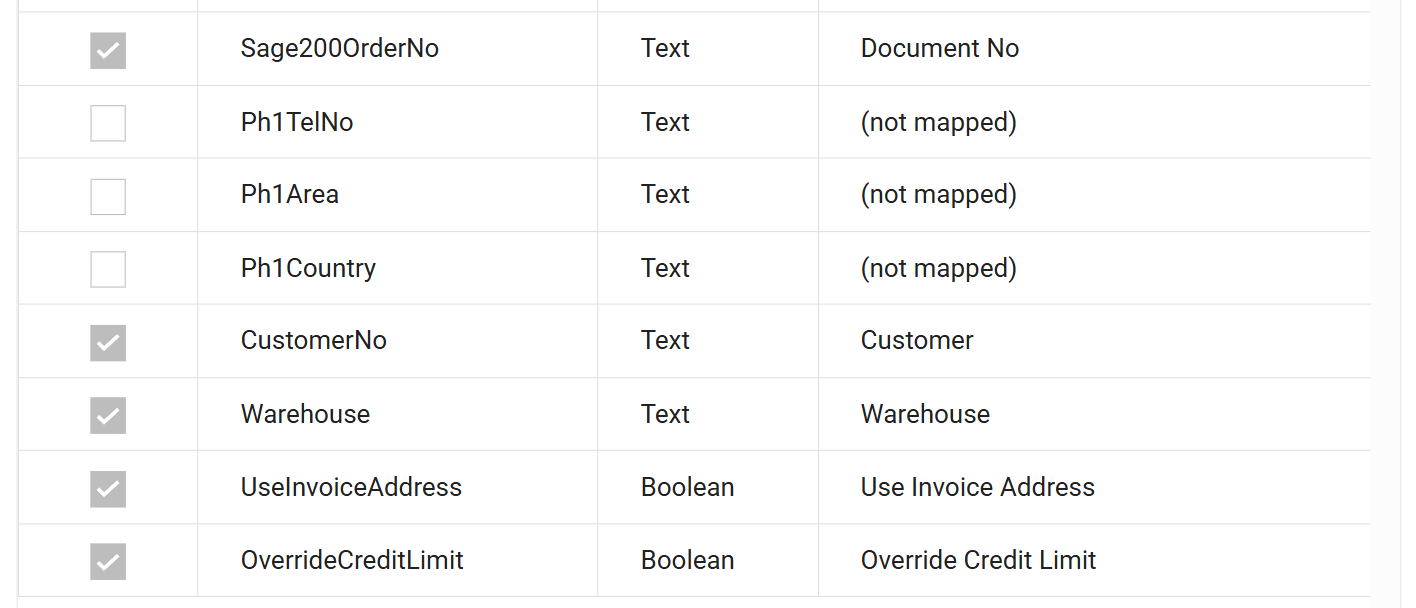
Press Edit above the grid and set the Sage 200 Extra Field on each of these rows:
Incoming Field Sage 200 Extra Field OrderId Customer Document No ShipName Postal Name ShipAddress1 Address Line1 ShipAddress2 Address Line2 ShipCity City ShipCounty County ShipPostcode Post Code DateTime Document Date CustomerNo Customer Warehouse Warehouse UseInvoiceAddress Use Invoice Address OverrideCreditLimit Override Credit Limit Sage200OrderNo Document No 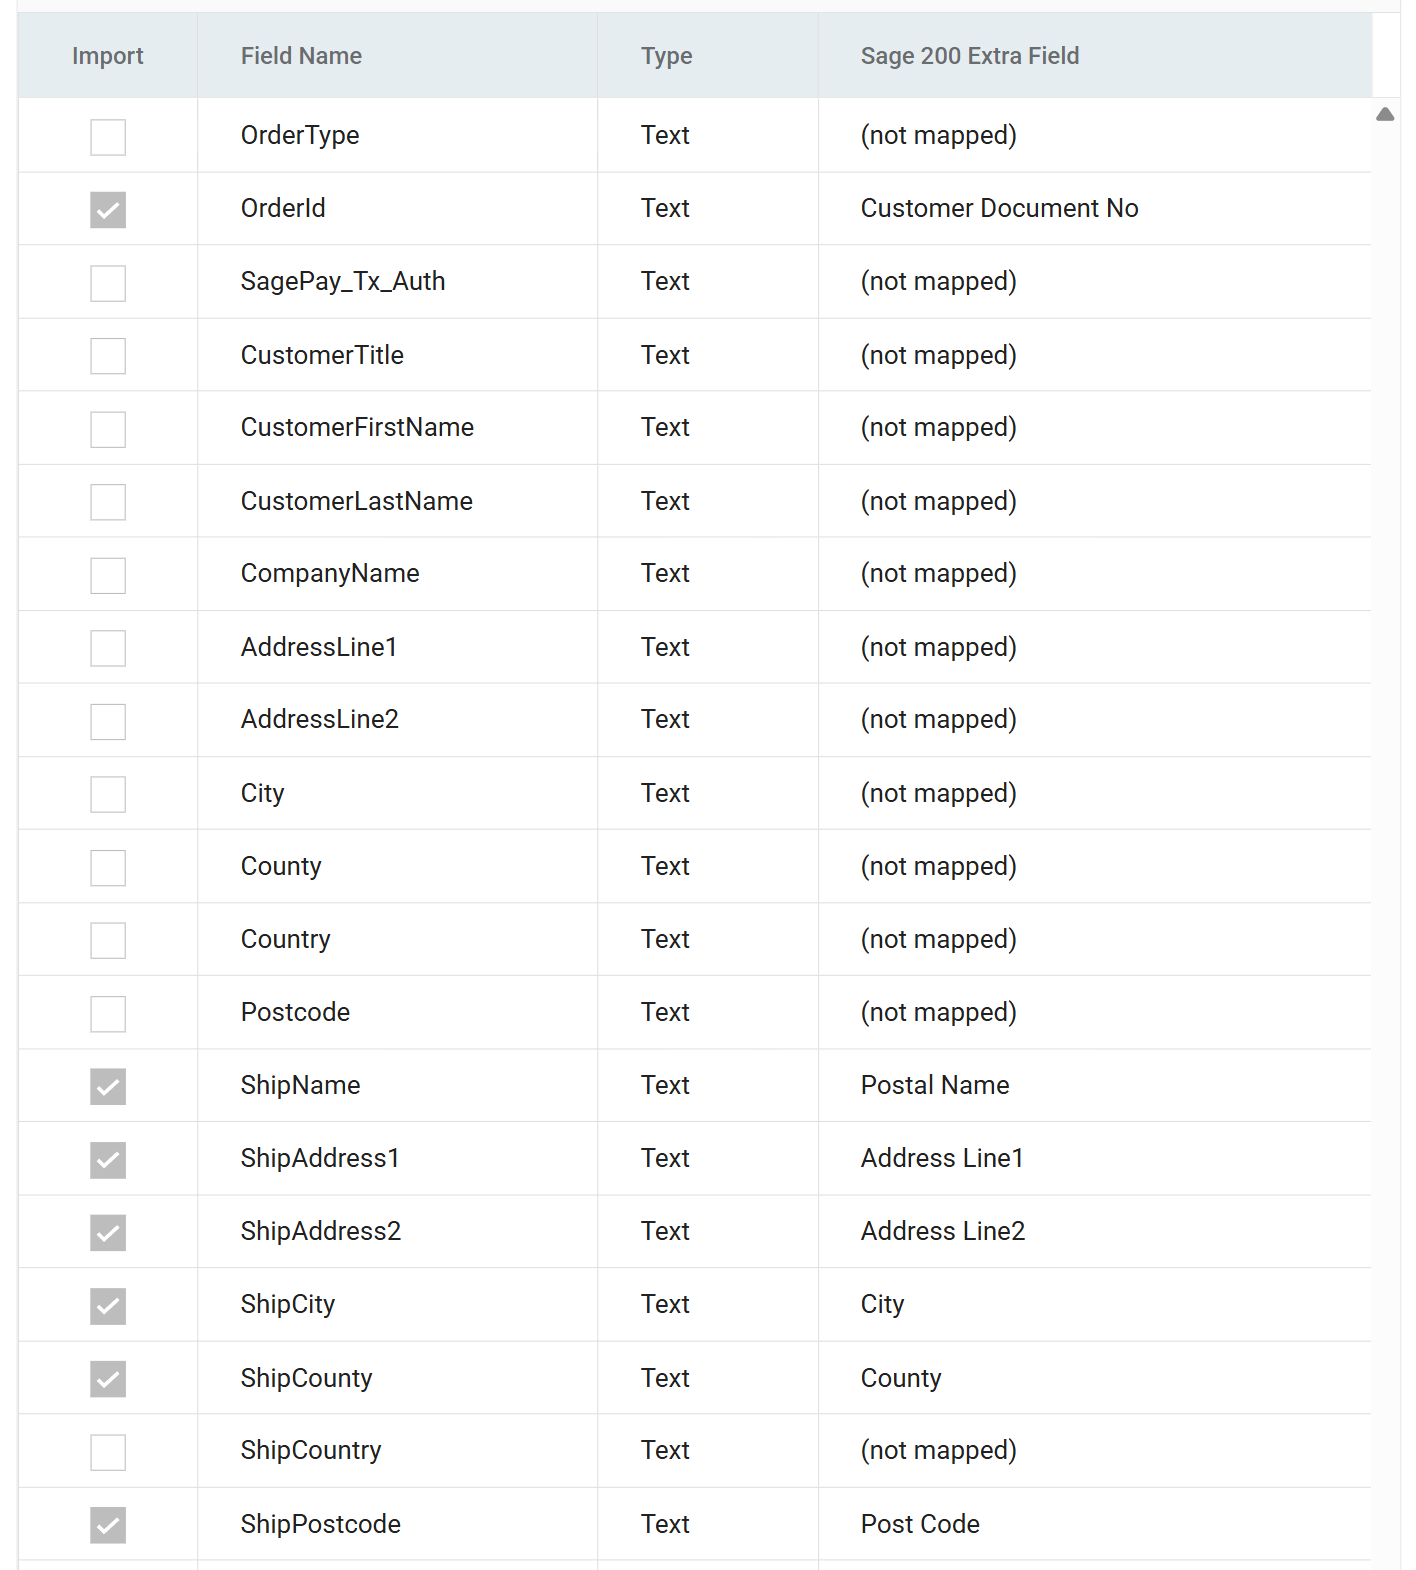
CustomerNois the account number that Step 4 looked up or generated and Step 5 imported. Sage 200 cannot attach the order to a customer that does not exist.Sage200OrderNogoes in empty and comes back with the order number Sage 200 allocates during the import. That is why Step 4 creates it.
-
Press Save above the grid.
Connector > Field Mapping — the order lines
- Change Current Transaction Id to
OrderDetails, then choose SOPOrderLine from Sage 200 Extra Transaction Type. -
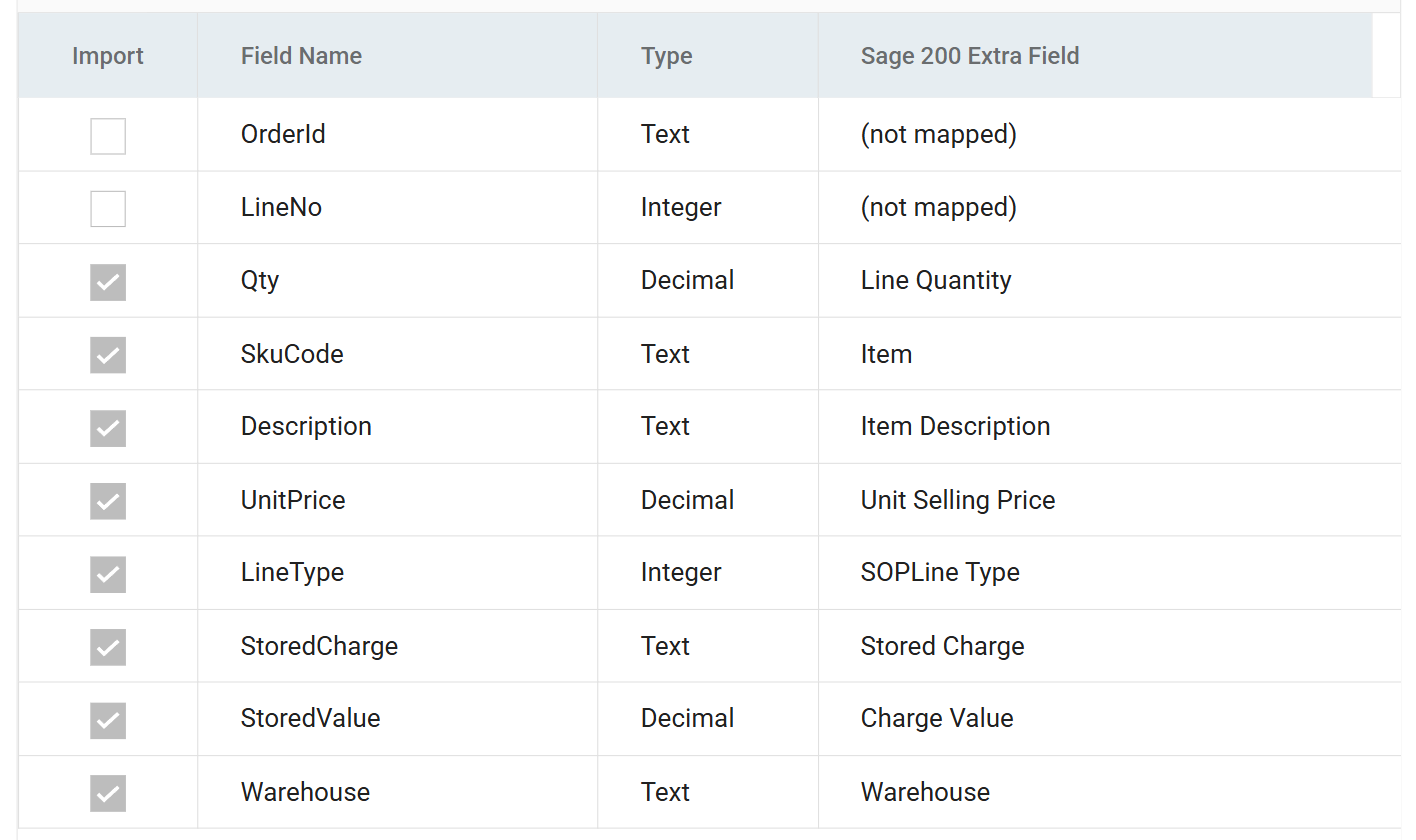
Press Edit and map:
Incoming Field Sage 200 Extra Field Qty Line Quantity SkuCode Item Description Item Description UnitPrice Unit Selling Price LineType SOPLine Type StoredCharge Stored Charge StoredValue Charge Value Warehouse Warehouse LineTypetells Sage 200 whether each line is an item, a charge or a comment, using the values you set in 6.1 and 6.2.- Leave
OrderIdandLineNounmapped. The lines are already nested under their order, so Sage 200 does not need these fields to know which order they belong to.
-
Press Save above the grid.
Running the import
-
Press Refresh.
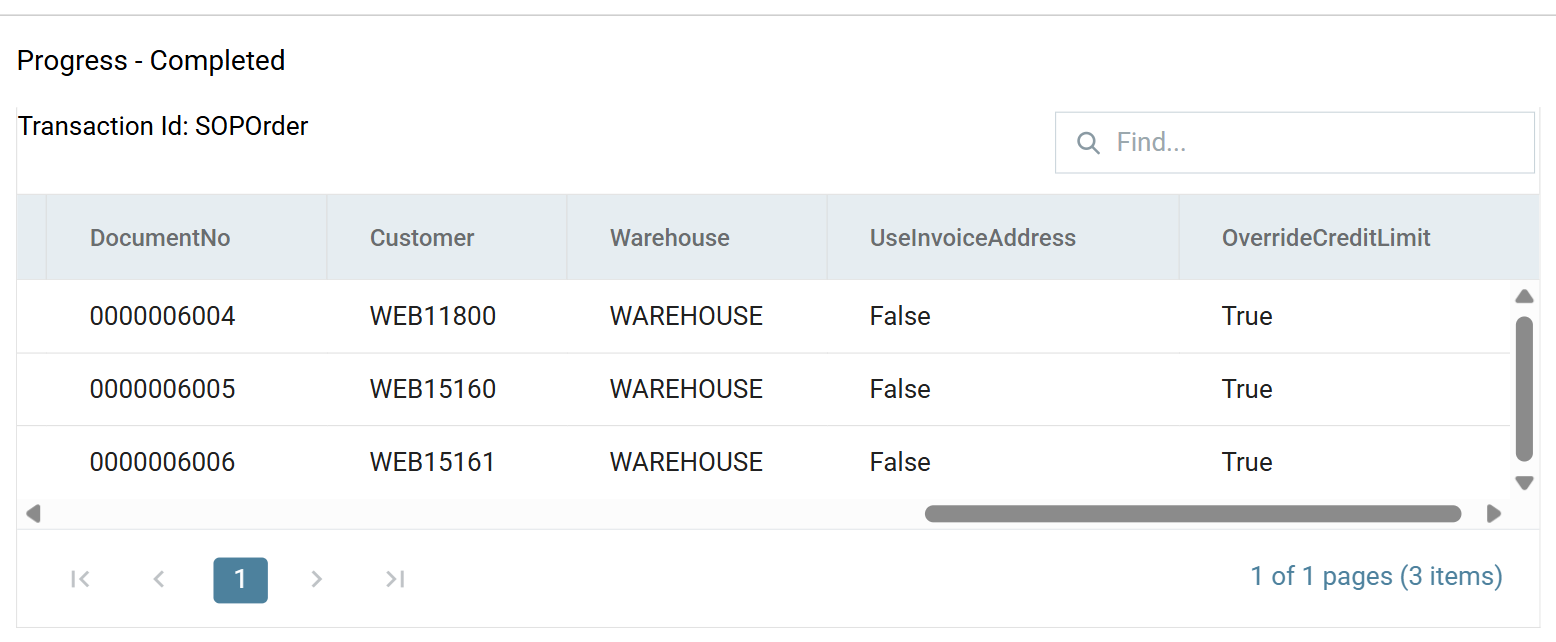
- When the status reads Progress - Completed, the orders are in Sage 200.
- Scroll the preview to the right:
DocumentNonow carries the Sage 200 order number for each of the three orders. It went in empty.
-
Press Close at the bottom of the transform, then Save the integration.
Your order numbers will not match the screenshots
The order numbers will not match the ones in these screenshots. Sage 200 allocates the next number each time the import runs, and the import has run before.