Step 10 – FTP Upload
Step 9 wrote a file listing what Sage 200 did with each order. The file is in a folder on the IMan server, where the system that sent the orders cannot reach it. In this step you upload it.
Like Step 5, this step has two parts:
- An FTP server record in Setup, holding the address and credentials.
- An FTP task on the design surface, which uploads the file.
Setup > FTP Servers
You define a server once, then choose it by name in any FTP task. The credentials are kept in one place instead of in every integration that uses them.
- Save the integration. In the left-hand menu, press Setup, then FTP Servers. The screen that opens is headed FTP OR SSH.
-
For training, a server called
LOCALis already defined. Double click the row to open it. Add creates a new one.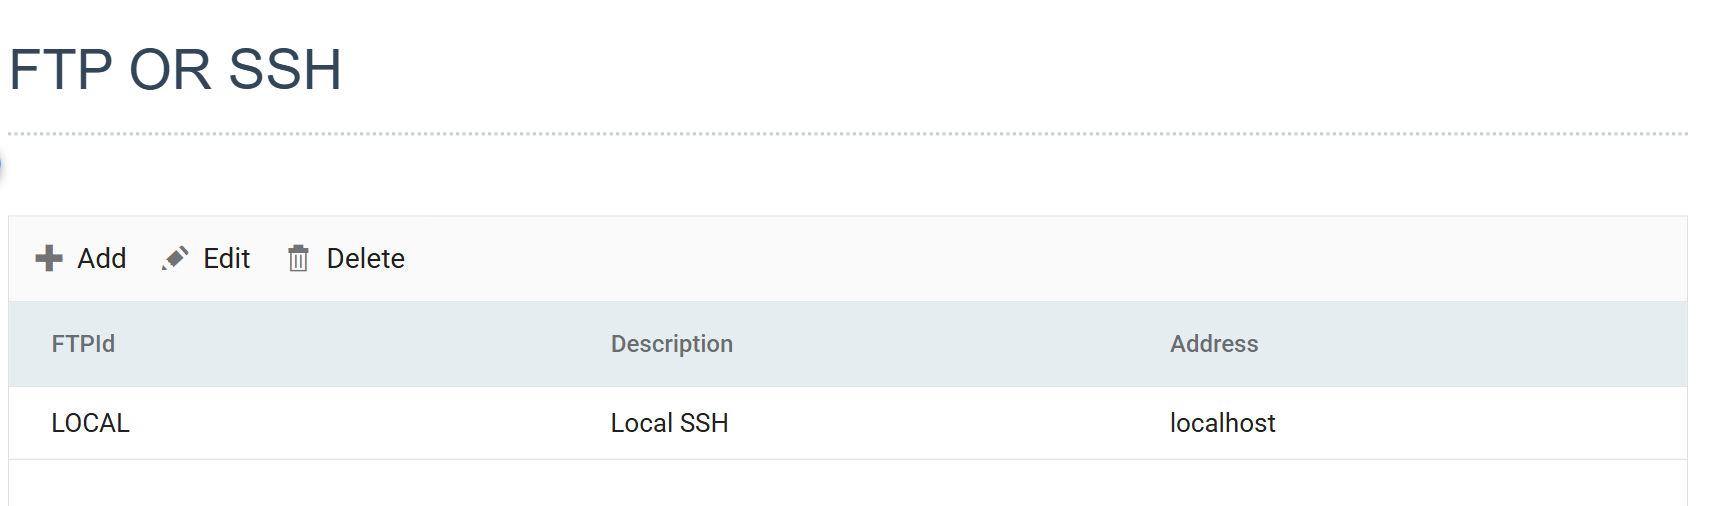
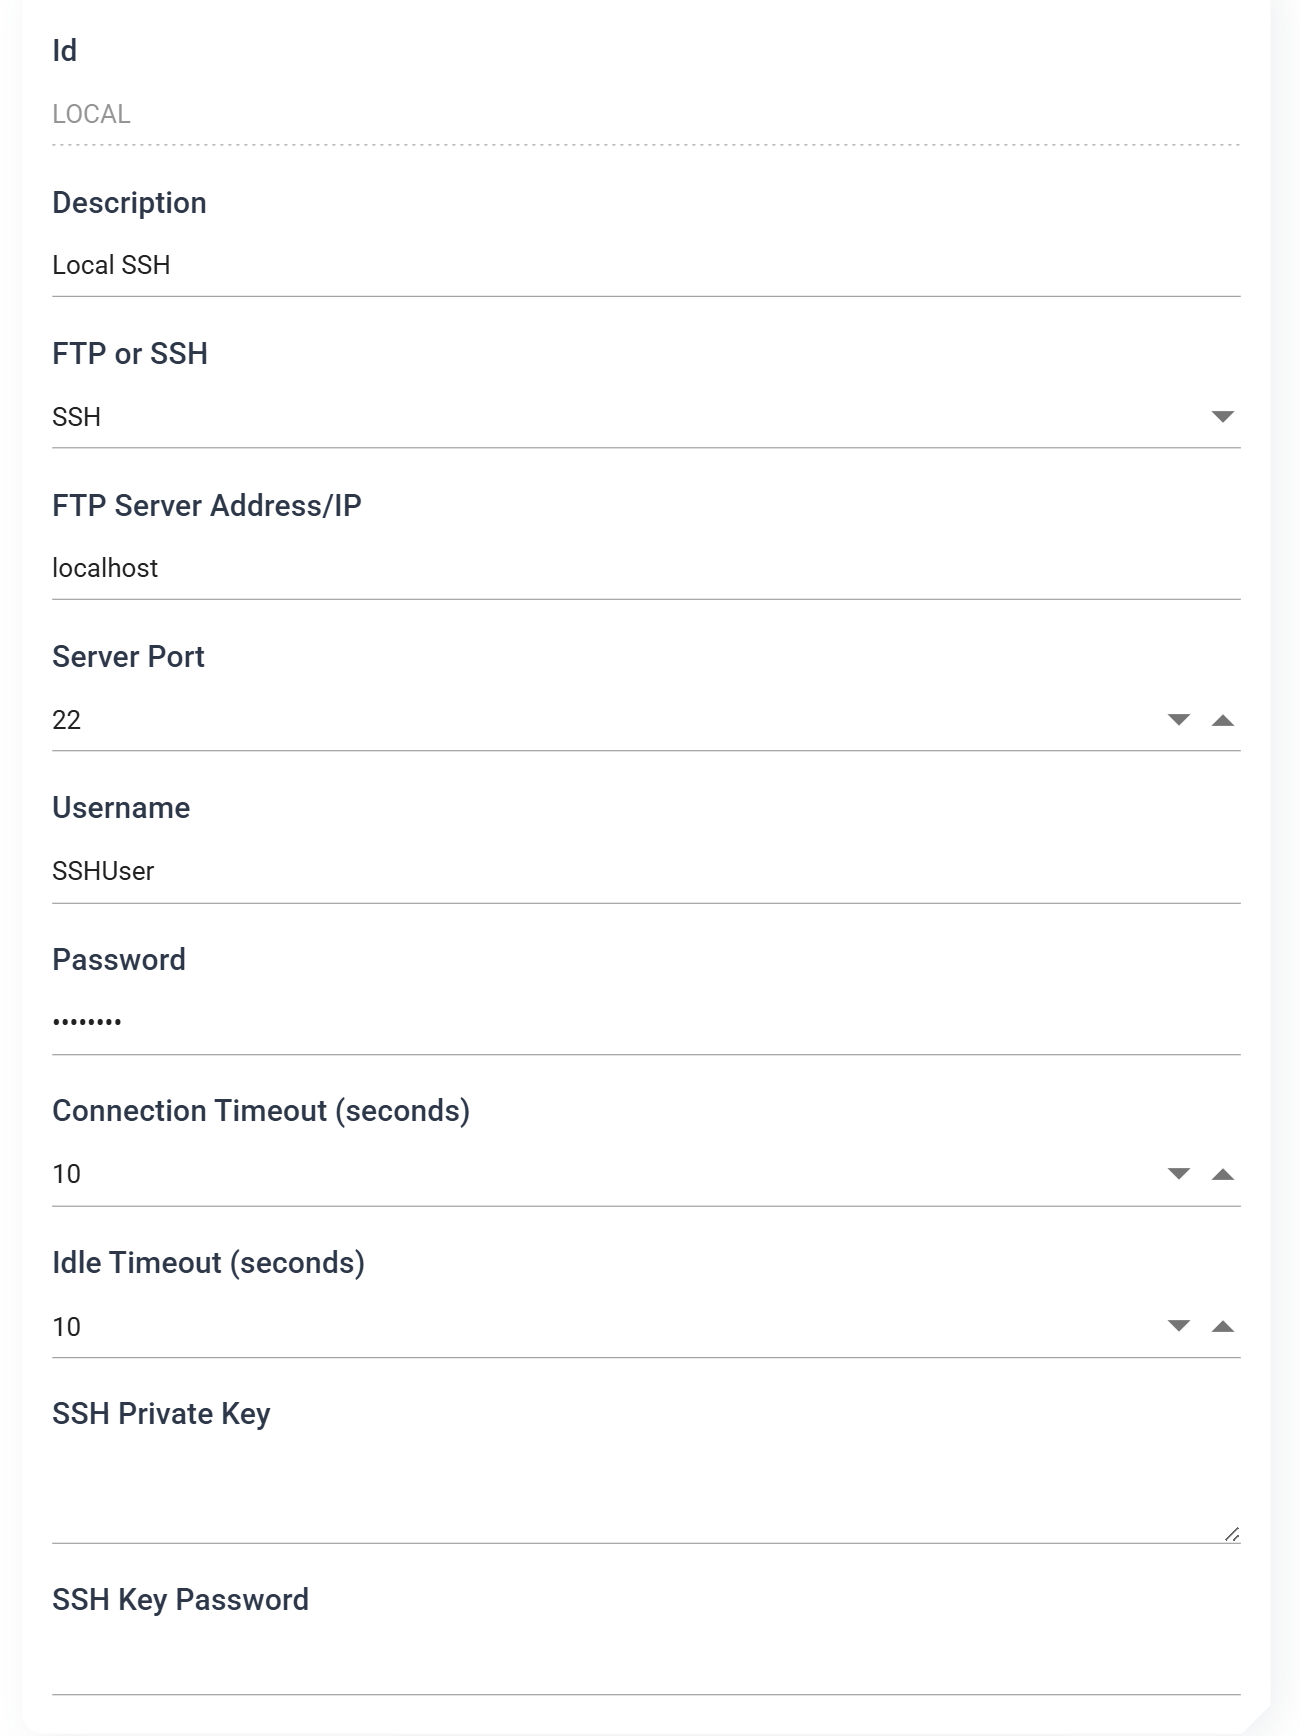
- Id
- Identifies the server. It cannot be changed once the record is saved.
- For training:
LOCAL
- Description
- The FTP task lists servers by description, not by id, and a vague description is hard to find later. The System Connector in Step 5 works the same way.
- For training:
Local SSH
- FTP or SSH
SSHtransfers files over SFTP.FTPis plain FTP.- For training, leave as: SSH
- FTP Server Address/IP
- The server, by name or address. For training it is the IMan server itself,
so:
localhost
- The server, by name or address. For training it is the IMan server itself,
so:
- Server Port
22for SSH,21for FTP, unless the service listens somewhere else.
- Username / Password
- The account IMan signs in as. The password field hides the password as you type.
- Connection Timeout / Idle Timeout
- Seconds to wait before giving up on a slow or unresponsive server.
- SSH Private Key / SSH Key Password
- Key-based authentication instead of a password, for servers that require it. Leave both empty to sign in with the username and password above.
FTP or SFTP?
This training uses SFTP, the SSH option. SFTP encrypts both the
credentials and the file, and needs one port instead of FTP's separate
control and data ports. Most servers now expect it.
Testing the connection
Press TEST at the bottom of the form. A tick on the button, and a second one in the Ftp Server Results panel beside it, confirms that IMan reached the server and signed in. The System Connector in Step 5 confirmed its connection the same way.
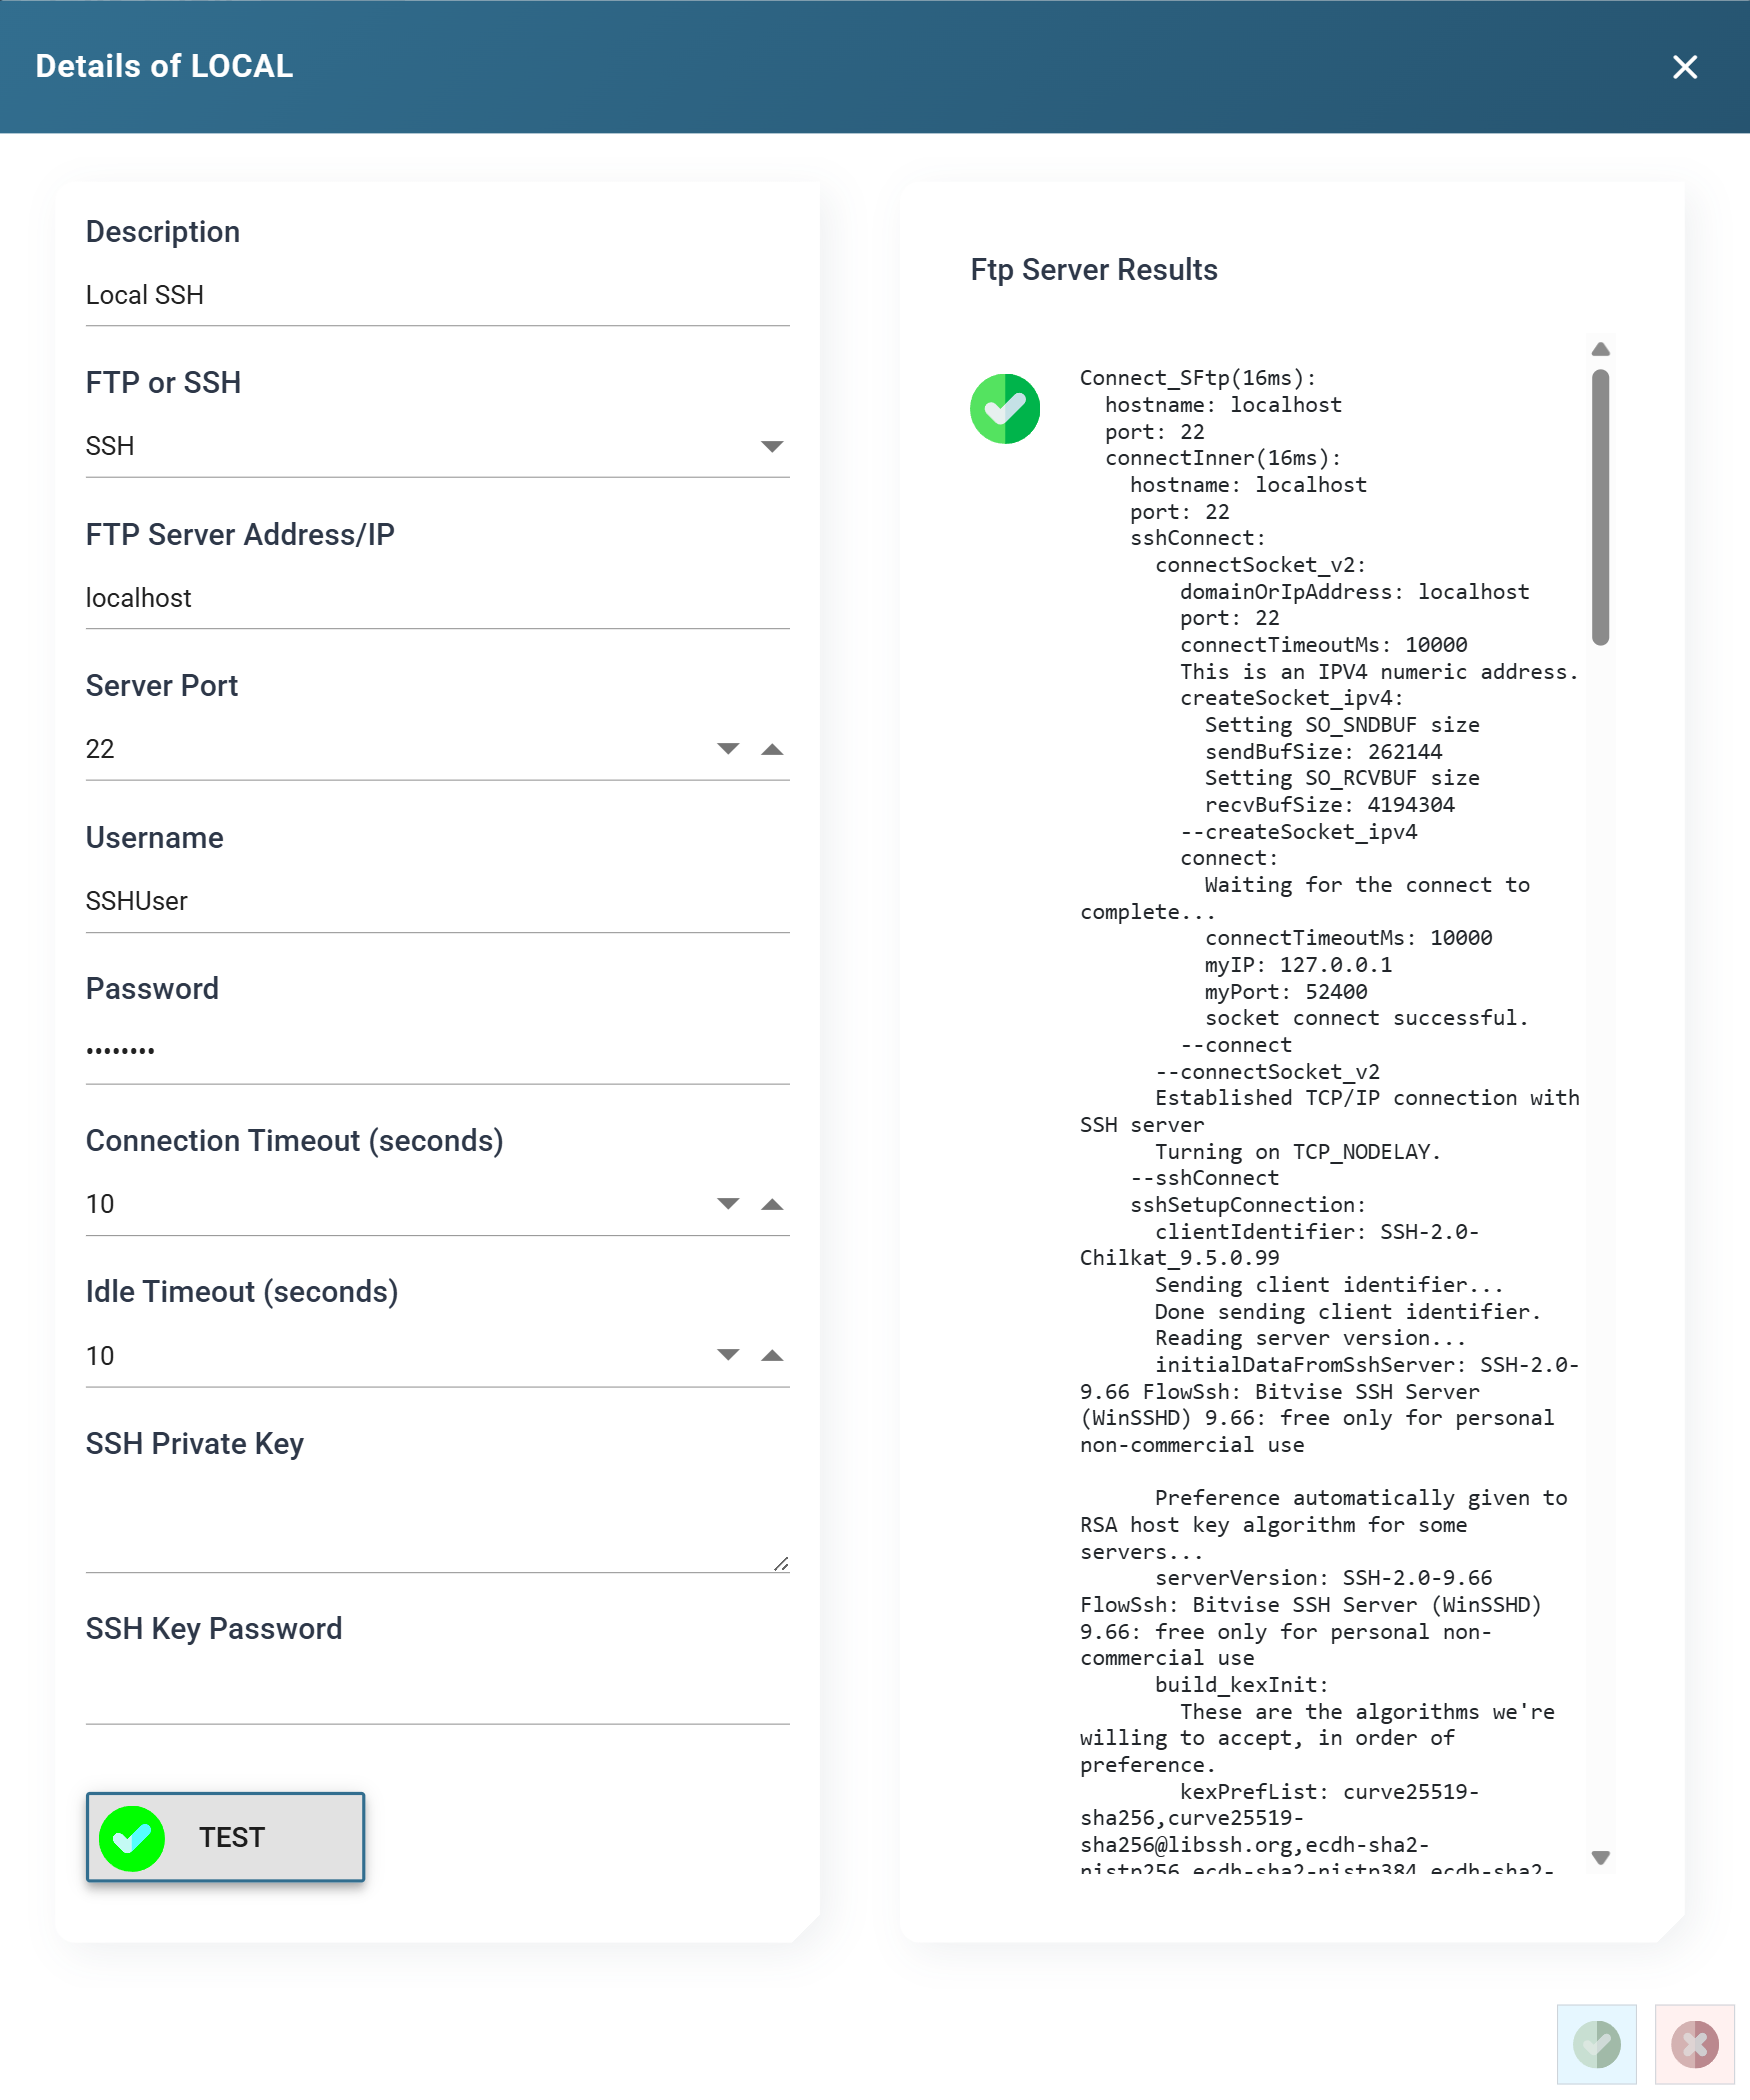
The panel holds the whole exchange with the server, several hundred lines long:
the connection, the key exchange and the sign-in, each block ending in
Success. Scroll to read it. If a block does not end in Success., fix the
details before you go any further. The trace names what failed; a later error
inside a running integration will not.
TEST uses the details on screen, not the saved ones, so you can try a change before you save it. Press the green tick at the bottom right to save the record, or the red cross to leave it as it was.
Design > Transform Setup
- Return to Design, load the integration, and press the Transform Setup tab.
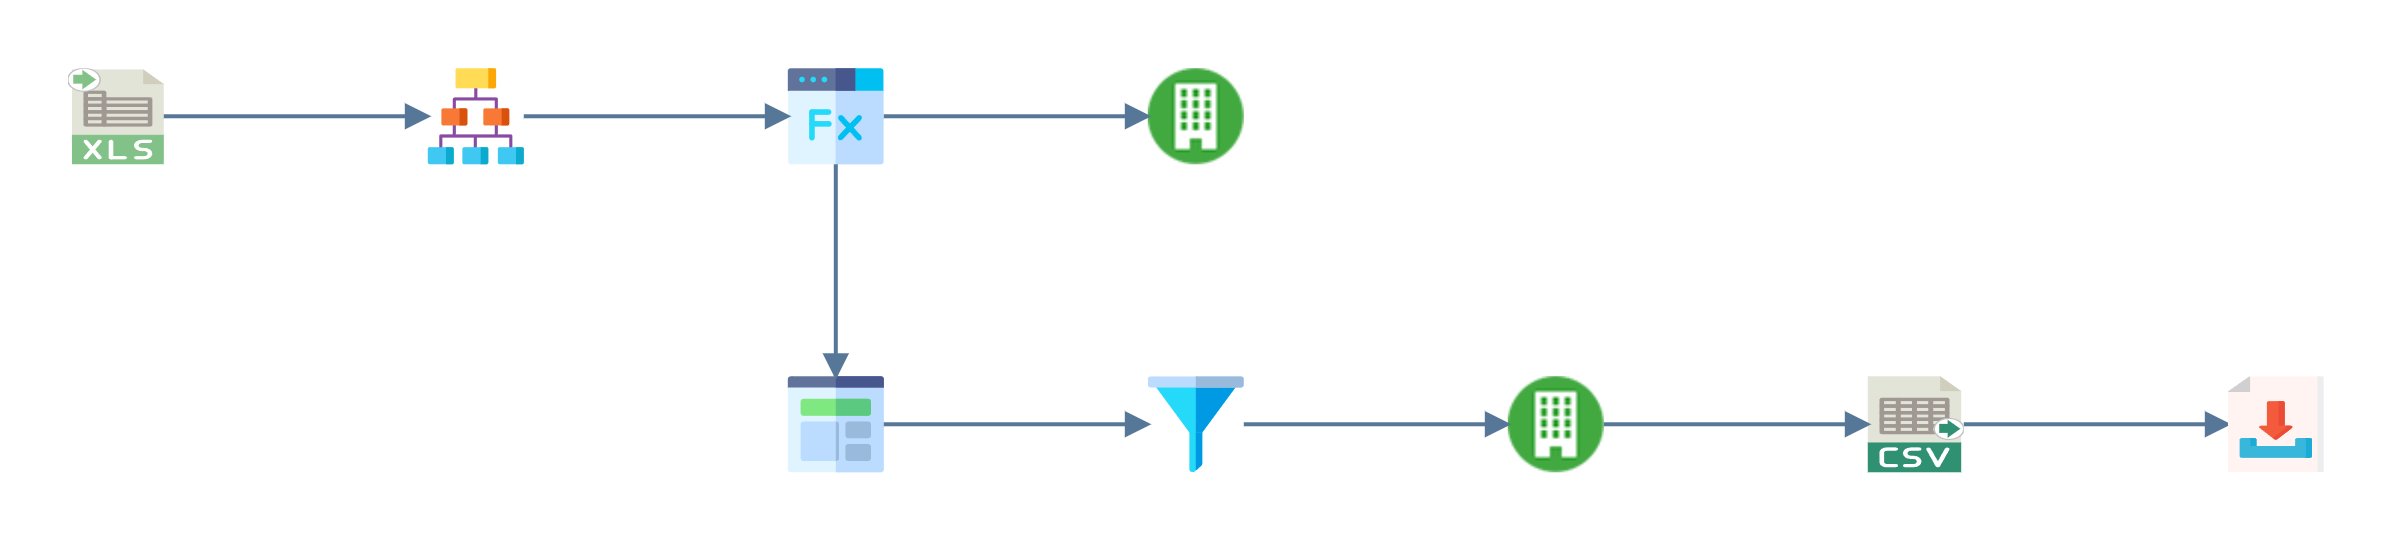
- Open the Tasks group in the palette and drag an FTP task onto the design surface, to the right of the CSV Writer.
- Drag a Connector from the Transforms group and join the writer to it.
-
Save the integration.
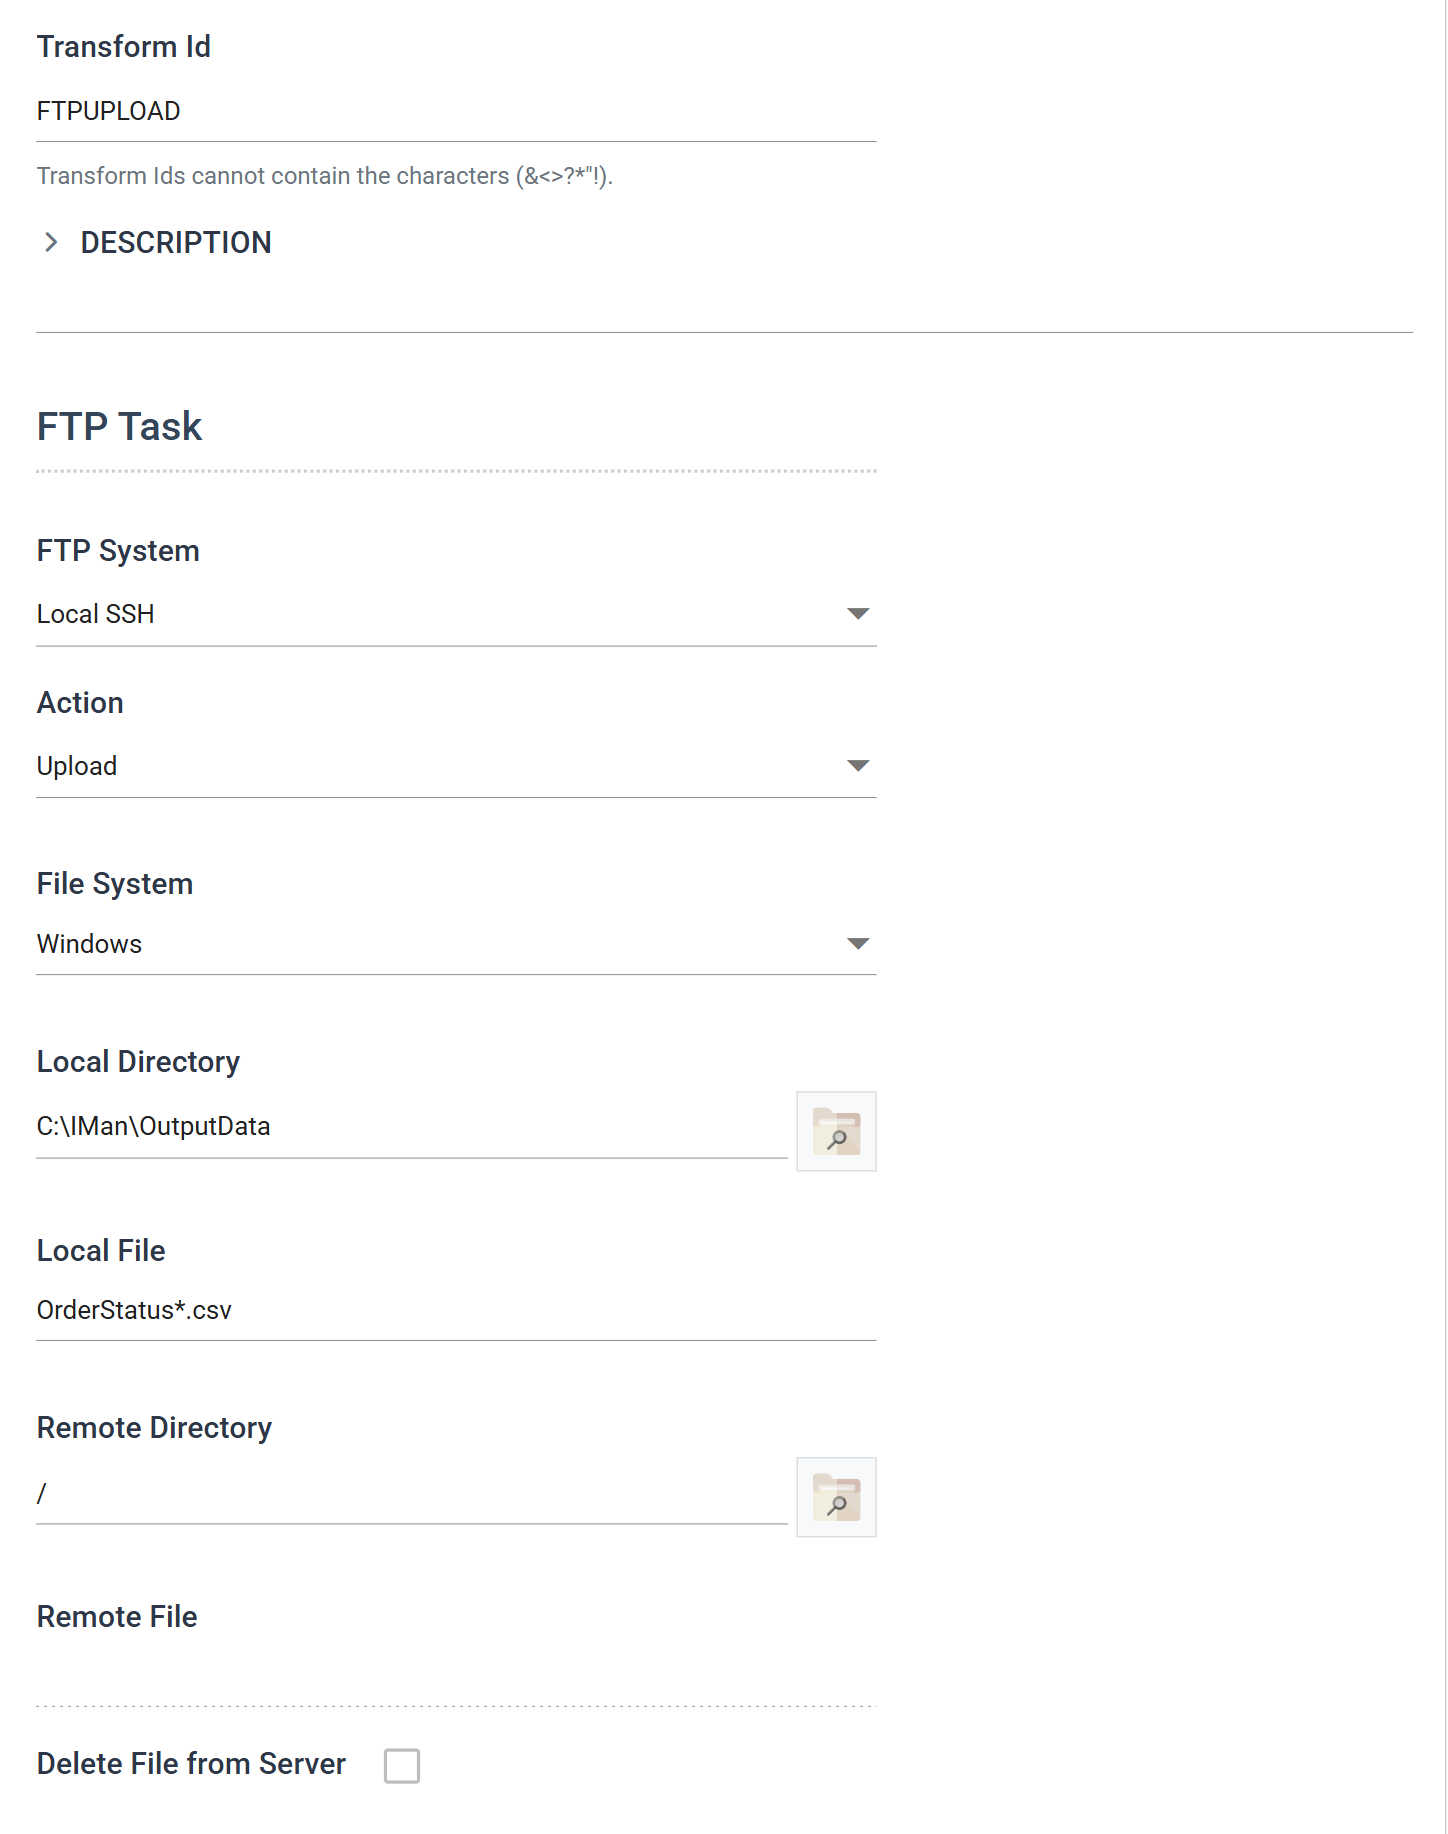
FTP Task > Setup
Double click the task to open it.
- Transform Id
- Identifies the transform in the audit report, in its Process Id
column. A new task is named
FTP. - For training, enter: FTPUPLOAD
- Identifies the transform in the audit report, in its Process Id
column. A new task is named
- FTP System
- The server defined above, listed by its description.
- For training, select: Local SSH
- Action
- What to do:
Upload,Download,Delete Remote FileorDelete Remote Folder. - For training, select: Upload
- What to do:
- File System
- The local file system to read the file from or write it to: the ordinary Windows file system, or Azure Blob storage.
- For training, leave as: Windows
- Local Directory
- The folder holding the file to upload.
- For training, enter:
C:\IMan\OutputData
- Local File
- The file, or files. This step needs a wildcard: Step 9 put the run date in the file name, so there is no single name to give.
- For training, enter:
OrderStatus*.csv
- Remote Directory
- The folder on the server to upload into, relative to the folder the account starts in when it signs in.
- For training, enter:
/
- Remote File
- The name to give the file on the server. Leave it blank to keep the local name. That is almost always right when the local name carries a date.
- For training: leave blank
- Delete File from Server
- Only applies to
Download.
- Only applies to
Action arrives set to Download
A new task's Action is Download. If you leave the default, the task
downloads instead of uploading, and reports no error.
Running it
Press Refresh, then press the TRACE tab in the preview pane. Like the setup screen's test, the trace records the exchange with the server, this time for the transfer itself. It has one block per operation: connect, authenticate, initialise SFTP, open the remote directory, and then one UploadBd block per file sent.
Scroll to the last of them:
UploadBd:
  uploadFileFromDb:
    remoteFilePath: /OrderStatus20260817.csv
    ...
    writeDataSource:
      startingOffset: 0
      server_max_packet_size: 65536
      uploadChunkSize: 32000
      End of data stream...
      ------------------------------------------------
      totalNumBytesSent: 103
    ...
  --uploadFileFromDb
  Success.
--UploadBd
remoteFilePath is where the file landed. totalNumBytesSent is how much of it
arrived: 103 bytes, the size of the file Step 9 wrote. Success. closes the
block. It is the server's acknowledgement of the write, so you do not need to
open an FTP client to confirm it.
A wildcard uploads every file it matches, not just today's
There is one UploadBd block per file the wildcard matched. OrderStatus*.csv
matches every status file in the folder, not just today's. If status files
have been building up in the folder since last month, every run uploads all
of them.
Close the task and save the integration.