Step 9 – Order Status Feedback File
The integration now writes orders into Sage 200, but the system that sent them cannot tell what happened to them. In this step you add a CSV file that pairs each incoming order id with the order number Sage 200 allocated. Step 10 uploads the file to send it back.
The file holds the same pairs as the audit summary in Step 8, as a file instead of a report.
Design > Transform Setup
- Open the Writers group in the palette and drag a CSV Writer onto the design surface, to the right of the Sage 200 order connector.
- Drag a Connector from the Transforms group and join the order connector to it.
-
Save the integration.
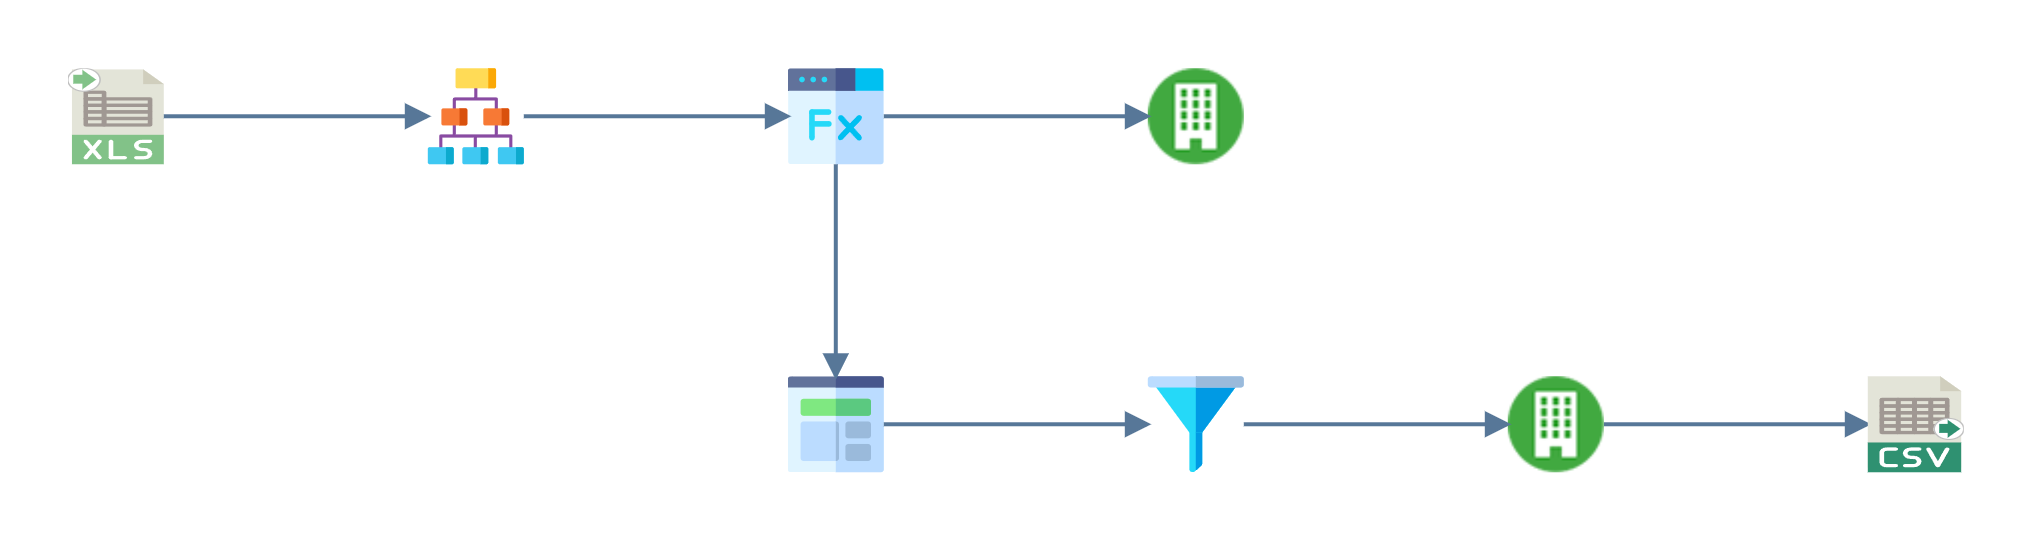
A transform cannot be opened until the integration is saved
Save before going any further. You cannot open a newly dropped transform until you save the integration. Double clicking it does nothing, and no message explains why.
Writer > Setup
Double click the writer to open it.
- Transform Id
- A new writer is named
CSV Writer, and the audit report uses this name for it. - For training, enter: CSVWRITE
- A new writer is named
- Target
- Where the output goes. For training, leave as: File
- File System
- The ordinary Windows file system, or Azure Blob storage.
- For training, leave as: Windows
- File Path
- The folder the file is written to.
- For training, enter:
C:\IMan\OutputData
- Evaluate FileName
- Whether File Name is a literal name or a formula to be evaluated.
- For training: ticked.
- File Name
- For training, enter:
"OrderStatus" & Format(Date, "yyyymmdd") & ".csv"
- For training, enter:
- Encoding Method
- For training, leave as: Unicode (UTF-8) (utf-8)
- Write Byte Order Mark (BOM)
- For training, leave unticked.
- Overwrite Existing File
- Whether a second run on the same day replaces the file, or writes a second file beside it with a unique suffix added to the name.
- For training: leave ticked.
- Auto-Create Folder
- For training, leave unticked. See below.
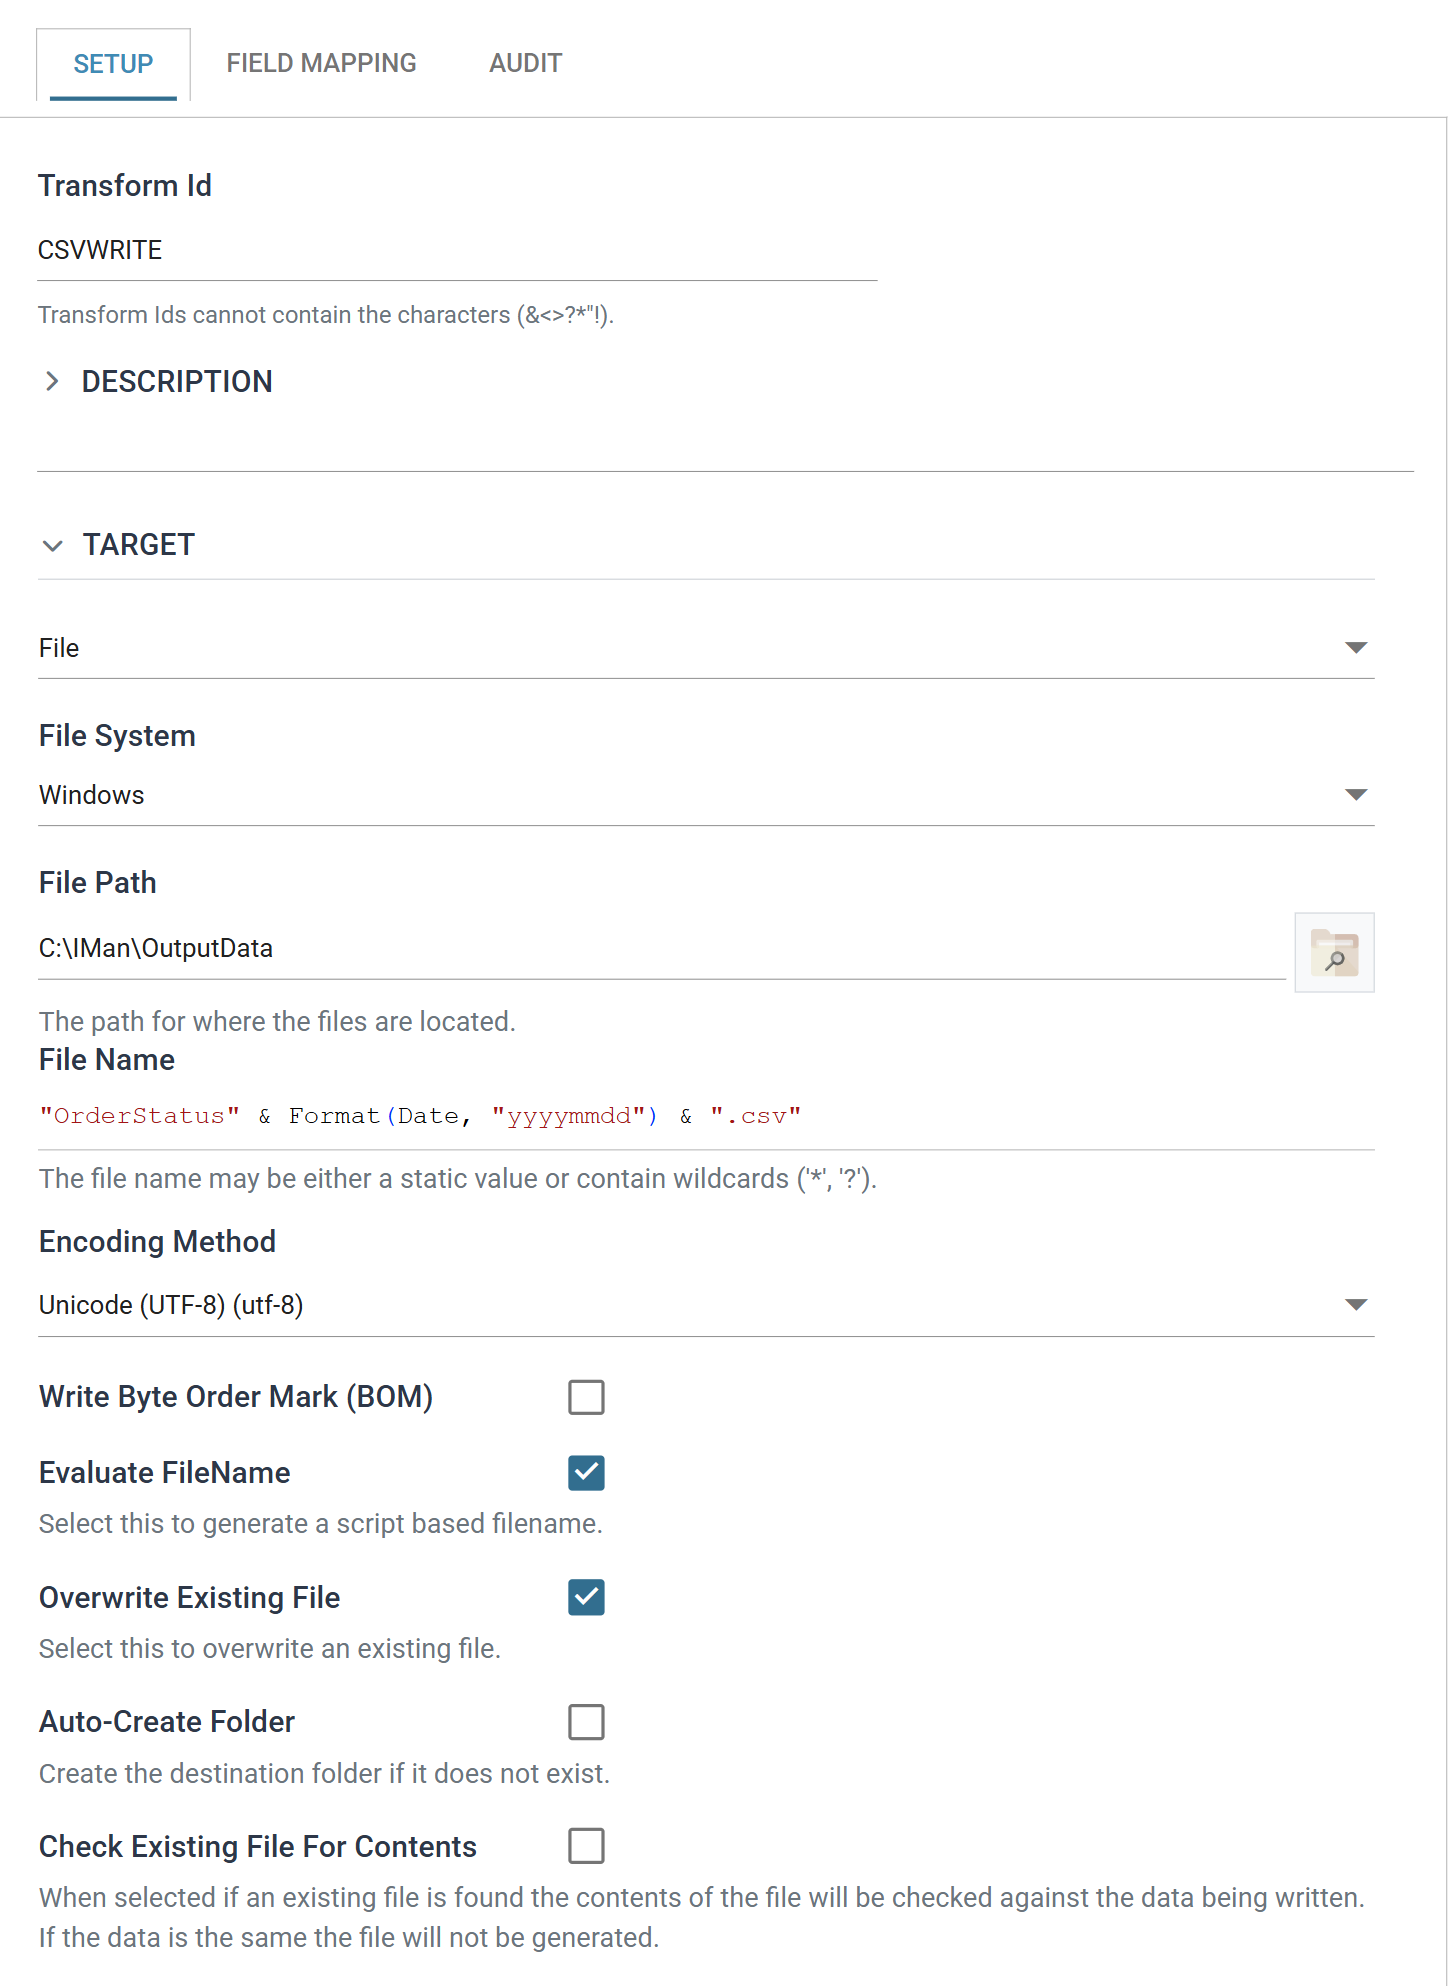
Tick Evaluate FileName before typing the file name
Tick Evaluate FileName before typing the file name. The steps above follow that order.
Ticking it replaces the plain File Name text box with a formula editor and discards whatever was in the box, without warning. If you fill in the name first, it disappears and the writer has no file name.
The folder in File Path must exist. Auto-Create Folder creates it if it
does not. For training, create C:\IMan\OutputData yourself and leave that
option unticked. IMan then reports a mistyped path instead of creating a new
folder.
Writer > Setup — the output format
The rest of the tab controls what the file looks like. Scroll down to Options.
- Field Delimiter
- The character between values. For training, leave as:
,
- The character between values. For training, leave as:
- Line Delimiter
- For training, leave as: Windows Carriage Return & Linefeed (CRLF)
- Quote Text Fields
- Whether text values are wrapped in quotes. For training, leave as: NoQuotes
- Write Header Rows
- Writes the field names as the first line of the file. This makes the file self-describing. It is not ticked by default.
- For training: ticked.
Below them, under Commit:
- Create File When No Data
- For training, leave unticked. A run that imported no orders should not leave an empty file for the other system to collect.
- Generate File Per Transaction
- One file per transaction rather than one per run. For training, leave as: (none)
- Batch Size
- How many records IMan writes at a time. For training, leave as: 0
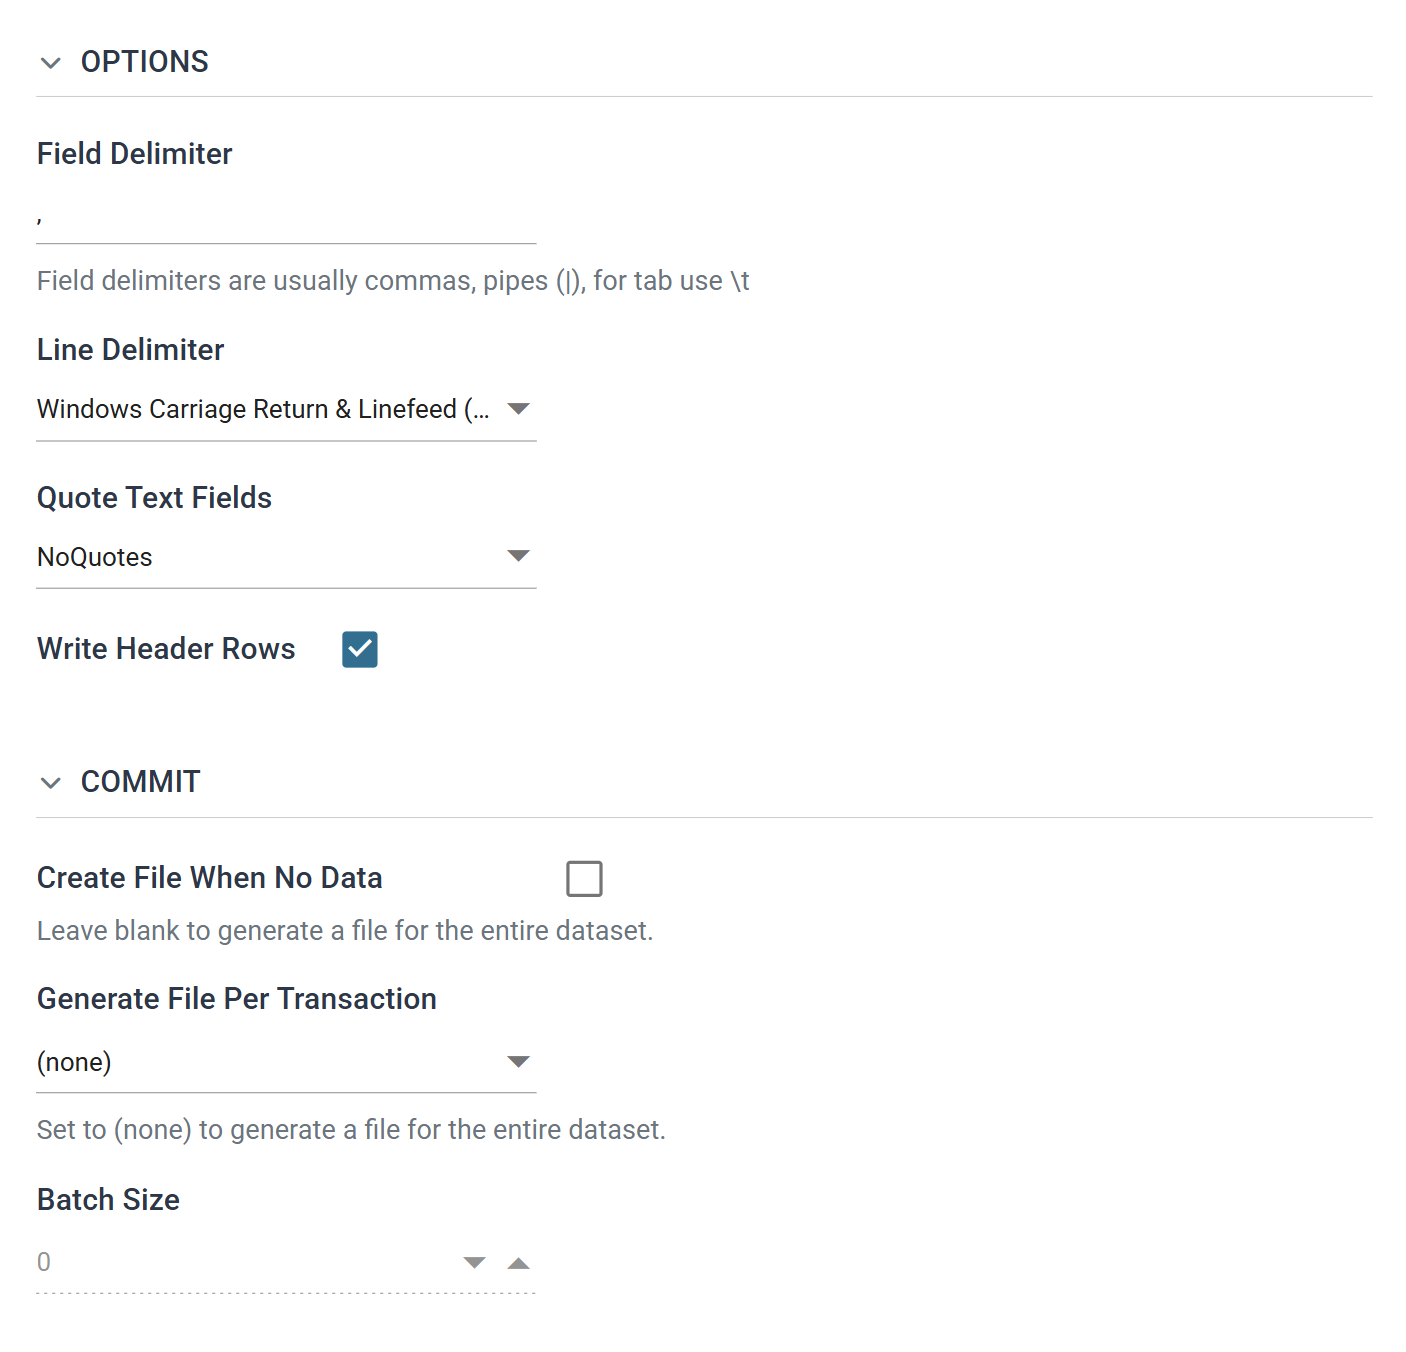
Writer > Field Mapping
By default the writer exports everything the connector passes on, which here is the whole order header. The file needs only two columns.
The fields are listed under the connector's names
The fields are listed under the connector's names
(CustomerDocumentNo, DocumentNo), not the workbook's.
Step 7 describes this renaming. OrderId went into
the connector and came out as CustomerDocumentNo. Sage200OrderNo went in
empty and came back as DocumentNo, carrying the number Sage 200 allocated.
- Press the Field Mapping tab and make sure SOPOrder is the current transaction.
- Press Edit, then Deselect All Fields and confirm.
- Tick Export against
CustomerDocumentNoandDocumentNoonly. -
Save the grid with the green tick.
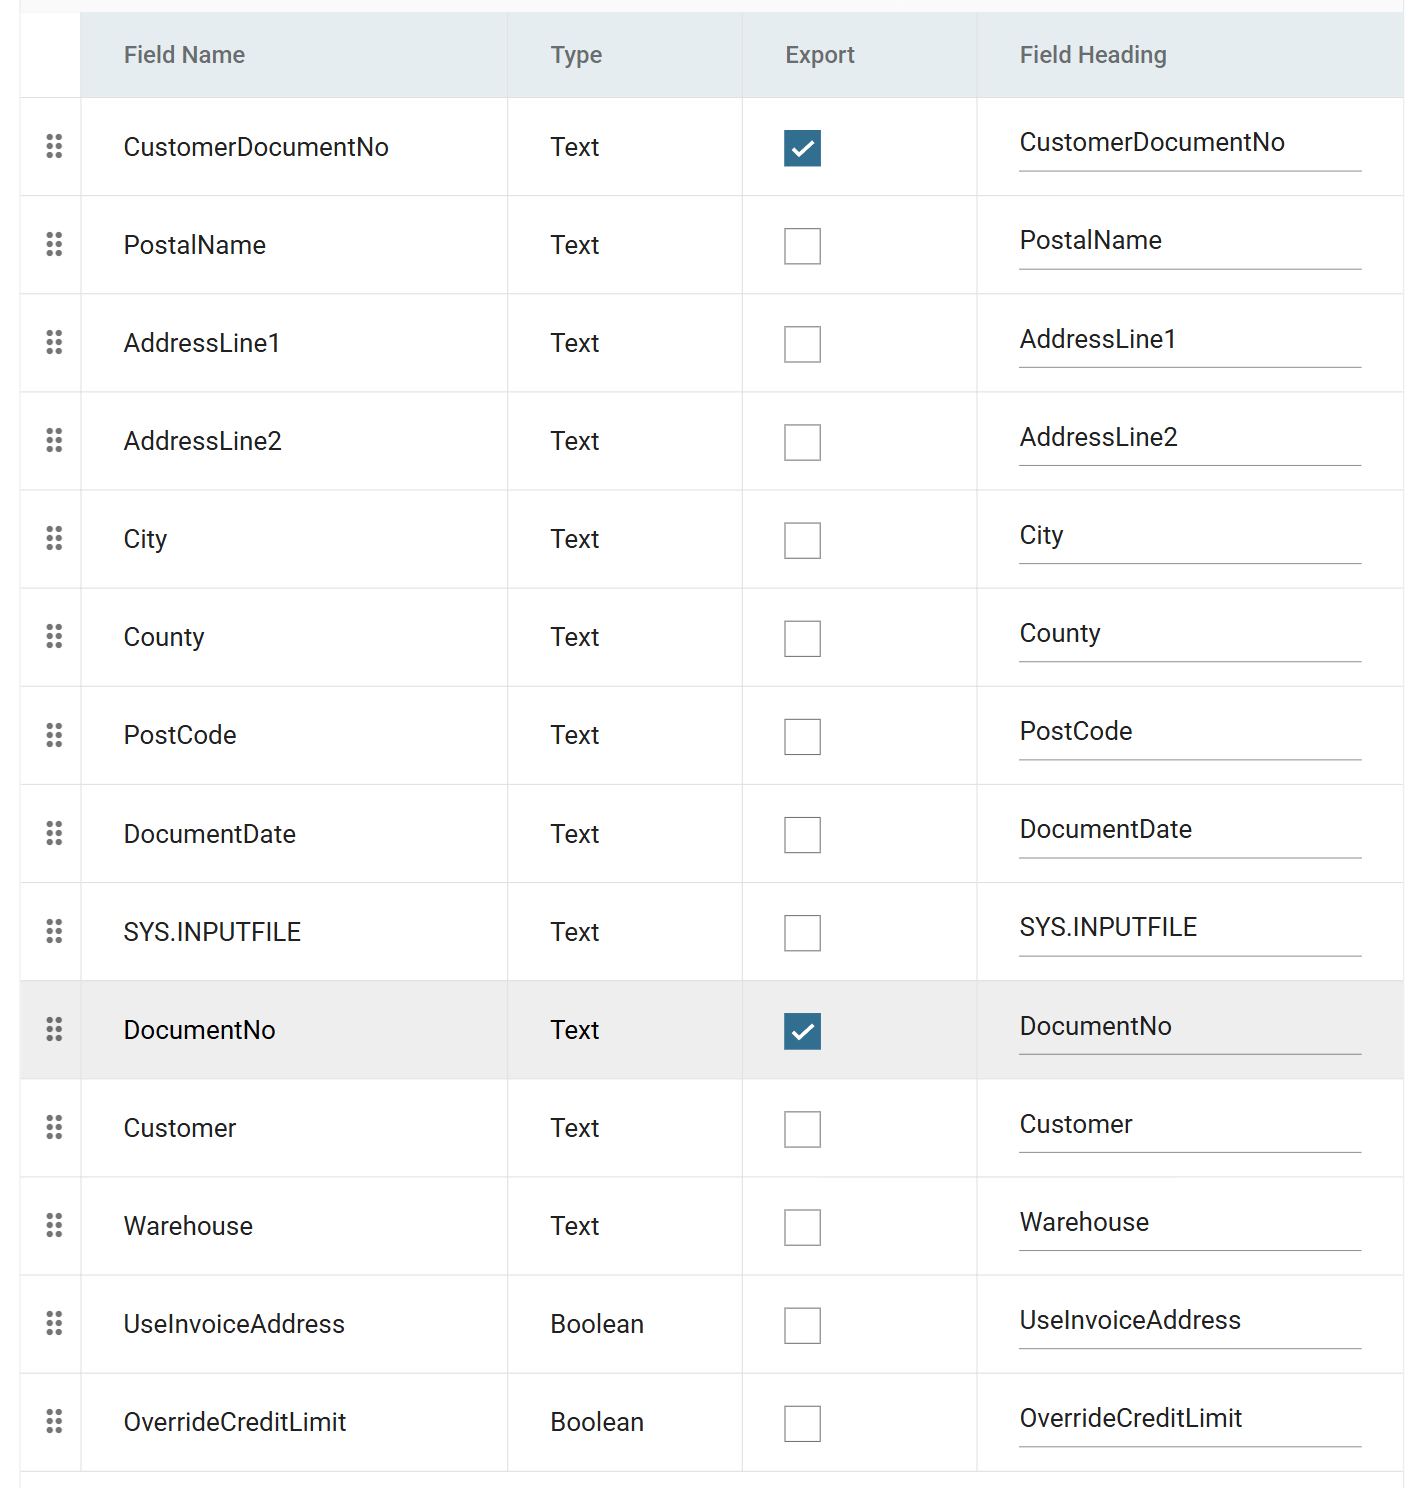
-
Change the current transaction to SOPOrderLine (the order lines), press Edit, then Deselect All Fields and confirm. Nothing from the lines goes into this file.
- Save the grid, close the writer and save the integration.
Field Heading writes the header row, not Field Name
IMan writes the header row from Field Heading, not Field Name.
Field Heading starts as a copy of the field name, so if you leave it alone
the header reads CustomerDocumentNo,DocumentNo. Change it if the system
reading the file expects different column titles.
Leave SYS.INPUTFILE unticked. It is in this list because
Step 8 gave it a log key so that it would survive
the connector for Step 12. It does not
belong in a file of order numbers.
Running it
Press Refresh on the Excel Read transform, and then on each transform in
turn down to this one. The writer writes the file when its preview runs, so the
file appears in C:\IMan\OutputData straight away:
CustomerDocumentNo,DocumentNo
FBRN-309242,0000006012
FBRN-309243,0000006013
FBRN-309244,0000006014
The first line is there because Write Header Rows was ticked, and the file name carries the run date because Evaluate FileName made the name a formula.
Refresh from the reader down
If you press Refresh on the writer alone, you get a file that looks correct but is out of date.
A transform's Refresh replays the cached dataset from the transform above it; it does not re-run that transform. The writer therefore receives the order numbers from whichever run last filled the cache. IMan writes nothing to Sage 200 and reports nothing, and the file names orders that already existed.
Refreshing each transform in turn, starting at the Excel Read, re-runs the whole chain. The same caution applies anywhere downstream of a connector. It is also why Step 12 works the way it does.
A real run puts three more orders into Sage 200
A real run puts three more orders into Sage 200, as described in Step 7, so your numbers will not match the ones above.