3. Email Invoice
The invoices are printed. In this section you email each one to its customer, with the PDF attached and the customer's own name and balance in the message.
First you need the customer details, which are in Sage 300 but not in the dataset, and a Map transform to hold them.
Setup > Lookups
A lookup runs a query against a database connection and returns a single value. This one takes an invoice number and returns the customer behind it.
- Save the integration, go to the Setup area and press Lookups.
- Press Add and enter the following:
- Id
- For training, enter:
SAGE300INV
- For training, enter:
- Description
- For training, enter:
Sage300 Customer by Invoice Lookup
- For training, enter:
- Use IMan Lookup Table
- Unticked. The lookup reads Sage 300 directly, not an IMan table.
- Database Connection
- The connection the query runs against.
- For training, select:
Sage300
- Select Clause
NAMECUST, NAMECTAC, AMTBALDUET, EMAIL2
- From Clause
ARCUS inner join OEINVH on CUSTOMER = IDCUST
- Where Clause
INVNUMBER = '%1'
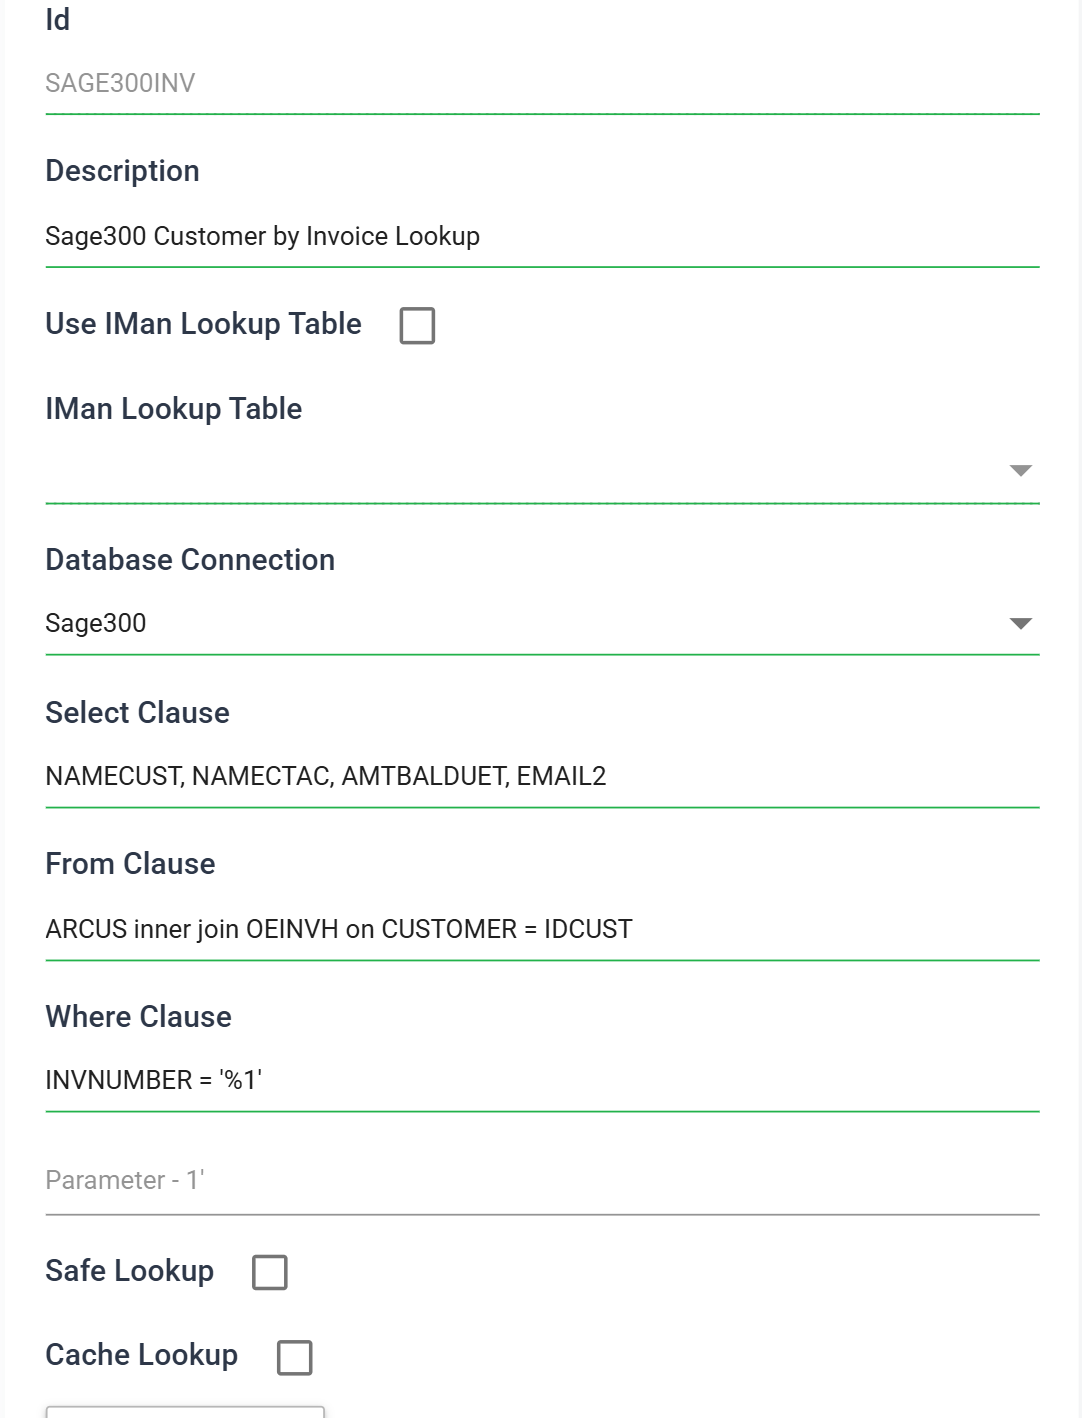
%1 is a parameter. IMan replaces it with the value the formula passes as the
lookup's third argument, so the same lookup works for any invoice.
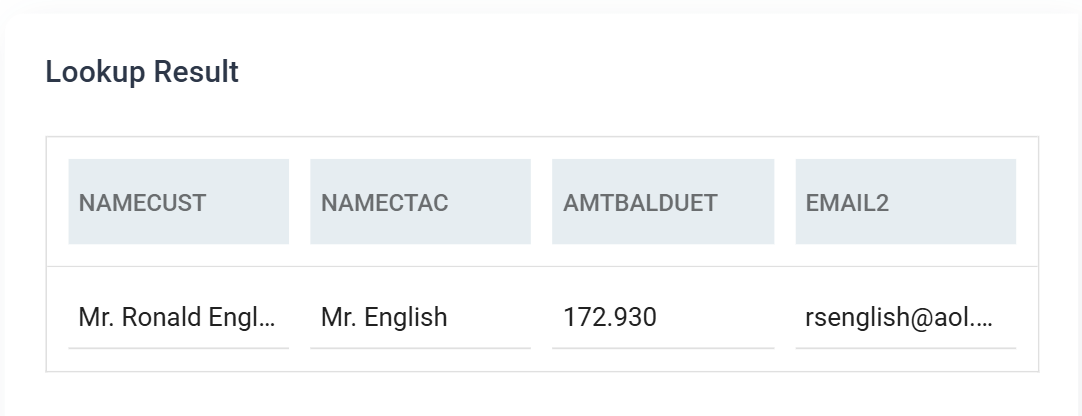
Because the where clause contains a parameter, a Parameter box appears below it. Type an invoice number into it (one from the last section will do) and press TEST:
Press SAVE.
TEST runs the query against the real connection
Use TEST on every lookup you write. It runs the query against the real connection and shows exactly what comes back. That is far quicker than finding a bad join through a failed integration run. IMan saves nothing until you press SAVE.
Email Prep Map > Field Mapping
- Return to the Designer, load the integration and press Transform Setup.
- Add a Map transform to the right of the invoice print connector, join it and save.
- Open it and set Transform Id to
EMAILPREP. - Press Field Mapping, leave Current Transaction Id on
OEINVPRINTand press Add three times:
- New Field Name
ContactName
- Type
- Text
- Evaluate
- Ticked
- Evaluate String
- The contact name if the customer has one, and the company name if not:
Dim Result
Result = Lookup("SAGE300INV", "NAMECTAC", %INVOICE, True)
If Result = "" Then
    Result = Lookup("SAGE300INV", "NAMECUST", %INVOICE, True)
End If
Result
- New Field Name
Balance
- Type
- Text
- Evaluate
- Ticked
- Evaluate String
Lookup("SAGE300INV", "AMTBALDUET", %INVOICE, True)
- New Field Name
Email
- Type
- Text
- Evaluate
- Ticked
- Evaluate String
Lookup("SAGE300INV", "EMAIL2", %INVOICE, True)
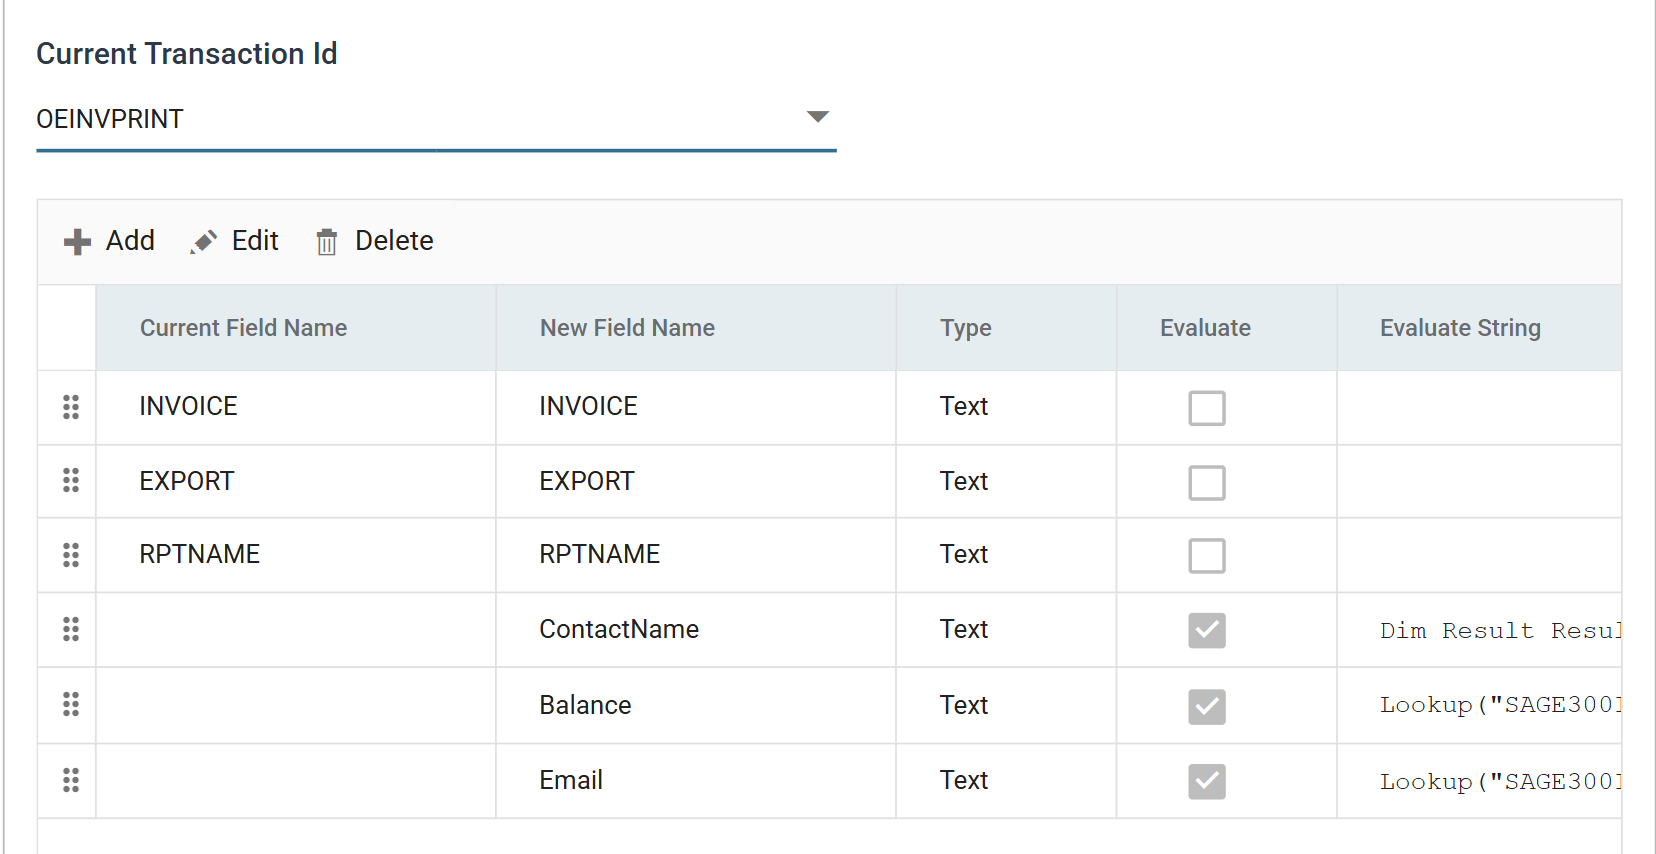
%INVOICE is the invoice number the print connector output. IMan puts this
value into the lookup's %1.
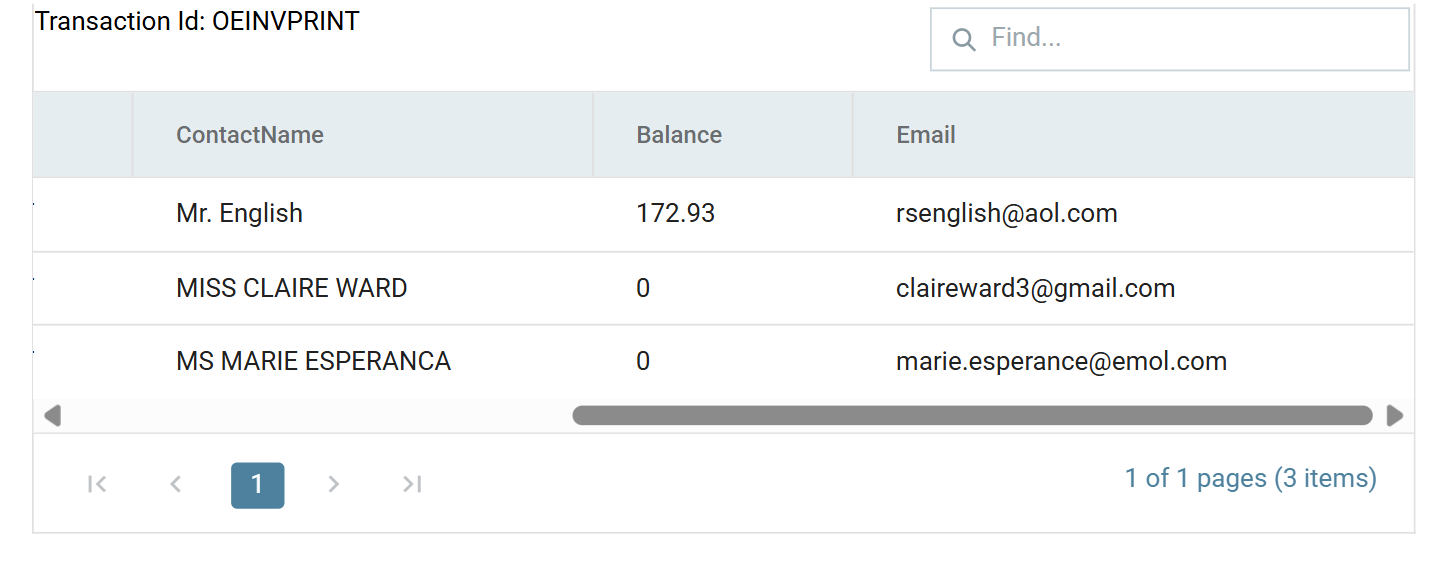
Press Refresh. Each row now carries the customer details fetched from Sage 300:
Press Close and save the integration.
Email Task > Setup
- Open the Tasks group in the palette and drag an Email task onto the design surface, to the right of the Map.
- Join the Map to it and save the integration.
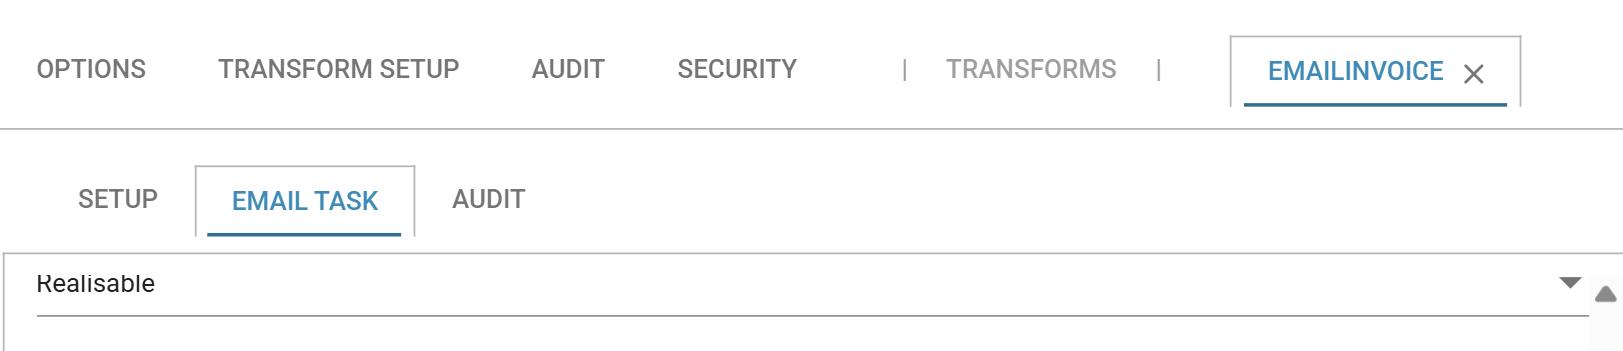
- Double-click the task, and on its Setup tab set Transform Id to
EMAILINVOICE.
Email Task > Email Task
Everything else is on the Email Task tab.
- Action
Send Email,Retrieve EmailorDelete Email.- For training, leave as: Send Email
- File System
- Where attachments are read from.
- For training, leave as: Windows
- Email System
- One of the mail servers configured in Setup > SMTP. The task cannot send without one.
- For training, select your own mail server.
Addresses and subject
The address and subject boxes accept merge fields, and have a picker for them.
Type % and a list of every field in the dataset appears, grouped by
transaction and showing each field's type:
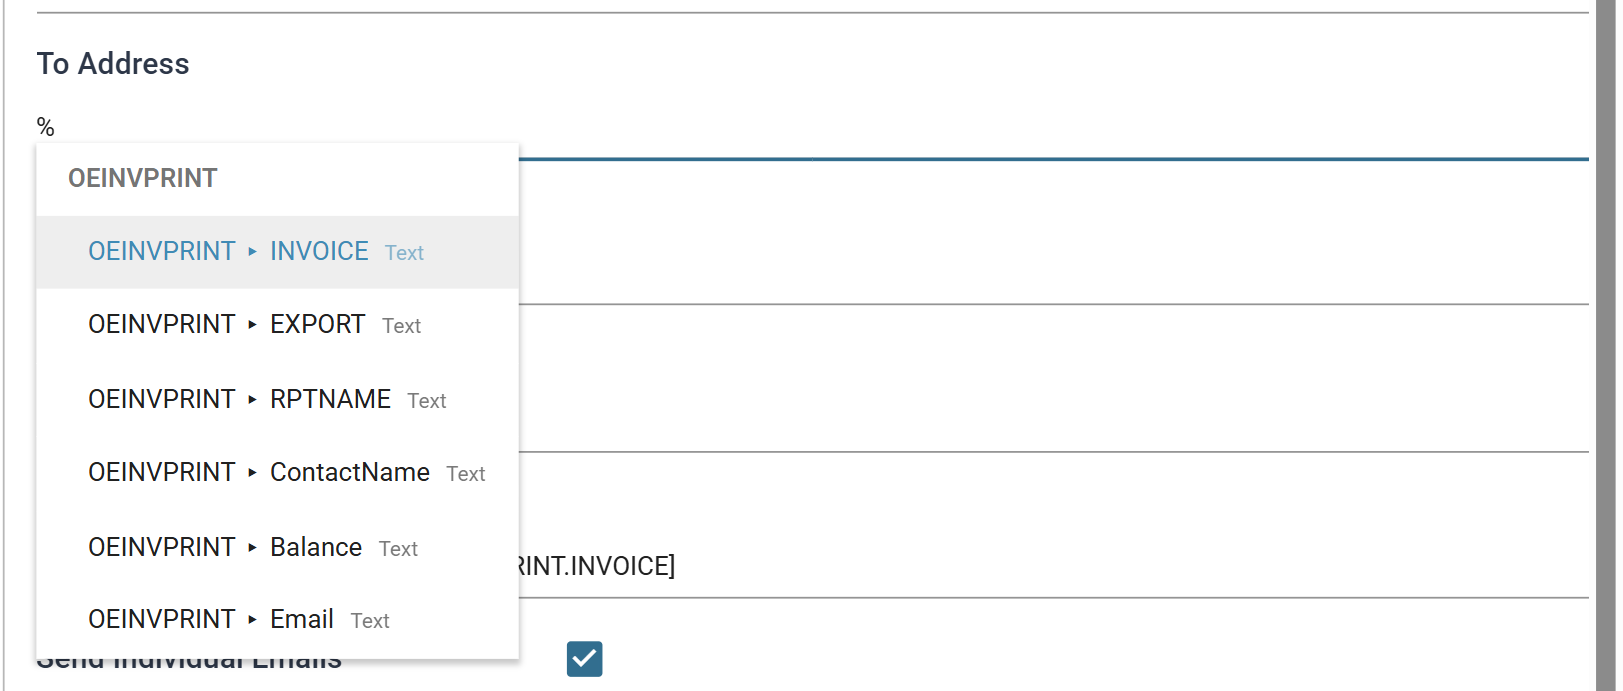
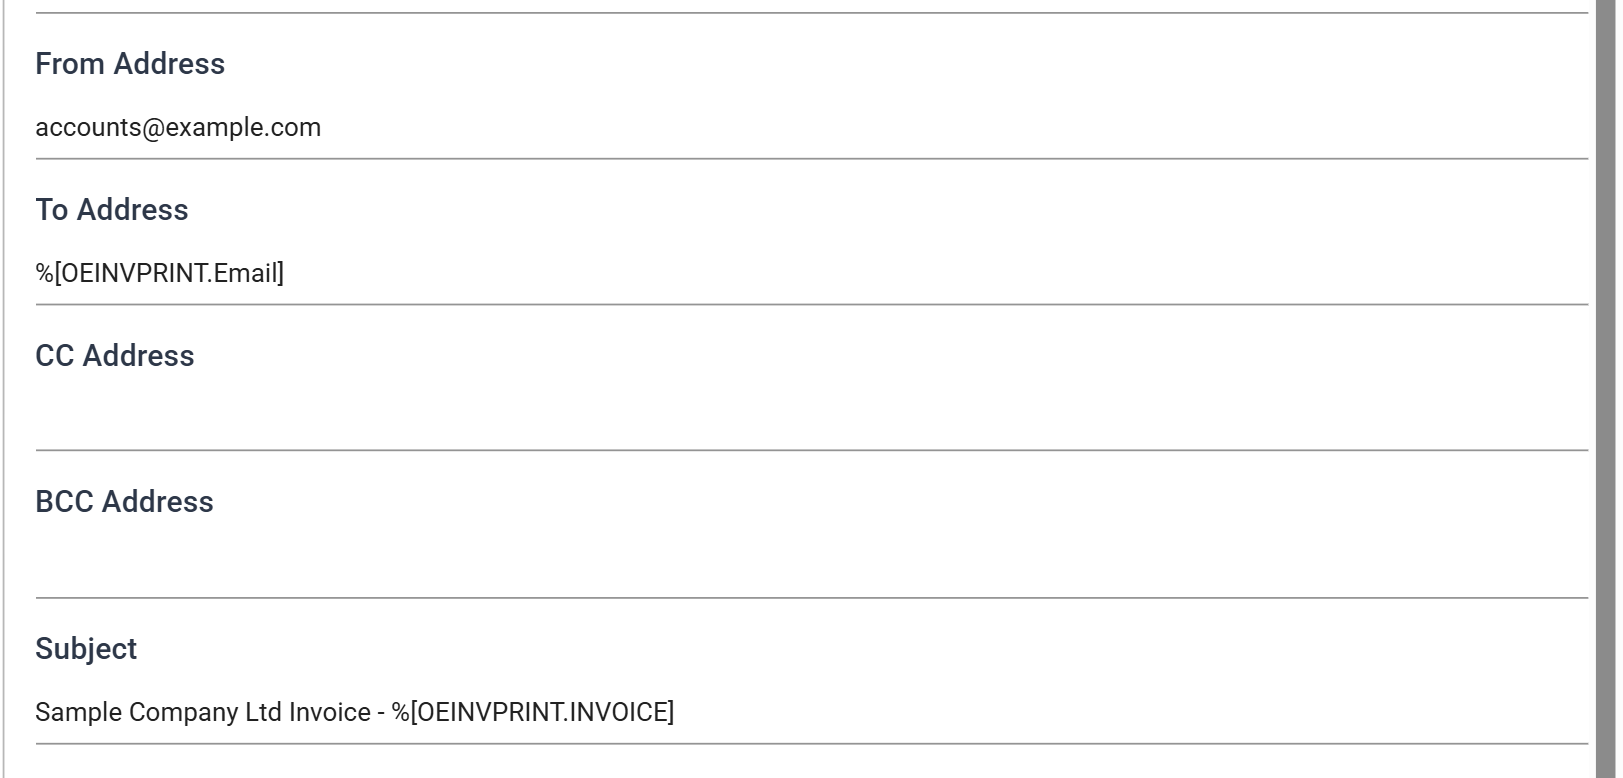
Choosing one inserts it as %[OEINVPRINT.Email], the transaction and the field
together. Enter the following:
- From Address
- The address the invoices are sent from. Replace with your own.
- To Address
%[OEINVPRINT.Email], the address the lookup fetched. Each invoice goes to its own customer.
- Subject
Sample Company Ltd Invoice - %[OEINVPRINT.INVOICE]
Put your own address in To Address while you are learning
While you are learning, put your own address in To Address. The lookup returns whatever is in the customer record, and you cannot easily undo a training run that reaches real customers. Replace it with the merge field when you are happy with what the integration sends.
The picker opens only after a space or at the start of the box
The picker opens only when the % follows a space or starts the box. To put
a merge field straight after another character, such as a currency symbol,
leave a space before it or type the reference out in full.
Options
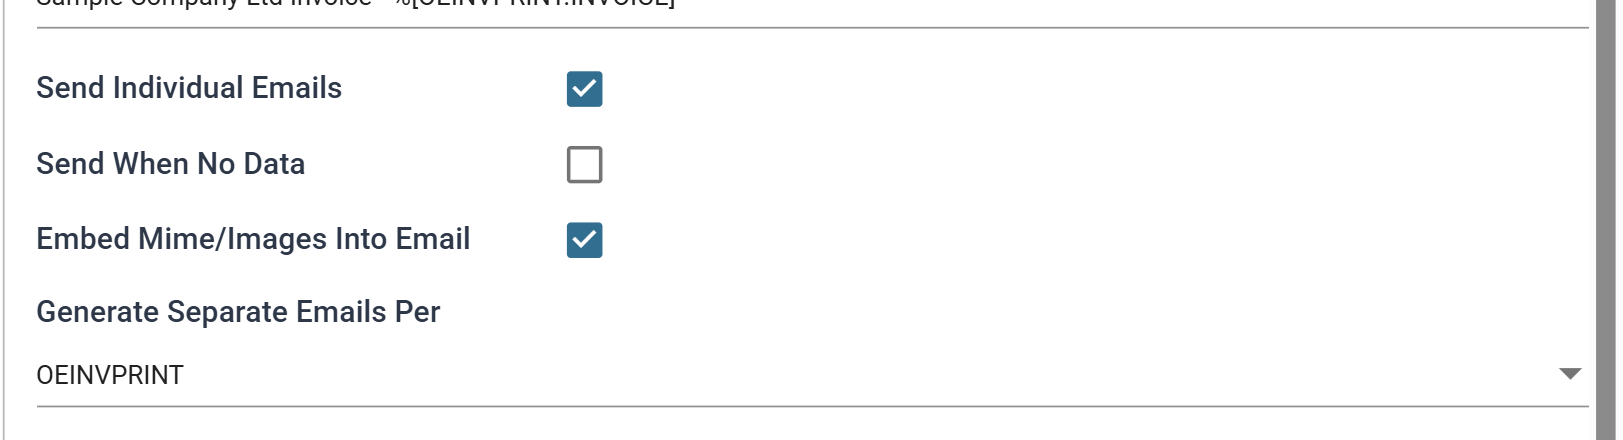
- Send Individual Emails
- Every address in To Address gets its own email, instead of one email addressed to all of them.
- For training, tick it.
- Send When No Data
- Sends even when the run produced no records. Use it for a "nothing to report" notification.
- For training, leave unticked.
- Embed Mime/Images Into Email
- Embeds the images in the email instead of linking to them, so the recipient sees them.
- For training, tick it.
- Generate Separate Emails Per
- The transaction to split the emails by, one email per record. Without it, all three invoices would arrive in a single message.
- For training, select:
OEINVPRINT
Email Body
The body is a rich text editor. Merge fields work here as they do in the address
boxes: type % and pick a field. Each one appears as a chip instead of raw
text, so the message stays readable while you write it.
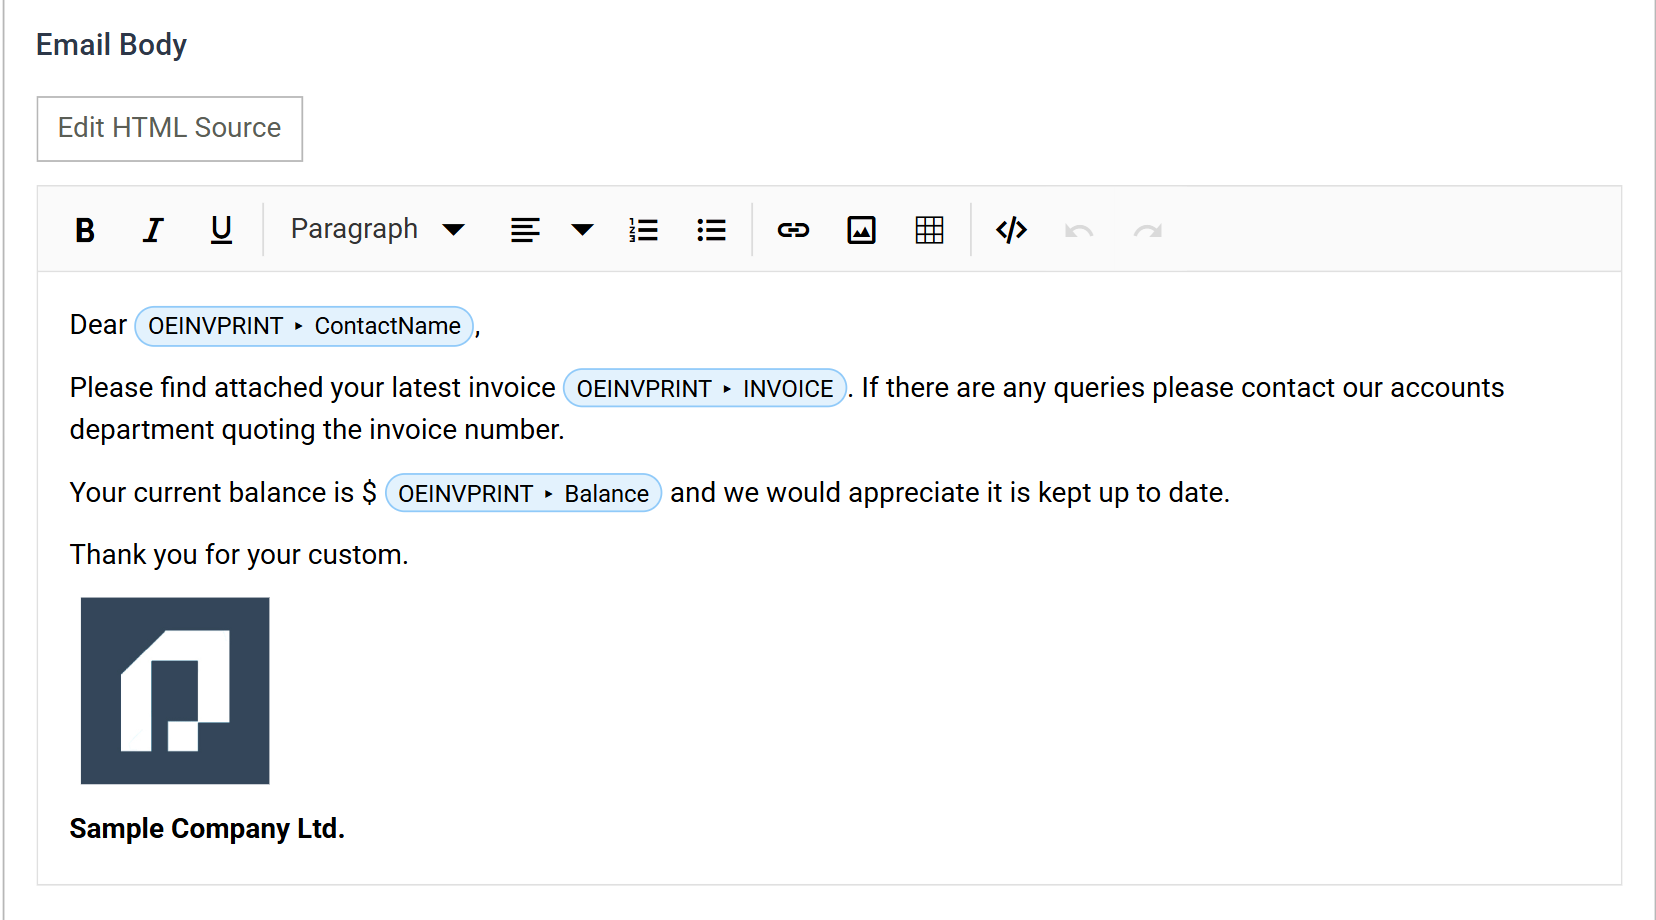
Enter the following, using the picker for the three merge fields:
Dear %[OEINVPRINT.ContactName],Please find attached your latest invoice %[OEINVPRINT.INVOICE]. If there are any queries please contact our accounts department quoting the invoice number.Your current balance is $ %[OEINVPRINT.Balance] and we would appreciate it is kept up to date.Thank you for your custom.
Then add the company logo and a sign-off:
- Press Insert Image on the toolbar, browse to a logo (
SampleLogo.pngin the training folder will do) and press INSERT. IMan embeds the file in the message when you insert it, so it travels with the email. - Click the image and use Change Size to reduce it to about 96 pixels.
- Type
Sample Company Ltd.underneath, select it and press Bold.
Insert Image takes an upload or a web address, not a server path
Insert Image takes an upload or a web address, not a path on the server. Upload the image where you can. IMan embeds it in the message, so the recipient does not need to reach a URL to see it.
The size you set here may not survive delivery. Some mail clients ignore it and show the image at its natural size. If the delivered size matters, resize the image file itself.
Edit HTML Source switches the editor to raw HTML if you need markup the toolbar cannot produce. A Use Internal Stylesheet option appears there. It formats the message with the same styling IMan uses for the audit report.
Attachments
Press Add attachment and enter %[OEINVPRINT.EXPORT], the path the invoice
print connector wrote each PDF to. The Browse button beside it picks a fixed
file instead. Use it when the same document goes to everyone.

Running it
Press Refresh. The Generation Status goes to complete and IMan sends three emails, one per invoice:
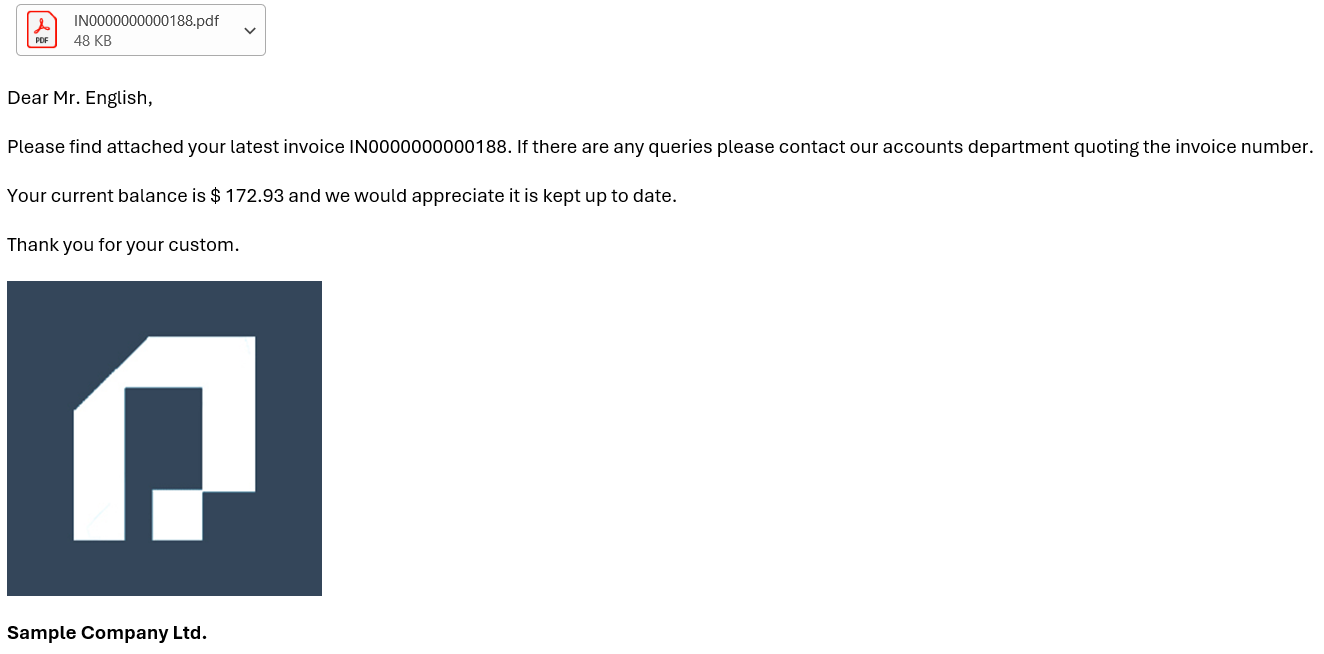
IMan has replaced every merge field with that invoice's values and attached the PDF the print connector produced.
Press Close and save the integration. The training manual is finished.