Step 5 – Sage 300 Customer Import
In this step you import the customers into Sage 300. There are two parts:
- A System Connector, which holds the credentials and company IMan uses to talk to a Sage 300 installation.
- A Sage 300 connector on the design surface, which takes the transformed orders and writes a customer for each one.
The connector is the first transform in this training that changes data outside IMan. Everything before it has been a preview.
Setup > System Connector
You define a System Connector once and then choose it by name in any Sage 300 connector. The database connection in step 4 works the same way.
- Save the integration, then press Setup at the top of the main screen.
-
Press System Connector in the left-hand menu, then press Add.
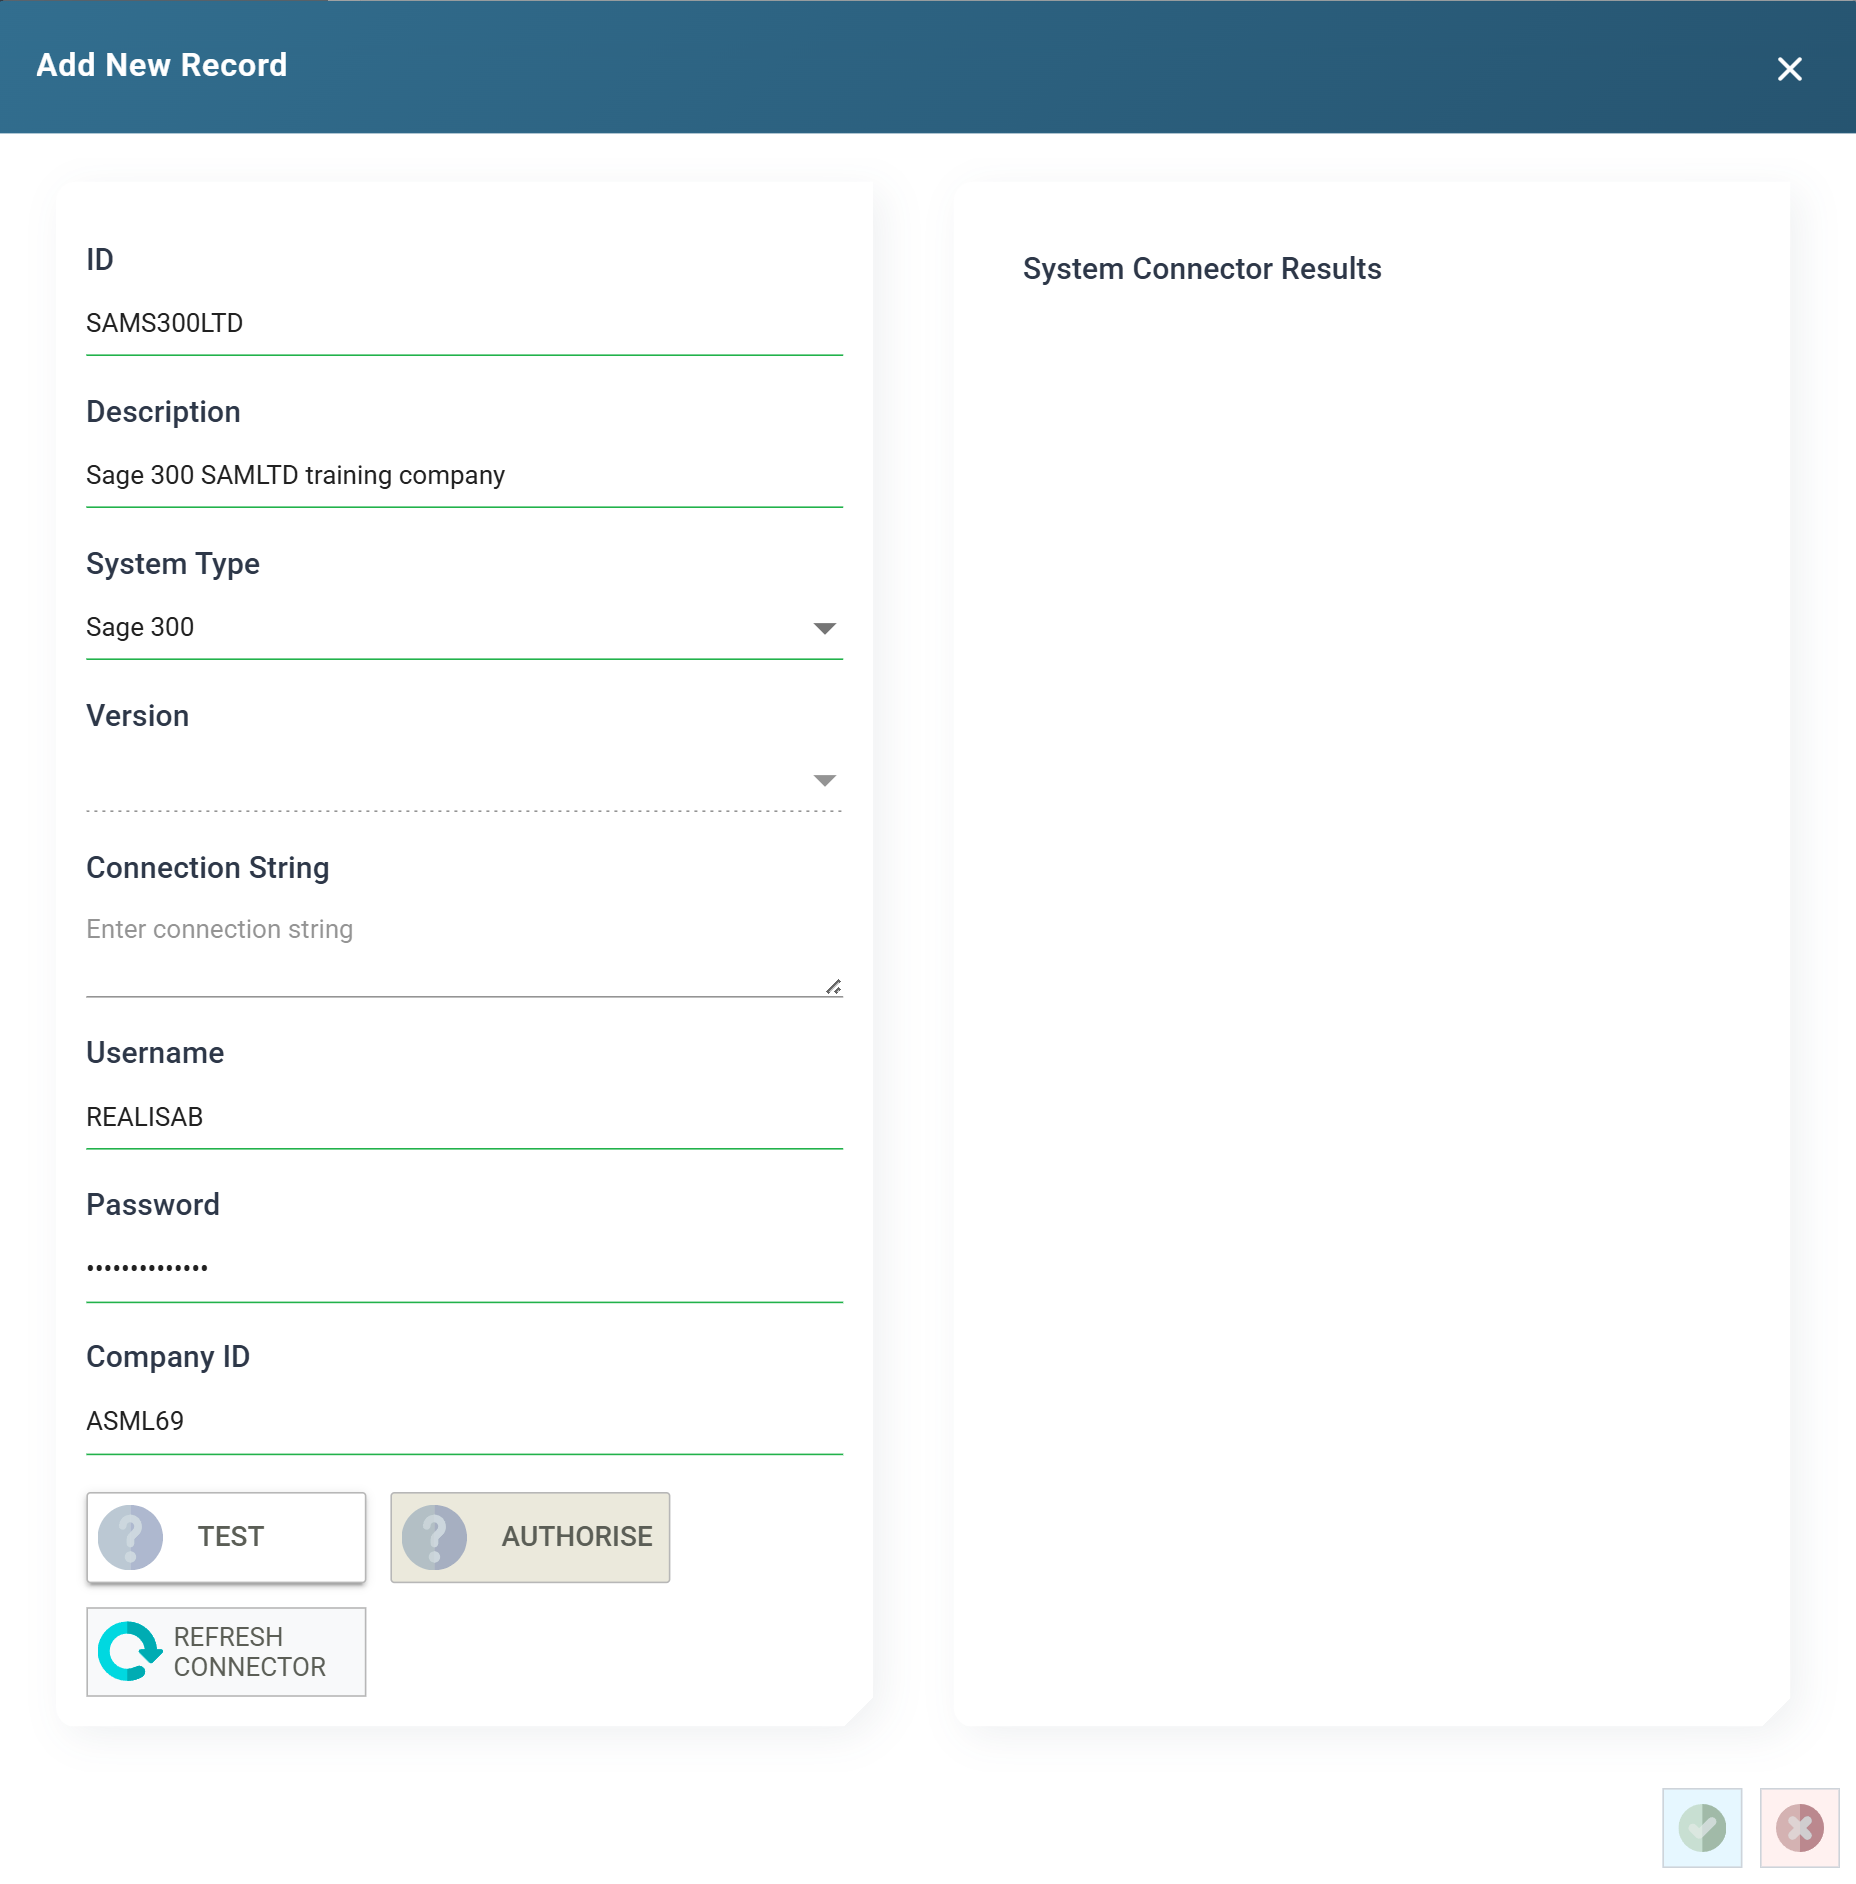
- ID
- Must be populated.
- For training, enter: SAMS300LTD
- Description
- Always enter a recognisable description. The connector transform lists System Connectors by description, not by id. A vague description is hard to find later.
- System Type
- Must be selected.
- For training, choose: Sage 300
- Version
- Used only by connector types that have more than one release. Leave it empty for Sage 300.
- Connection String
- What goes here depends on the connector. See System Connectors.
- For Sage 300, leave blank.
- Username
- The Sage 300 user IMan signs in as.
- Password
- The user's password. The field hides it as you type.
- Company ID
- The Sage 300 company id as it appears in the Sage 300 database setup utility. This is not the database id.
- For training, enter: ASML69
- ID
-
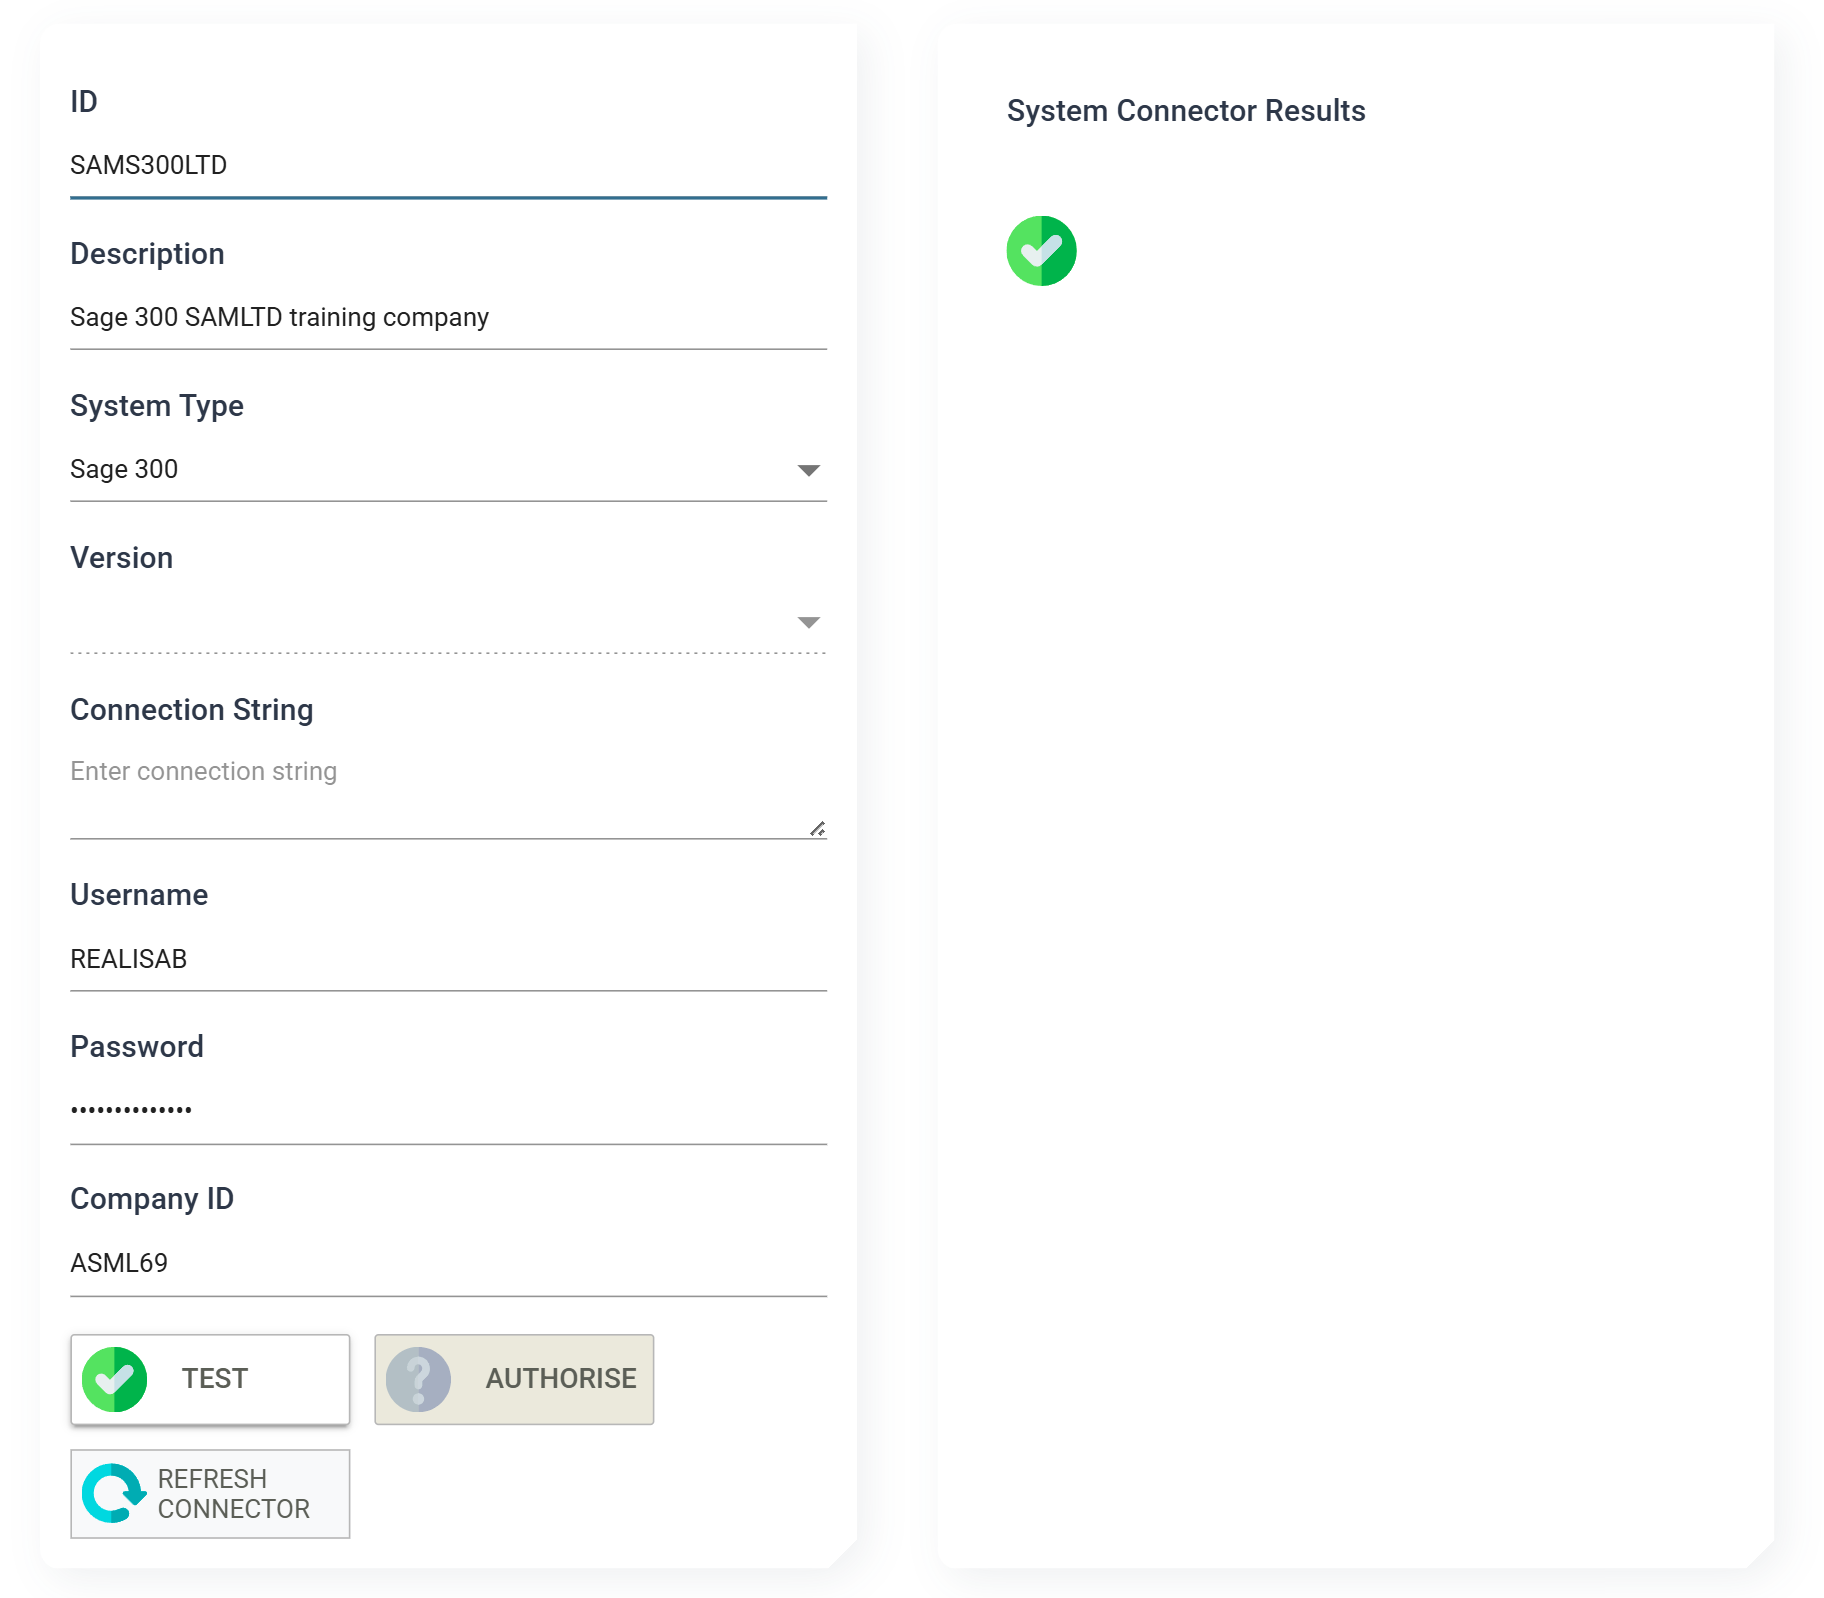
Press TEST.
- A tick on the button and a second one in the System Connector Results panel confirm that IMan signed in to Sage 300 with those details. If they do not appear, fix the details before you go further.
-
Press the green tick at the bottom right to save the record.
Design > Transform Setup
- Return to Design, load the integration and press the Transform Setup tab.
- Open the Connectors group in the palette and drag a Sage 300 connector onto the design surface.
-
Drag a Connector from the Transforms group and join the Map transform to it.

Connector > Setup
-
Double-click the Sage 300 connector to open it.
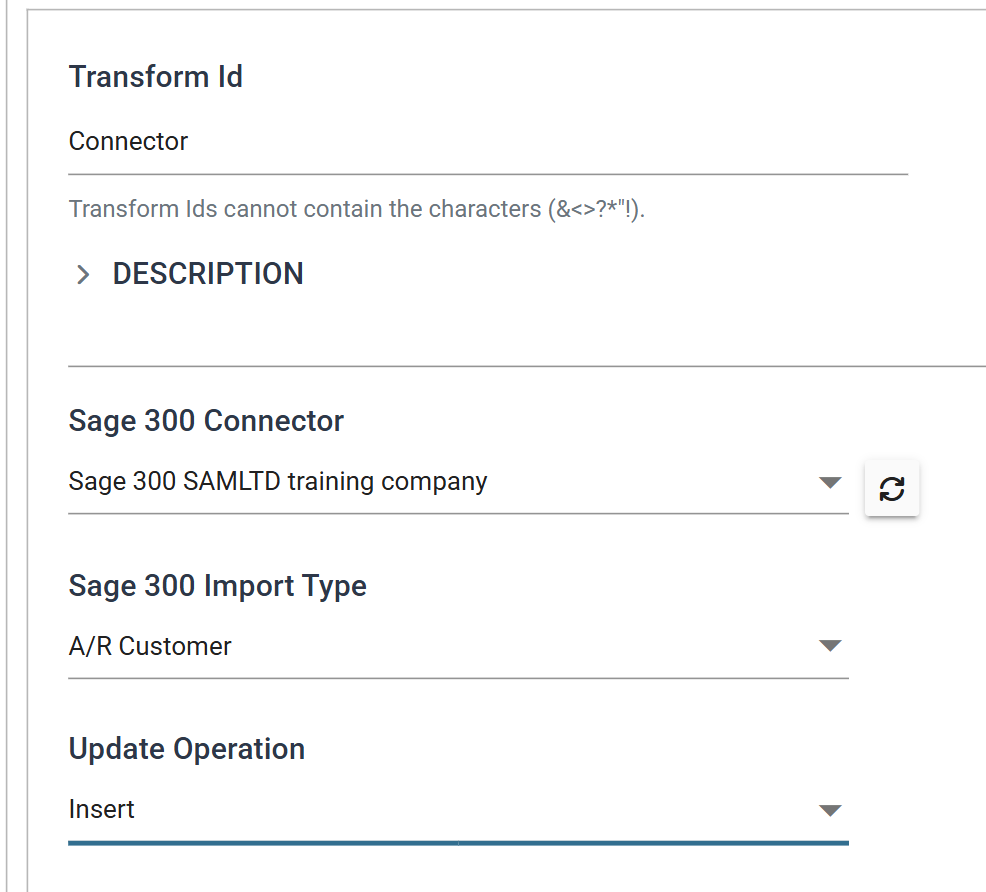
- Transform Id
- Identifies the transform in the audit report. A new connector is
already named
Connector. For training, leave it.
- Identifies the transform in the audit report. A new connector is
already named
- Sage 300 Connector
- The System Connector defined above, listed by its description.
- For training, choose: Sage 300 SAMLTD training company
- The refresh button beside the list reloads it. Use it if you have just added a System Connector in another tab.
- Sage 300 Import Type
- What you are importing. Sage 300 has 92 import types. The list includes types for modules that are not activated on this company.
- For training, choose: A/R Customer
- Update Operation
- Whether to Insert new records, Update existing ones, or Insert/Update either as required.
- For training, leave as: Insert
- Transform Id
Connector > Field Mapping
- Press the Field Mapping tab.
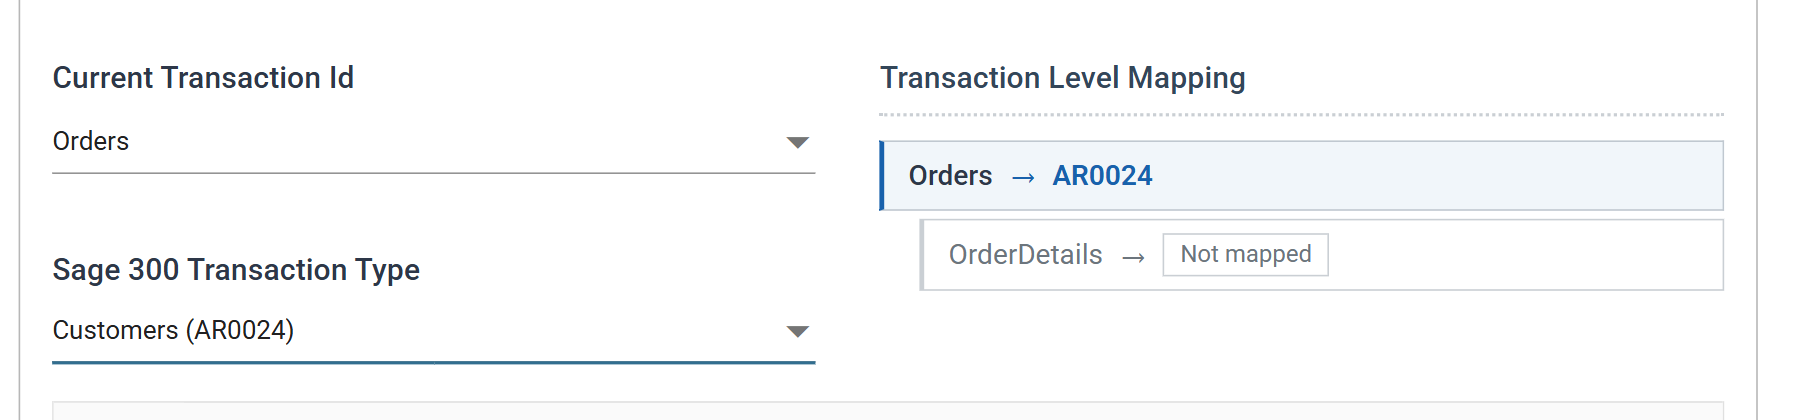
- Check that Orders is selected in Current Transaction Id.
-
Choose Customers (AR0024) from Sage 300 Transaction Type.
- Transaction Level Mapping then shows which incoming transaction feeds
which Sage 300 view.
Ordersmaps toAR0024.OrderDetailsstays unmapped, because this step imports customers, not orders.
- Transaction Level Mapping then shows which incoming transaction feeds
which Sage 300 view.
-
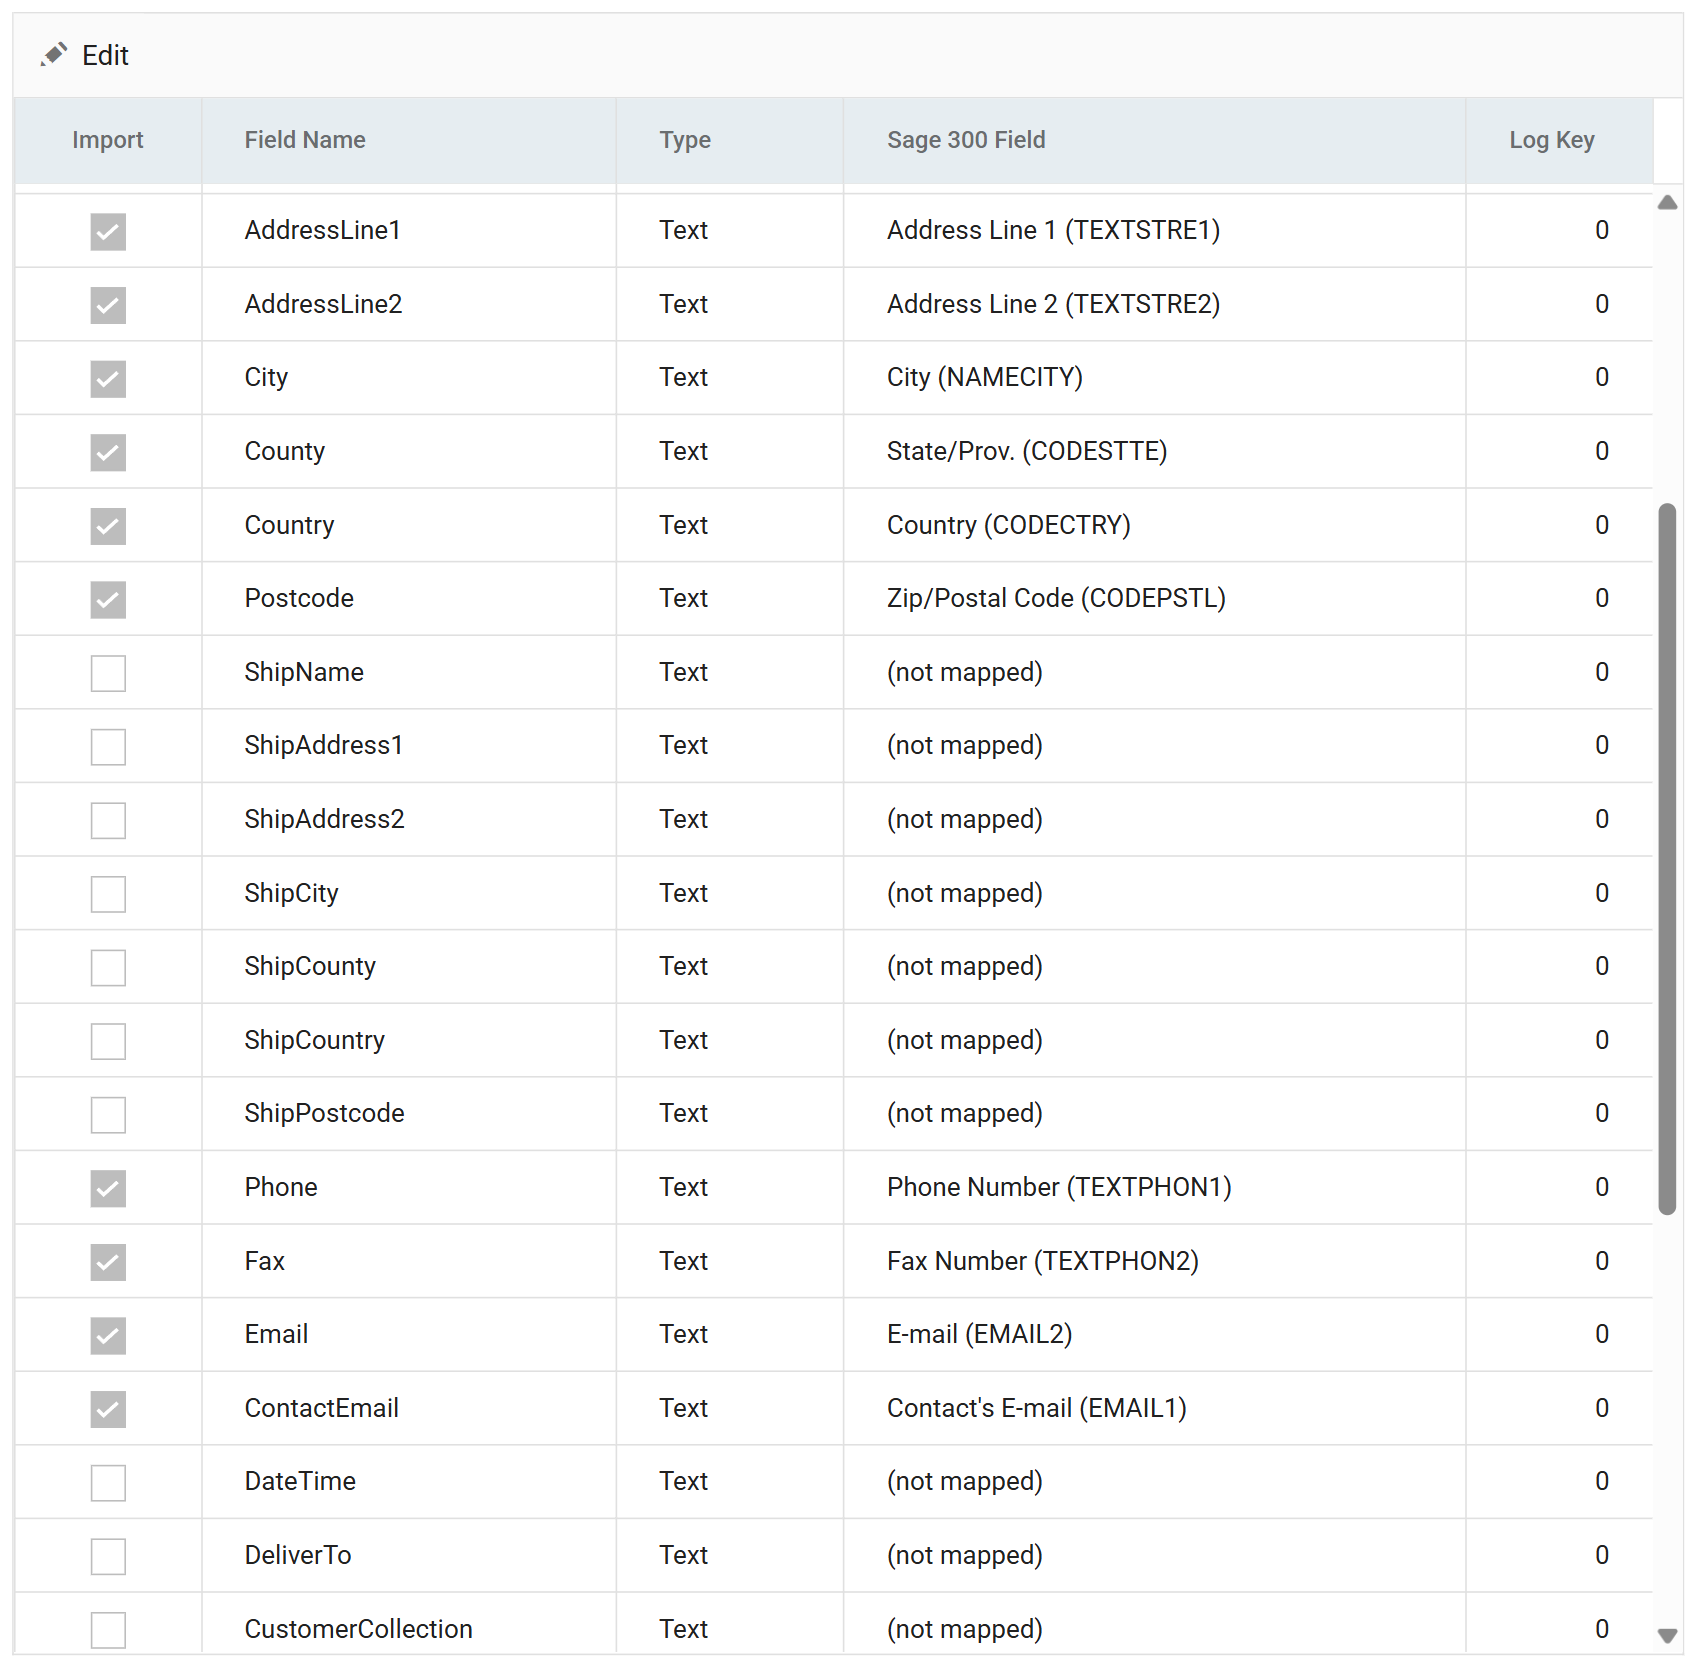
Press Edit above the grid, then set the Sage 300 Field on each of these rows:
Incoming Field Sage 300 Field AddressLine1 Address Line 1 (TEXTSTRE1) AddressLine2 Address Line 2 (TEXTSTRE2) City City (NAMECITY) County State/Prov. (CODESTTE) Country Country (CODECTRY) Postcode Zip/Postal Code (CODEPSTL) Phone Phone Number (TEXTPHON1) Fax Fax Number (TEXTPHON2) Email E-mail (EMAIL2) ContactEmail Contact's E-mail (EMAIL1) CustomerActualName Customer Name (NAMECUST) CustomerContact Contact Name (NAMECTAC) CustomerGrp Group Code (IDGRP) CustomerNo Customer Number (IDCUST) - Each entry shows the Sage 300 view field it writes to in brackets. The
CUSTEMLlookup in step 4 queriesEMAIL2, soEmailmaps toEMAIL2and not toContact's E-mail. - You do not need to tick Import. Choosing a Sage 300 field ticks the row for you.
- The grid is one scrolling list. Every incoming field is in it, including the four the Map transform created.
- Each entry shows the Sage 300 view field it writes to in brackets. The
-
Press Save above the grid.
The tax group error
- Press Refresh at the bottom of the pane.
-
The import fails.
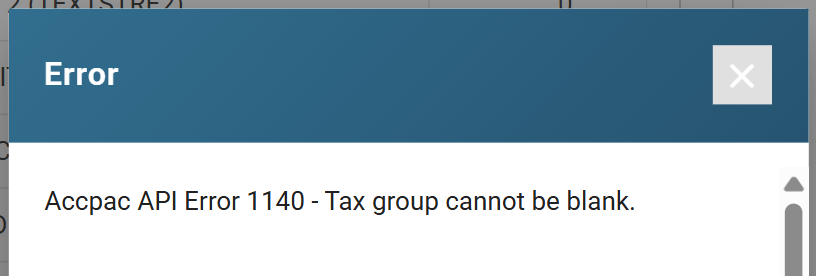
- This is a Sage 300 error, not an IMan one. Sage 300 will not accept a customer without a tax group, and nothing in the incoming file supplies one.
- Behind the dialog the preview shows Progress - Error. The TRACE tab records the Sage 300 calls the run made, up to the one that failed. The message itself appears only in the dialog.
Fix it in the Map transform. You have to supply the tax group, so add it as a field like any other.
Map > Field Mapping — the tax group
-
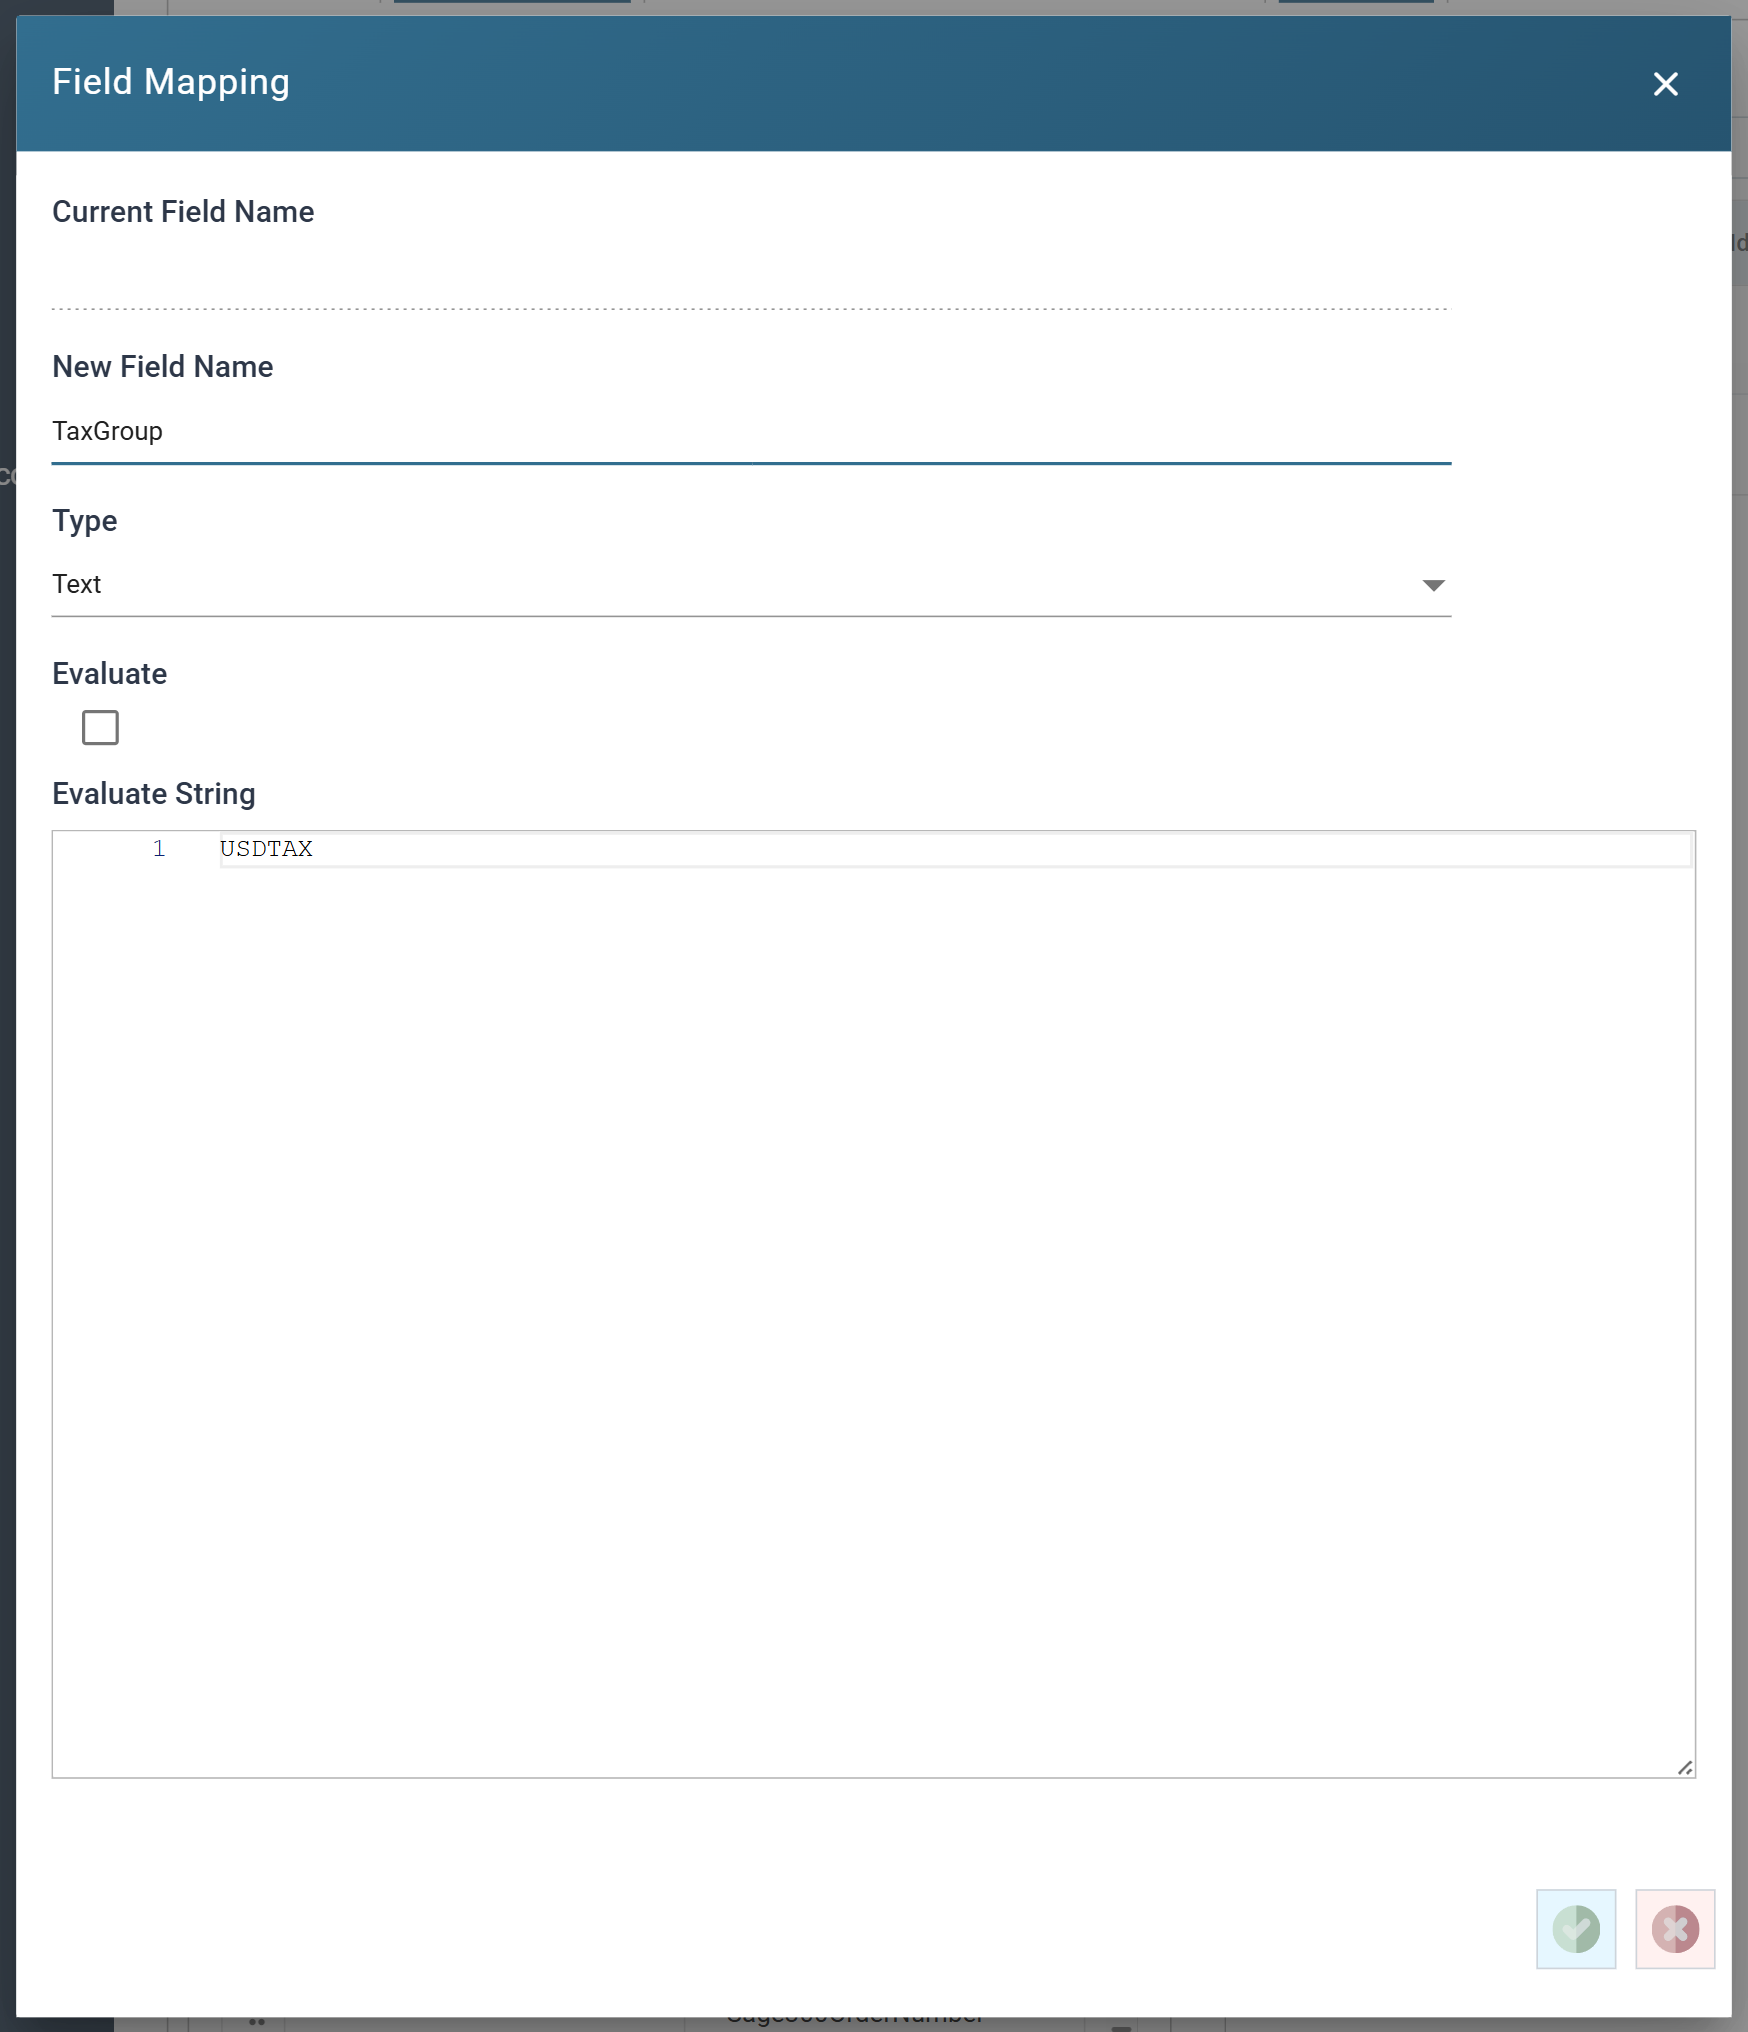
Press Close at the bottom of the connector, then open the Map transform and press its Field Mapping tab. Press Add:
- New Field Name
- TaxGroup
- Type
- Text
- Evaluate
- Unticked.
USDTAXis a literal, not a formula.
- Unticked.
- Evaluate String
- USDTAX
- New Field Name
-
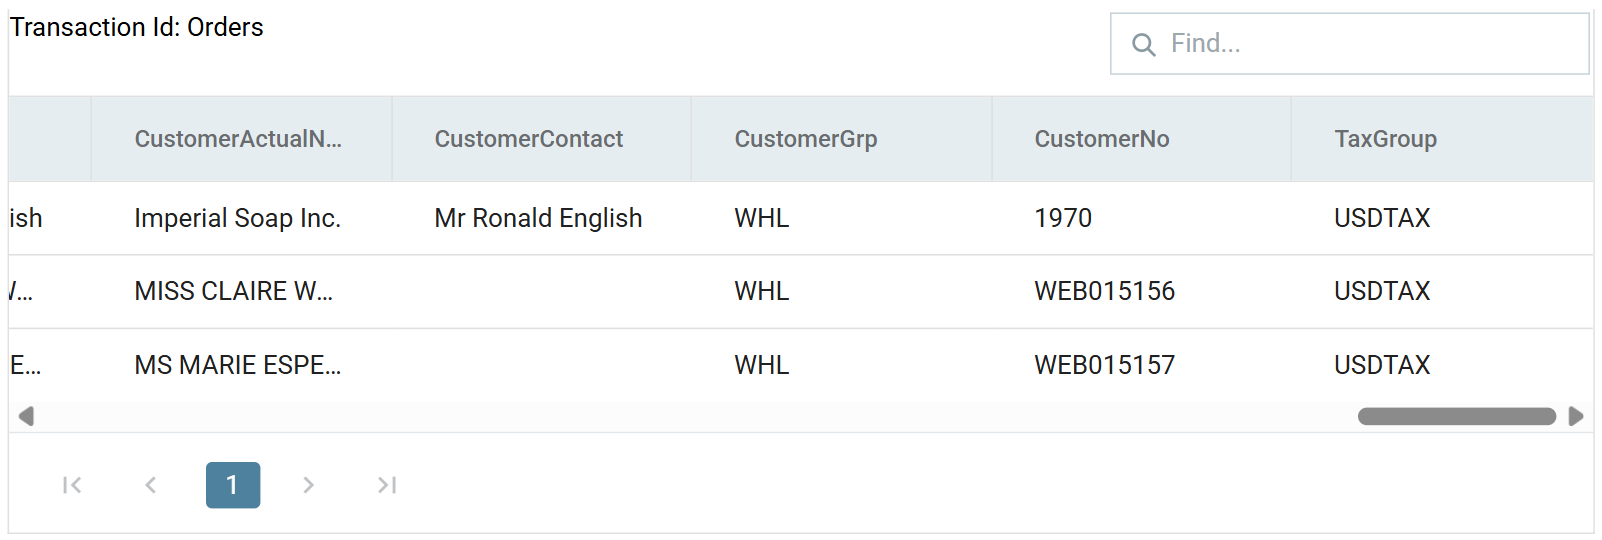
Press the tick to save the field, then press Refresh and scroll the preview to the right.
Connector > Field Mapping — mapping the tax group
- Press Close on the Map transform, save the integration and re-open the Sage 300 connector.
- On Field Mapping, press Edit, set
TaxGroupto Tax Group (CODETAXGRP), and press Save.TaxGroupis already in the grid. The connector picks up a field added upstream by itself. Use Refresh MetaData on the Setup tab only when Sage 300 itself has changed.
-
Press Refresh.
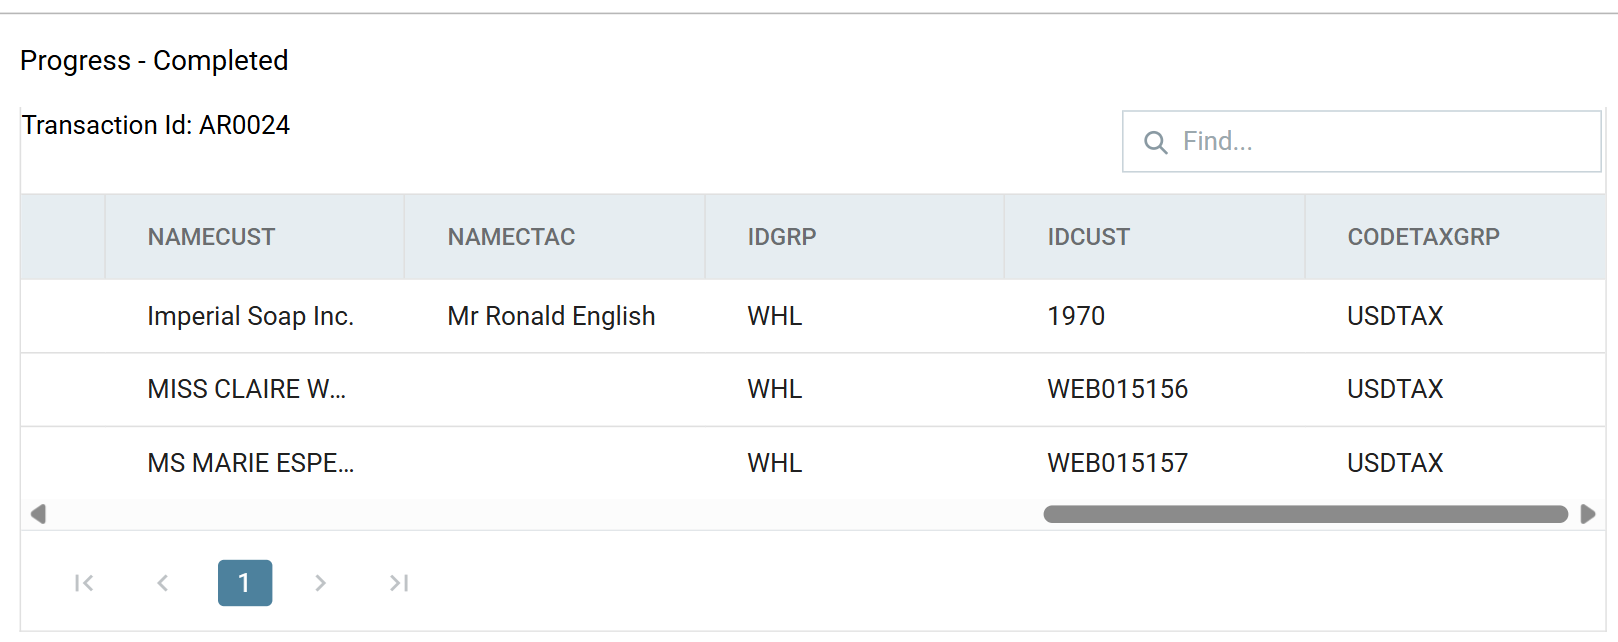
- The run reaches Progress - Completed and the customers are in Sage 300. The preview now shows the values as Sage 300 received them, under the Sage 300 field names.
Proving the customers were created
-
Re-open the Map transform and press Refresh twice.
CustomerNono longer changes between refreshes. Before the import, the lookup found nothing and the counter allocated a new number every time. Now the lookup finds the customer the import created and returns its id, so the formula does not call the counter.
-
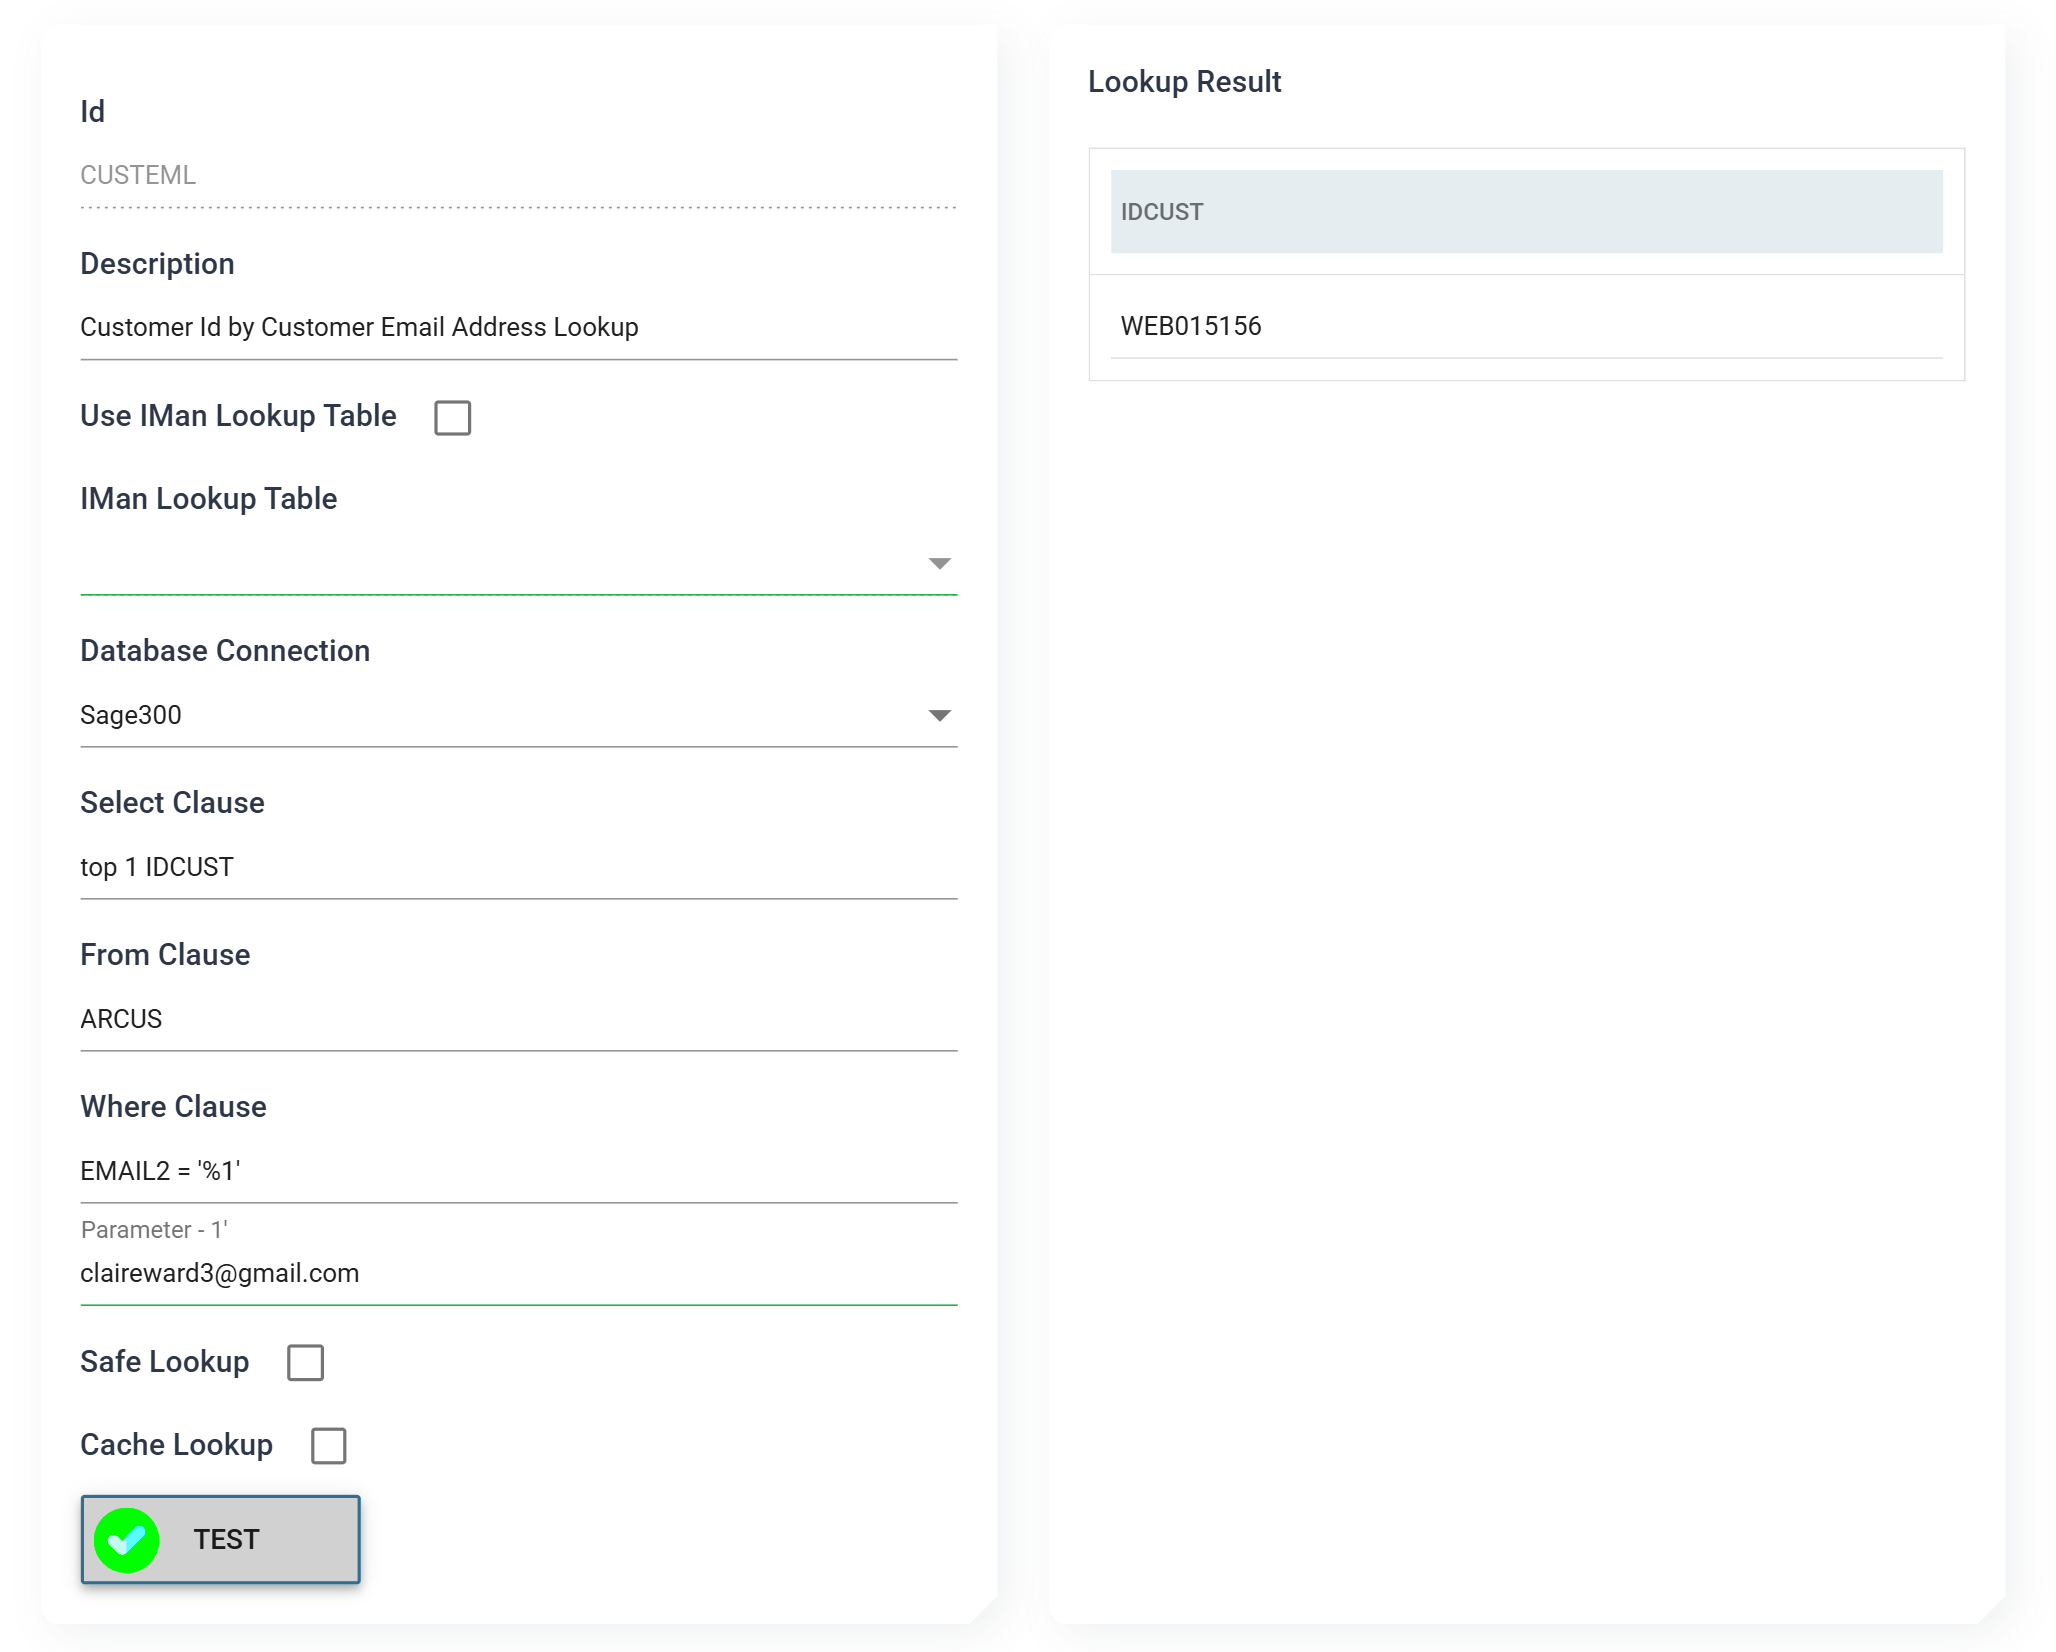
To check this directly, go to Setup > Lookups, select
CUSTEMLand press Edit. Enter one of the imported email addresses as the parameter and press TEST.- The lookup returns the customer number the import allocated. The record exists in Sage 300.
Your generated numbers will not match the screenshots
The generated numbers will not match the ones in these screenshots. The
CUSTNO counter advances on every preview refresh, including runs that do
not reach Sage 300. By the time you get here, the sequence has moved on.