Step 7 – Sage 300 Order Import
This is the second Sage 300 connector in the integration. It takes the filtered orders and writes them into Sage 300 as O/E Orders, header and lines together.
It reuses the System Connector defined in step 5. Any number of connectors can choose the same System Connector by name.
What a connector does to the dataset
Connectors perform destructive mapping
Connectors perform destructive mapping.
- Only mapped fields flow out of a connector. A field you do not map is not part of the dataset downstream, and you cannot refer to it after the connector. Log Keys get round this, and 8 – Auditing shows how.
- A connector renames the transaction ids and the fields to the Sage 300
view and field names. After this transform the transaction is
OE0520, notOrders, andShipCityisSHPCITY. That is why step 8's audit summaries use%OE0520.ORDNUMBERand not the earlier names.
For the full description see Push Connector > Field Mapping in the IMan User Guide.
Design > Transform Setup
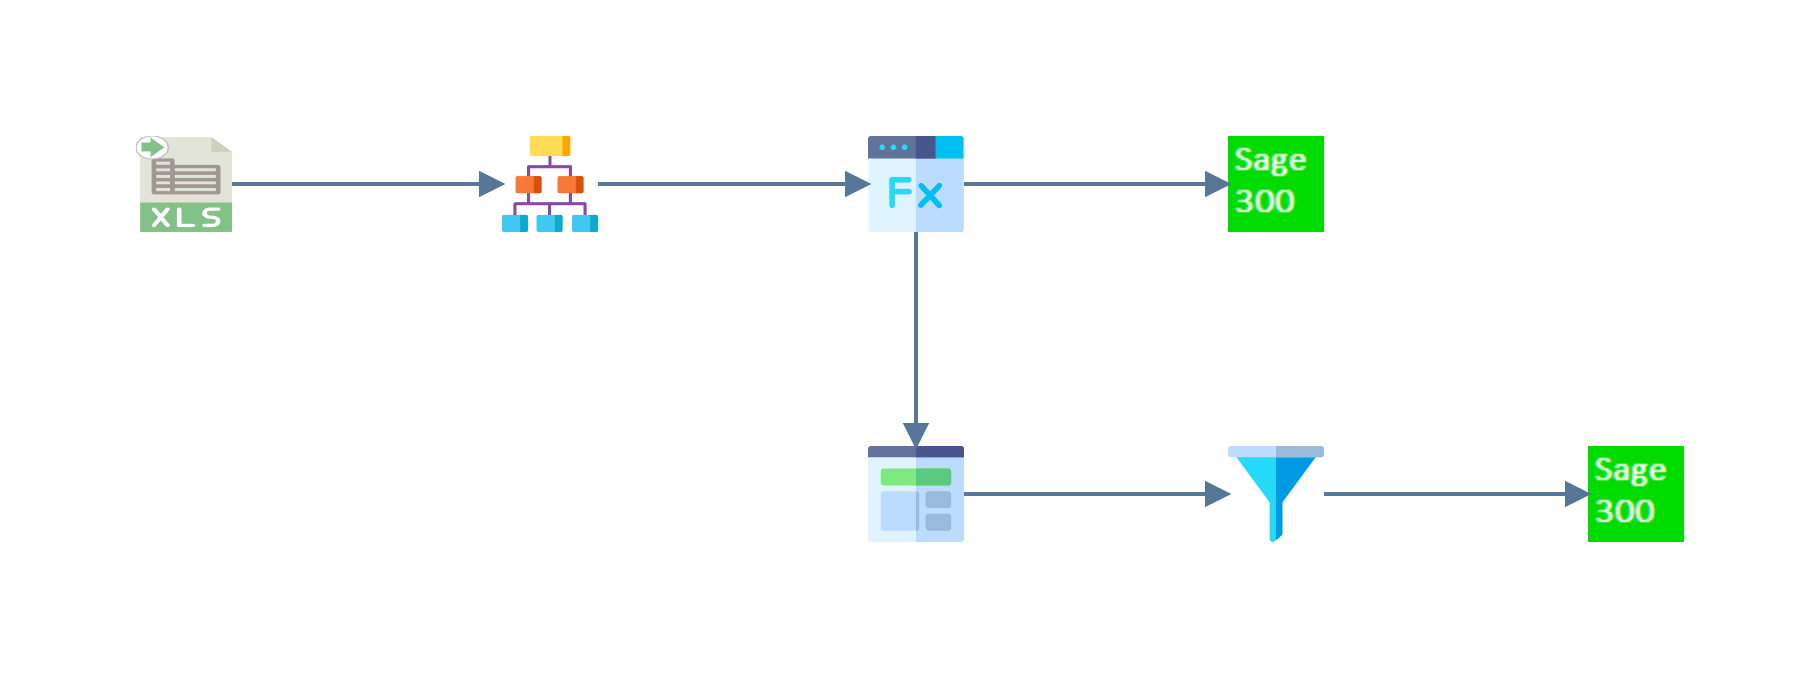
- Open the Connectors group in the palette and drag a Sage 300 connector onto the design surface.
-
Drag a Connector from the Transforms group and join the Filter transform to it.
Connector > Setup
-
Double-click the new connector to open it.
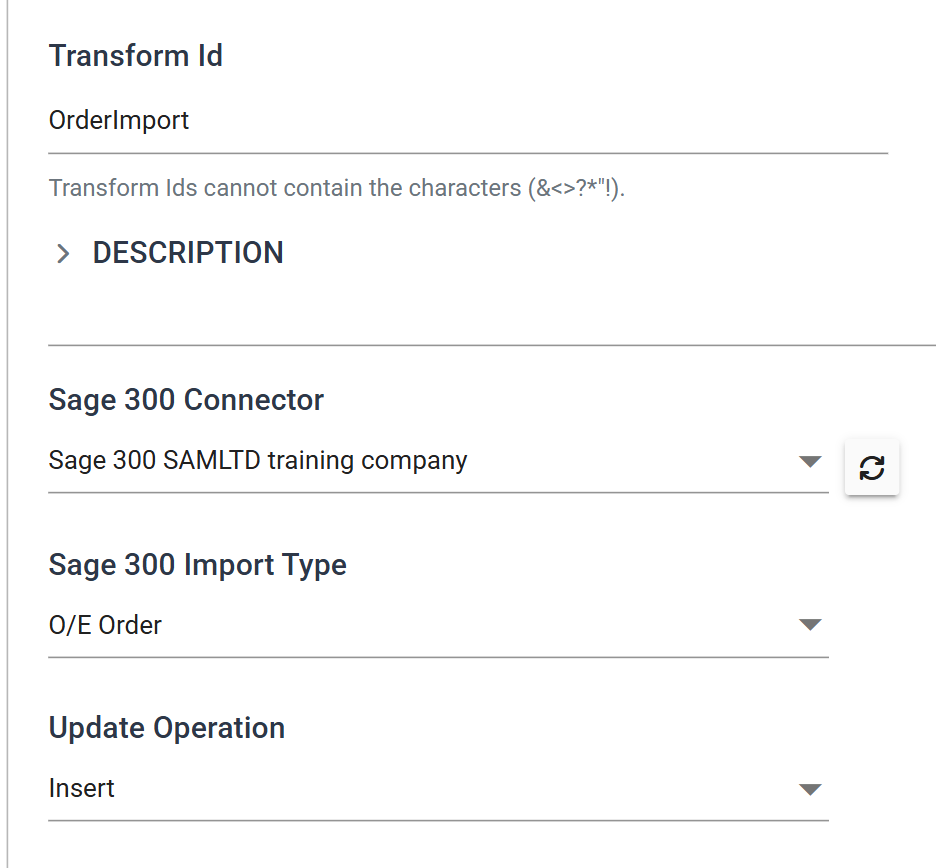
- Transform Id
- Identifies the transform in the audit report, in its Process Id column.
- This is the second connector in the integration, so it arrives named
Connector_1. Two connectors calledConnectorandConnector_1tell you nothing when you read a report, so rename it. - For training, enter: OrderImport
- Sage 300 Connector
- The System Connector defined in step 5, listed by its description.
- For training, choose: Sage 300 SAMLTD training company
- Sage 300 Import Type
- What you are importing. The list holds 92 types.
- For training, choose: O/E Order
- Update Operation
- For training, leave as: Insert
- Transform Id
Every run of this connector writes a new set of orders
Every run of this connector writes a new set of orders into Sage 300. That includes every press of Refresh while you are building it. The customer import in step 5 has a lookup to recognise a record it has already sent. This connector has none, so a second run gives you a second copy.
Connector > Field Mapping — the order header
The incoming data is hierarchical: Orders with OrderDetails beneath it. You
map each transaction to a Sage 300 view, and then map its fields. Start with the
header.
- Press the Field Mapping tab.
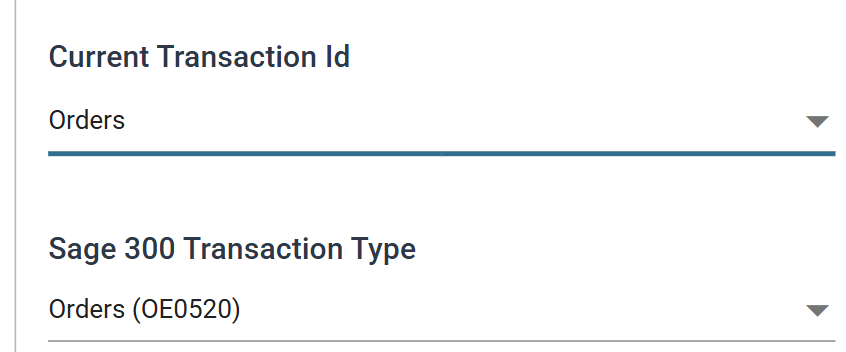
- Check that Orders is selected in Current Transaction Id.
-
Choose Orders (OE0520) from Sage 300 Transaction Type.
-
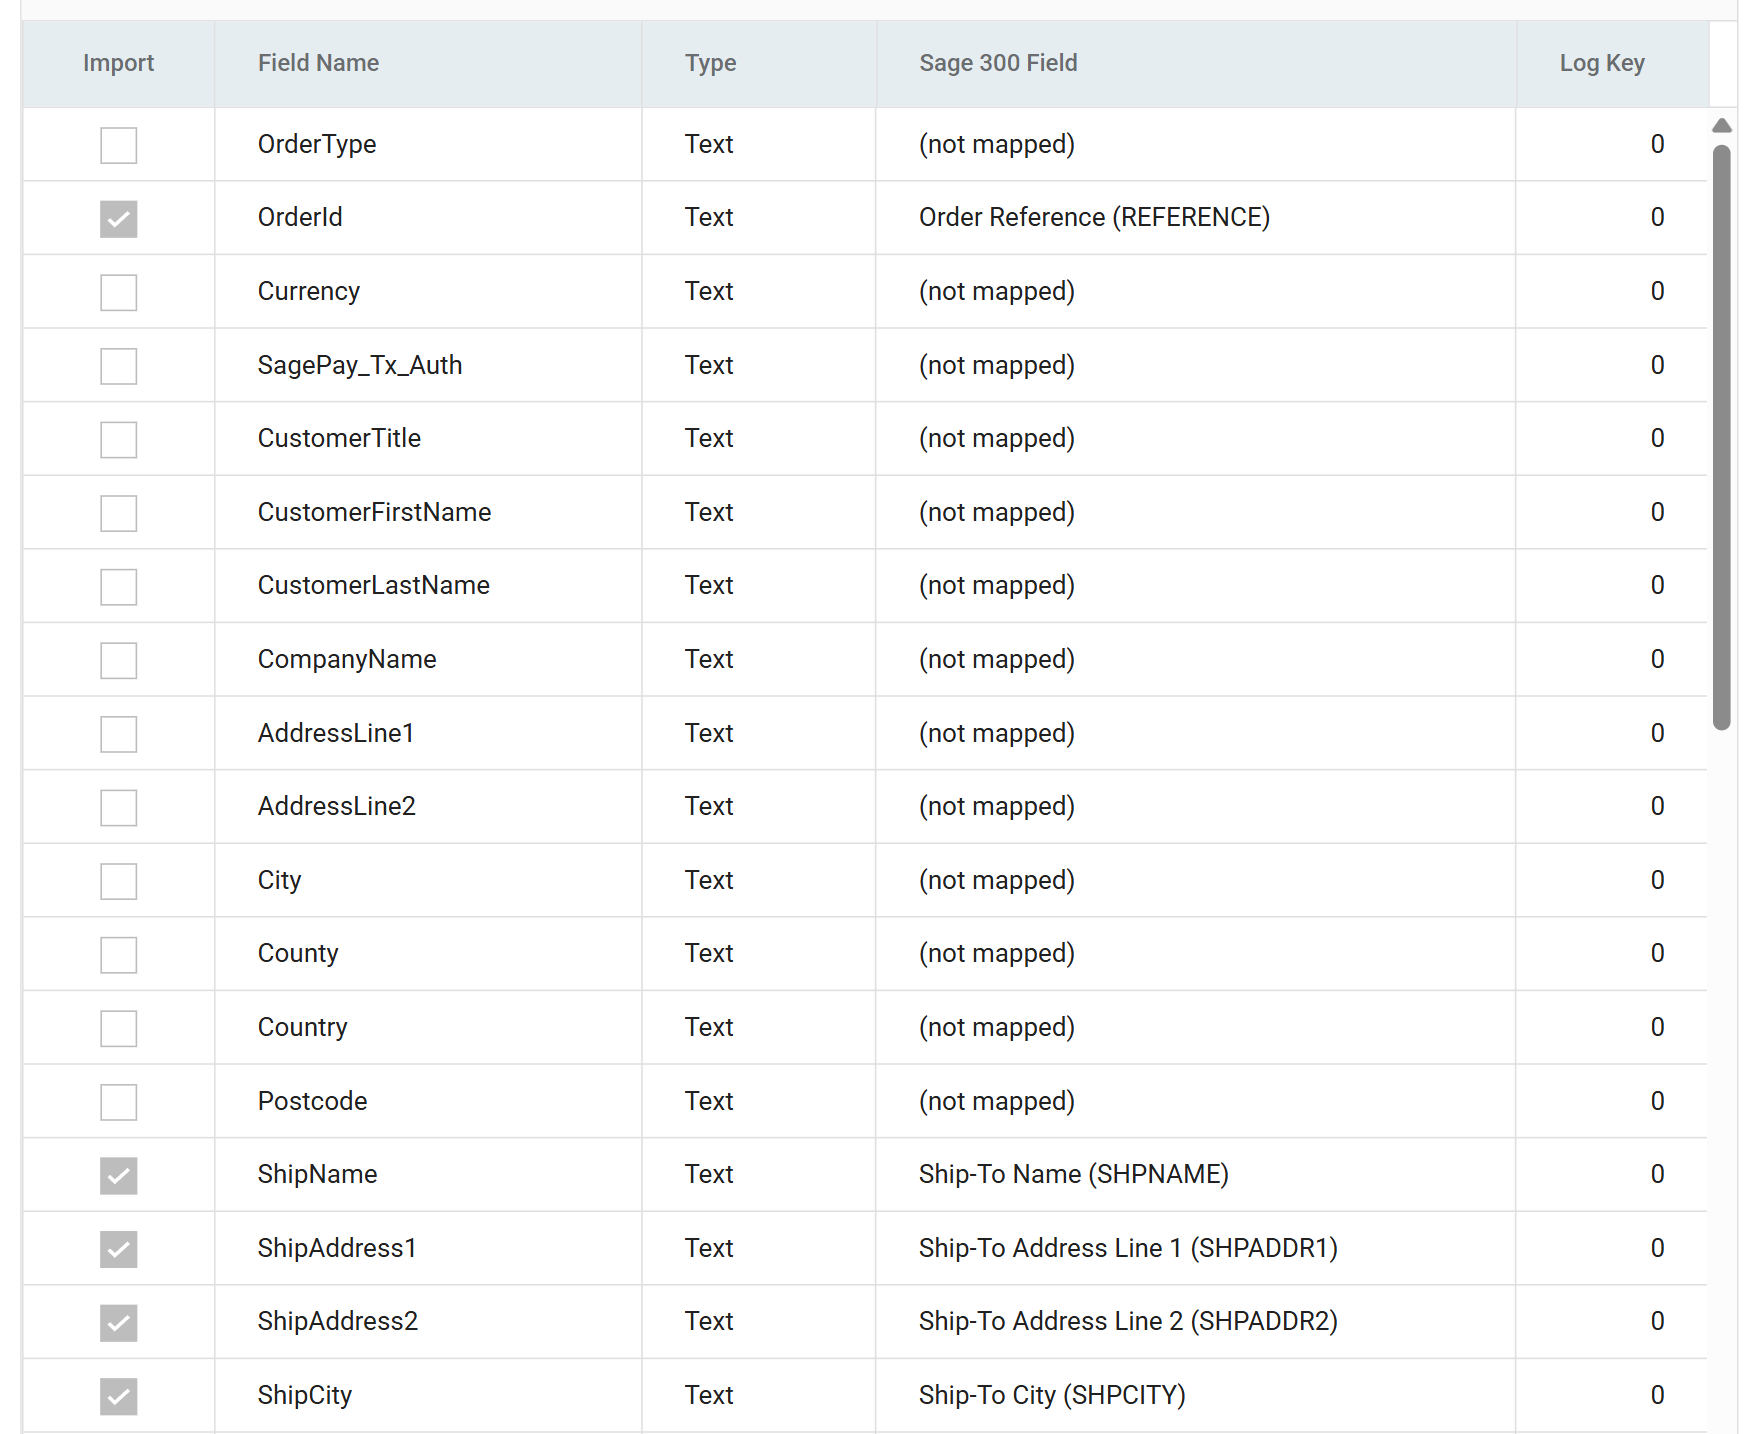
Press Edit above the grid, then set the Sage 300 Field on each of these rows:
Incoming Field Sage 300 Field OrderId Order Reference (REFERENCE) ShipName Ship-To Name (SHPNAME) ShipAddress1 Ship-To Address Line 1 (SHPADDR1) ShipAddress2 Ship-To Address Line 2 (SHPADDR2) ShipCity Ship-To City (SHPCITY) ShipCounty Ship-To State/Province (SHPSTATE) ShipCountry Ship-To Country (SHPCOUNTRY) DateTime Order Date (ORDDATE) CustomerComments Order Comment (COMMENT) CustomerNo Customer Number (CUSTOMER) Sage300OrderNumber Order Number (ORDNUMBER) - The name in brackets is the Sage 300 view field that receives the value. Match on that name, not on the label. The list offers an Optional Field - Order Date (ORDERDATE) a few rows from Order Date (ORDDATE), and they are different fields.
Sage300OrderNumberis the empty field created in 6.1. When you map it to Order Number, Sage 300 returns the number it allocates into the dataset.- You do not need to tick Import. Choosing a Sage 300 field ticks the row for you.
-
Press Save above the grid.
Connector > Field Mapping — the order lines
- Change Current Transaction Id to
OrderDetails. -
Choose Order Details (OE0500) from Sage 300 Transaction Type.
- It is the only type offered. Because the parent maps to
OE0520, the list offers only the views that can sit beneath it. - Transaction Level Mapping now shows both levels mapped. This confirms the shape is right before you map any fields.
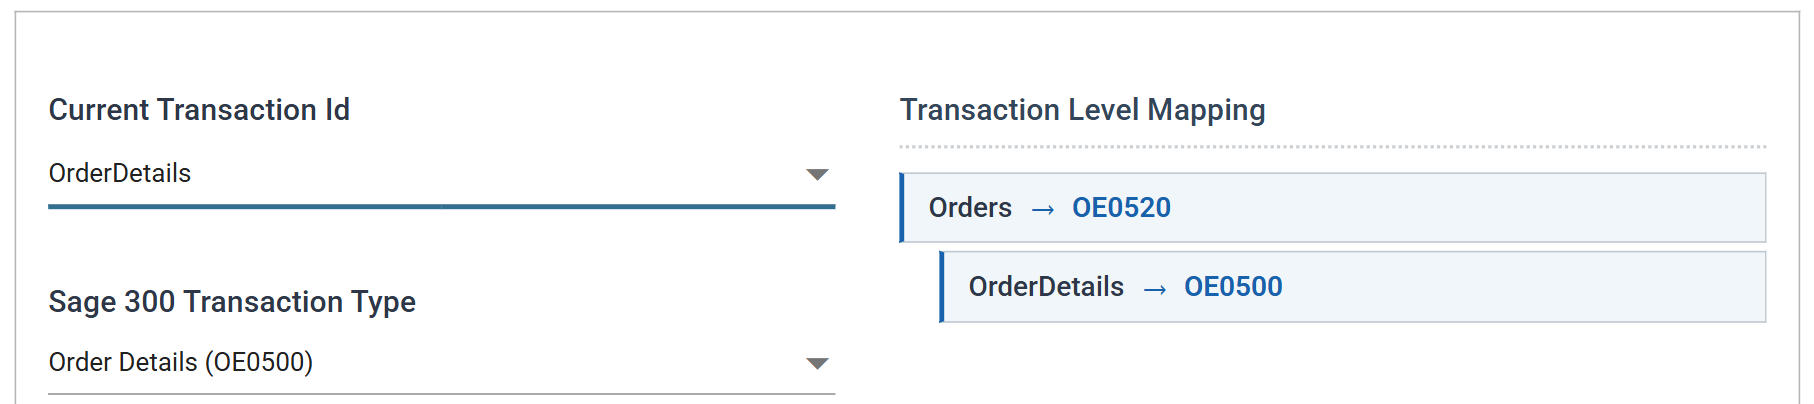
The two drop-downs do different jobs
The two drop-downs do different jobs. The top one, Current Transaction Id, chooses which transaction's grid you are editing. The bottom one, Sage 300 Transaction Type, sets what that transaction is mapped to. If you change the bottom one to see a different grid, you re-map the transaction.
- It is the only type offered. Because the parent maps to
-
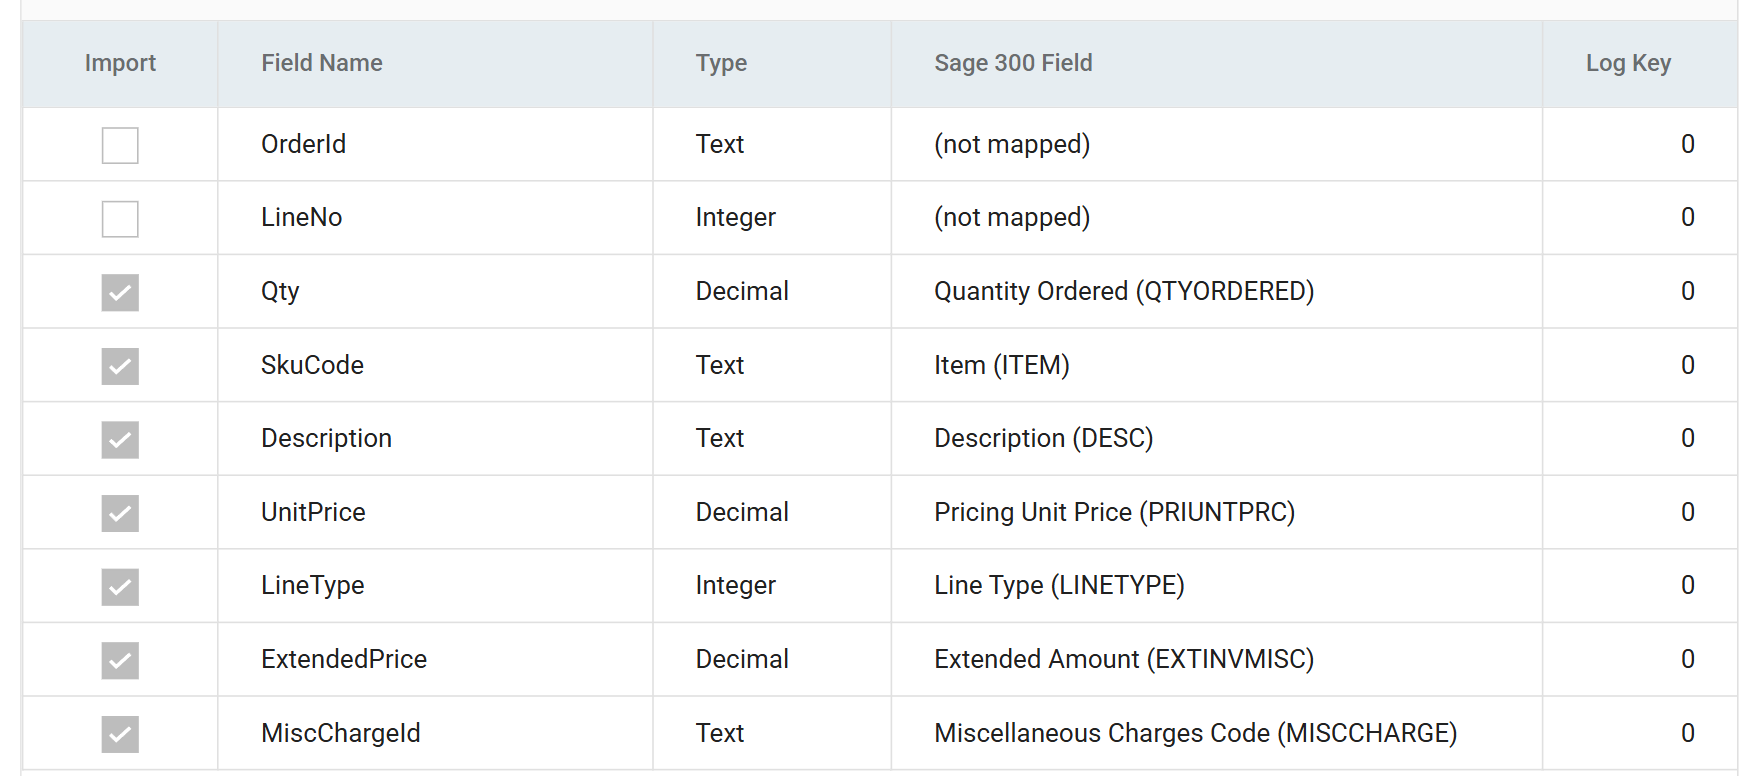
Press Edit above the grid, then set the Sage 300 Field on each of these rows:
Incoming Field Sage 300 Field Qty Quantity Ordered (QTYORDERED) SkuCode Item (ITEM) Description Description (DESC) UnitPrice Pricing Unit Price (PRIUNTPRC) LineType Line Type (LINETYPE) ExtendedPrice Extended Amount (EXTINVMISC) MiscChargeId Miscellaneous Charges Code (MISCCHARGE) -
Press Save above the grid.
-
Press Close at the bottom of the transform, then Save the integration.
Running the import
- Re-open the connector and press Refresh at the bottom of the pane.
- IMan writes the orders into Sage 300. The preview reads
Progress - Completed and shows the orders as Sage 300 received them: under
the Sage 300 field names, and headed
Transaction Id: OE0520, notOrders. -
Scroll the preview to the right. ORDNUMBER carries the order number Sage 300 allocated to each order.
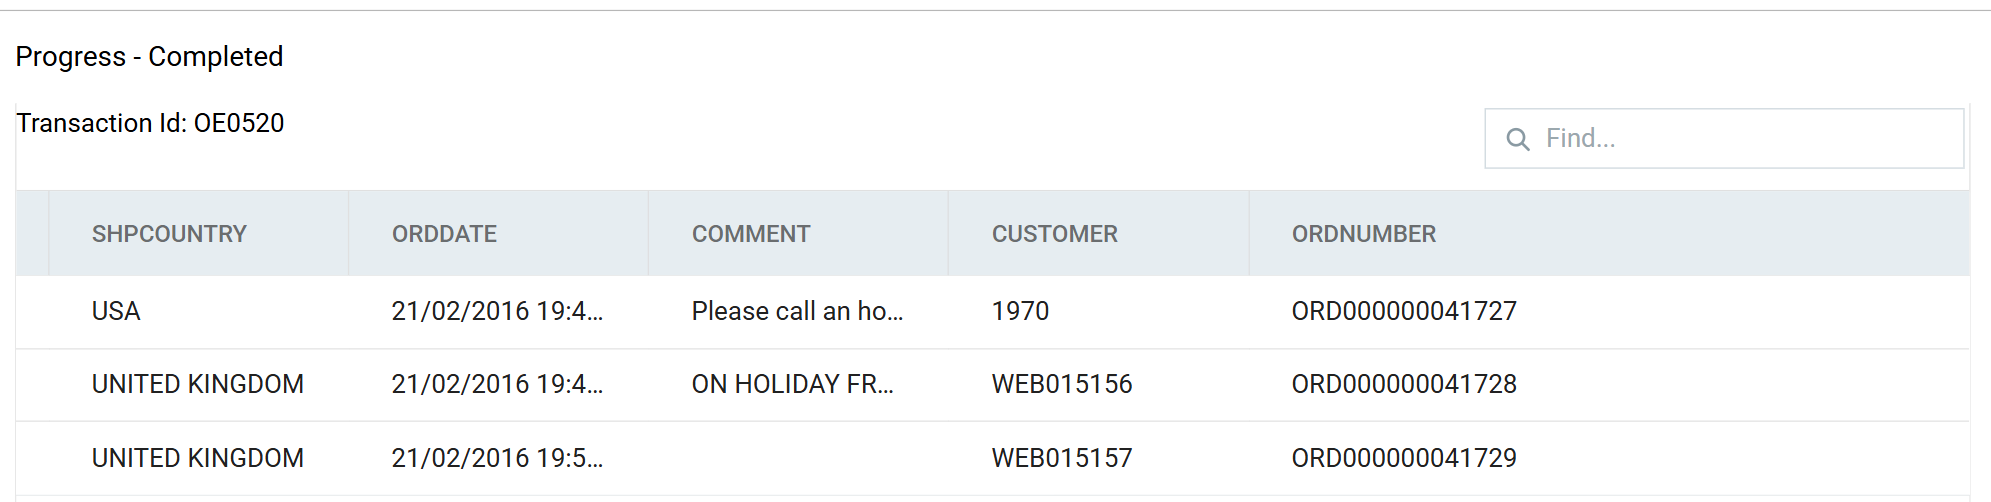
- This is why 6.1 created the empty
Sage300OrderNumberfield. The number does not exist until Sage 300 writes the order, and it comes back in the field mapped to it. ORDNUMBERis wider than its default column. Drag the column edge to read the whole value.
- This is why 6.1 created the empty
The orders are now in Sage 300, and step 9 writes these numbers back out to a file.
Your order and customer numbers will not match the screenshots
The order numbers, and the customer numbers beside them, will not match the ones in these screenshots. Both are allocated in sequence as records are created, so they depend on the records already in the company.