3. Email Invoice
The invoices are printed. In this section you email each one to its customer, with the PDF attached and the customer's own name and balance in the message.
First you need two things: the customer's contact details, which are in Sage 200 but not in the dataset, and a Map transform to hold them.
Setup > Lookups
A lookup runs a query against a database connection and returns a single value. This one takes an invoice number and returns the customer behind it.
- Save the integration, go to the Setup area and press Lookups.
- Press Add and enter the following:
- Id
- For training, enter:
SAGE200INV
- For training, enter:
- Description
- For training, enter:
Sage200 Customer by Invoice Lookup
- For training, enter:
- Use IMan Lookup Table
- Unticked. The lookup reads Sage 200 directly rather than an IMan table.
- Database Connection
- The connection the query runs against.
- For training, select:
Sage200 DemoData Connection
- Select Clause
A.CustomerAccountNumber, A.CustomerAccountName, C.ContactName, A.AccountBalance, CV.ContactValue
- From Clause
- The five joins below, entered as a single line.
- Where Clause
SYSContRole.Role = 'Account' and ContRole.IsPreferredContactForRole = 'True' and CV.SYSContactTypeID = 2 and I.DocumentNo = '%1'
SOPInvoiceCredit I inner join SLCustomerAccount A on I.CustomerID = A.SLCustomerAccountID inner join SLCustomerContact C on A.SLCustomerAccountID = C.SLCustomerAccountID inner join SLCustomerContactRole ContRole on ContRole.SLCustomerContactID = C.SLCustomerContactID inner join SYSTraderContactRole SYSContRole on SYSContRole.SYSTraderContactRoleID = ContRole.SYSTraderContactRoleID inner join SLCustomerContactValue CV on CV.SLCustomerContactID = C.SLCustomerContactID
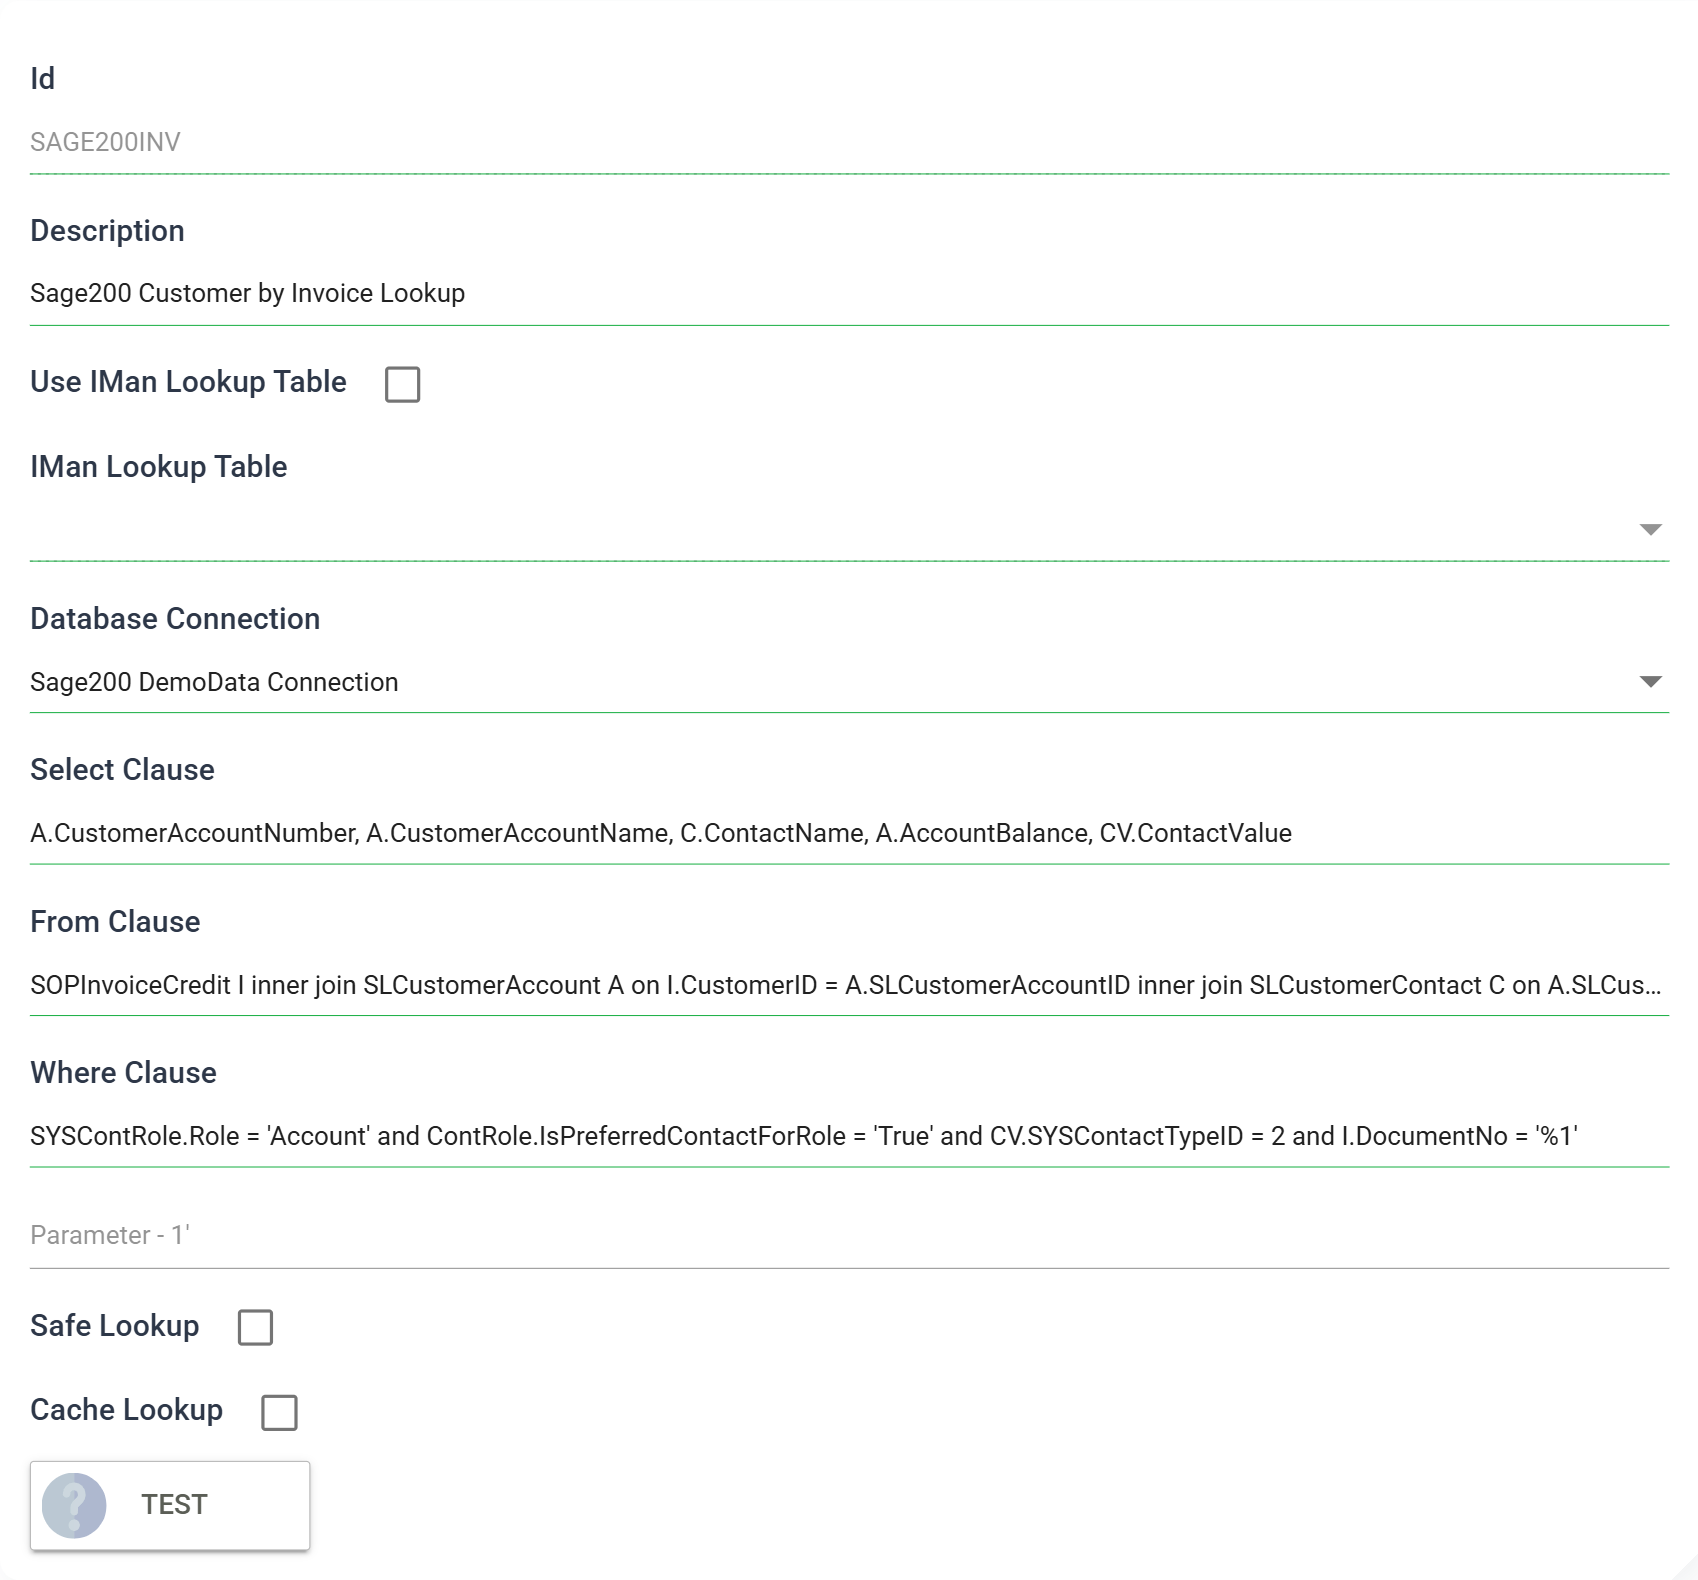
The From clause is long because a Sage 200 customer's email address is not a column on the customer. The account has contacts, each contact has roles, and each contact has values of a given type. To get from the invoice to the account contact's preferred address, the query joins all of these tables. The where clause then picks the right row: the Account role, the contact marked preferred for it, and contact type 2, which is E-mail Address.
%1 is a parameter. IMan replaces it with whatever the formula passes as the
lookup's third argument, so the same lookup works for any invoice.
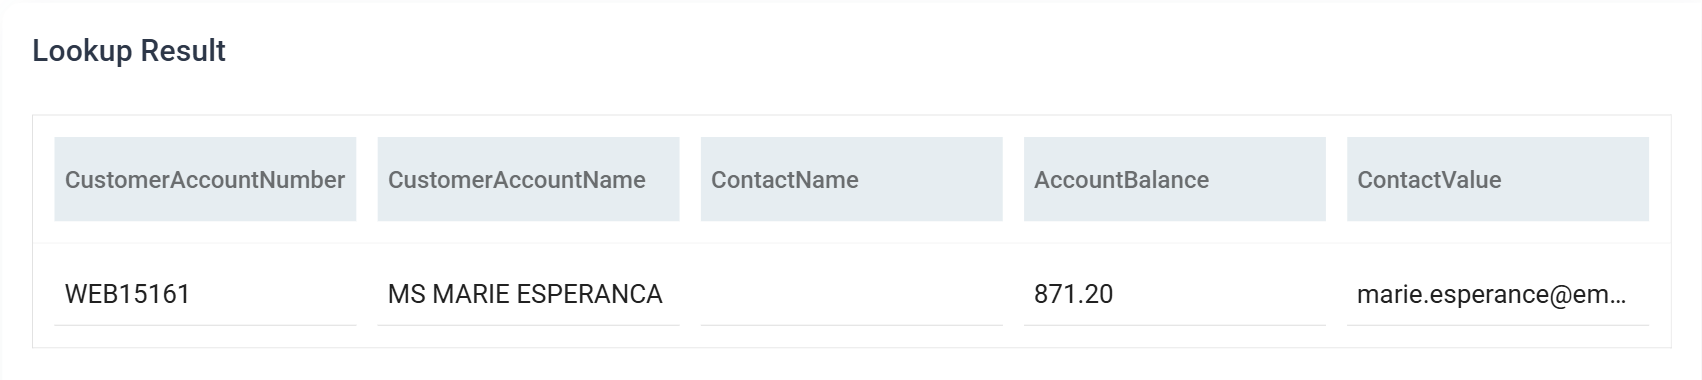
Because the where clause contains a parameter, a Parameter box appears below it. Type an invoice number into it (one from the last section will do) and press TEST:
Press SAVE.
TEST runs the query against the real connection
Use TEST on every lookup you write. It runs the query against the real connection and shows what comes back. This is far quicker than finding a bad join through a failed integration run. Nothing is saved until you press SAVE.
In the result above, ContactName is empty. The customers created in
Step 5 have a contact and an email address but no contact name. The formula
below handles this.
Email Prep Map > Field Mapping
- Return to the Designer, load the integration and press Transform Setup.
- Add a Map transform to the right of the invoice print connector, drag a
Connector from the Transforms group to join
INVOICEPRINTto it, and save the integration. - Open it and set Transform Id to
EMAILPREP. - Press Field Mapping, leave Current Transaction Id on
SOPPostInvoice, and press Add three times:
- New Field Name
ContactName
- Type
- Text
- Evaluate
- Ticked
- Evaluate String
- The contact name if the customer has one, and the account name if not:
Dim Result
Result = Lookup("SAGE200INV", "ContactName", %InvoiceCreditNo, True)
If Result = "" Then
    Result = Lookup("SAGE200INV", "CustomerAccountName", %InvoiceCreditNo, True)
End If
Result
- New Field Name
Balance
- Type
- Text
- Evaluate
- Ticked
- Evaluate String
Lookup("SAGE200INV", "AccountBalance", %InvoiceCreditNo, True)
- New Field Name
Email
- Type
- Text
- Evaluate
- Ticked
- Evaluate String
Lookup("SAGE200INV", "ContactValue", %InvoiceCreditNo, True)
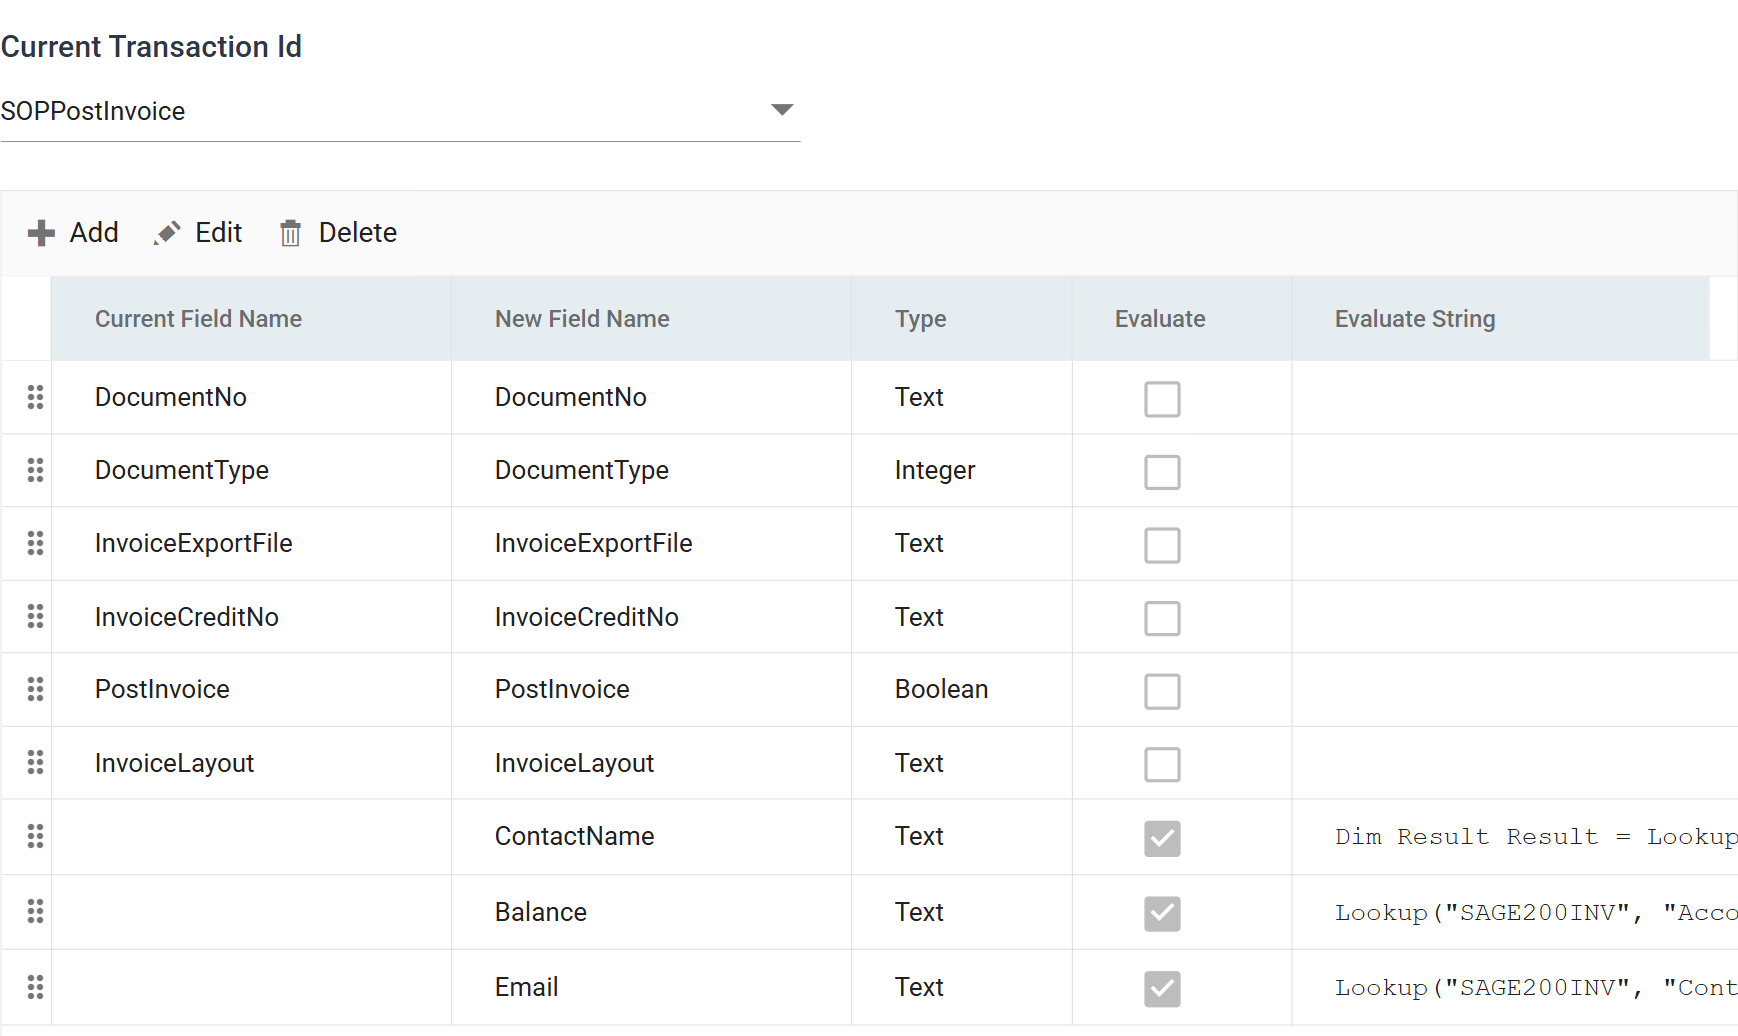
%InvoiceCreditNo is the invoice number
13.2 got back from Sage 200. IMan
substitutes it into the lookup's %1.
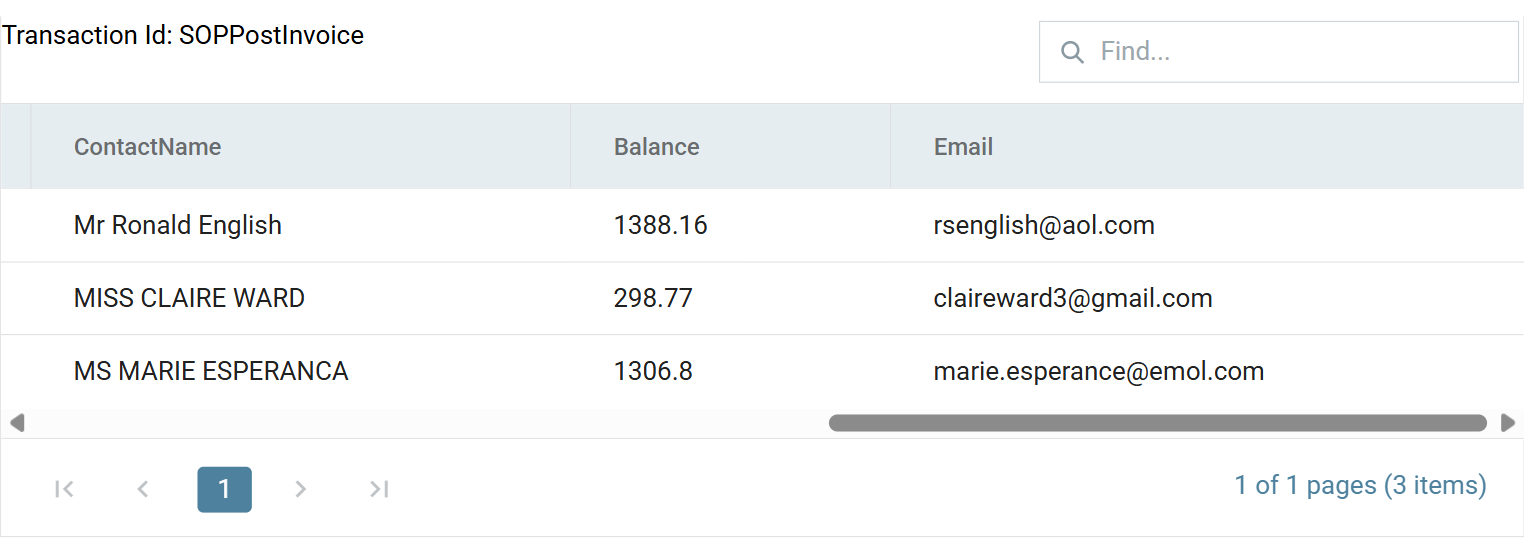
Press Refresh. Each row now carries the customer details fetched from Sage 200:
Press Close and save the integration.
A lookup that finds nothing returns an empty string
Every ContactName above is an account name, reached through the
If Result = "" branch, because none of these customers has a contact name
on record. A lookup that finds no value returns an empty string; it does not
fail. If the formula does not test for this, the greeting is empty and the
email goes out reading Dear ,.
Email Task > Setup
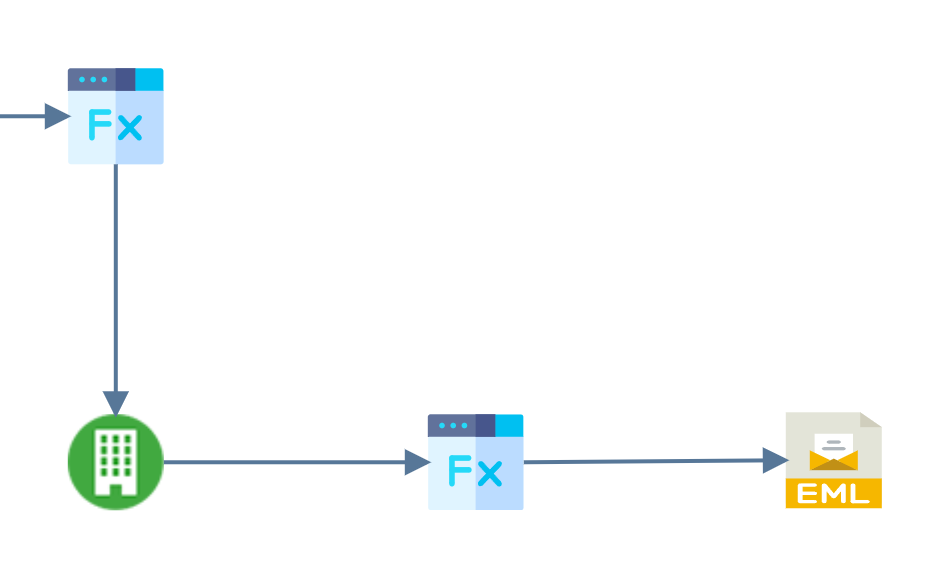
- Open the Tasks group in the palette and drag an Email task onto the design surface, to the right of the Map.
-
Join the Map to it, and save the integration.
-
Double click the task, and on its Setup tab set Transform Id to
EMAILINVOICE.
Email Task > Email Task
Everything else is on the Email Task tab.
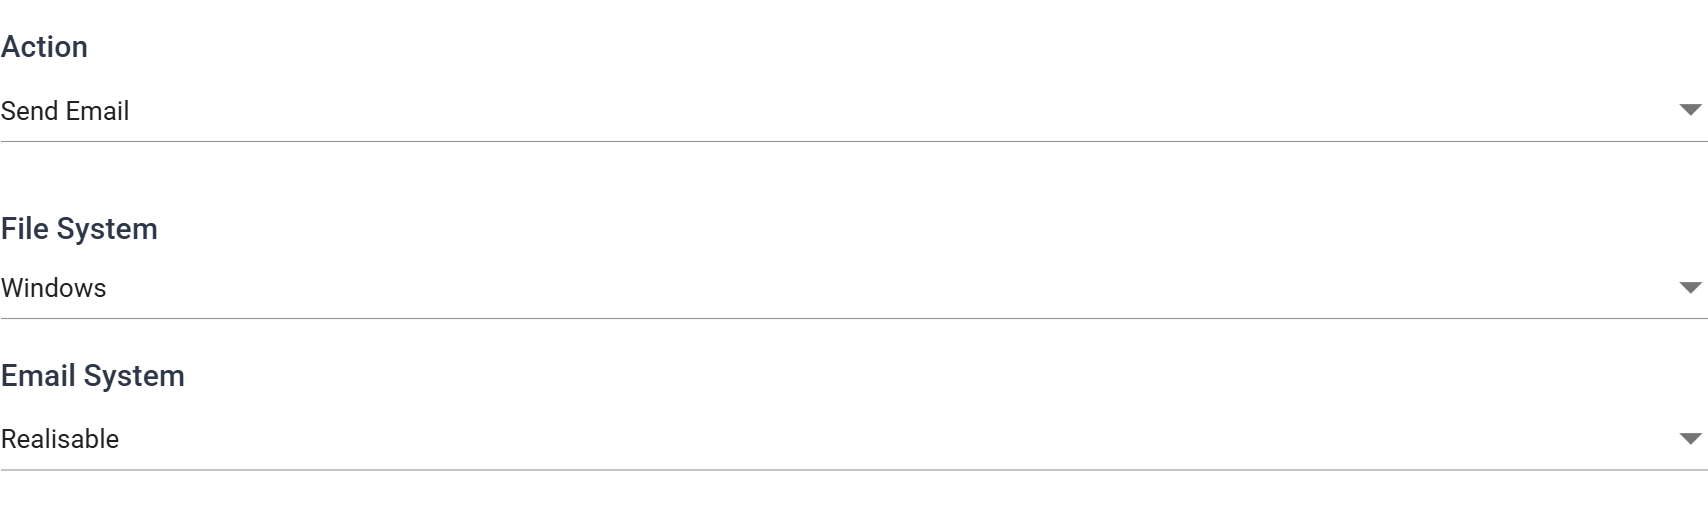
- Action
Send Email,Delete EmailorDownload Attachment.- For training, leave as: Send Email
- File System
- Where attachments are read from:
WindowsorAzure Blob. - For training, leave as: Windows
- Where attachments are read from:
- Email System
- One of the mail servers configured in Setup > SMTP. The task will not send without one.
- For training, select your own mail server.
Addresses and subject
The address and subject boxes accept merge fields, and there is a picker for
them. Type % and a list of every field in the dataset appears, grouped by
transaction and annotated with each field's type:
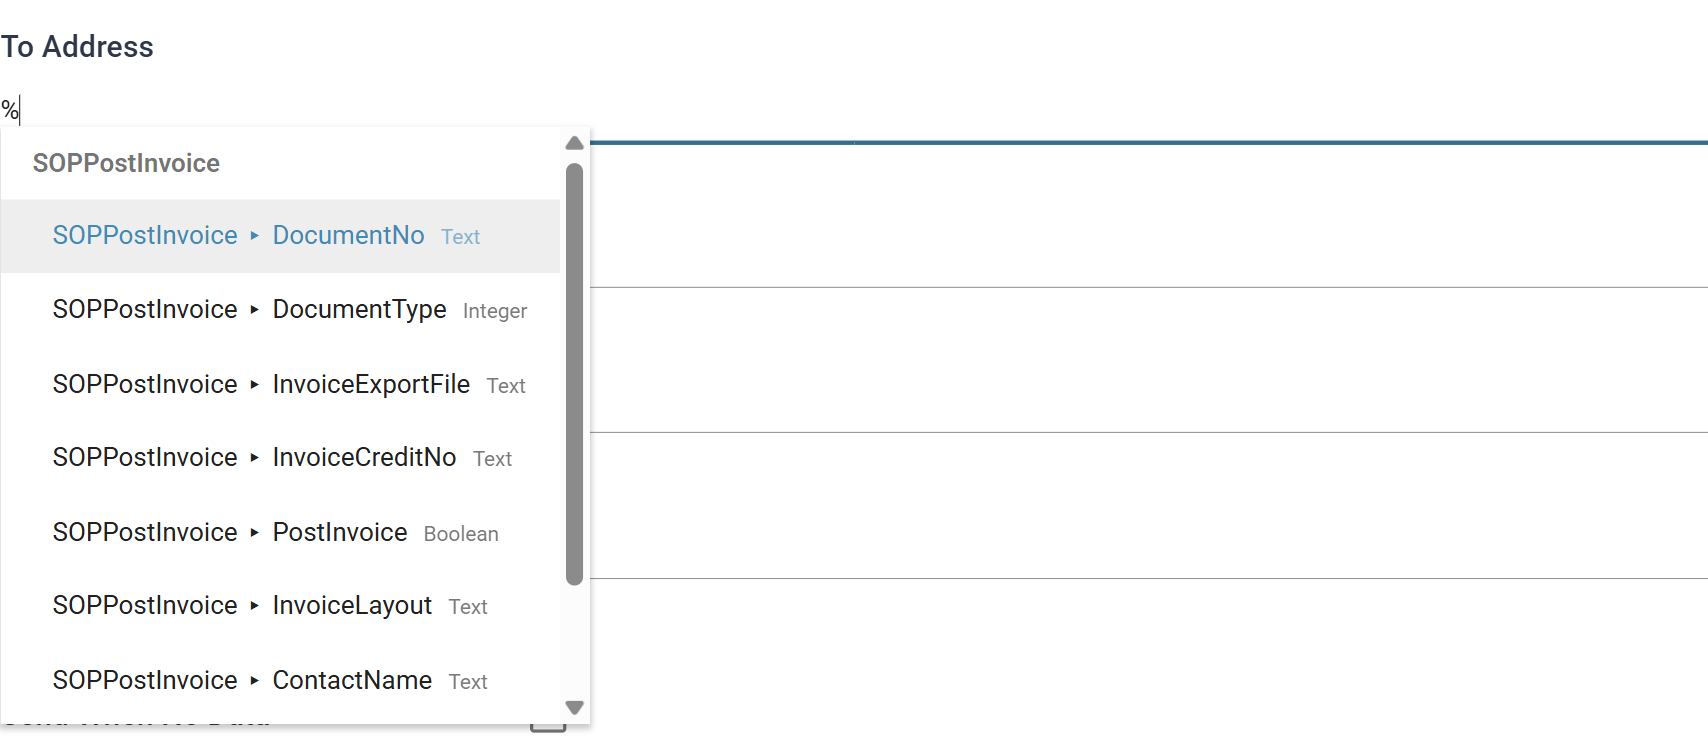
Keep typing to filter the list; %Email narrows it to one entry. Choosing an
entry inserts it as %[SOPPostInvoice.Email], with the transaction and the field
together. Enter the following:
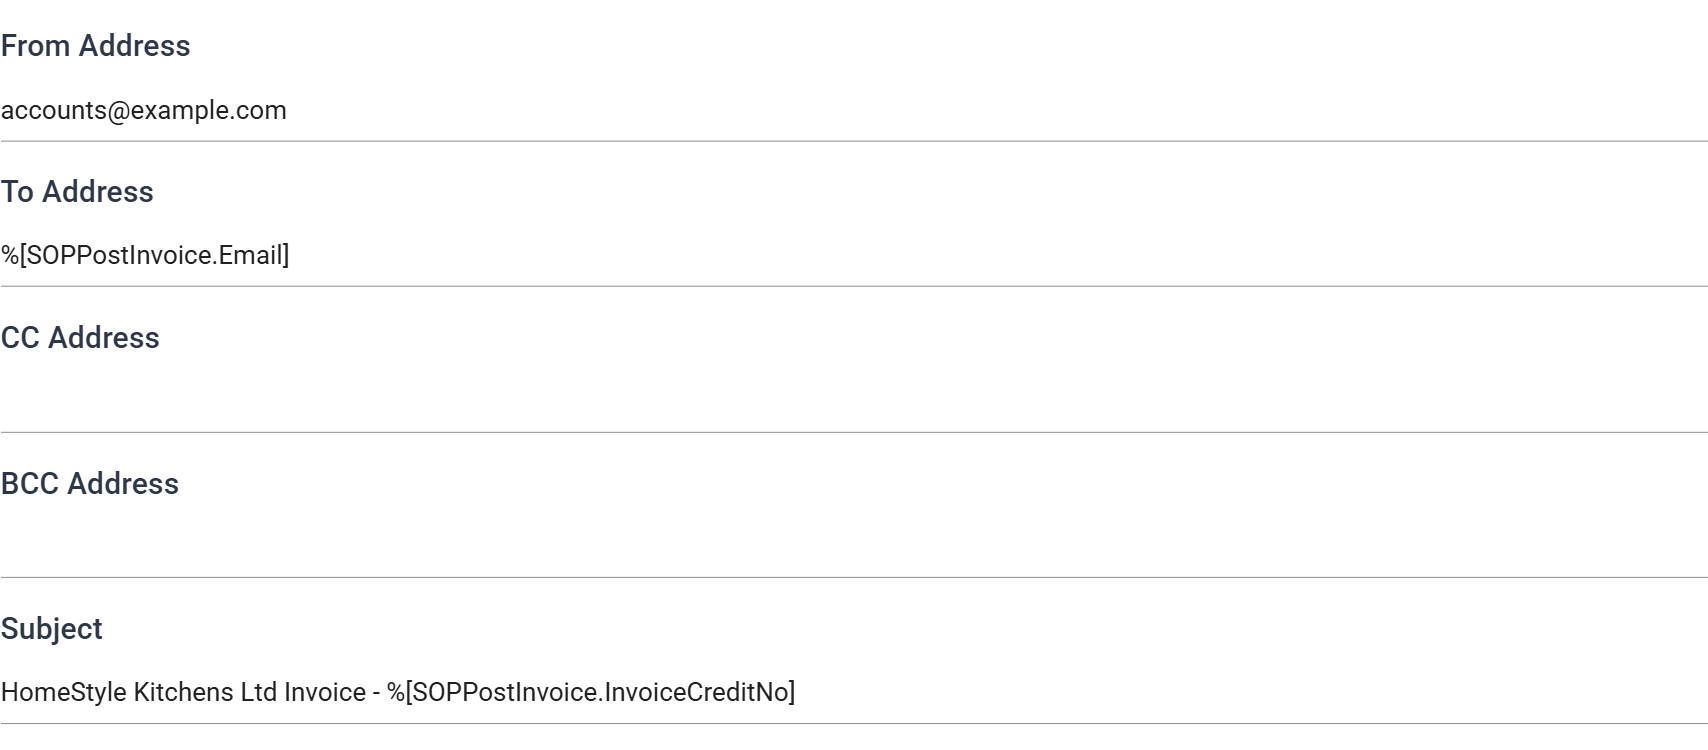
- From Address
- The address the invoices are sent from. Replace with your own.
- To Address
%[SOPPostInvoice.Email], the address the lookup fetched, so each invoice goes to its own customer.
- Subject
HomeStyle Kitchens Ltd Invoice - %[SOPPostInvoice.InvoiceCreditNo]
Put your own address in To Address while you are learning
While you are learning, put your own address in To Address. The lookup returns whatever is in the customer record, and the training data holds real addresses at real domains. Once an email is sent, deleting the task does not recall it. Swap in the merge field once you are happy with what the integration sends.
The picker opens only after a space or at the start of the box
The picker opens only when the % follows a space or starts the box. To put
a merge field straight after another character, such as a currency symbol,
leave a space before it or type the reference out in full.
Options
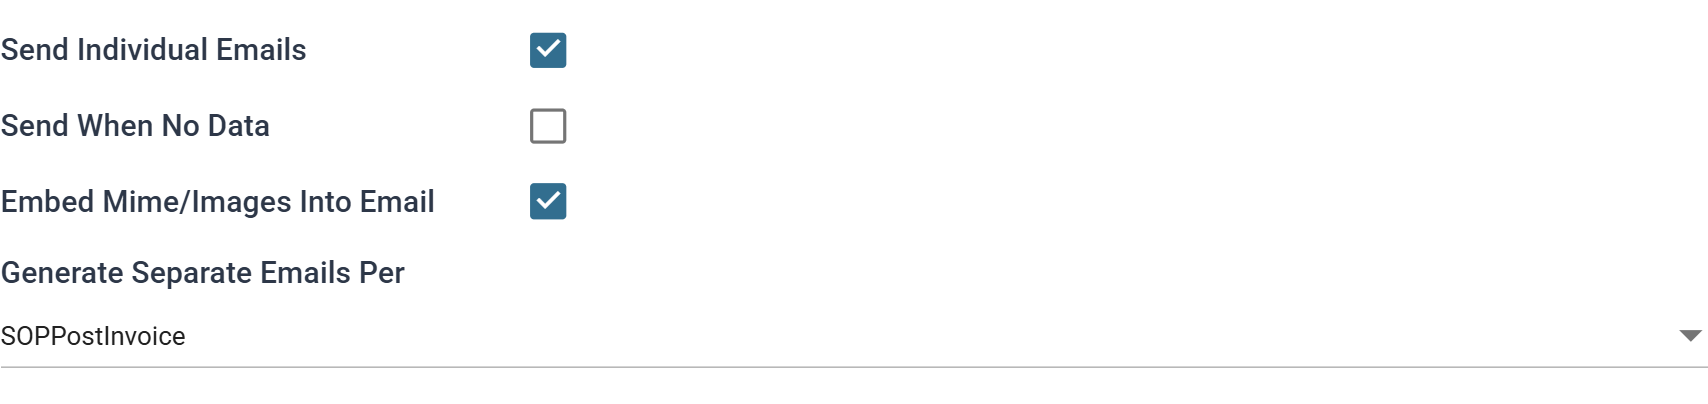
- Send Individual Emails
- Each address in To Address gets its own email, instead of one email addressed to all of them.
- For training, leave as: ticked.
- Send When No Data
- Sends the email even when the run produced no records. Use it for a "nothing to report" notification.
- For training: unticked.
- Embed Mime/Images Into Email
- Embeds the images the email refers to, instead of linking to them, so the recipient still sees them.
- For training: ticked.
- Generate Separate Emails Per
- The transaction that splits the emails: one email per record of that transaction. Without it, all three invoices would arrive in a single message.
- The choice here is
SOPPostInvoiceorSOPDespatchReceiptItem; splitting by the line transaction would send one email per despatched line. - For training, select:
SOPPostInvoice
Email Body
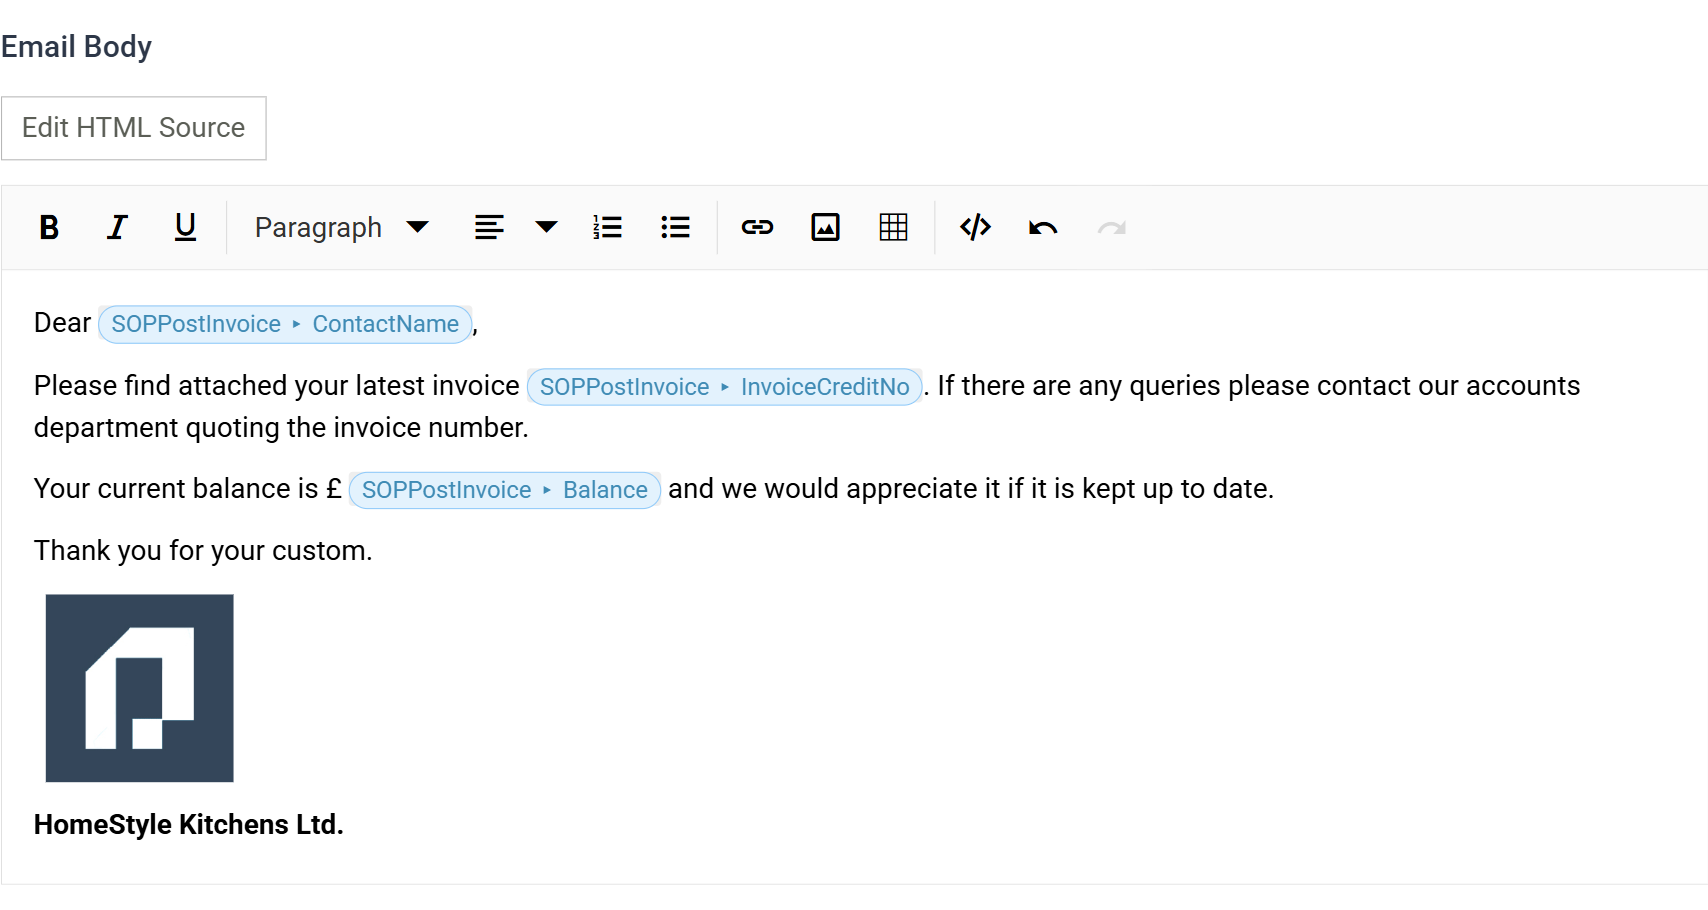
The body is a rich text editor. Merge fields work here as they do in the address
boxes: type % and pick a field. Each merge field appears as a chip instead of
raw text, so the message stays readable while you write it.
Enter the following, using the picker for the three merge fields:
Dear %[SOPPostInvoice.ContactName],Please find attached your latest invoice %[SOPPostInvoice.InvoiceCreditNo]. If there are any queries please contact our accounts department quoting the invoice number.Your current balance is £ %[SOPPostInvoice.Balance] and we would appreciate it if it is kept up to date.Thank you for your custom.
Then add the company logo and a sign-off:
- Press the image button on the toolbar, press BROWSE, choose a logo
(
SampleLogo.pngin the training folder will do) and press INSERT. IMan uploads the file and embeds it in the message, so it travels with the email. - Click the image and use Change Size on the toolbar that appears to bring its width down to something like 96 pixels.
- Type
HomeStyle Kitchens Ltd.underneath, select it and press Bold.
Insert Image takes an upload or a web address, not a server path
Insert Image takes an upload or a web address, not a path on the server. Uploading is the better choice: IMan embeds the image in the message, so the recipient does not need to reach a URL.
The size set here may not survive delivery. Some mail clients ignore it and show the image at its natural size. If the delivered size matters, resize the image file itself.
Edit HTML Source switches the editor to raw HTML, for markup the toolbar
cannot produce. The merge fields appear there as plain
%[SOPPostInvoice.ContactName] text. A Use Internal Stylesheet option
appears alongside it. It formats the message with the same styling IMan
uses for the audit report. When you switch back, IMan asks you to confirm,
because switching back normalises the HTML.
Attachments
Press Add attachment and enter %[SOPPostInvoice.InvoiceExportFile], the
path the invoice print connector wrote each PDF to. The folder button beside it
picks a fixed file instead. Use it when the same document goes to everyone.

Running it
Press Refresh. The Generation Status changes to complete, and IMan sends three emails, one per invoice:
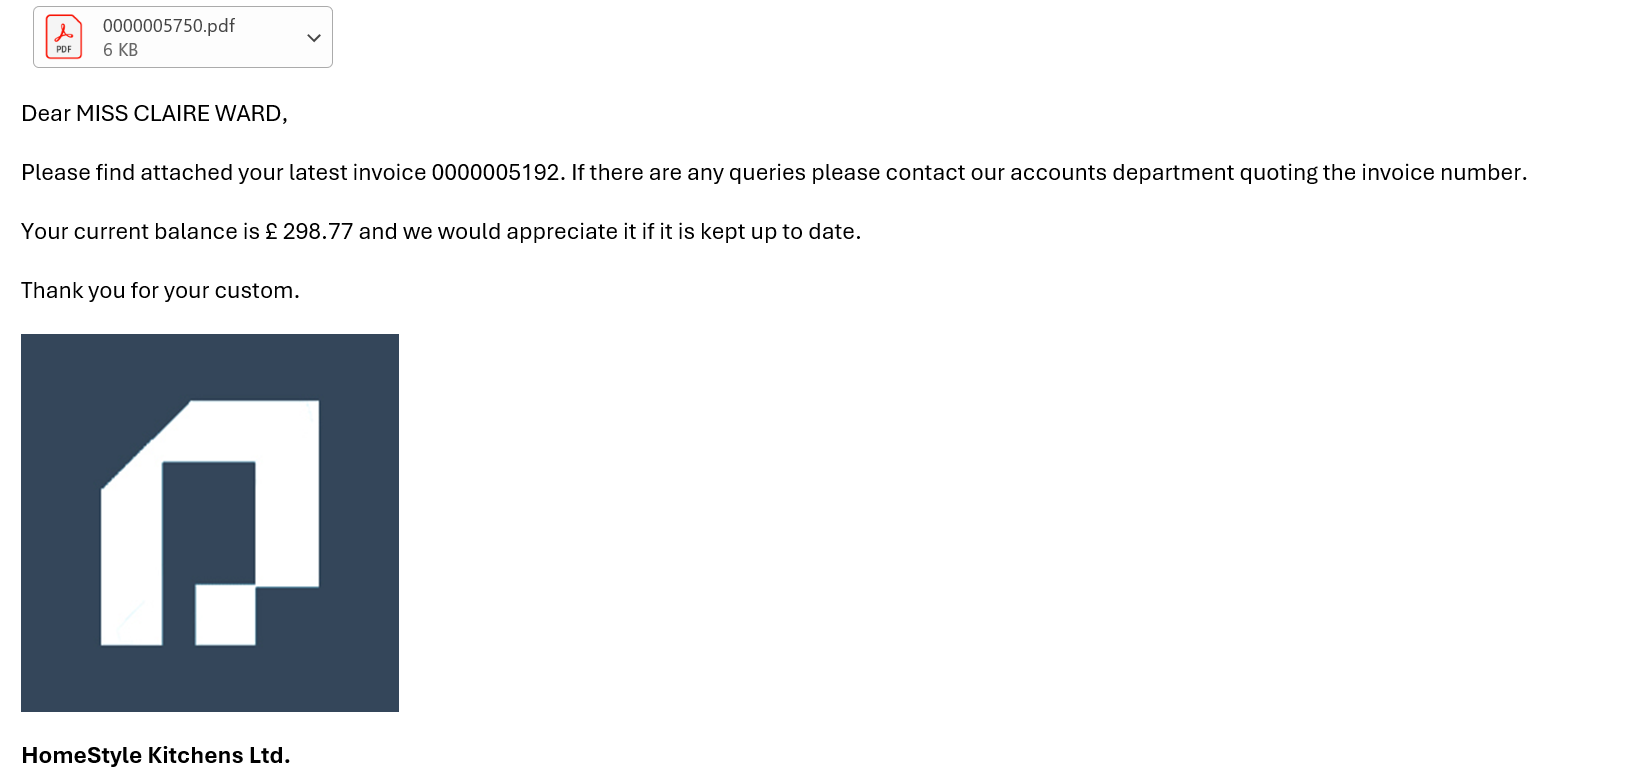
Every merge field has been replaced with that invoice's own values, and the PDF the print connector produced is attached.
Press Close and save the integration. This completes the training.
Refreshing here does not invoice anything again
Refreshing here does not invoice anything again. You refreshed the Map upstream a moment ago, and the task replays that dataset instead of re-running the connectors. The emails carry the same invoice numbers the preview showed. To send a new set, refresh from the Excel Read down as 13.2 describes. The whole chain then runs again from the workbook.