Reading Data from a Webservice — JSON Reader
This article builds a reader that pulls authorised invoices out of Xero, with their line items, credit notes and payments, into one hierarchical dataset.
It is the first article in this cookbook that reads anything. It assumes you have worked through Three-Legged OAuth 2.0 and Webservice Behaviour, because it uses the XERO behaviour built there and does not repeat any of it.
By the end you will have:
- a JSON Reader on the http(s) Url controller;
- a four-level hierarchy that IMan worked out for itself;
- and a clear idea of which parts of that it got right and which parts you have to fix.
This reader makes real calls
Every Refresh and every preview is a live request to Xero, counting against the rate limits the behaviour was configured for. They are reads, so nothing can be damaged, but use the Demo Company rather than a real organisation and do not leave a preview running in a loop.
Choosing the request
Almost all of the thinking happens before you touch IMan, and it is the same question every time: what is the one request that returns the records I want?
For invoices, Xero's own documentation answers it, and the answer is not the obvious one:
"When you retrieve multiple invoices, only a summary of the contact is returned and no line details are returned — this is to keep the response more compact. The line item details will be returned when you retrieve an individual invoice, either by specifying Invoice ID, Invoice Number, querying by Statuses or by using the optional paging parameter."
A plain GET /Invoices gives invoices with no lines on them. Paging gives invoices with their lines. The XERO behaviour already pages, so the reader gets the full documents without asking for anything — and a behaviour with paging switched off silently changes what this reader returns.
The request:
Statuses is one of Xero's optimised filters, and filtering at the service rather than in IMan is nearly always right: it is less data over the wire, fewer pages, and a smaller slice of a rate limit. It also keeps the preview quick while you are building.
The URL is relative because the behaviour's Base Url supplies https://api.xero.com/api.xro/2.0.
Step a — Add the JSON Reader
- Create a new integration — this article uses
DOCSWSREAD. - On the Transform Setup tab, open the Readers group in the palette and drag a JSON Reader onto the design surface.
- Save the integration. A newly dropped node cannot be opened until it has been saved.
- Double-click the node to open its setup pane.
Step b — The source
The Setup tab is where the reader is pointed at the service.
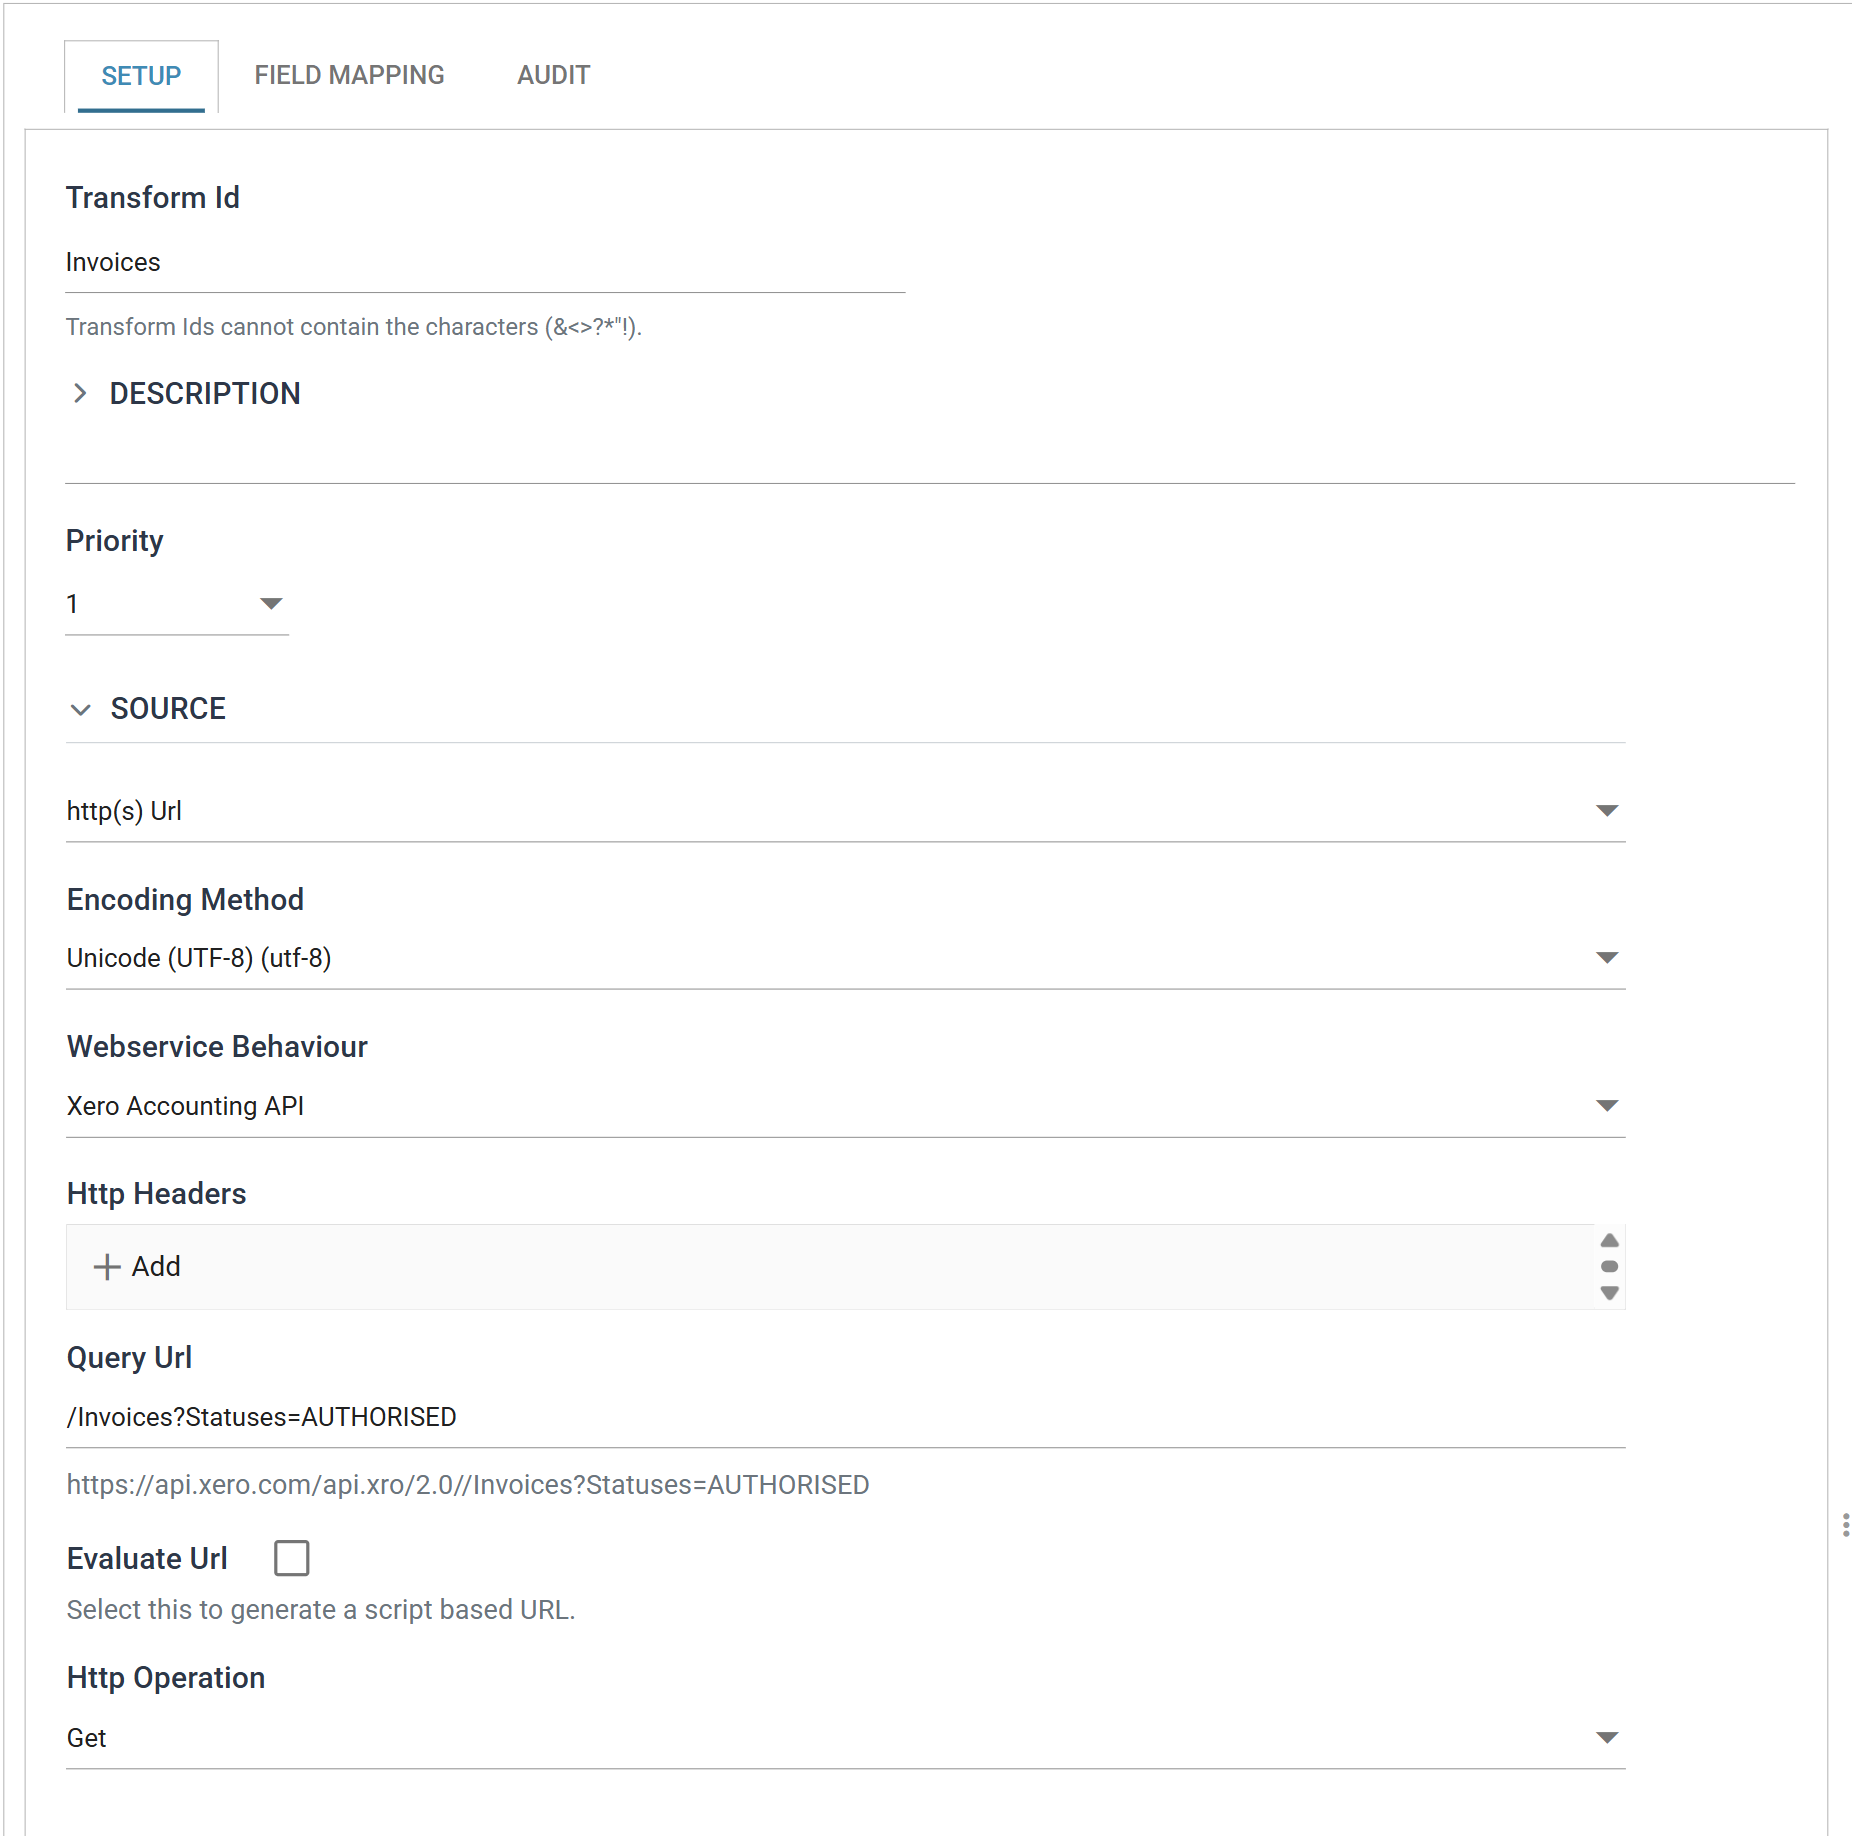
| Field | Value | |
|---|---|---|
| Transform Id | Invoices |
Names the transform in the diagram and in error messages |
| Source | http(s) Url | |
| Encoding Method | Unicode (UTF-8) | Xero's, and almost every REST API's |
| Webservice Behaviour | Xero Accounting API | The behaviour, selected by its Description |
| Http Headers | (empty) | Anything true of every Xero request is already on the behaviour |
| Query Url | /Invoices?Statuses=AUTHORISED |
|
| Http Operation | Get |
Http Headers here is for headers this request needs and others do not. In practice that is rare on a reader and normal on a writer, where a Content-Type may vary by endpoint. If you find yourself adding the same header to every transform, it belongs on the behaviour.
Http Operation, and reading with a POST
A read is a GET unless you change Http Operation. Set it to POST and a Request Body field appears beneath it, as GraphQL and other POST-to-query APIs need; set it back to Get and the body is hidden and cleared. See Http Operation on the controller's page.
Step c — Detect the schema
IMan detects the schema from a sample response, so nothing here defines a field by hand.
Move to the Field Mapping tab.
The entry point
JSON Entry Point is the JPath to the repeating element that each top-level record is read from. Xero wraps every collection in an object named after it:
{
  "Id": "...",
  "Status": "OK",
  "Invoices": [
    { "InvoiceID": "...", "InvoiceNumber": "INV-0017", "LineItems": [ ... ] },
    { "InvoiceID": "...", "InvoiceNumber": "INV-0023", "LineItems": [ ... ] }
  ]
}
so the entry point is:
A leading forward slash, and forward slashes rather than dots between segments — the commonest thing to get wrong if you have come from a JSON path syntax used elsewhere.
Refresh Schema
Two items sit at the right of the field grid's toolbar. On a reader with nothing defined the second is disabled and reads Refresh to detect the source schema and compare it with this definition.
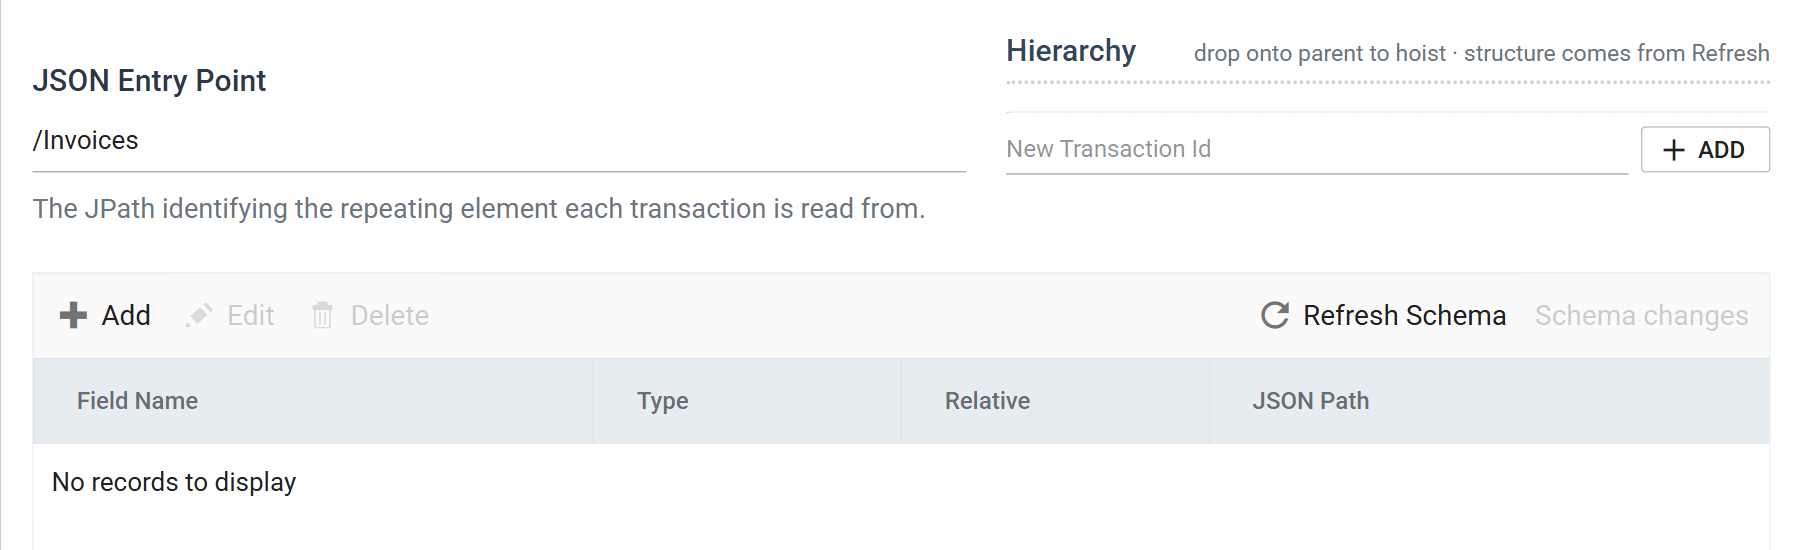
Press Refresh Schema. IMan makes the request, reads the response and works out the structure. On a reader with no definition at all the single proposed change reads "Initialise the definition from the detected schema", and the review opens on it showing what will be created before anything is.
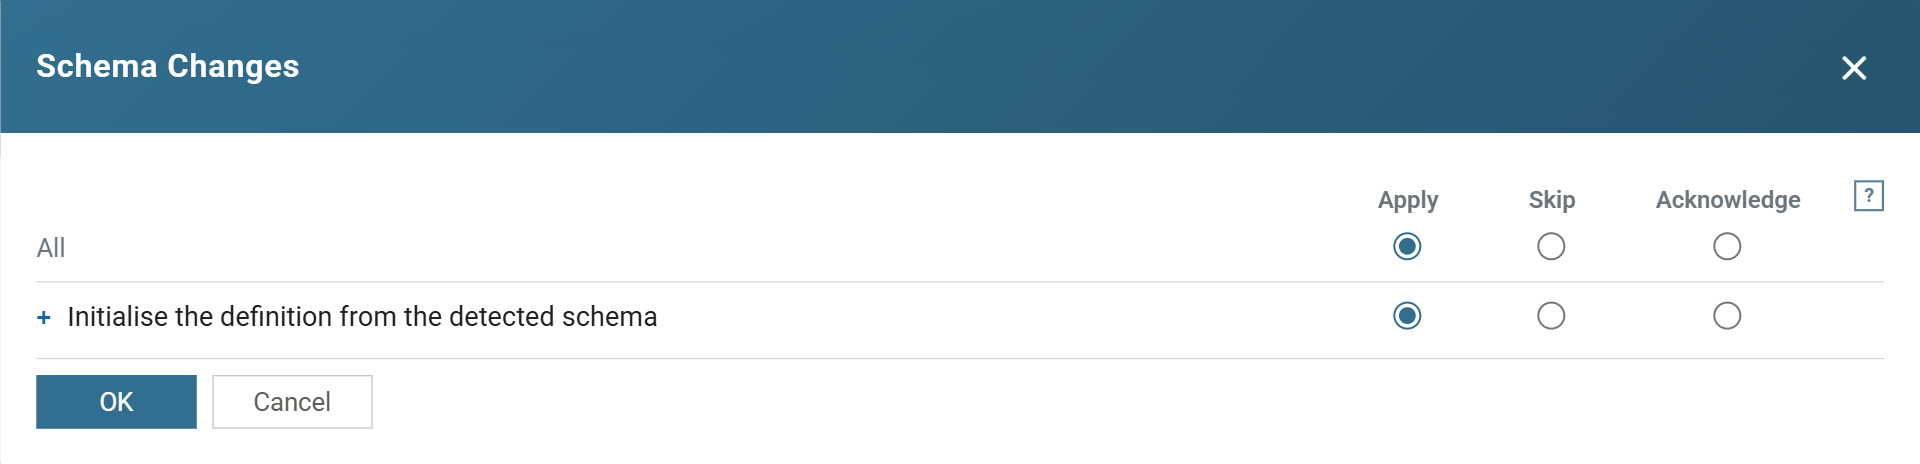
The change starts on Apply, and OK commits it. Until you press OK the definition is unchanged. Cancel applies nothing.
What came back
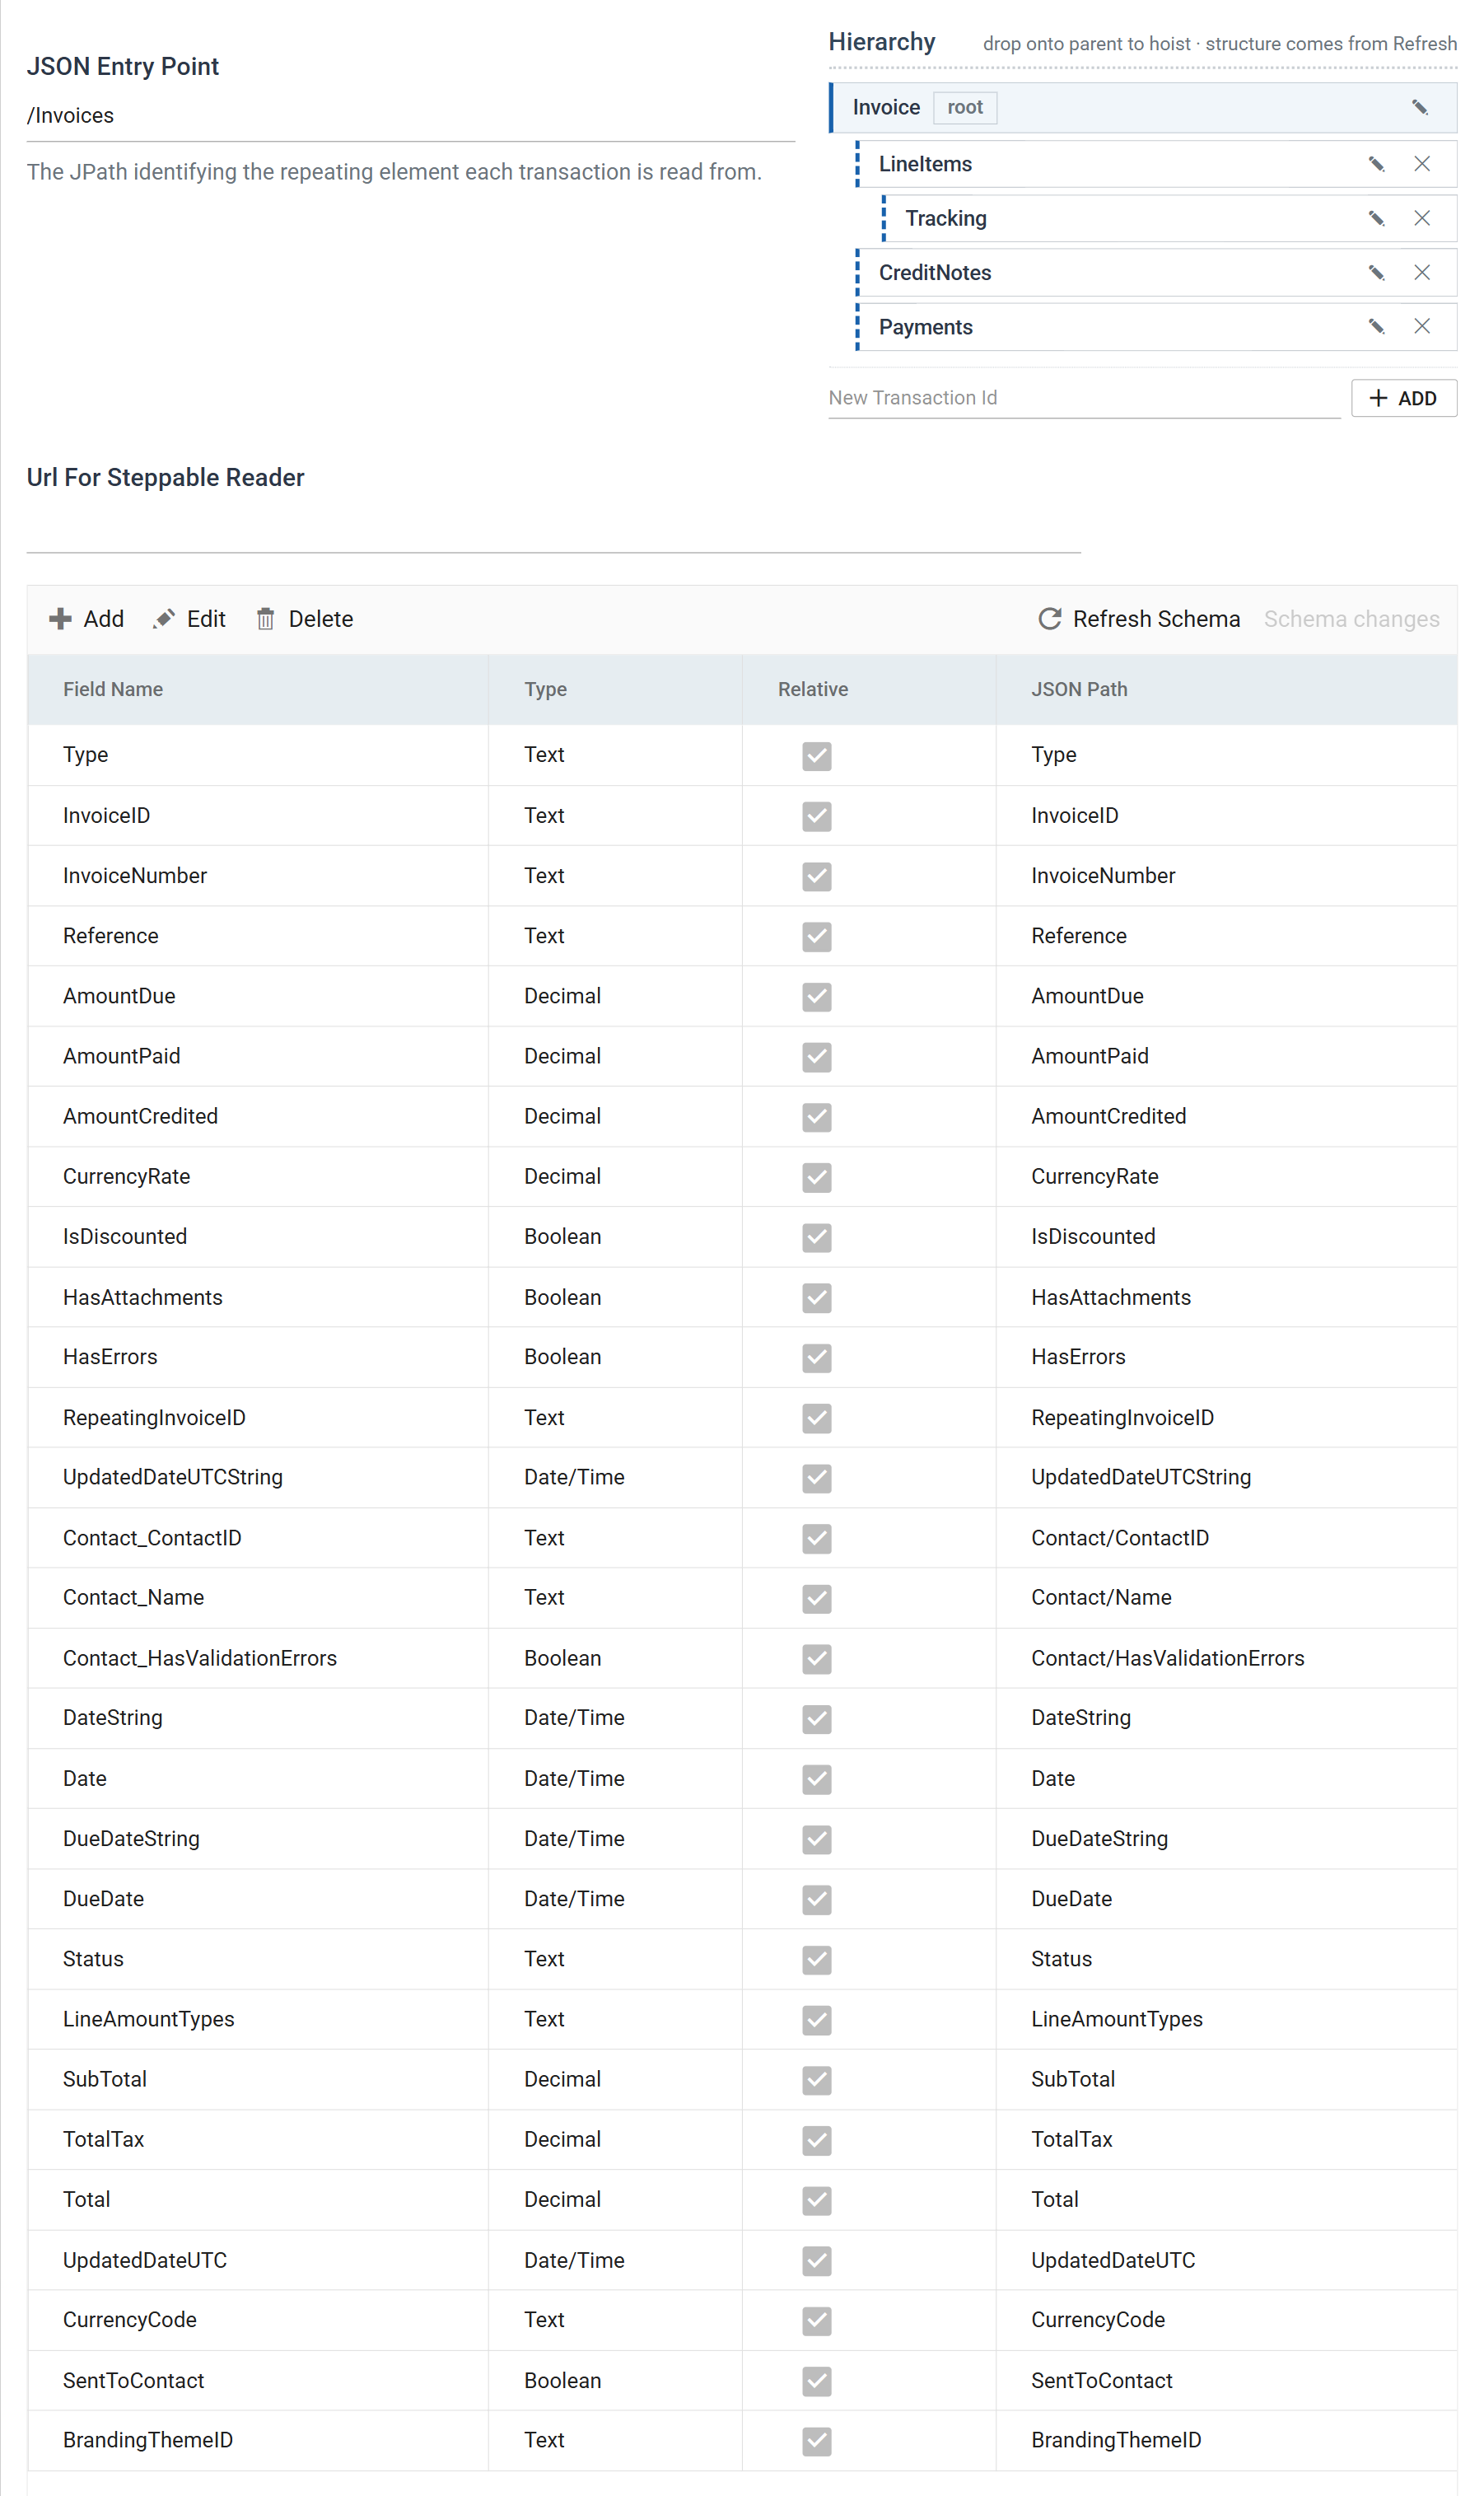
Four levels, from one request:
| Transaction | Parent | Fields | What it is |
|---|---|---|---|
Invoice |
root | 29 | One per invoice |
LineItems |
Invoice |
13 | The invoice's lines |
Tracking |
LineItems |
3 | Tracking categories on a line — two levels down |
CreditNotes |
Invoice |
8 | Credit notes applied to the invoice |
Payments |
Invoice |
7 | Payments applied to the invoice |
The root arrives named Root. Rename it to something meaningful — Invoice here — from the tree's own rename button, and do it now: transaction ids appear in every downstream transform, in audit summaries and in error messages, and a hierarchy of Root, LineItems, Tracking is one that nobody else can read.
Detection also flattens nested objects into their parent with an underscore. Xero's invoice carries a Contact object, and it arrives as three fields on Invoice:
| Field Name | JSON Path |
|---|---|
Contact_ContactID |
Contact/ContactID |
Contact_Name |
Contact/Name |
Contact_HasValidationErrors |
Contact/HasValidationErrors |
That treatment is right. Contact does not repeat, so making it a child transaction would give every invoice exactly one child and every downstream transform an extra level to navigate for no reason. Only arrays become transactions.
Step d — Correct what detection could not know
Detection reads one response. Everything it can tell you comes from that response, and three kinds of thing are not in it.
Field types come from the values, so they come from one sample
The Type column is populated — Text, Decimal, Boolean, Date/Time — and it is inferred from the values that happened to be in the response.
That is usually right and it is worth checking, because a field that was empty or null in every record of the sample has nothing to infer from, and a field whose sample values happen to be whole numbers may be typed more narrowly than the data deserves.
The one to look at first on any financial API is the money. Here Xero returned numbers and SubTotal, TotalTax, Total, AmountDue, AmountPaid and LineAmount all came back Decimal, which is correct. Had they arrived as Text — which they will, from a service that quotes its numbers — every downstream calculation would be doing string arithmetic.
Xero returns each date twice, and only one of them means what you think
This is the correction most likely to bite. The date format belongs to Xero, but a service inventing its own format is commonplace.
Every date appears as a pair:
"At Xero we use .NET, and used the Microsoft .NET JSON date format available at the time of original development. We know it's ugly but not something we can fix without a breaking change ... the date/time value is a unix timestamp value, but in milliseconds rather than seconds."
Both parse. They do not agree. The epoch form is an instant in UTC and is converted into the server's local time, so in British Summer Time an invoice dated the 25th reads 2026-08-25 01:00:00, while DateString reads 2026-08-25 00:00:00.
An invoice date is a date, not an instant — it does not have a timezone, and giving it one is how an invoice ends up in the wrong period. Map the *String fields — DateString, DueDateString, UpdatedDateUTCString — and delete or ignore the others.
The general rule, which is worth more than the Xero fact: where an API gives you the same value twice in two formats, the one you want is the one whose format cannot express something the value does not have.
Relative, and reading from outside the record
The Relative column is ticked on every detected field, and that is right for all of them.
- Ticked, the JSON Path resolves against the record — the entry point, plus the transaction's own path, plus what you type.
- Cleared, it resolves against the whole document, from the root.
Clearing it is how you put a document-level value onto every record. Xero's response carries Id, Status and DateTimeUTC at the top level, outside Invoices, and a field with Relative cleared and a path of Id puts that one value on every invoice in the batch — a batch stamp you can group by later.
Detection never proposes such a field, because from inside a record there is nothing to see.
Transaction JPath, and where it renders
Each child transaction has a Transaction JPath giving the array it repeats over, relative to its parent: LineItems[] on LineItems, Payments[] on Payments.
The root has no Transaction JPath and the field is not rendered for it — the JSON Entry Point is the root's path. If you are looking for it there, that is why.
Note the []. A child transaction's path carries the array suffix; a field's path does not, unless the field is reaching into an array to pick one element out of it.
Step e — Preview
Press Refresh at the foot of the pane.
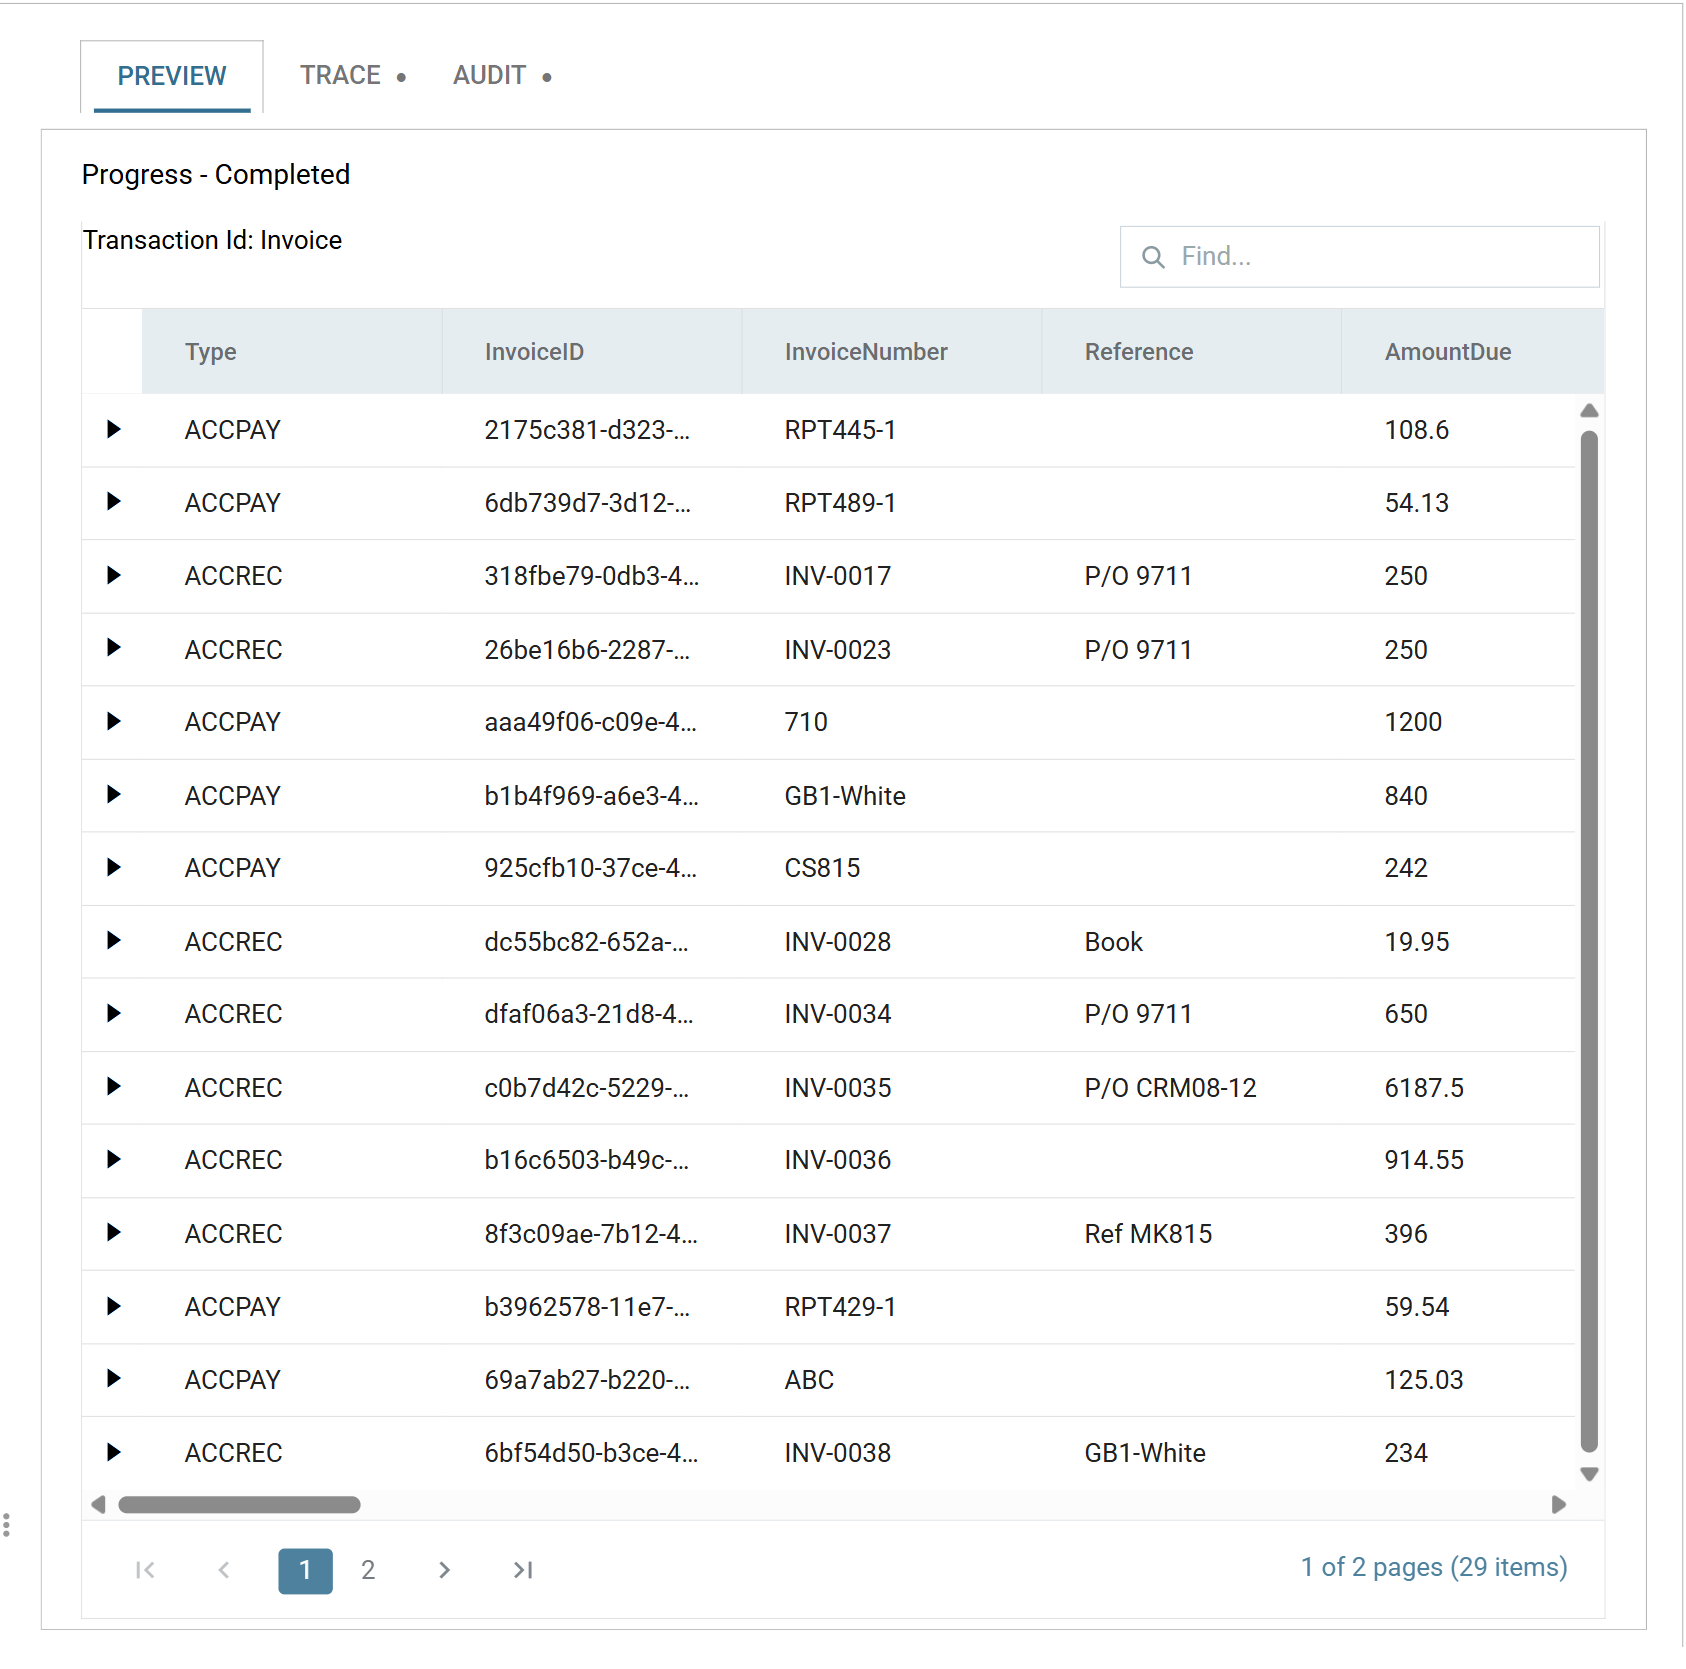
Real invoices out of the Demo Company. Expanding a row shows its line items, and a line item its tracking categories.
Then look at the Trace tab beside Preview, because it is the only place the request is visible as it was actually sent:
REQUEST
GET - https://api.xero.com/api.xro/2.0/Invoices?Statuses=AUTHORISED&page=1
...
REQUEST
GET - https://api.xero.com/api.xro/2.0/Invoices?Statuses=AUTHORISED&page=2
Three things are worth confirming there, once, so that you recognise them later:
- The Base Url composed correctly — the reader's
/Invoices?…became a full address. &page=1was appended, and then&page=2. The reader never mentions paging. The behaviour did it, and this is where you find out whether it did it right.- The headers arrived from two places at once —
Acceptfrom the behaviour,AuthorizationandXero-tenant-idfrom the OAuth object. If a service is rejecting a request that looks perfect on the reader, this is the list to read.
When it does not work
- Refresh Schema returns nothing and proposes no changes. The entry point. A path that matches nothing produces no error, because "no records" is a legitimate answer — check it against the response in the Trace tab, and check the slashes are forward slashes.
- A parse error rather than data. Xero answered in XML. The
Accept: application/jsonheader is missing from the behaviour. - Invoices arrive but with no line items. Paging is off on the behaviour, so the summarised form came back.
- Everything is
Text. The sample had nothing to infer from — usually an empty result. Filter to something that returns data and press Refresh Schema again. - Dates are an hour out. The epoch
Datefield rather thanDateString. - A field you can see in the response is not in the grid. It was null or absent in every record of the sample, so detection never saw it. Add it by hand; detection is a starting point and not an inventory.
- The preview is slow and gets slower. Look for
X-DayLimit-Remainingin the trace. If it is falling fast, something is paging further than you meant it to — narrow the filter.
Once the reader previews, it can feed the rest of an integration. The next article covers the case this one cannot handle: data that takes more than one request to assemble.
Verified against IMan 6.1 and the Xero Accounting API, on 2 September 2026.