Appendix 1 – Data Exports (SQL to XML) - Sage 300
Estimated time
Estimated time: 1 Hr
In this exercise you configure an export. It queries the Sage 300 database directly for customers and their ship-to locations, transforms the data a little and writes the result to an XML file.
Method
- Set Up a Shared Database Connection String
- Create the Export
- Add Hierarchy
- Filter the Dataset
- XML Writer
- Create Parent Transactions
- Create Child Transaction Types
Set Up a Shared Database Connection String
To export data from Sage 300 you query its database directly with SQL, which needs a connection string. See Lookups and counters in step 4 of the training.
A shared connection string is defined once and used in Database Readers, Database Writers and Lookups. You maintain it in one place, and integrations are easier to move from one IMan instance to another.
- Go to the Setup tab and press Database Connections.
-
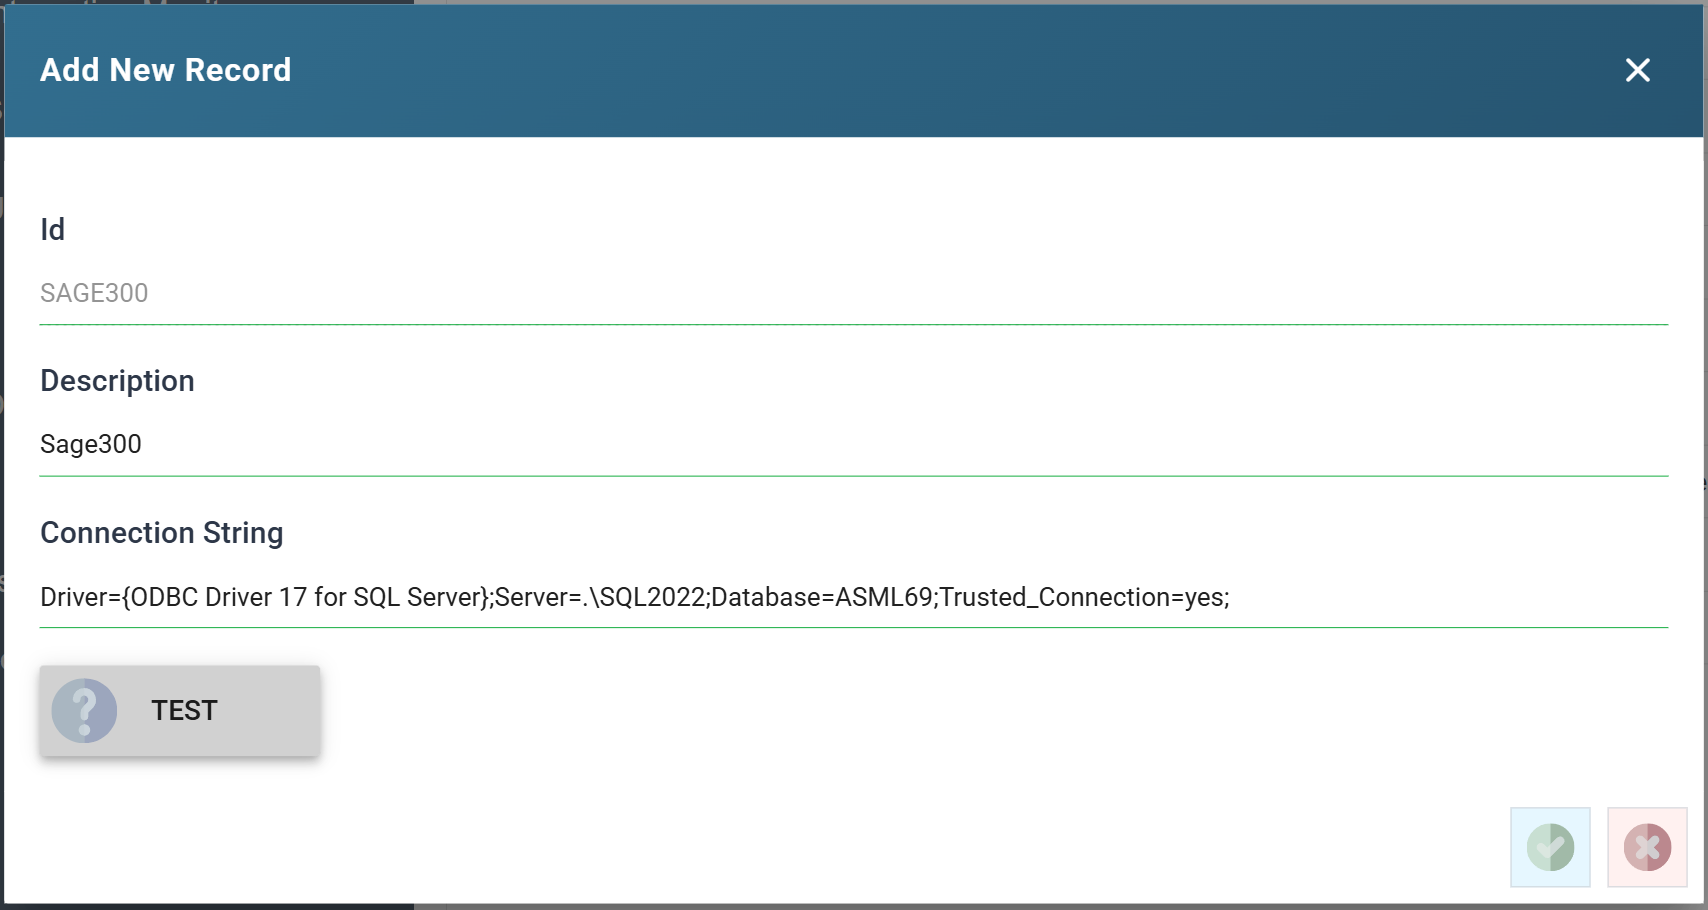
Create a new database connection:
- Enter a Connection ID.
- Enter a Description.
- Enter the corresponding connection string.
Test checks the string before you save it. A green tick on the button means it works. A red cross means it does not, and the database driver's error appears to the right of the button.
-
Press the green tick to save.
- Return to the Design tab.
Create the Export
- Create a new integration.
- Drag a Database Reader onto the integration and double-click it to open
its setup. Give it a Transform Id of
DB Read. The palette names itDatabase Reader, and a chain of four transforms is easier to read when each is named for what it does. -
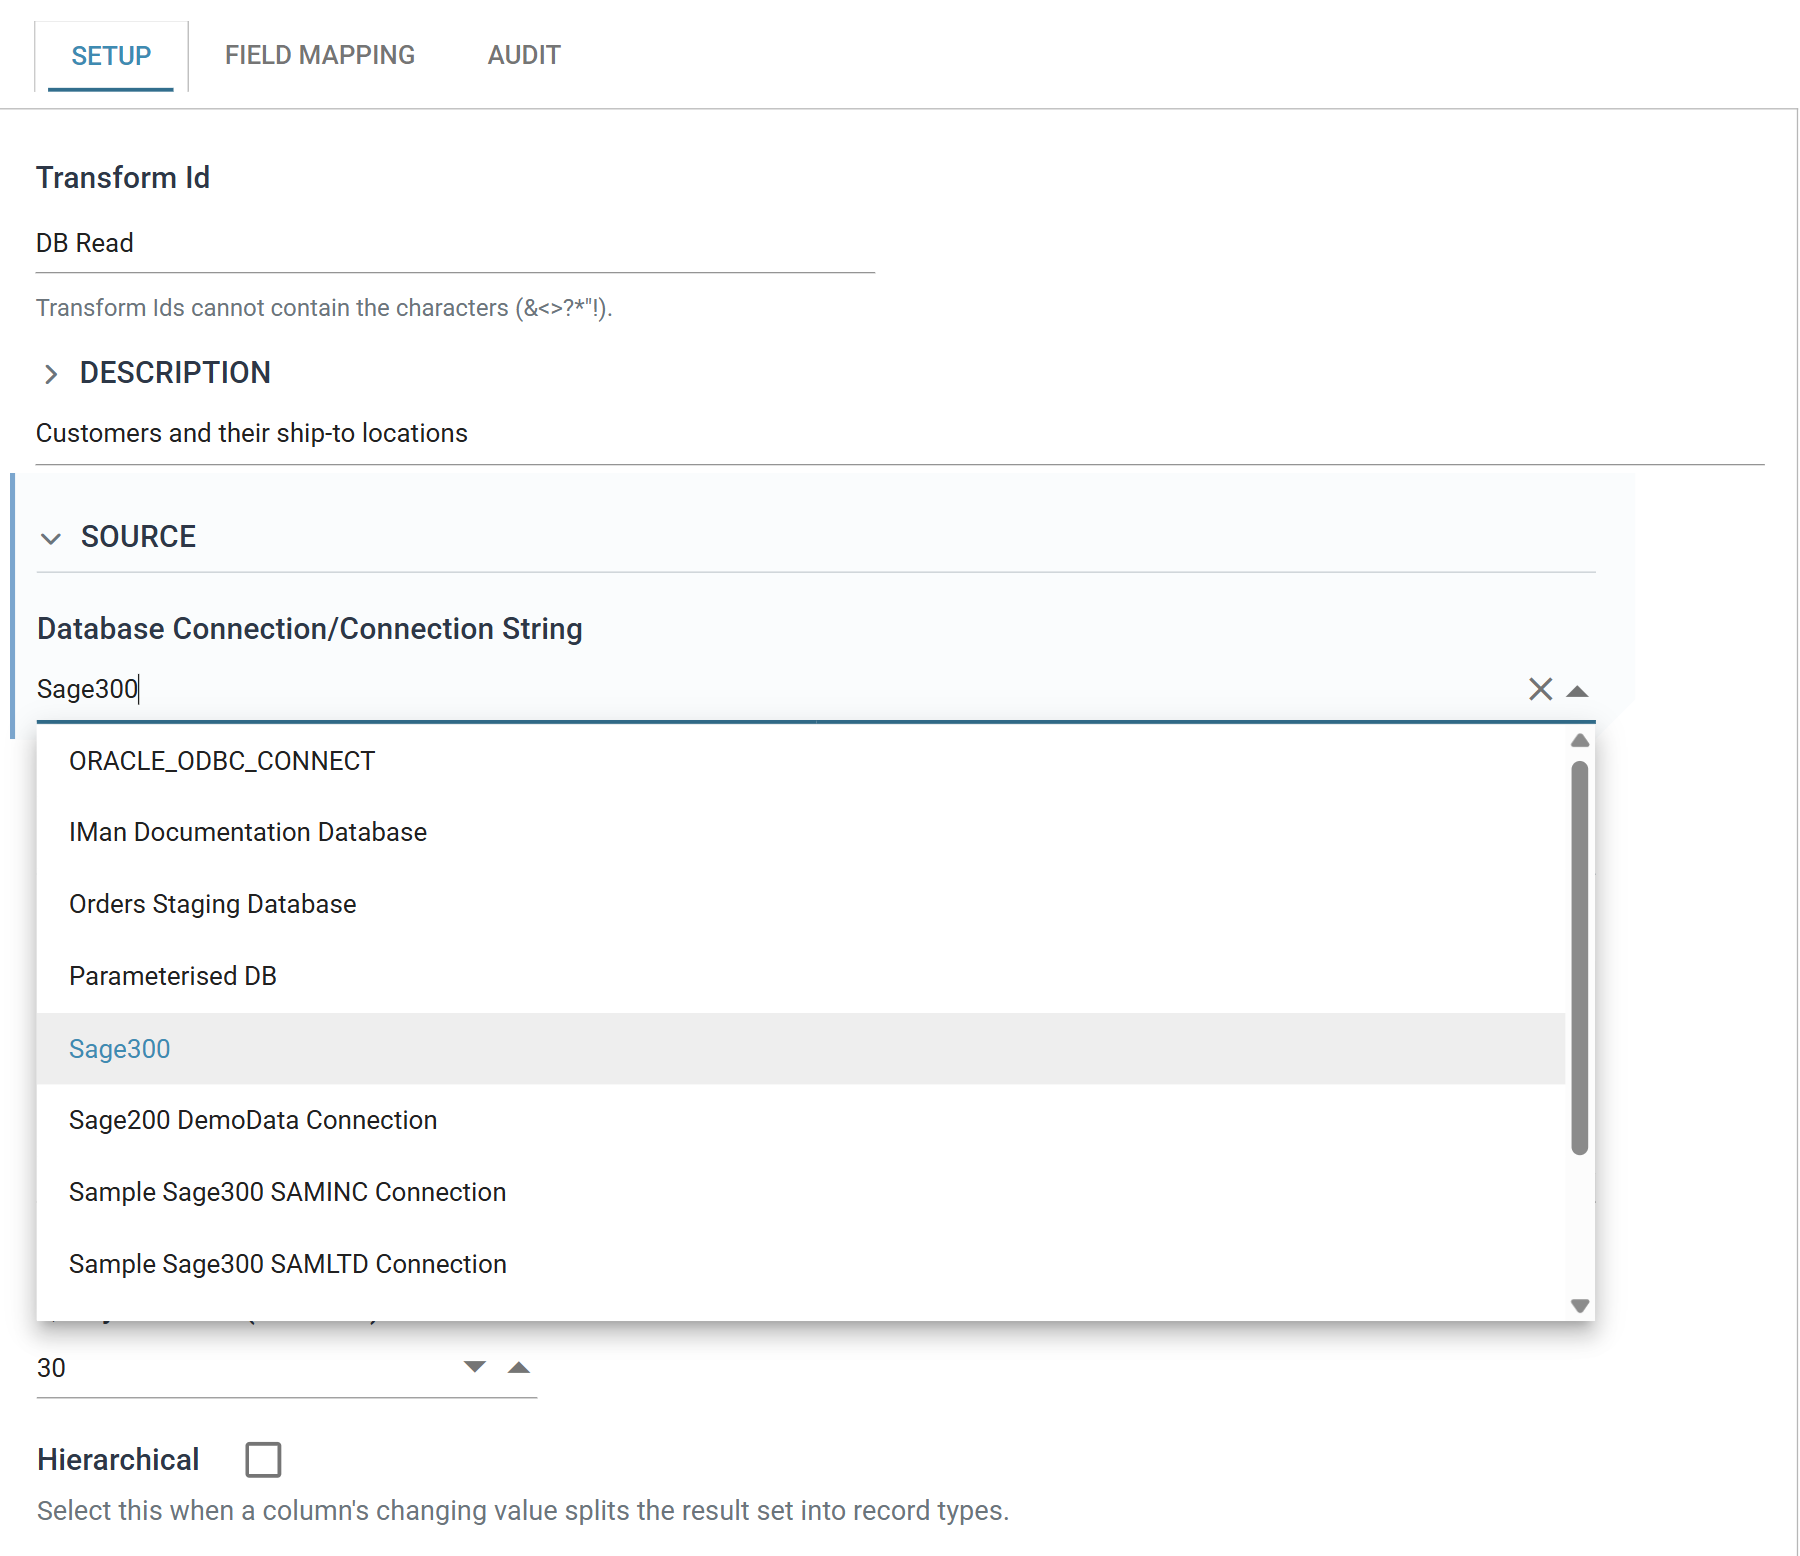
Under Source, select the connection string from the Database Connection drop-down.
-
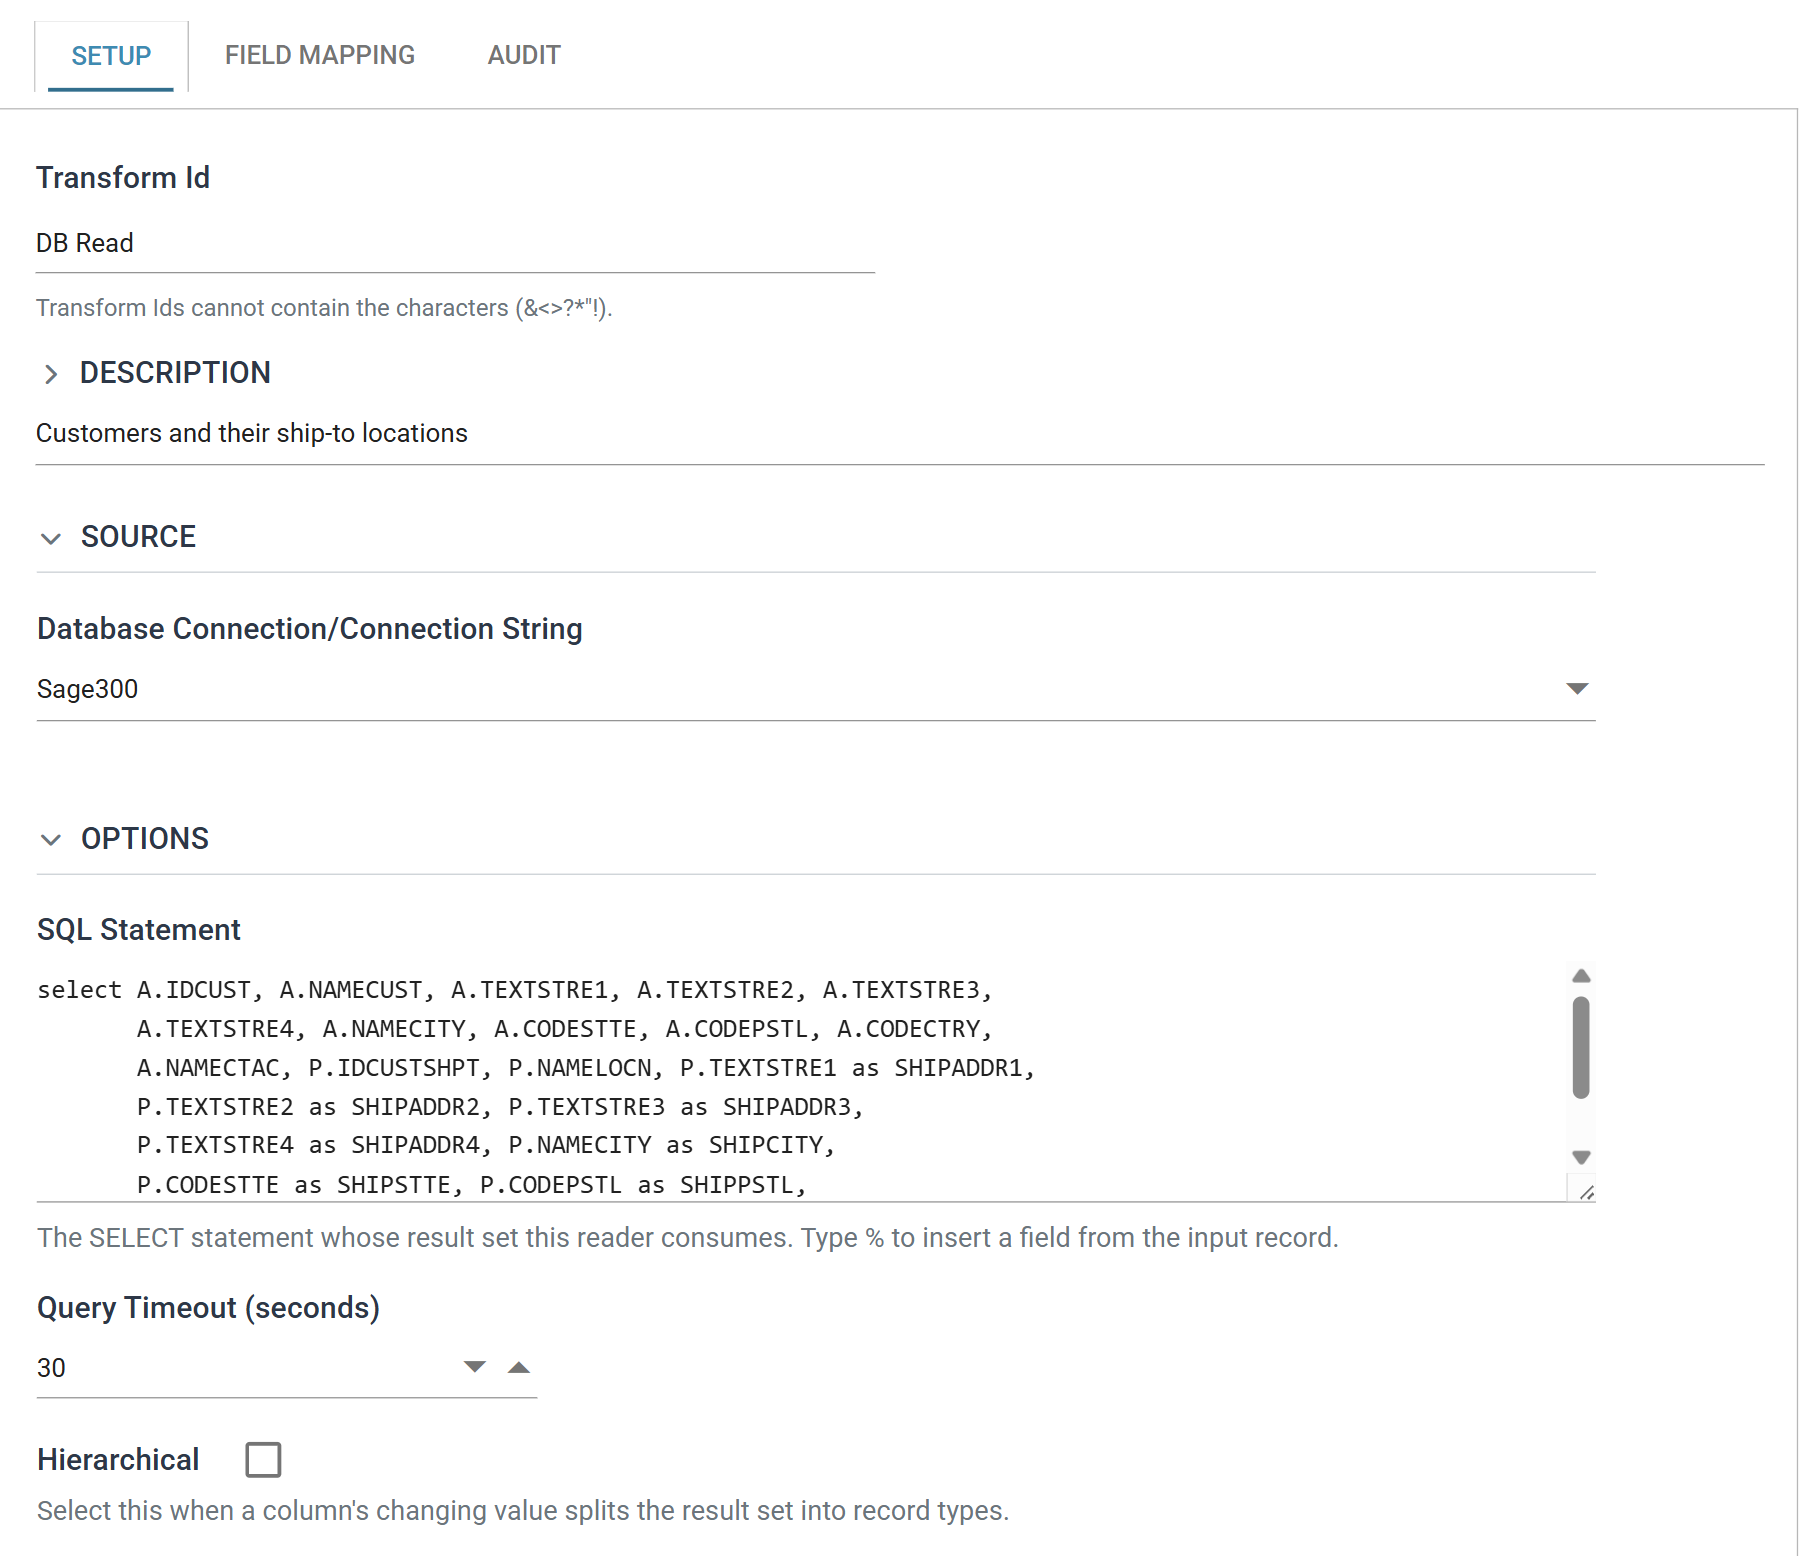
Enter the following into the SQL Statement:
select A.IDCUST, A.NAMECUST, A.TEXTSTRE1, A.TEXTSTRE2, A.TEXTSTRE3,
       A.TEXTSTRE4, A.NAMECITY, A.CODESTTE, A.CODEPSTL, A.CODECTRY,
       A.NAMECTAC, P.IDCUSTSHPT, P.NAMELOCN, P.TEXTSTRE1 as SHIPADDR1,
       P.TEXTSTRE2 as SHIPADDR2, P.TEXTSTRE3 as SHIPADDR3,
       P.TEXTSTRE4 as SHIPADDR4, P.NAMECITY as SHIPCITY,
       P.CODESTTE as SHIPSTTE, P.CODEPSTL as SHIPPSTL,
       P.CODECTRY as SHIPCTRY
from ARCUS A left outer join ARCSP P on A.IDCUST = P.IDCUST
The join is an outer join, so the query still returns a customer with no ship-to location. The Filter removes the empty ship-to records later.
-
Press Refresh.
-
Press the Field Mapping tab and rename the transaction to
Customerswith the pencil beside it in the Transaction panel. The rename changes only the display name. The id beside it staysroot.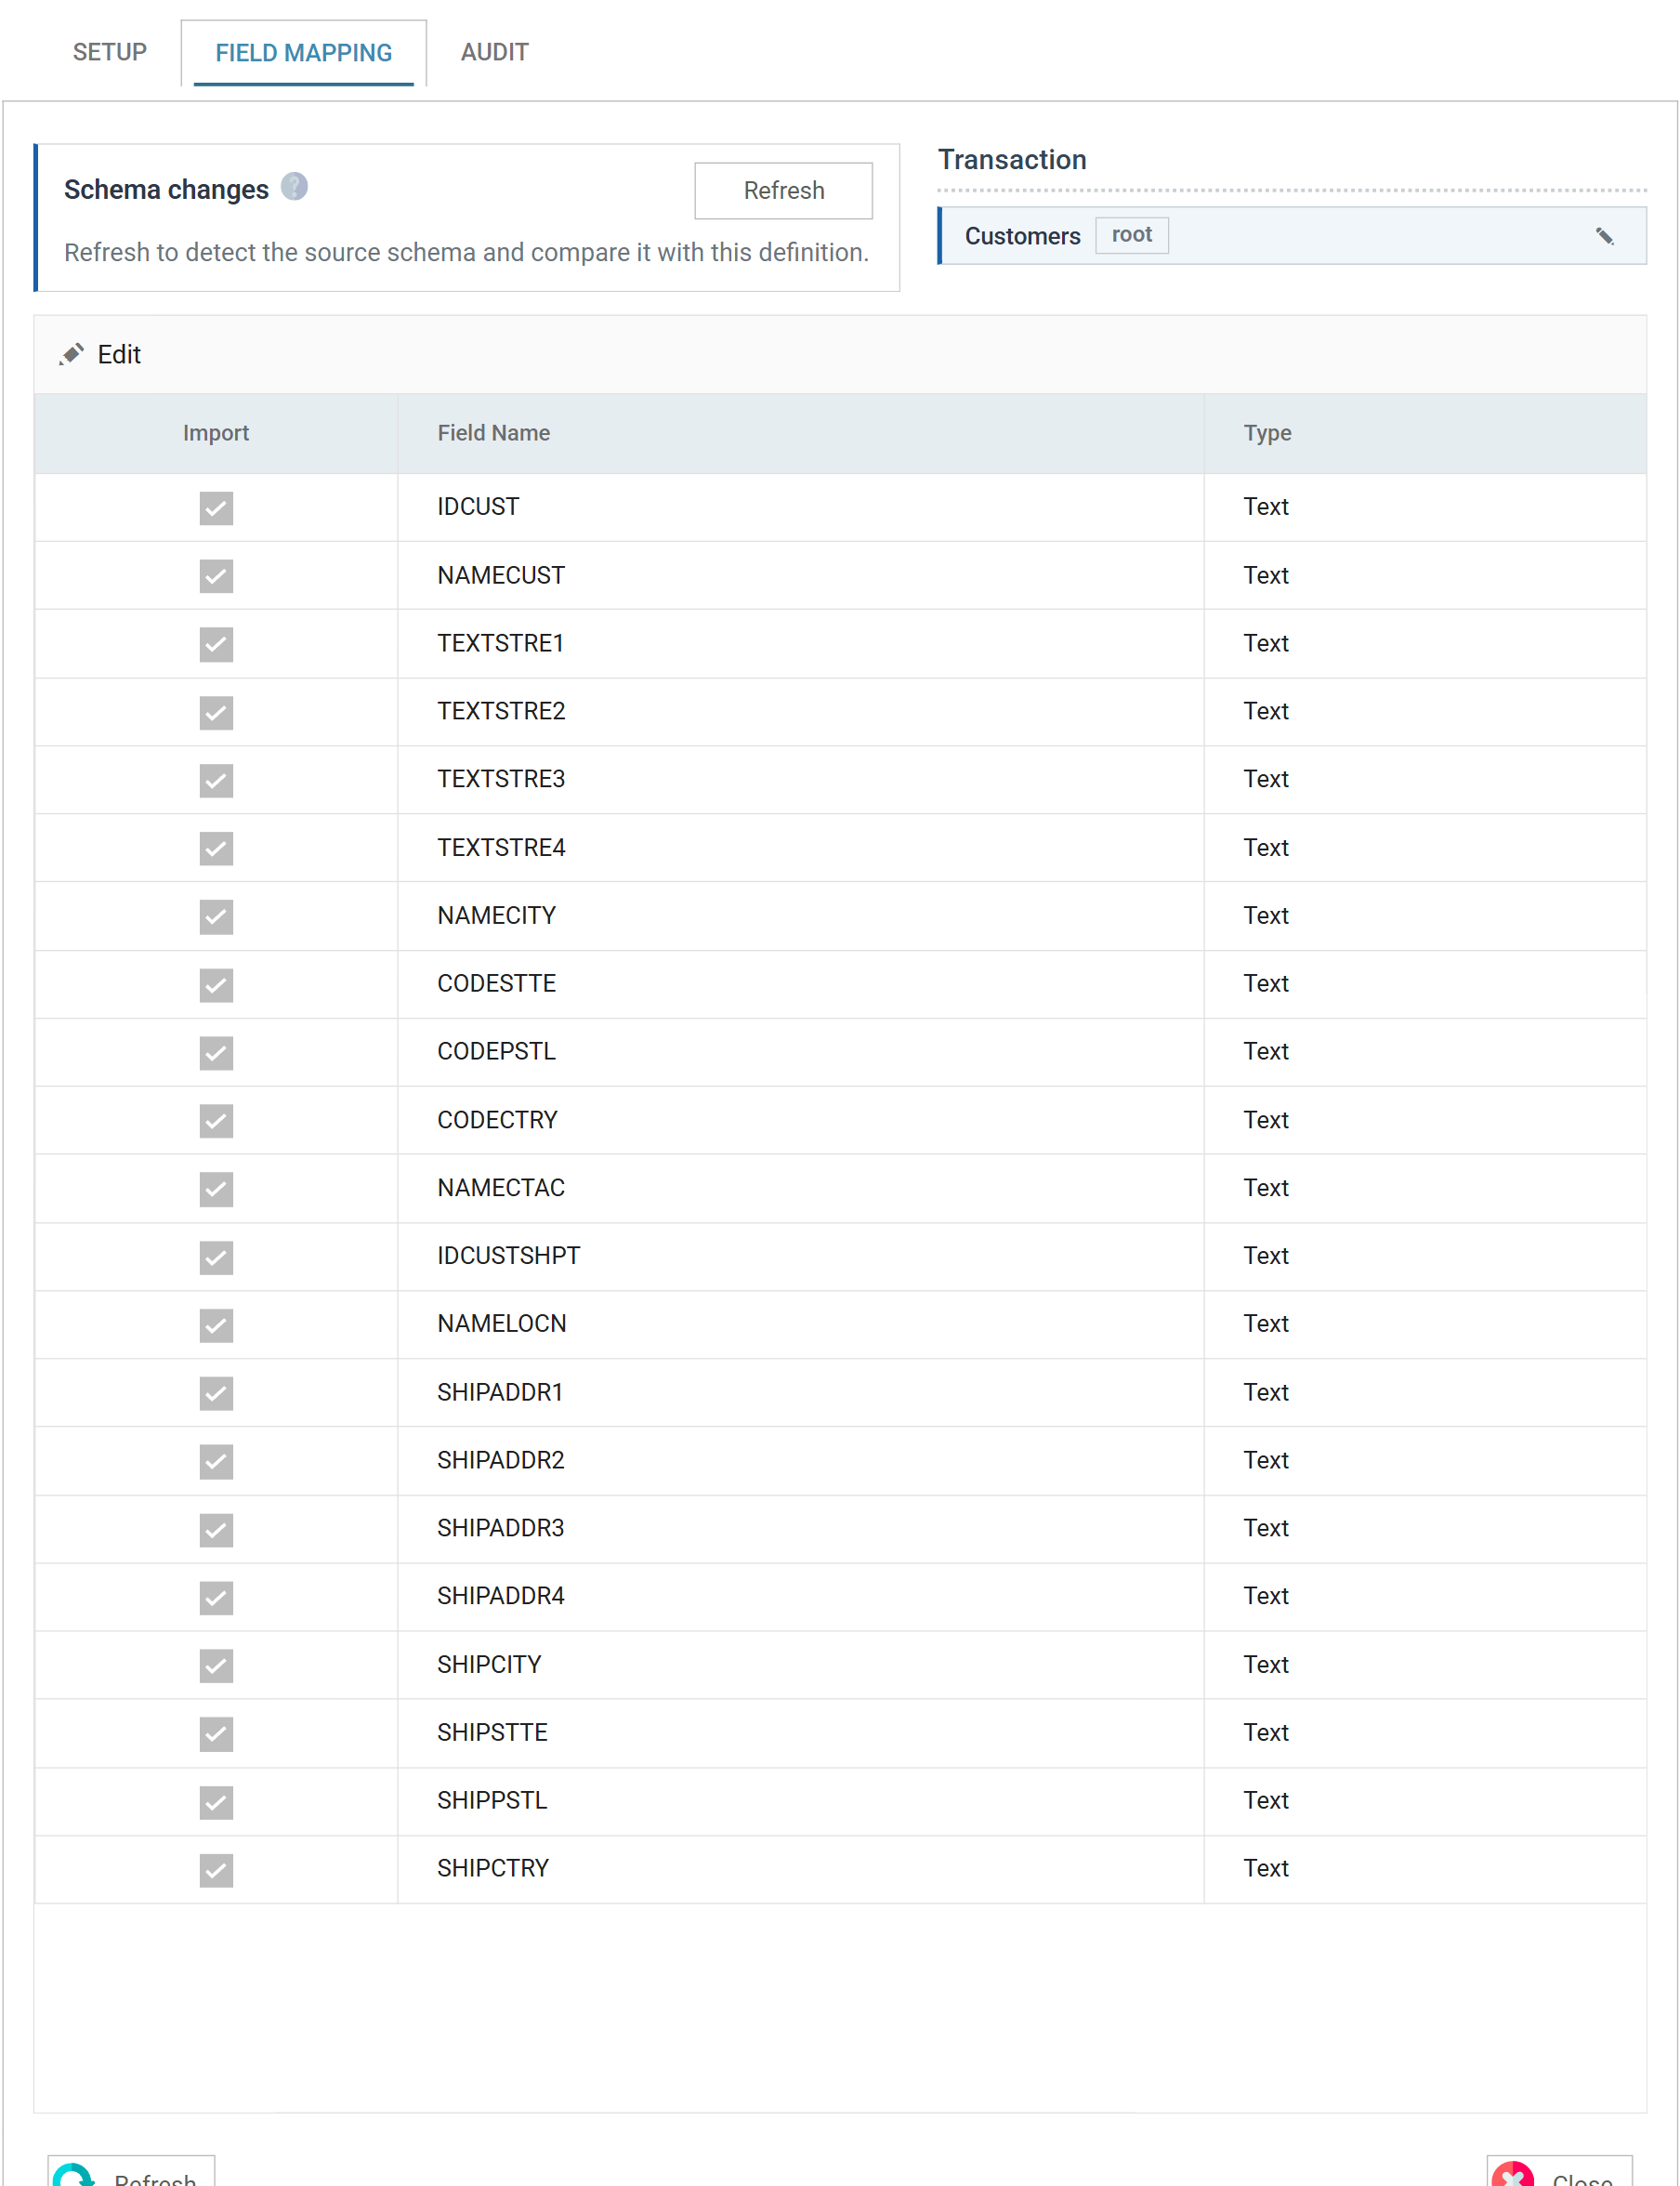
-
Go back to the Setup tab.
-
Press Refresh. The preview shows
Customers: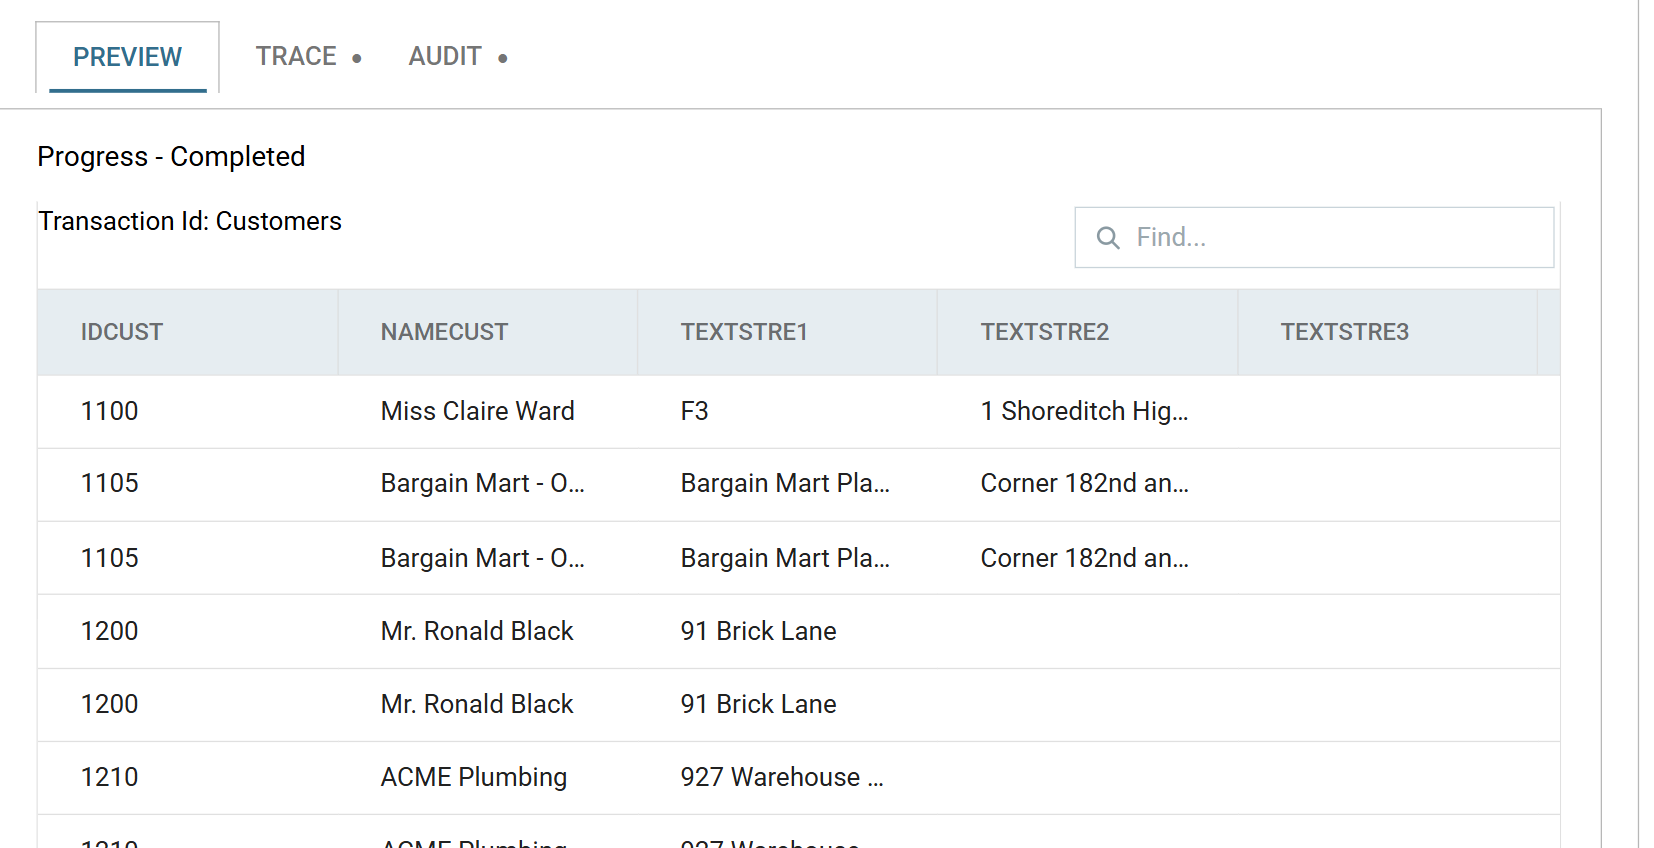
-
Press Close. A transform pane has no Save of its own. Closing it commits the pane to the integration, and the integration's own Save then stores it.
Add Hierarchy
-
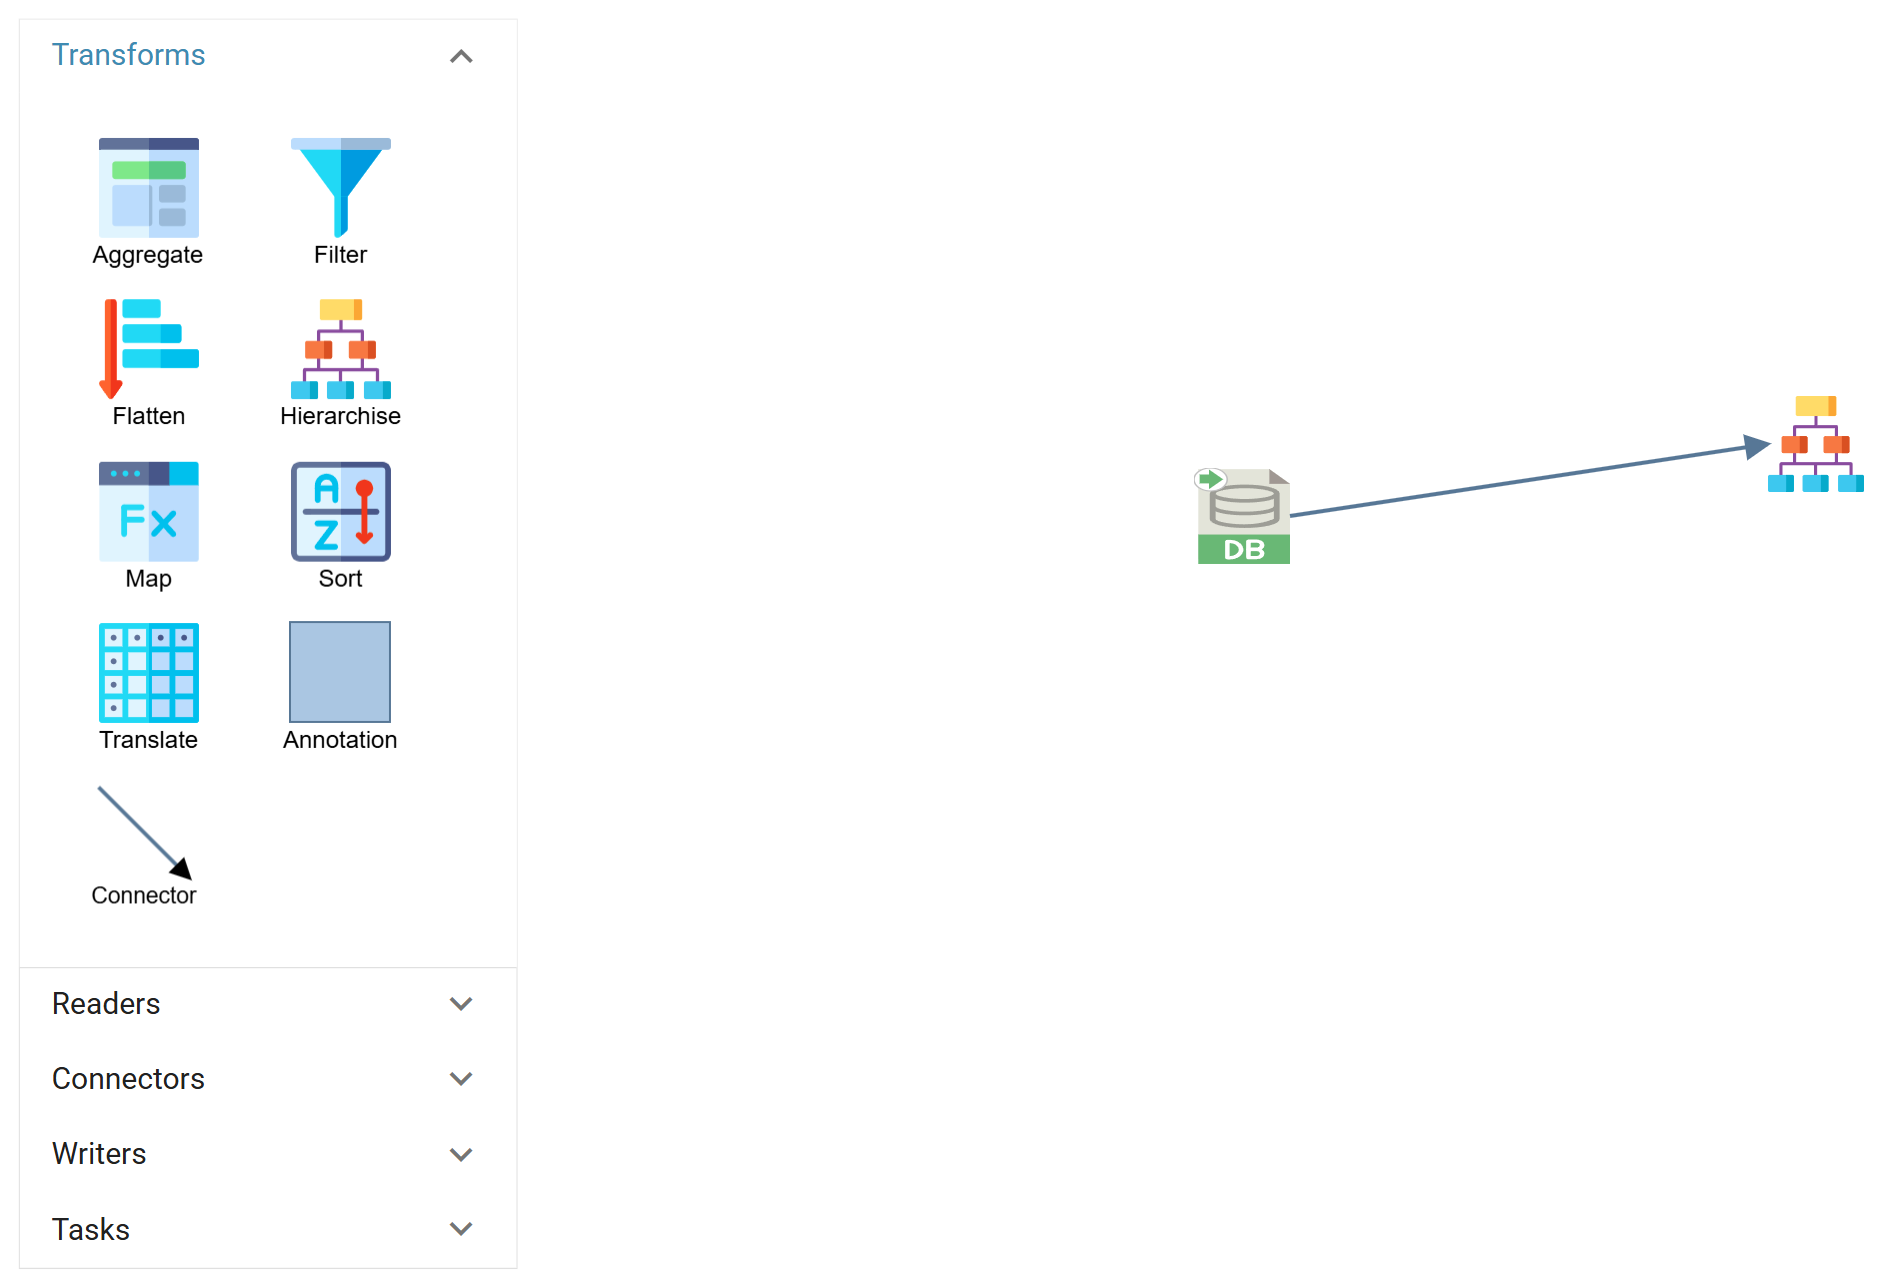
Drag a Hierarchy transform onto the integration, connect it to the Read transform, and double-click it to open.
-
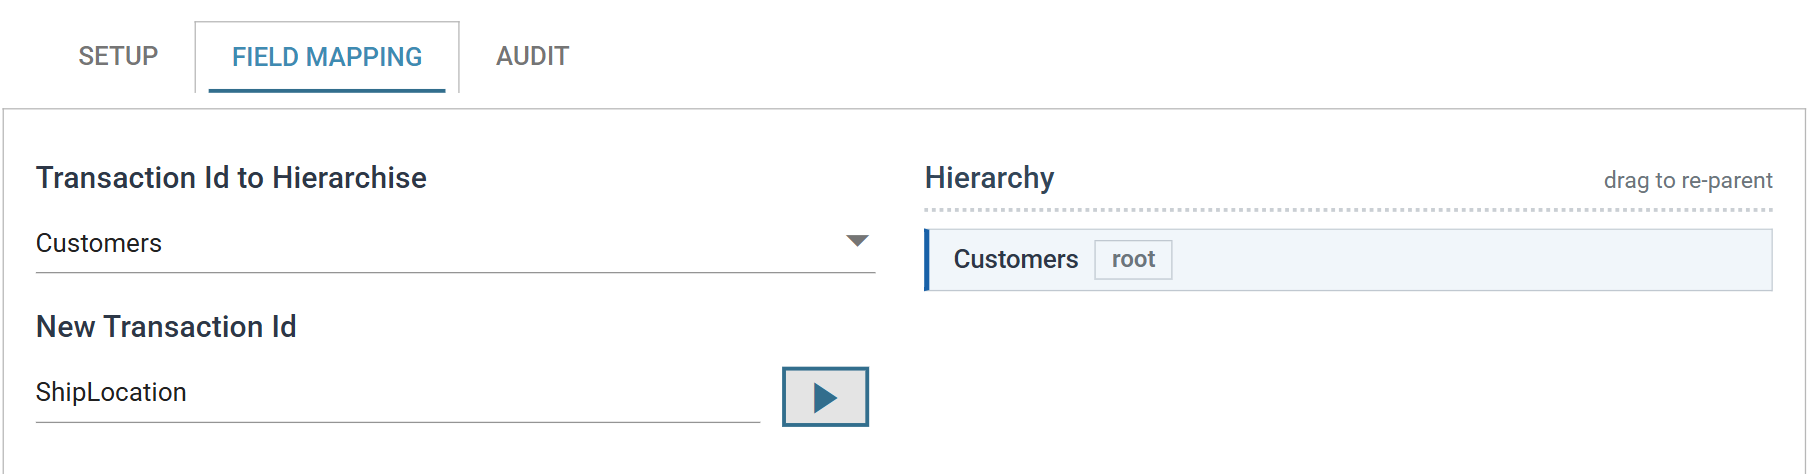
Press the Field Mapping tab. Transaction Id to Hierarchise already reads
Customers. IMan chooses it for you because the Read transform has only one transaction. -
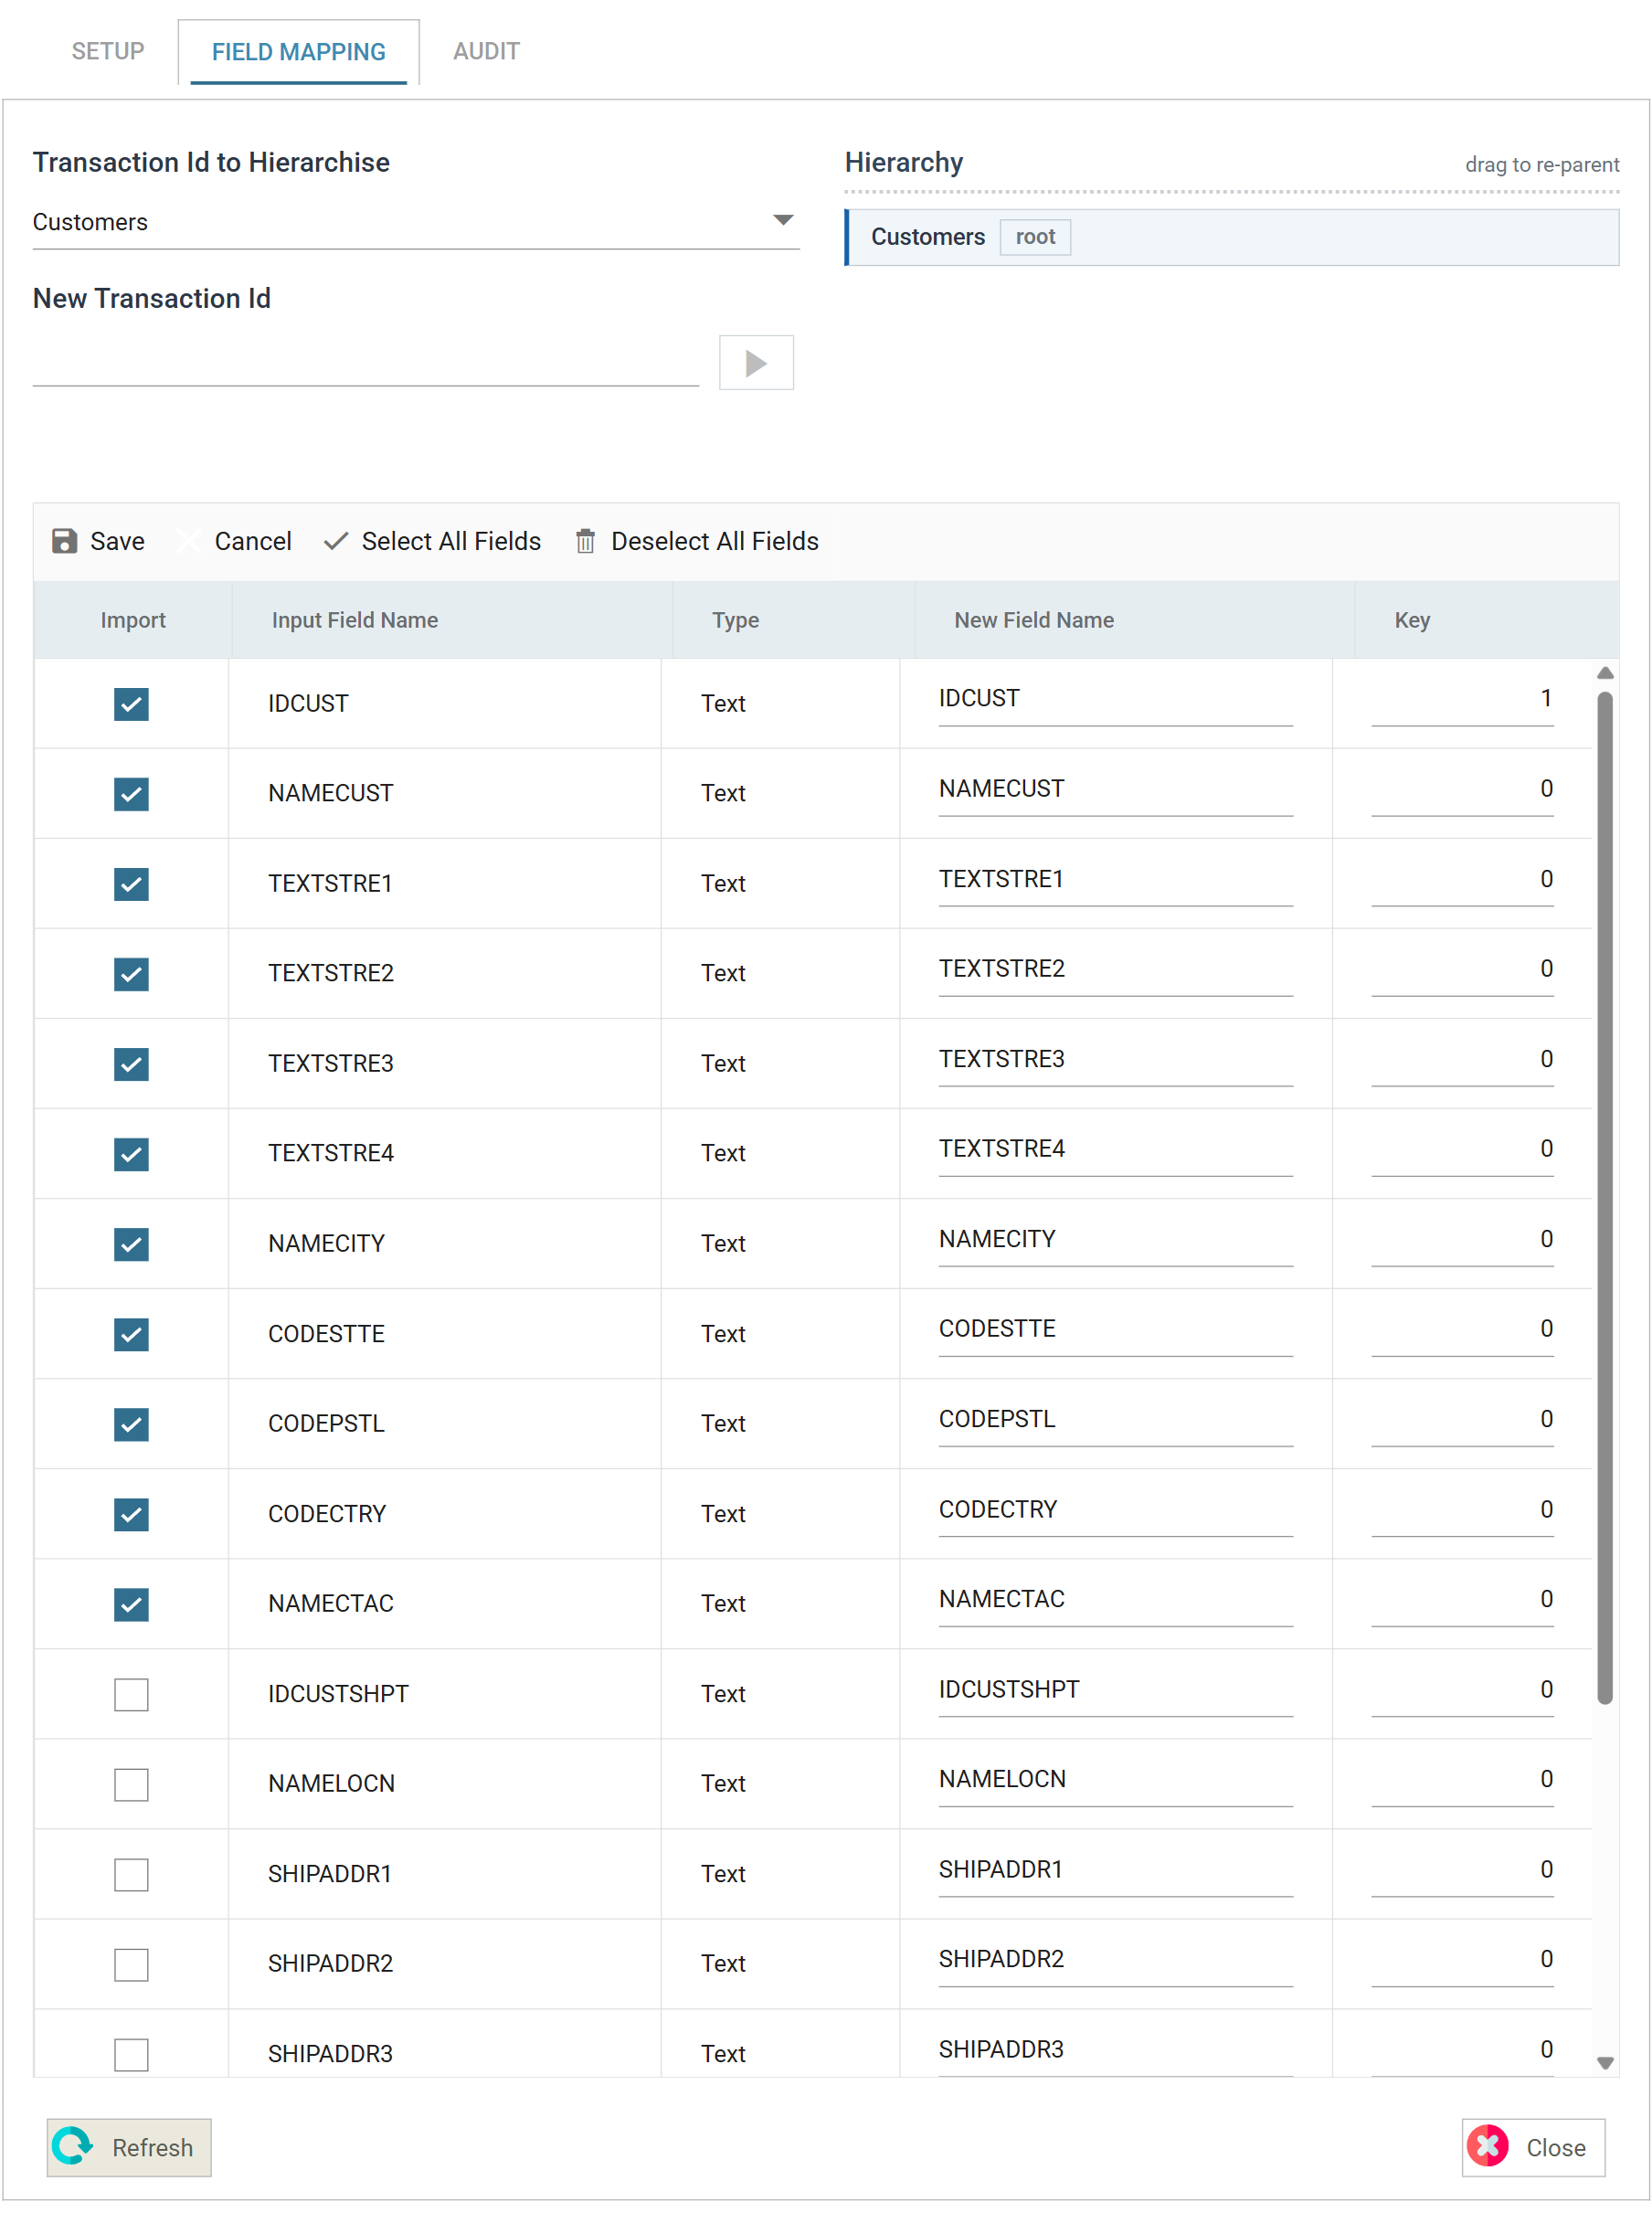
Press Edit, then set the key field and deselect the detail fields:
Field Setting IDCUSTKey field 1Ship-to fields Deselect all -
Press Save on the grid's toolbar.
The confirmation looks worse than it is
When you save with fields deselected, a Remove Fields prompt lists each of them and says they "will be deleted from the transform". IMan removes them only from the records this transaction passes downstream. The fields stay in the grid, unticked, and you can still select them on the child you create in the next step. Answer OK and carry on.
-
Select
Customersin the Hierarchy tree on the right. - In the New Transaction Id textbox enter
ShipLocation. -
Press the add button, the triangle beside the textbox (Add under the selected transaction). It stays disabled until the textbox has a name in it. It adds the new transaction under the selected one, so do not skip step 5.
-
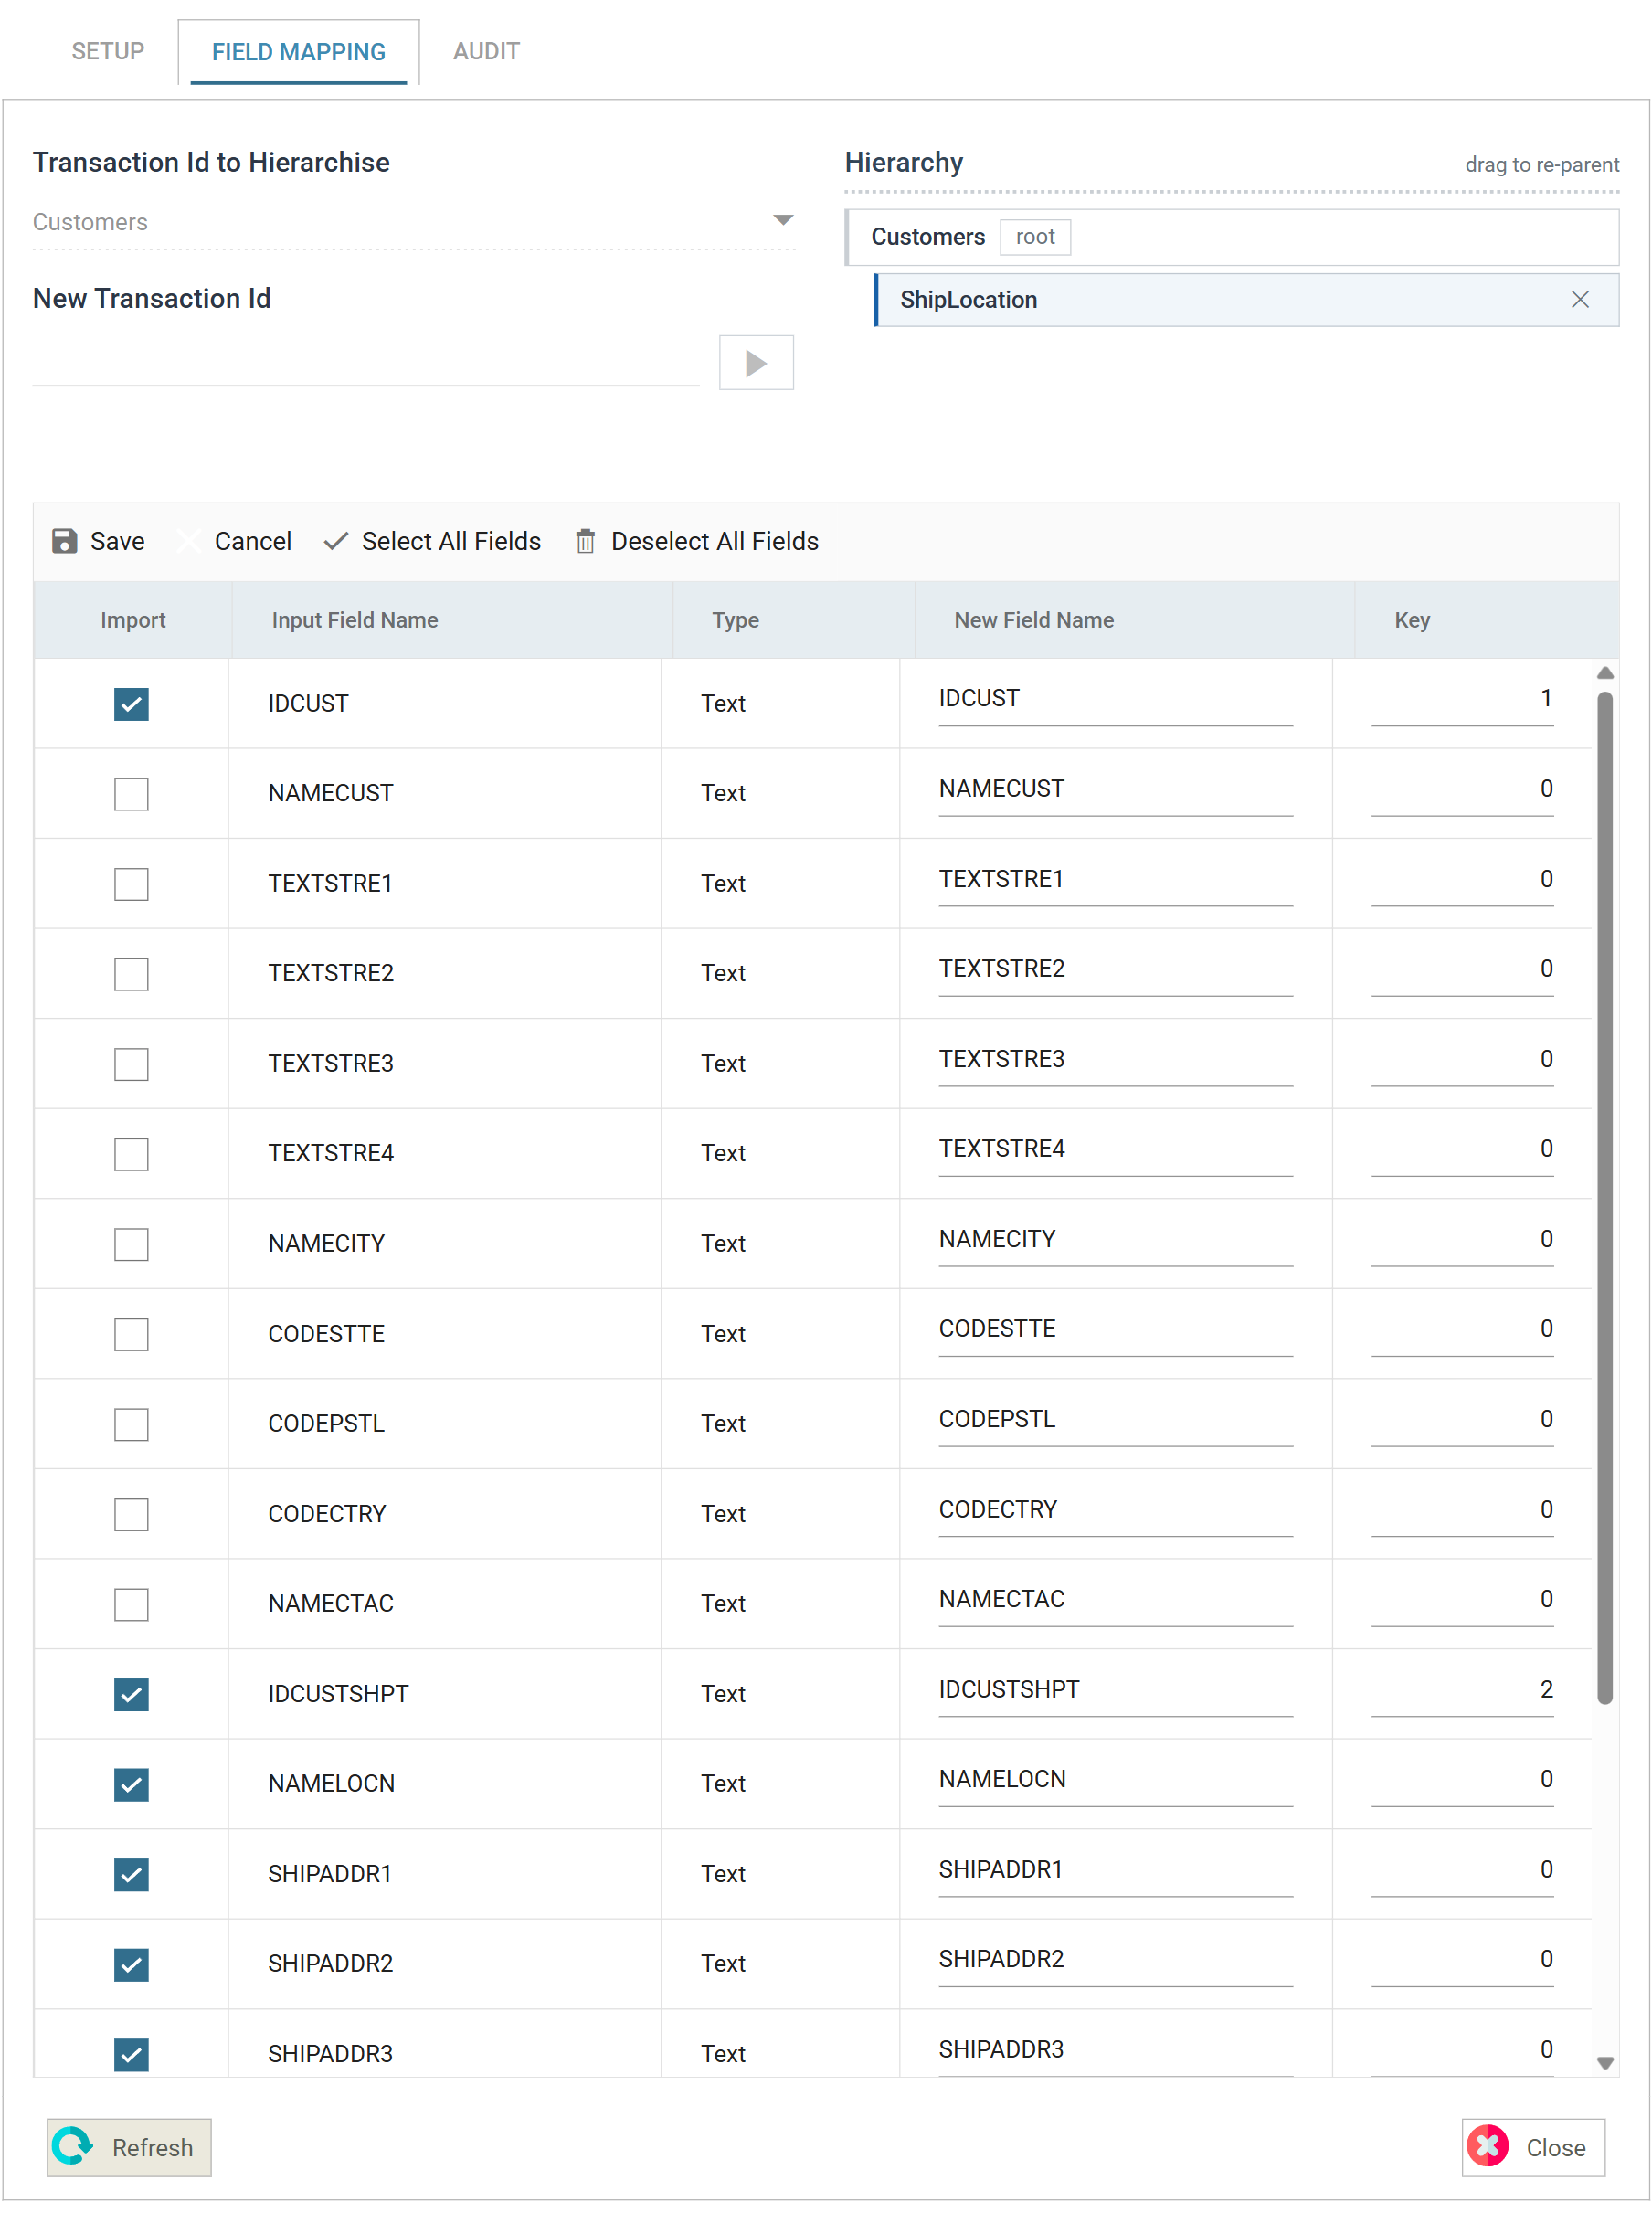
Press Edit, then select the detail fields and set the key fields for the new transaction:
Field Setting IDCUSTSelect, key field 1Ship-to fields Select all IDCUSTSHPTKey field 2 -
Press Save. The same Remove Fields prompt appears for the customer-only fields. Answer OK.
-
Press Refresh.
-
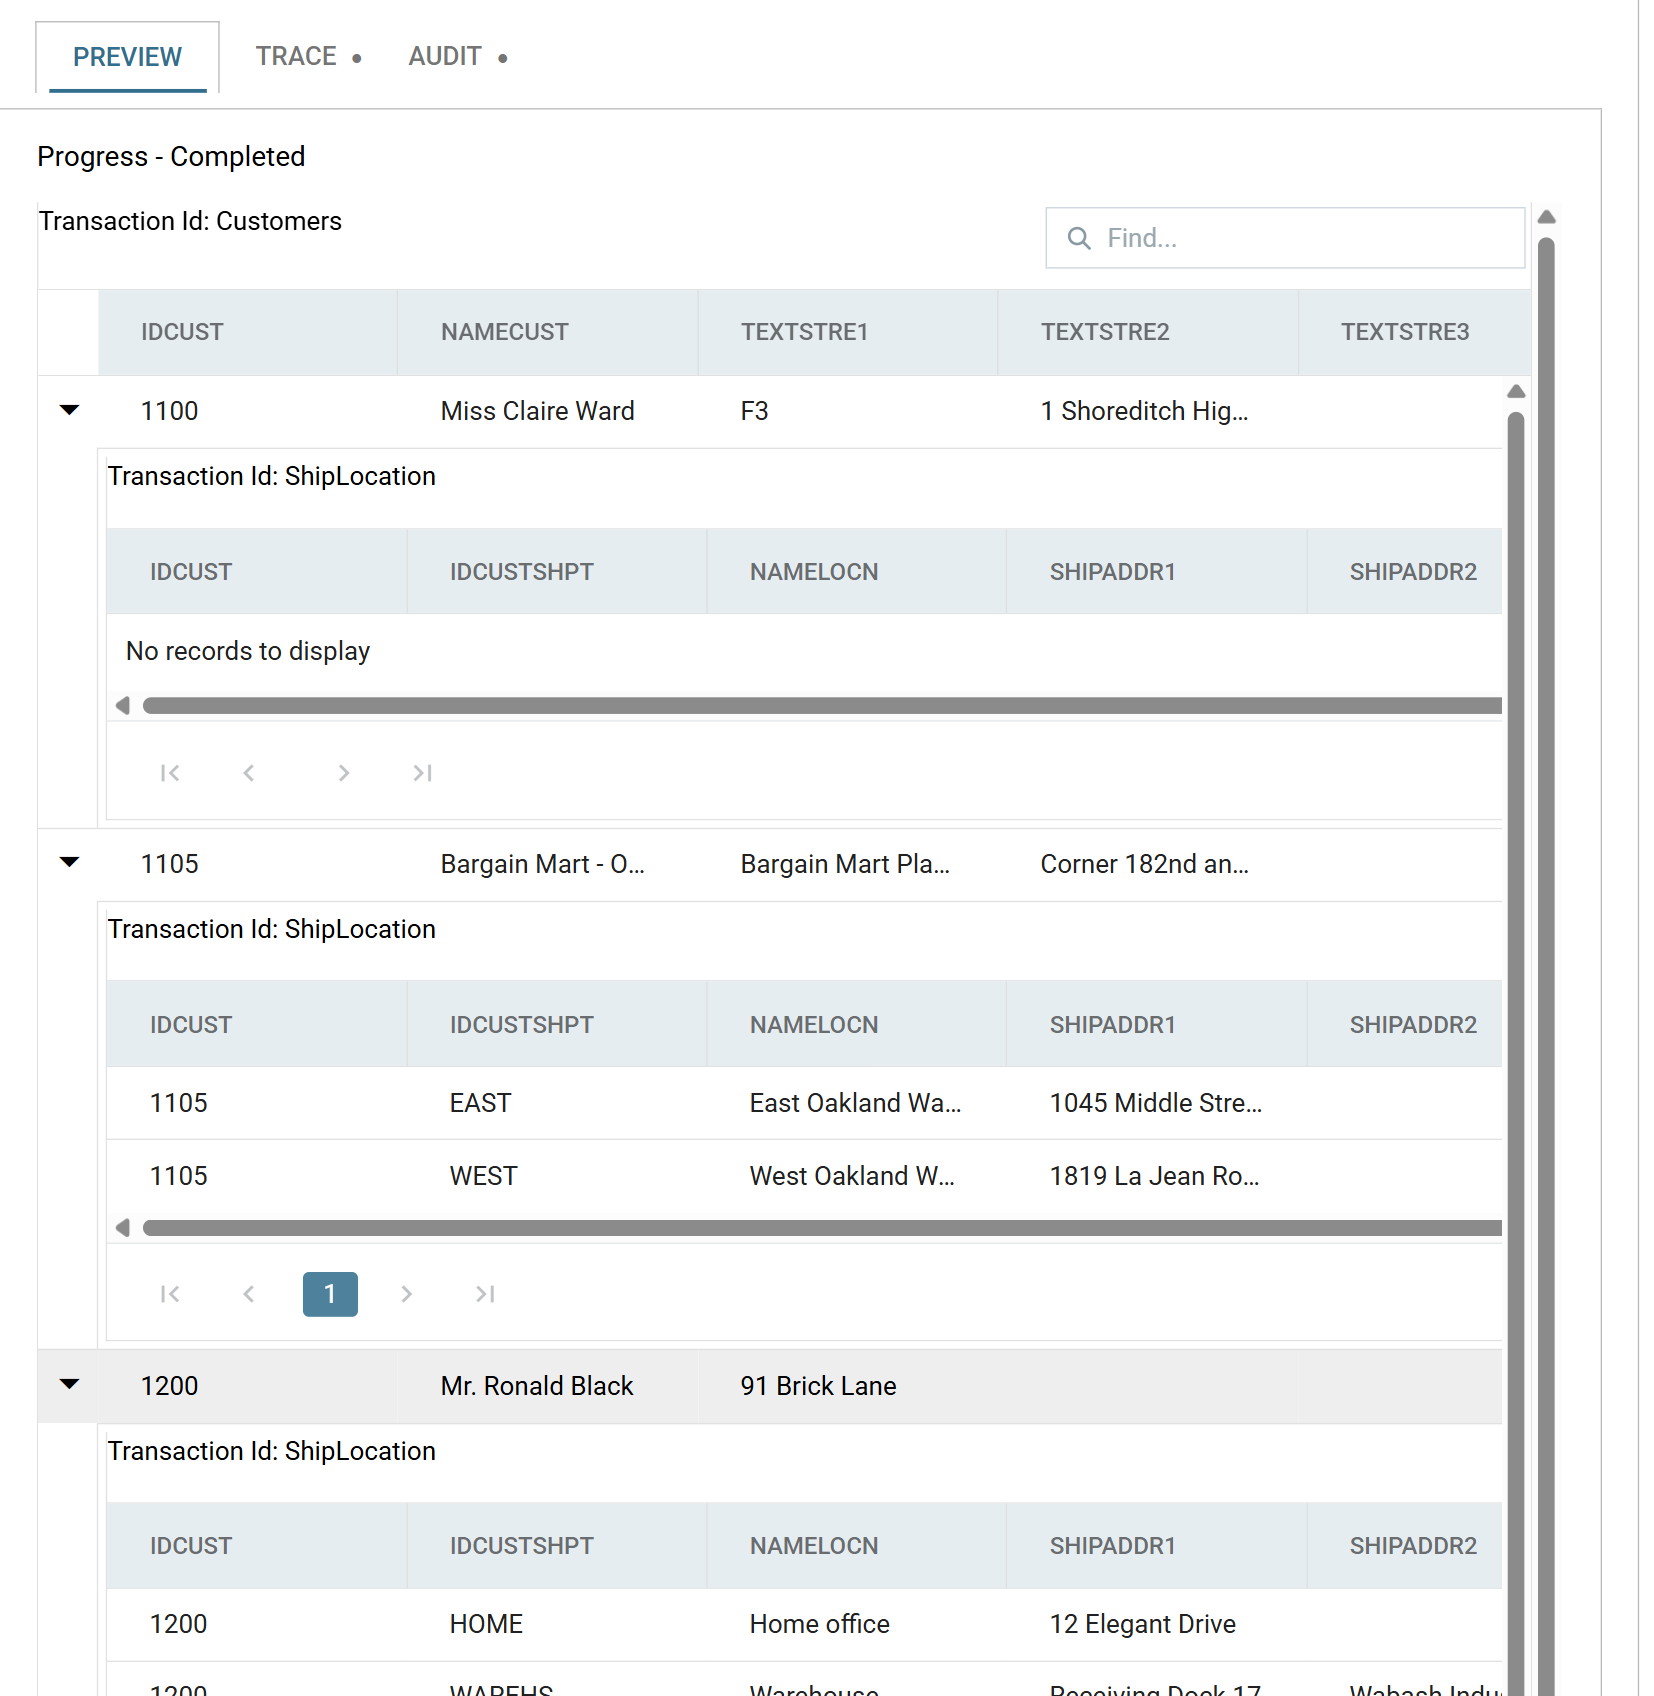
Expand some of the records. Some customers have an empty ship-to location. This is expected, because:
- the SQL query uses a left outer join
- where there are no ship-to records, the query still returns the customer record, with null or empty ship-to values.
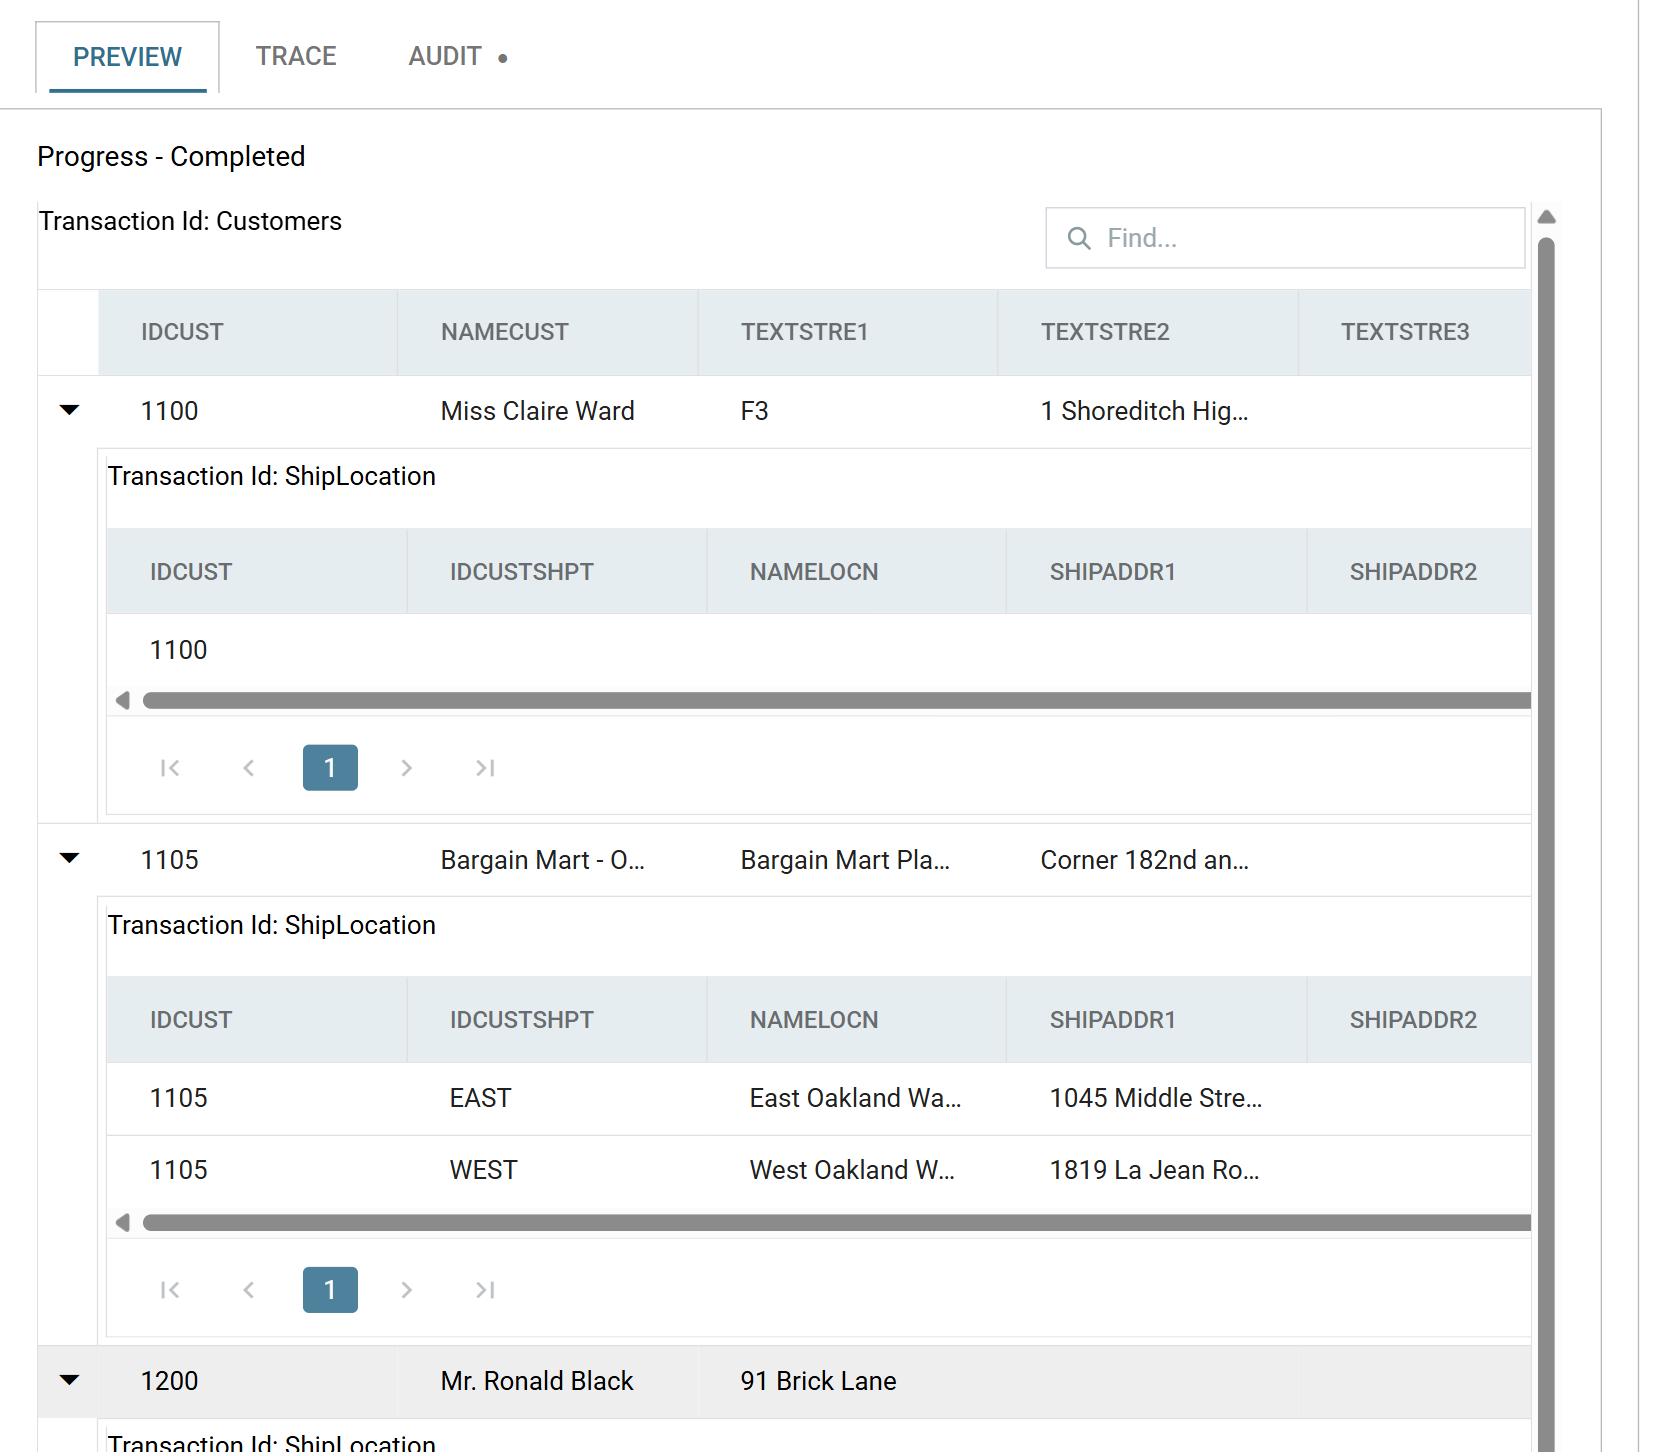
In the next step a Filter transform removes the empty records.
Filter the Dataset
-
Add a Filter transform to the integration, connect it to the Hierarchy transform, and double-click it to open.

-
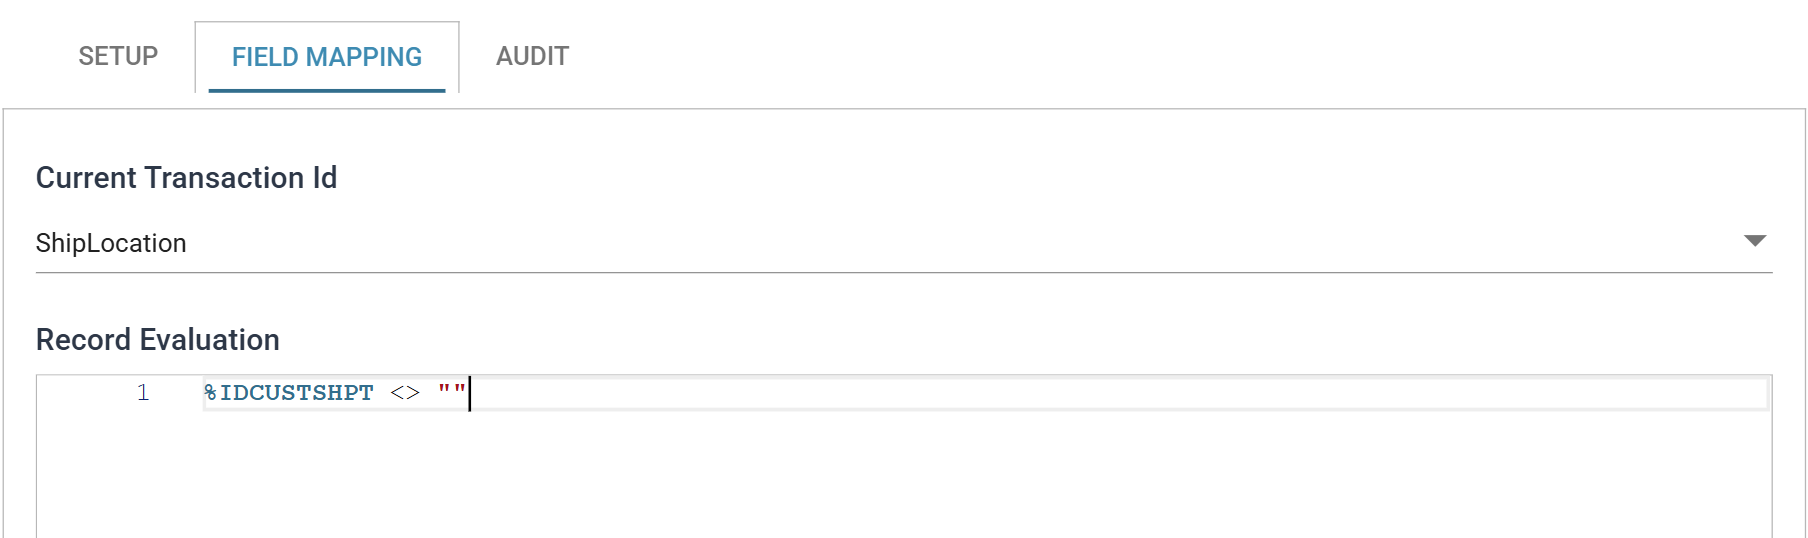
Move to the Field Mapping tab and select the
ShipLocationtransaction. -
Enter the filter:
-
Click outside the editor to commit the filter, then press Refresh. The empty rows are gone.
XML Writer
-
Add an Xml Writer to the integration and connect it to the Filter transform.

-
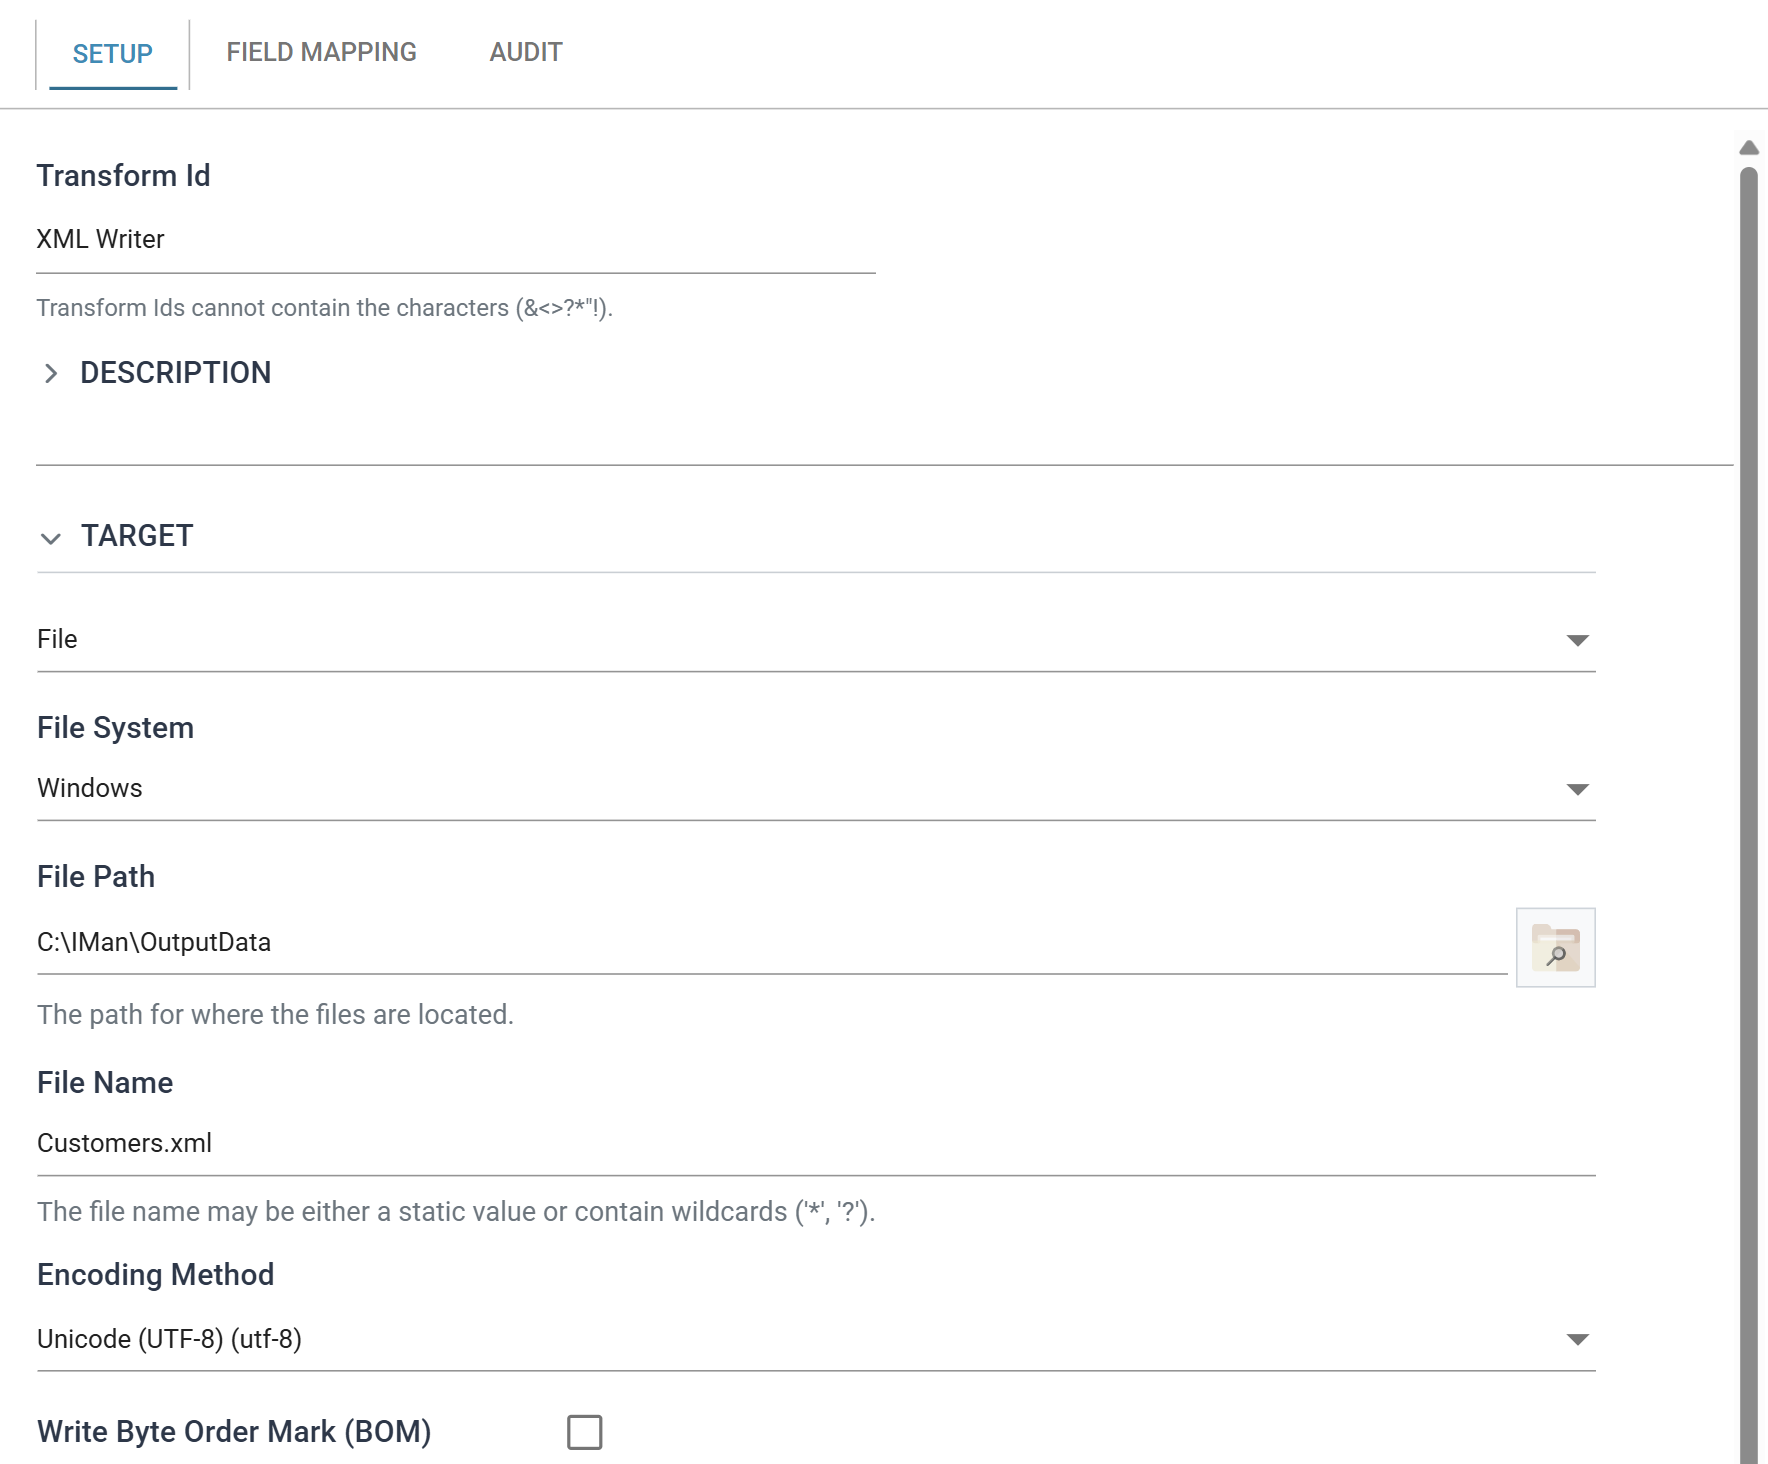
Double-click it to open, and set the file options:
Field Value Target The destination of the file. For training, select File File Path C:\IMan\OutputDataFile Name Customers.xmlLeave the other settings as they are.
Create Parent Transactions
- Open the Field Mapping tab.
-
Set the Initial XPath to
/Customers.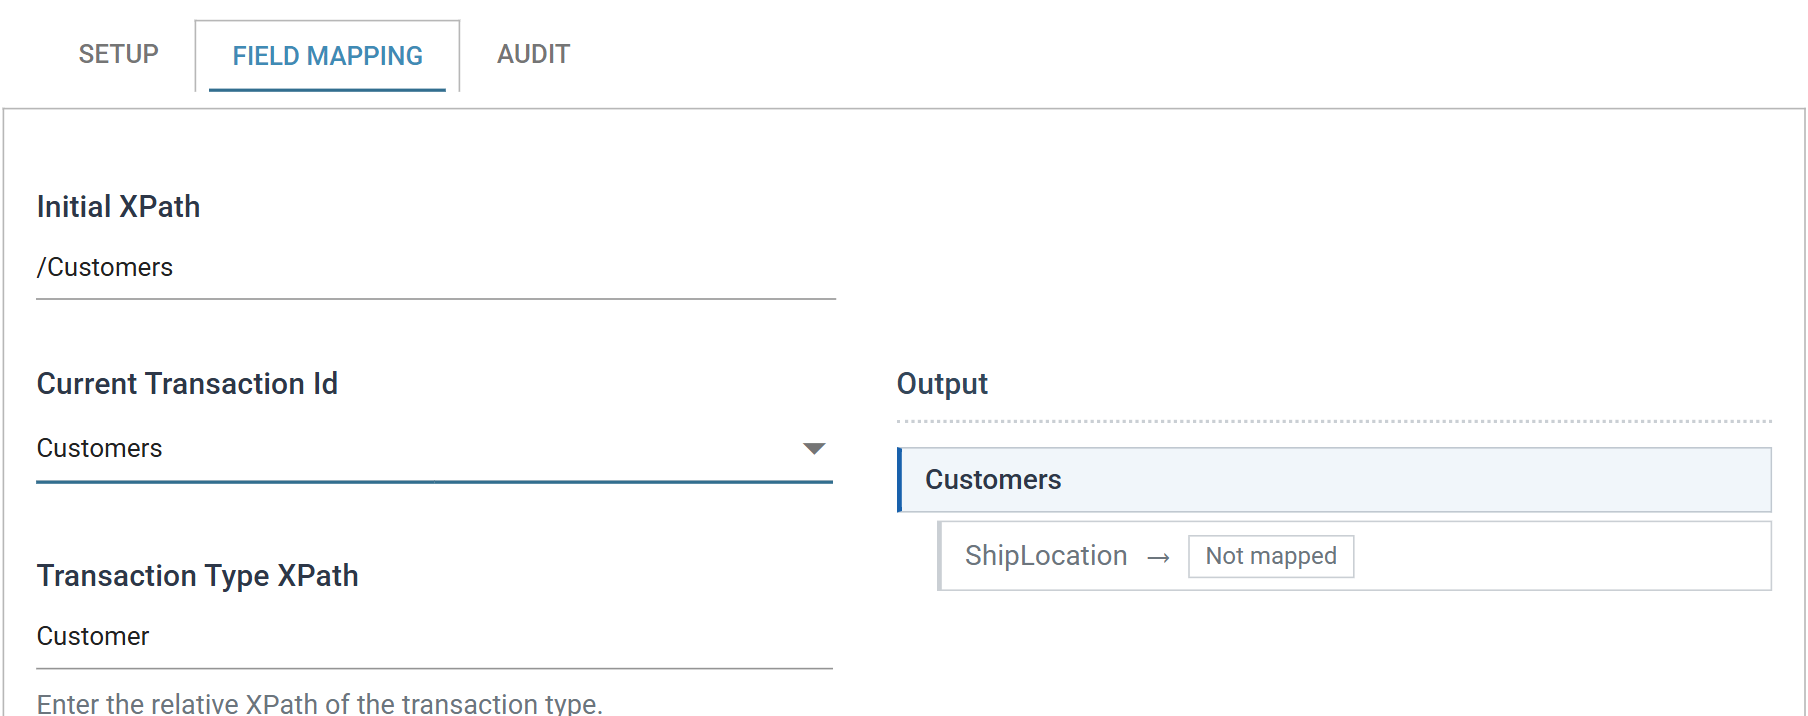
-
Set the Transaction Type XPath to
Customer, the singular node that repeats inside/Customers.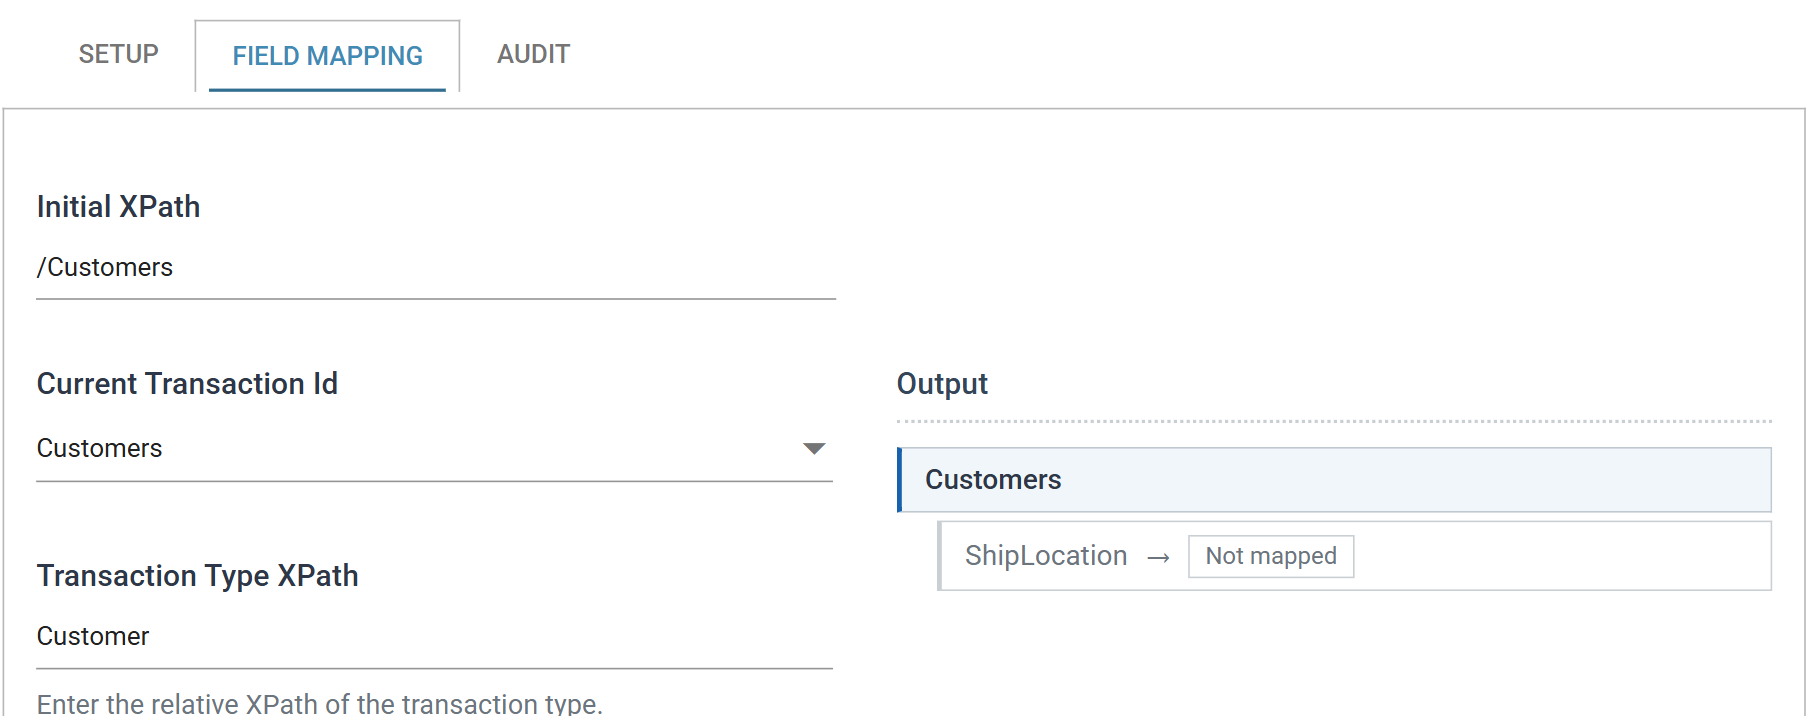
-
Double-click the
IDCUSTrow to edit it, tick Export Field, and set its XPath toCustomerId. A newly added Xml Writer has Export Field unticked on every field, so each row needs both settings.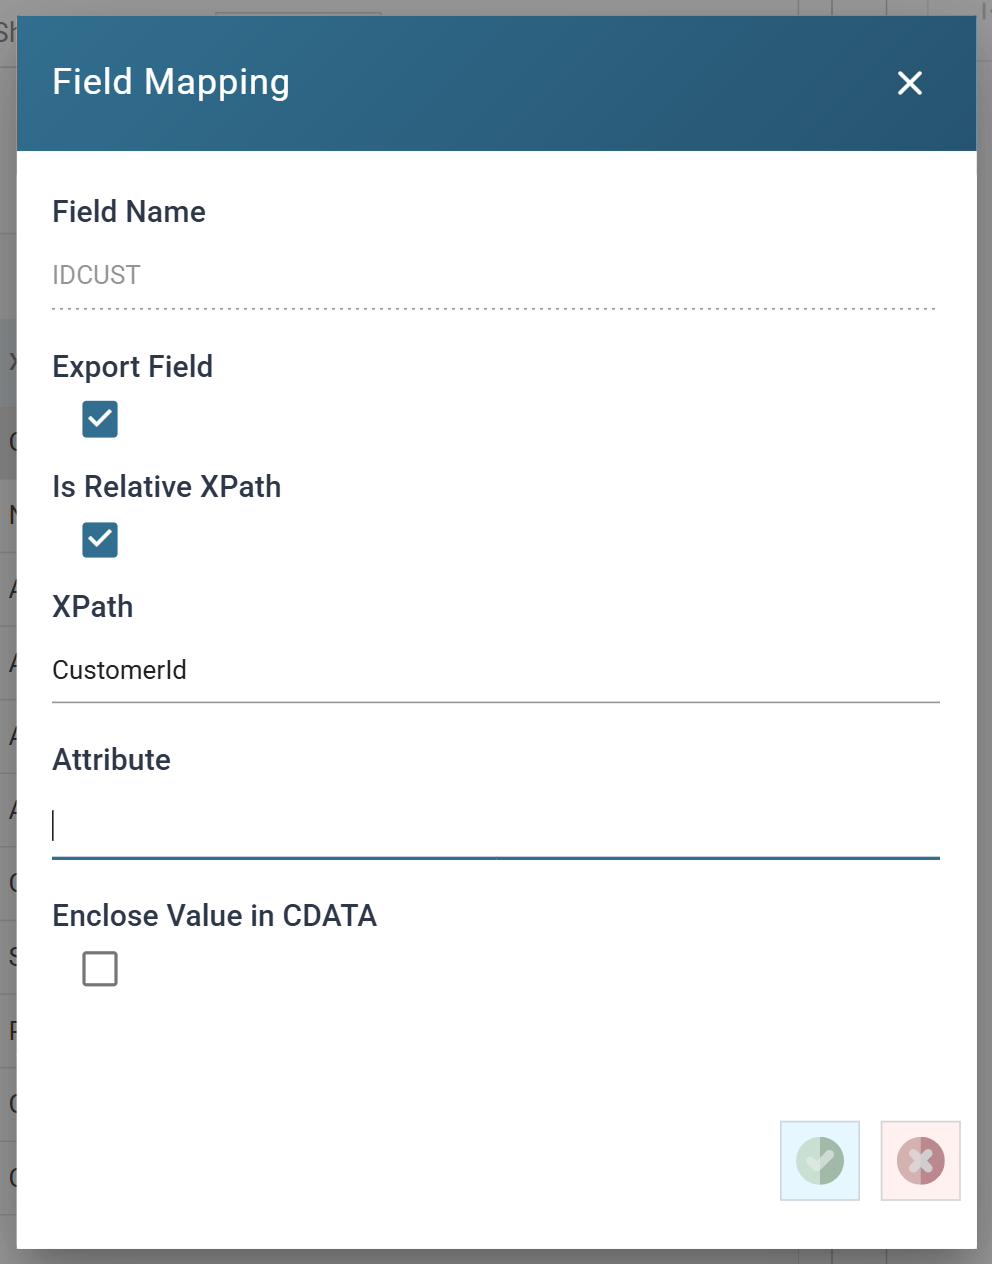
-
Press the green tick to save.
-
Repeat for each of the remaining fields, ticking Export Field on every one, and set the XPaths as below:
Field Name XPath IDCUST CustomerId NAMECUST Name TEXTSTRE1 Address1 TEXTSTRE2 Address2 TEXTSTRE3 Address3 TEXTSTRE4 Address4 NAMECITY City CODESTTE State CODEPSTL PostCode CODECTRY Country NAMECTAC Contact 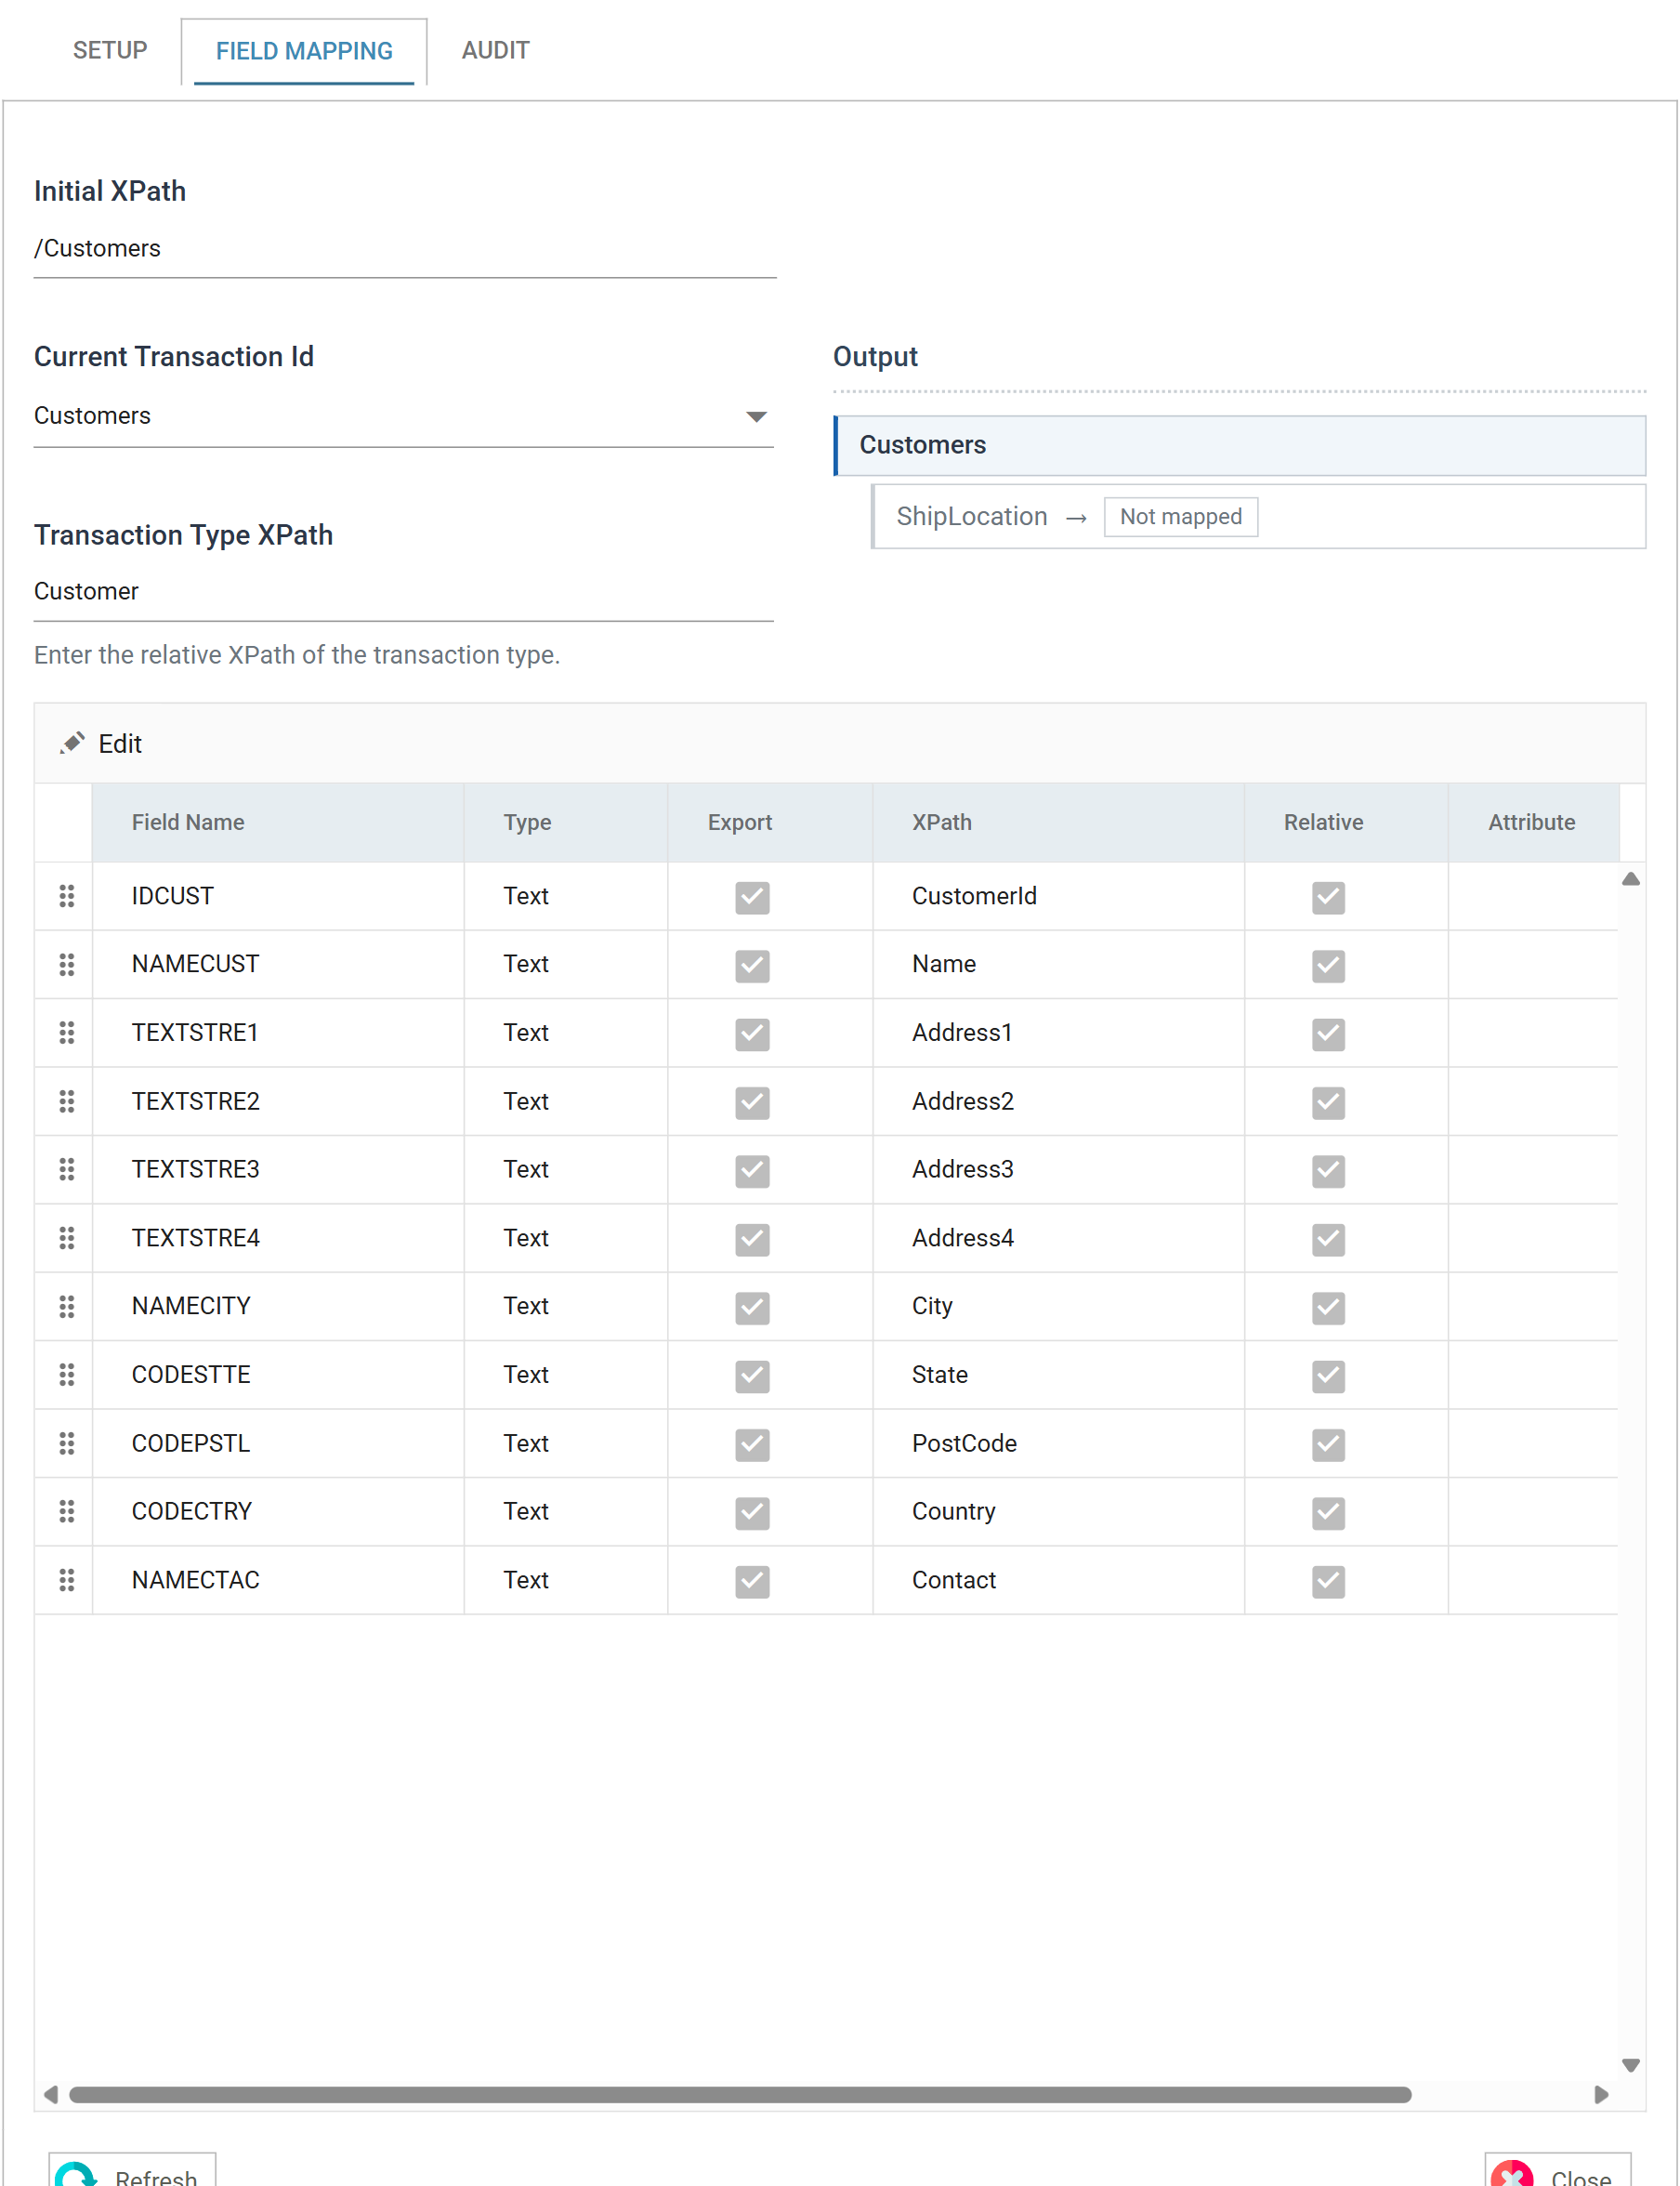
-
Press Refresh.
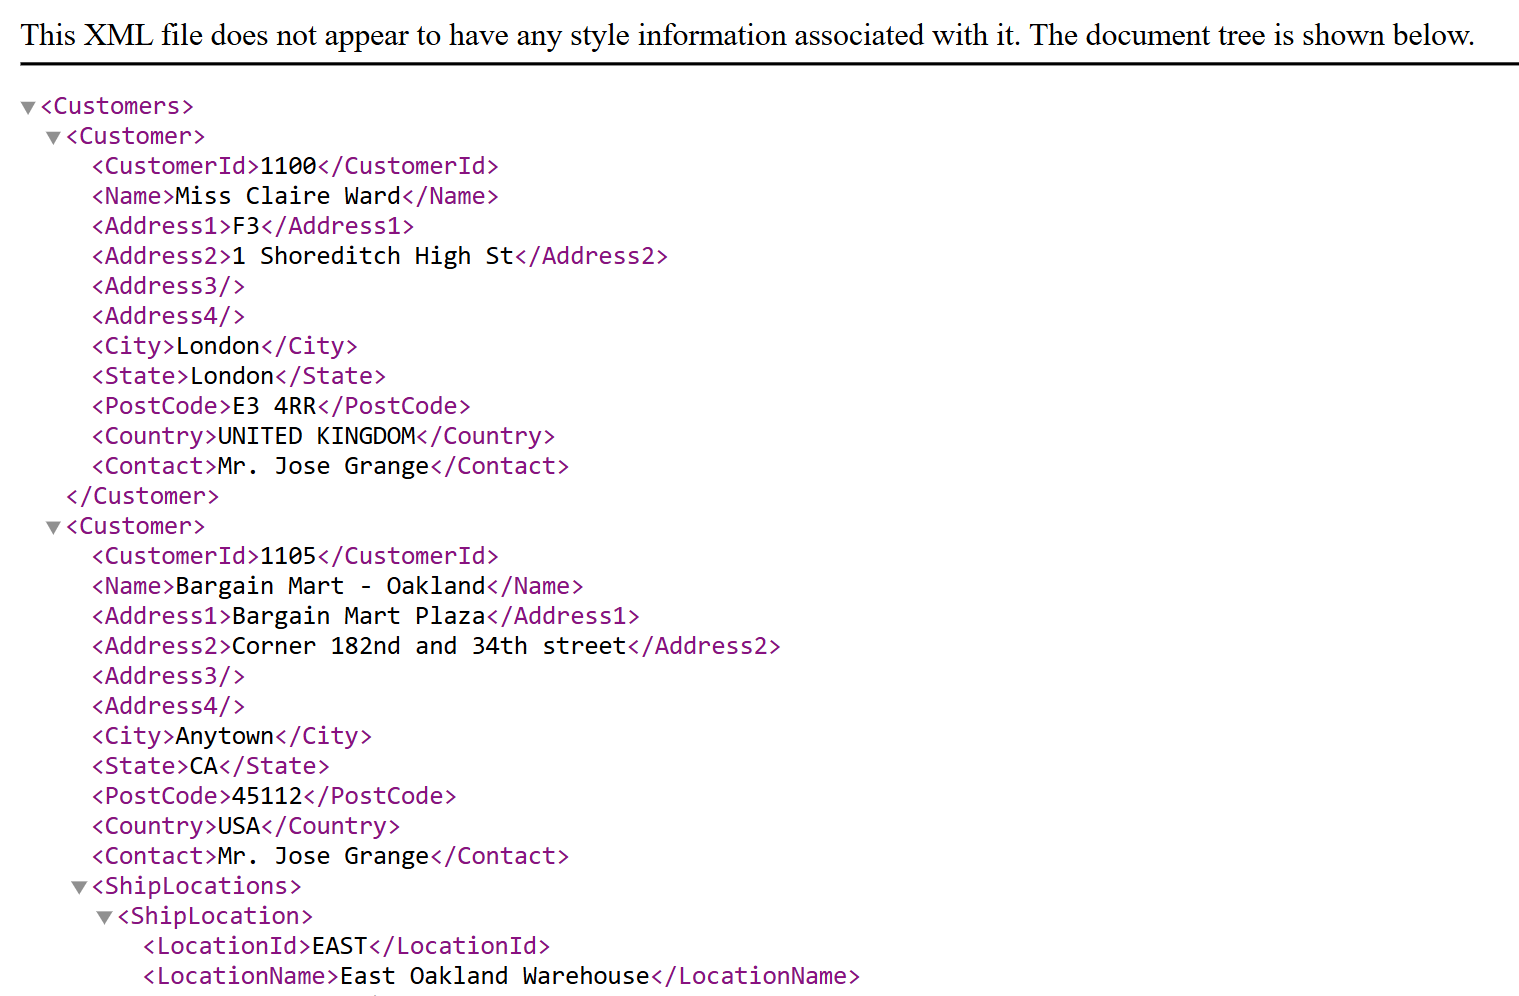
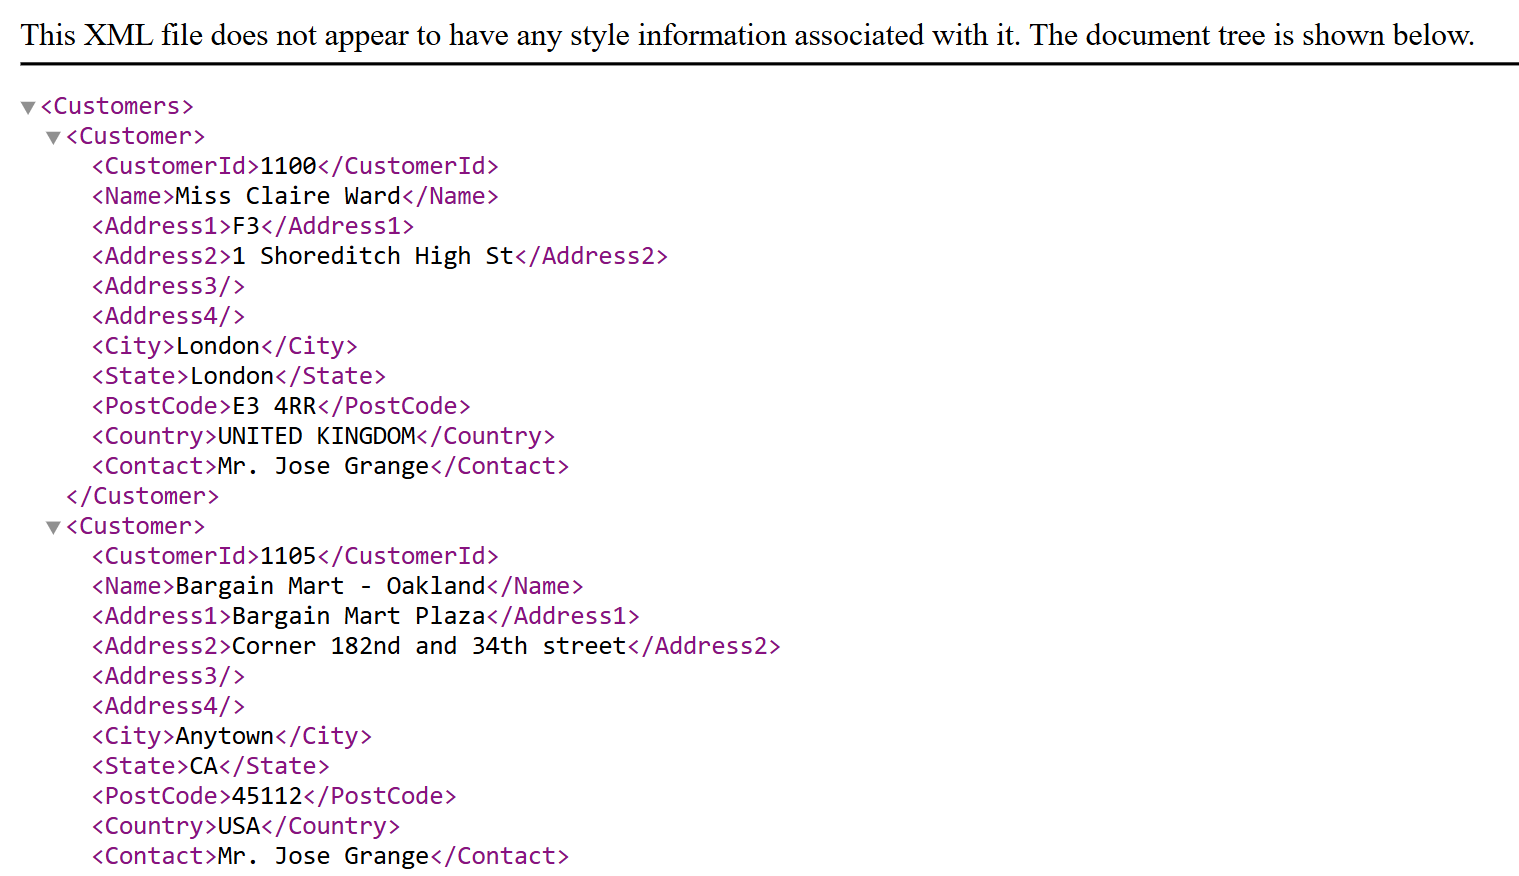
The child transaction has no XPaths yet, so IMan writes none of its data. The run still completes, and you can look at the parent half of the document. Open the XML file at the path and file name you set on the Setup tab. It should have a node per customer, with an individual node per field:
Create Child Transaction Types
-
Select
ShipLocationfrom the Current Transaction Id drop-down.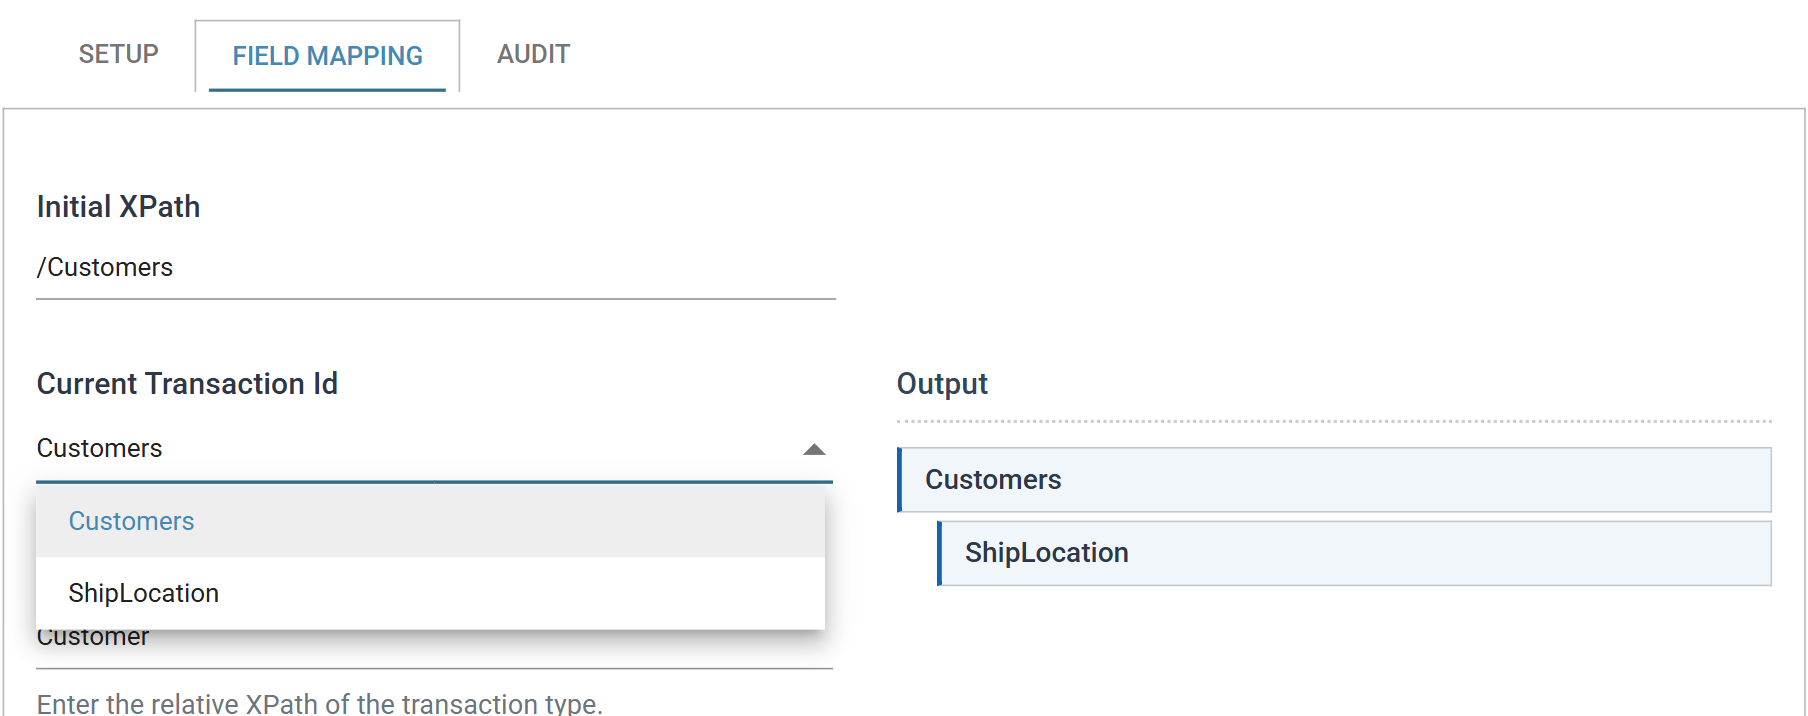
-
Set the Transaction Type XPath to
ShipLocations.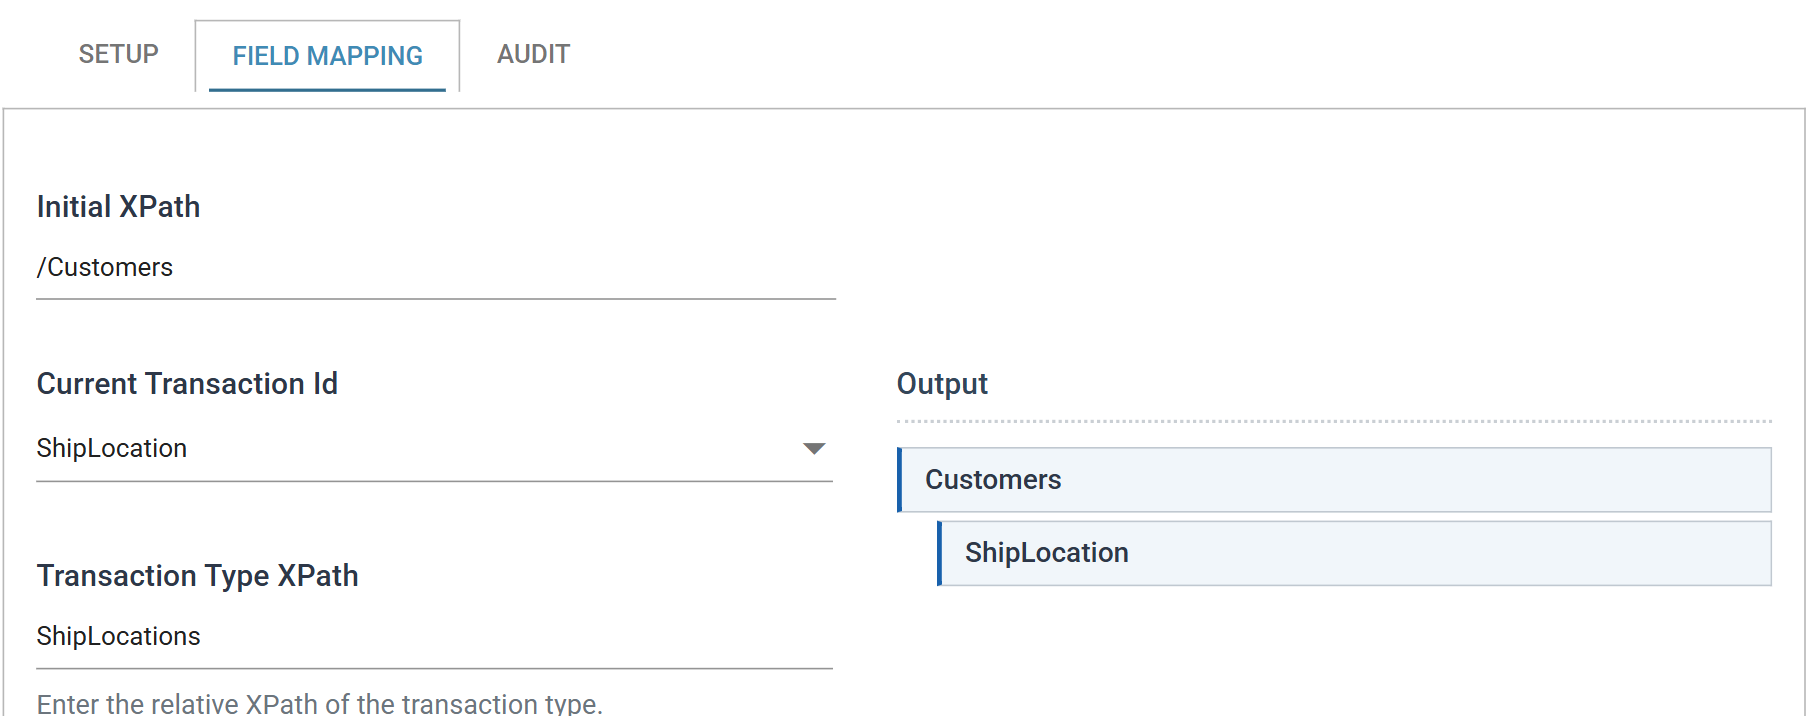
-
Edit the
IDCUSTfield and leave Export Field unticked. That keeps the field out of the file. It is here only because it is the key that joins the child to its parent.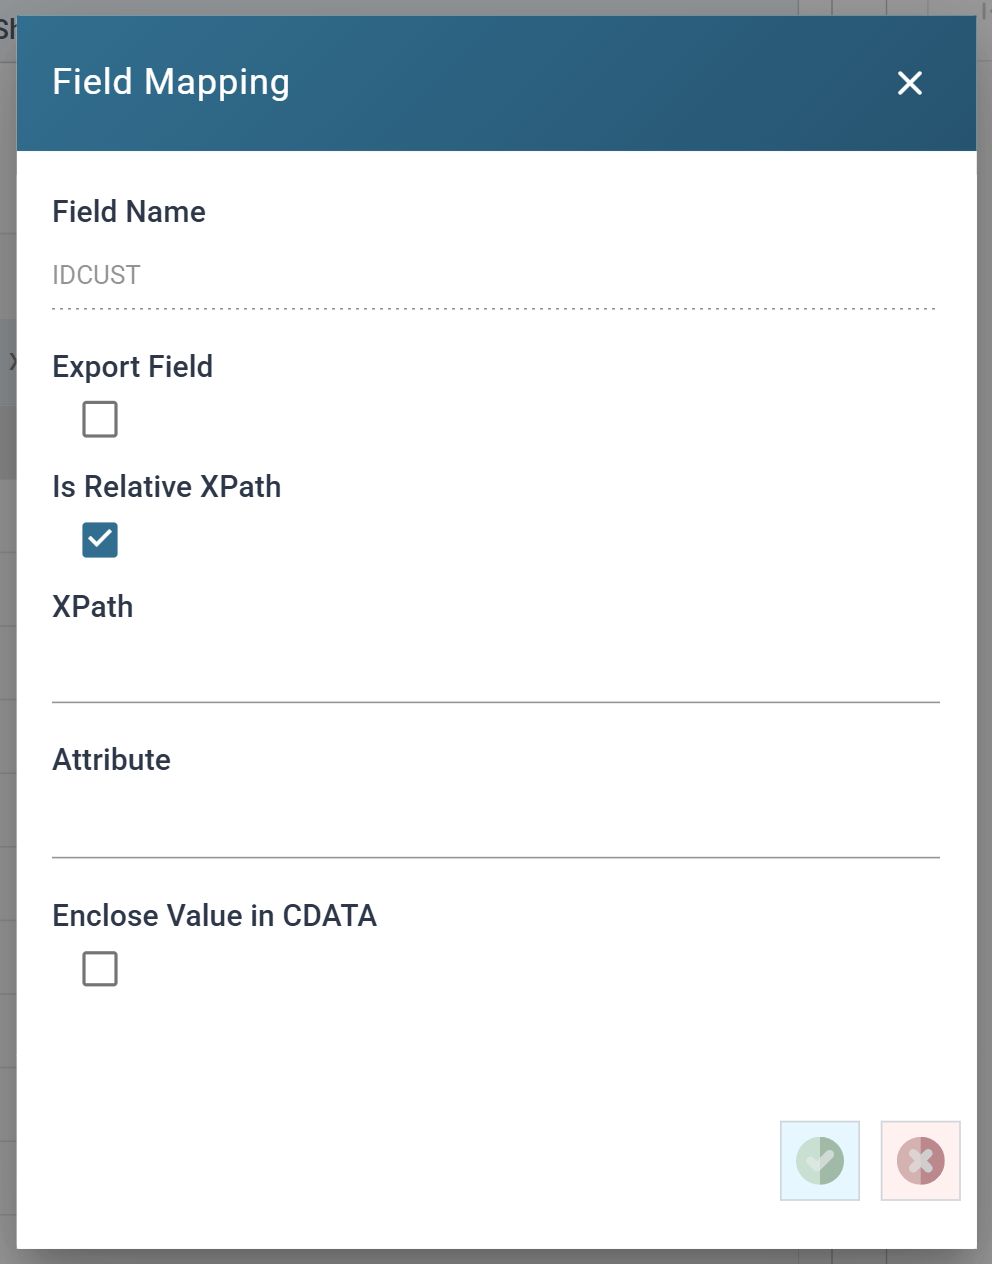
-
For each of the remaining fields, prefix the XPath with
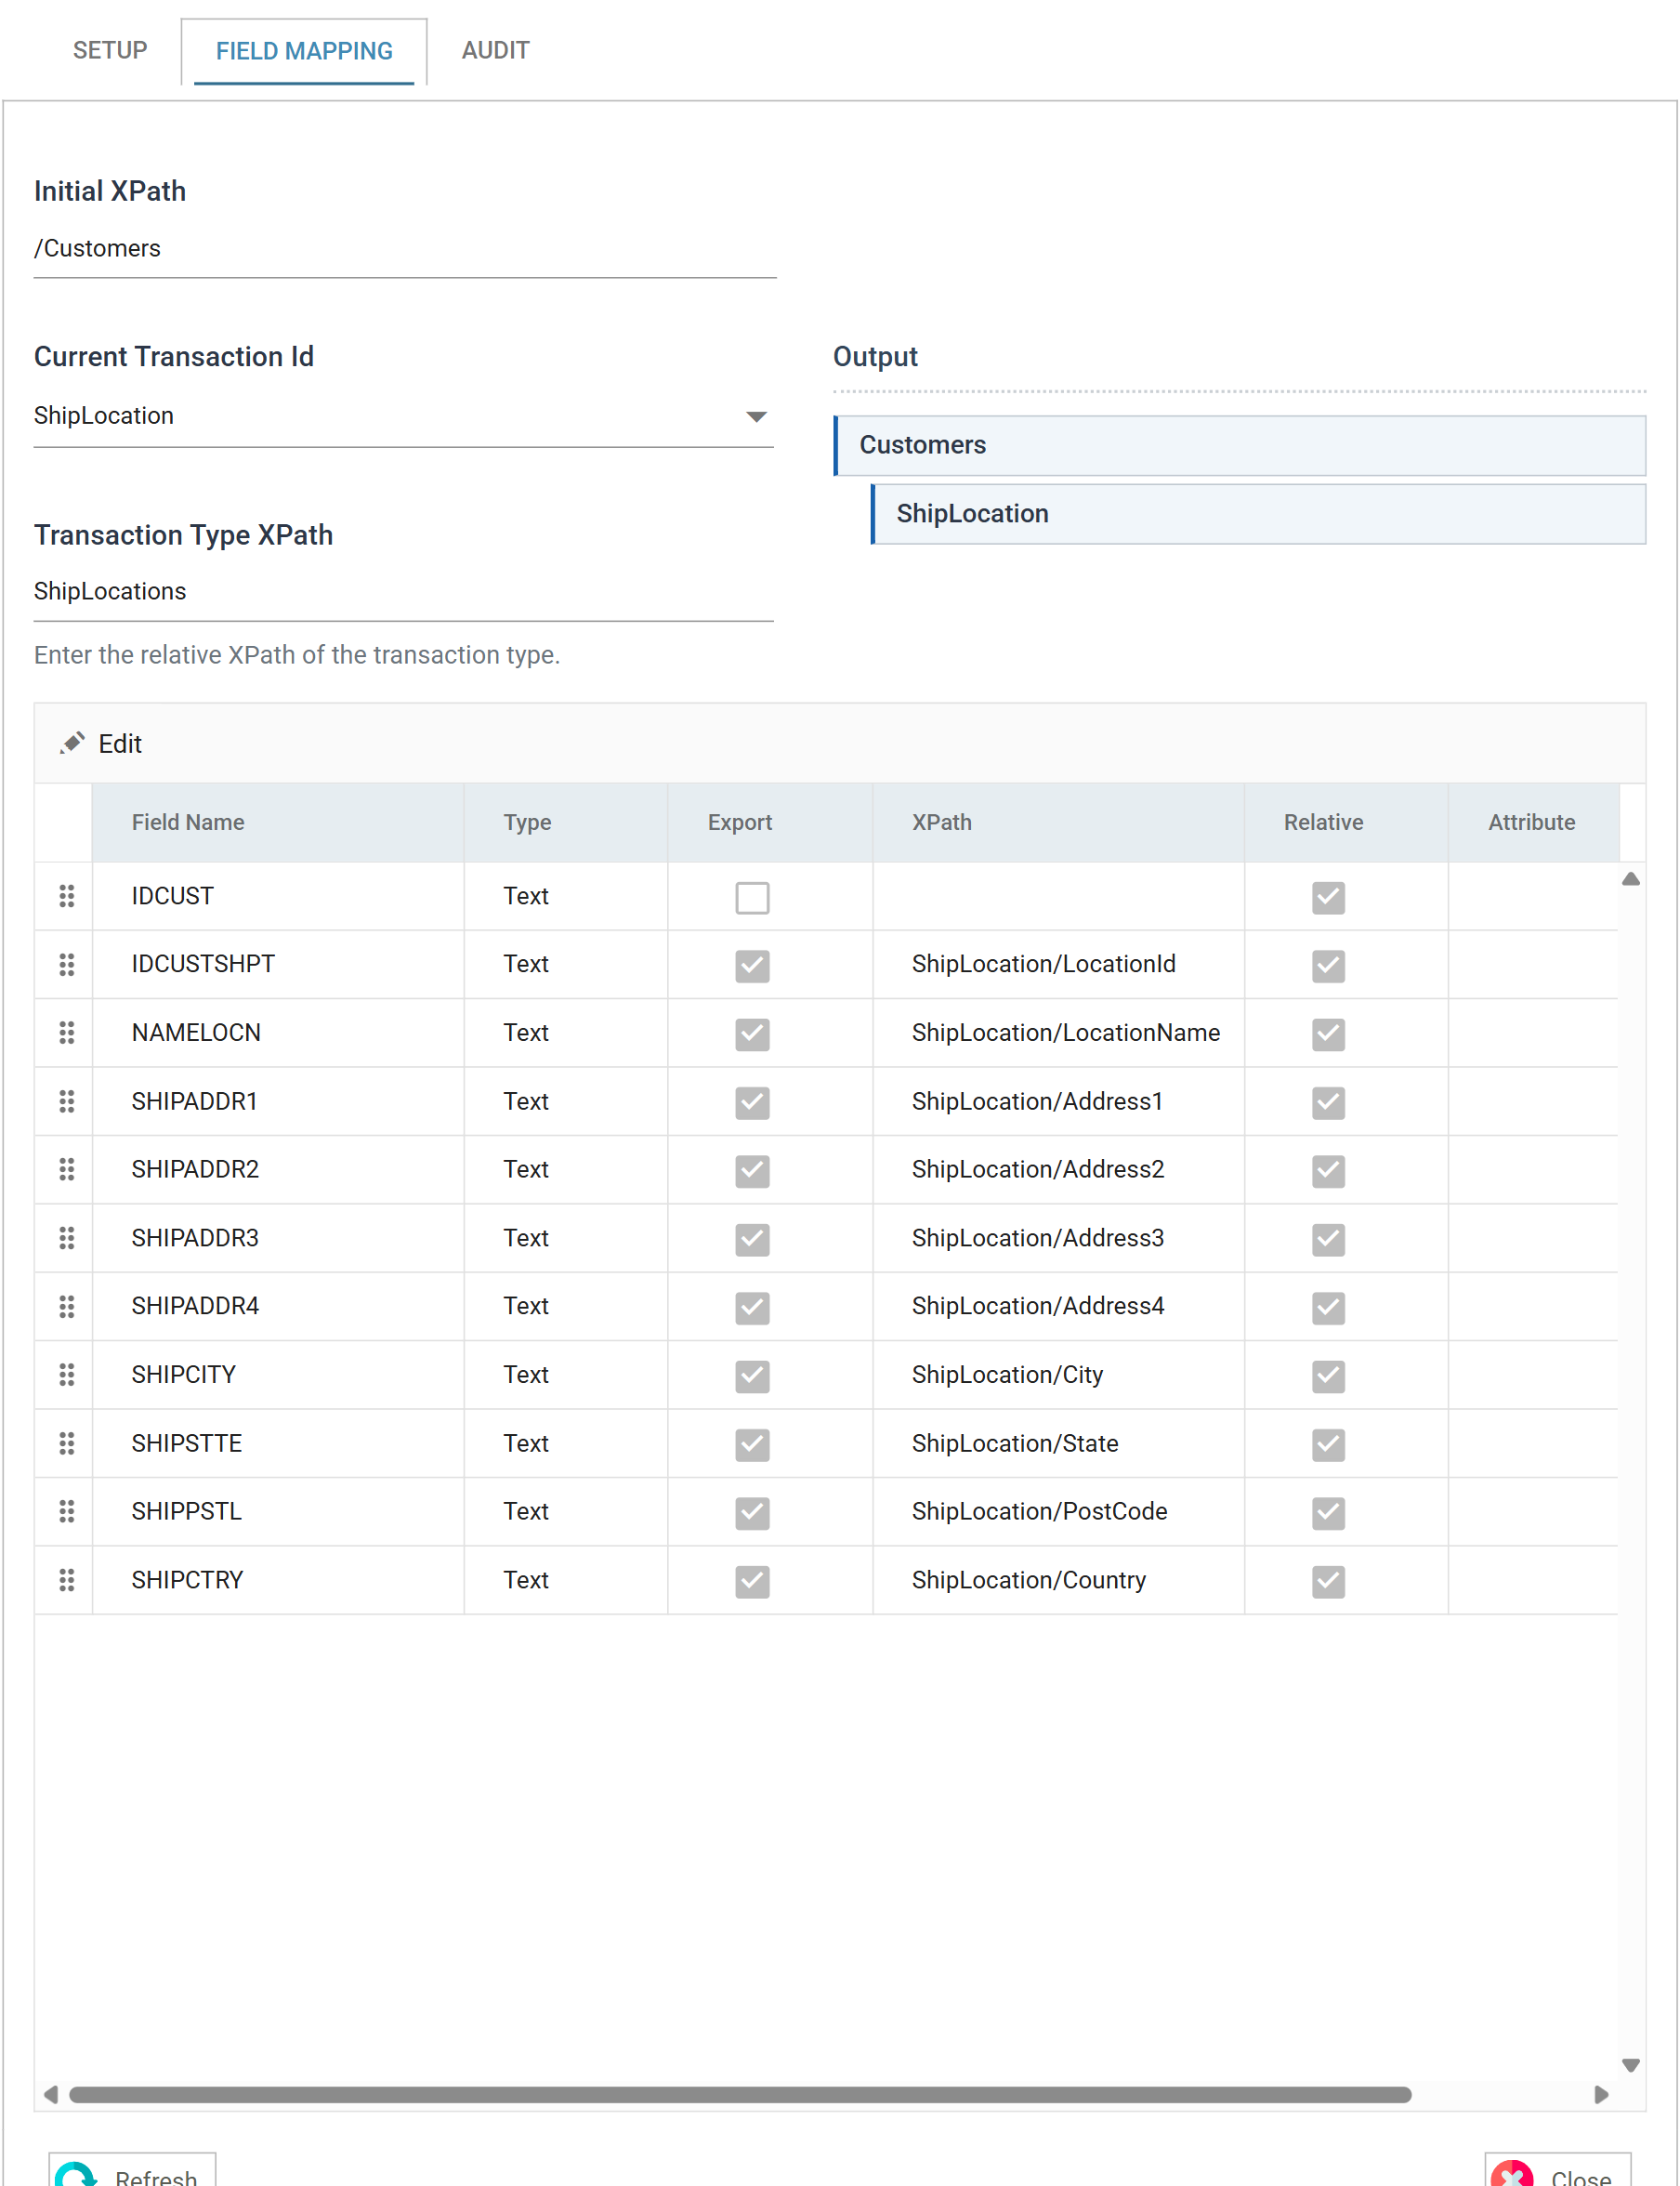
ShipLocation/, so that every ship-to location gets its ownShipLocationnode:Field Name XPath IDCUSTSHPT ShipLocation/LocationId NAMELOCN ShipLocation/LocationName SHIPADDR1 ShipLocation/Address1 SHIPADDR2 ShipLocation/Address2 SHIPADDR3 ShipLocation/Address3 SHIPADDR4 ShipLocation/Address4 SHIPCITY ShipLocation/City SHIPSTTE ShipLocation/State SHIPPSTL ShipLocation/PostCode SHIPCTRY ShipLocation/Country The transaction names the container,
ShipLocations, and the fields name the repeating node inside it. People often get this pair the wrong way round. The Writing XML Documents cookbook article explains it in full.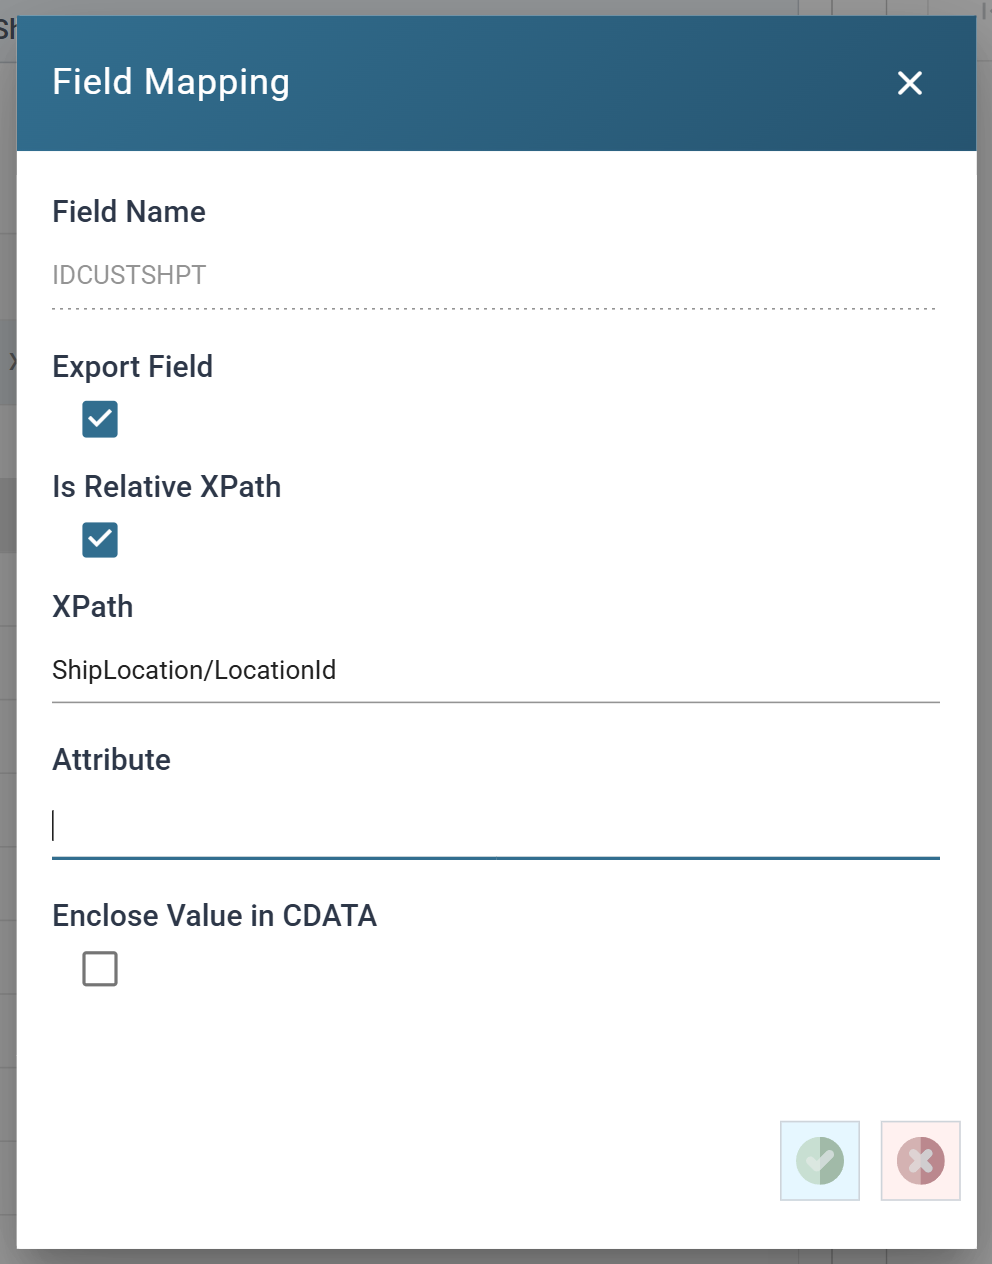
-
The resulting Field Mapping grid will look like this:
-
Press Refresh again, now that the child is mapped.
-
Open the file at the path and file name set on the Setup tab. It has ship-to location nodes for the customers that have them, and none for the customers that do not: