Appendix 2 – Exporting Transactional Data - Sage 200
Estimated time
Estimated time: 1 hr
In this exercise you export transactional data and use the Database Writer to flag the exported transactions, so that they are not exported again.
This integration writes to your Sage 200 database
The last transform runs
UPDATE SOPOrderReturn SET AnalysisCode5 = 'Yes' against the company the
connection points at, and pressing Refresh on it performs the update.
There is no separate run step. Point it at a company you are allowed to
change, and read the Where Clause step before you press it. That
clause alone decides which orders are flagged.
Method
- Create Analysis Code in Sage200
- Set up a Database Reader
- Add the Map Transform
- Add the CSV Writer
- Add the Database Writer
Other Considerations
Create Analysis Code in Sage200
- Open Sage 200 and create an analysis code
Exported. - Set two values,
YesandNo. -
Set the
Novalue to be the default.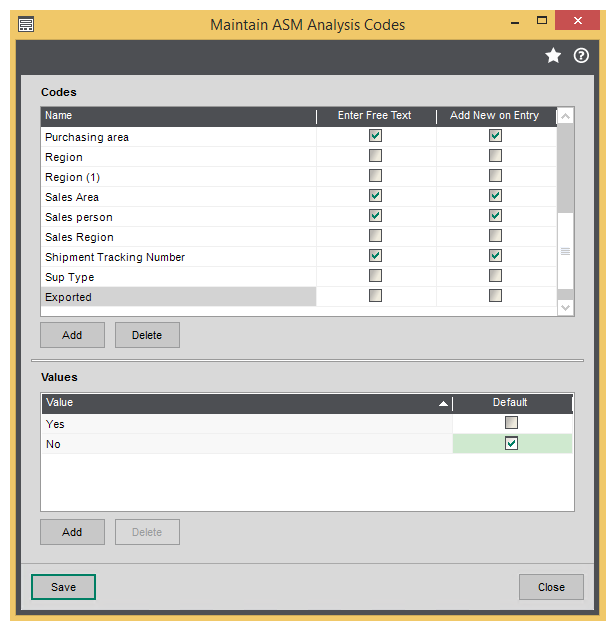
-
Open the Sales Order Processing analysis code setup.
-
Add the
Exportedanalysis code as shown: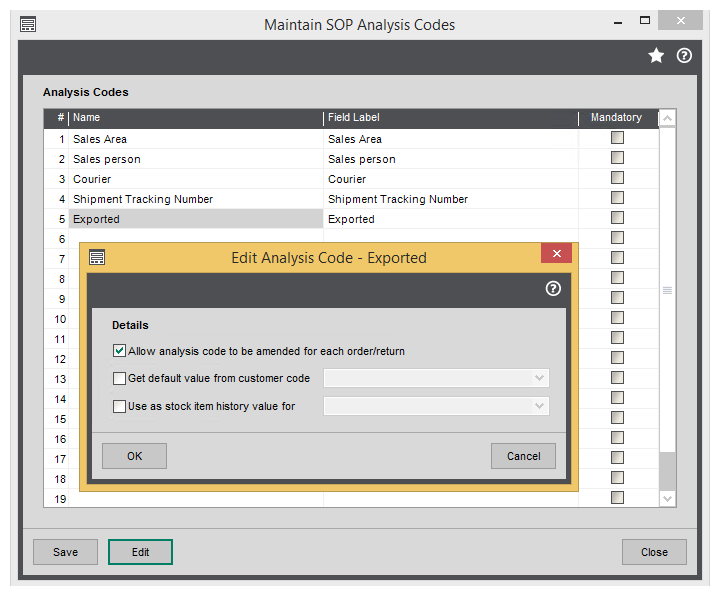
Analysis Code 5 is this setup's; yours may differ
This example uses Analysis Code 5, which is the AnalysisCode5 column of
SOPOrderReturn. Yours may differ depending on your analysis code setup,
and every reference to AnalysisCode5 below changes with it.
Set up a Database Reader
-
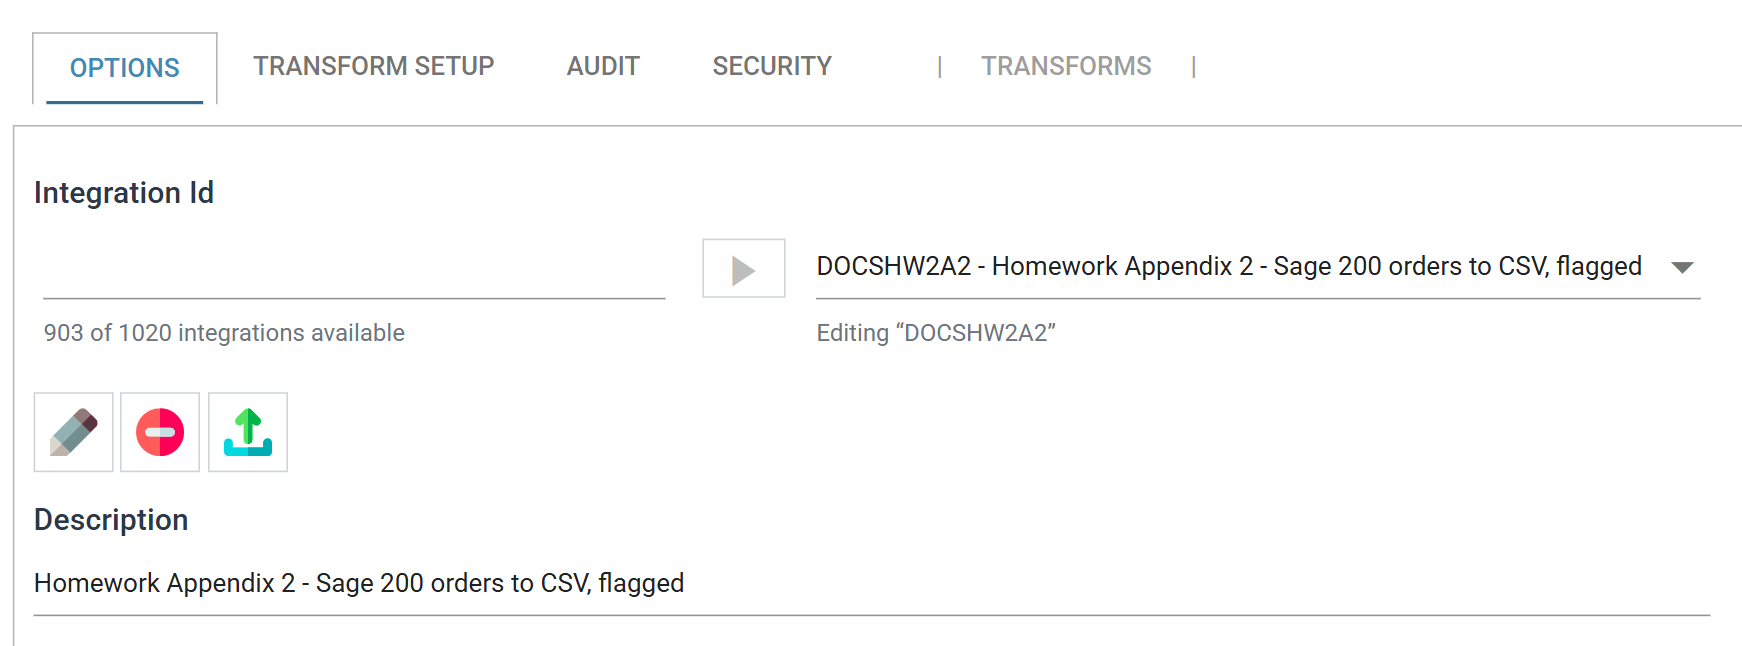
Open IMan and create a new integration.
-
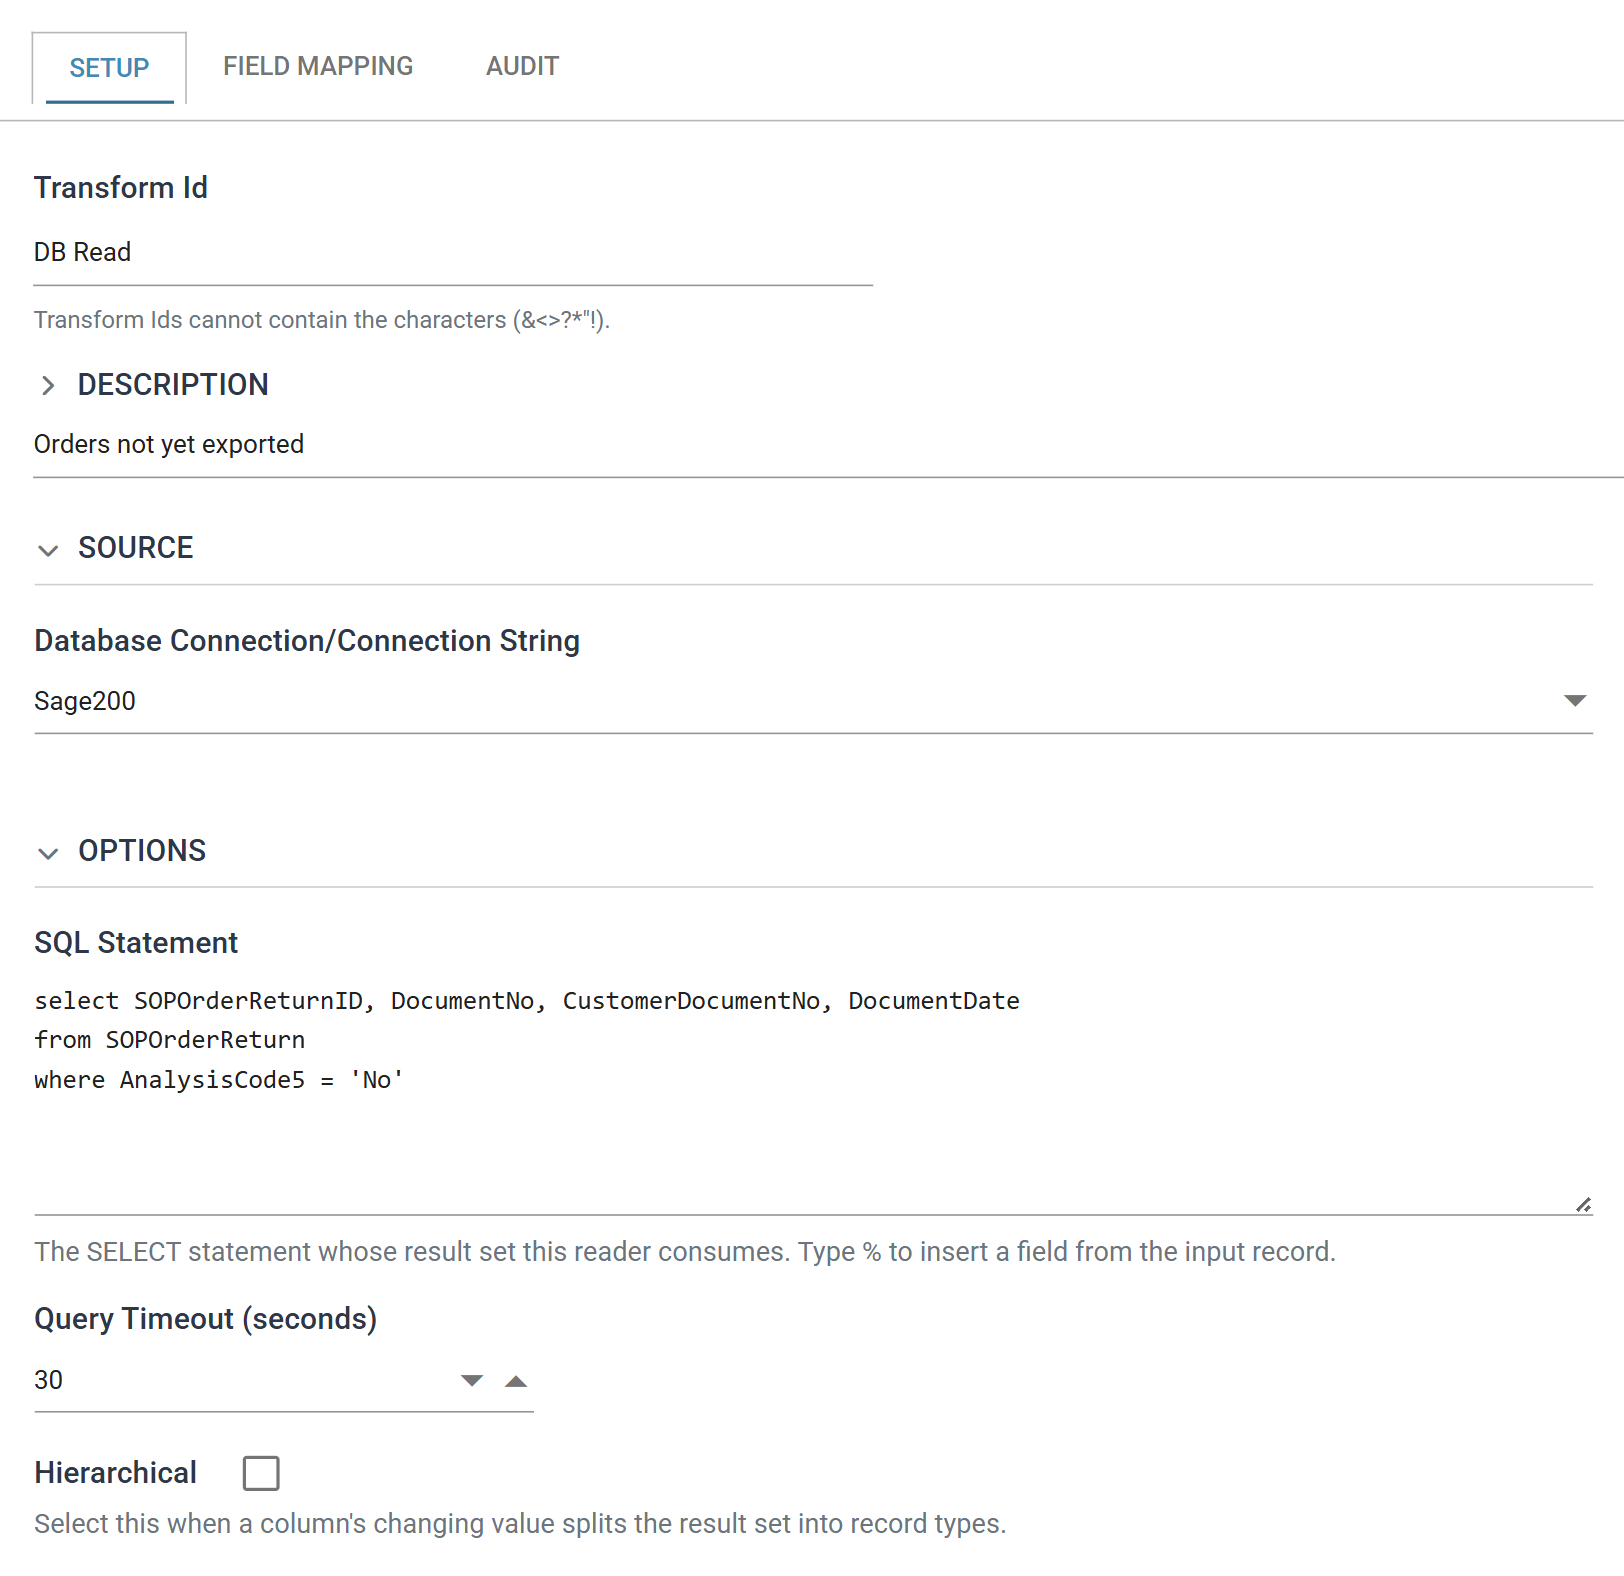
Press the Transform Setup tab, drag a Database Reader onto the integration and double-click it to open. Give it a Transform Id of
DB Read. - Under Source, select the Sage 200 shared database connection set up in the previous task from the Database Connection drop-down.
-
Enter the following SQL query, replacing
AnalysisCode5to match your setup:select SOPOrderReturnID, DocumentNo, CustomerDocumentNo, DocumentDate from SOPOrderReturn where AnalysisCode5 = 'No'The query is kept simple. It must return the primary key of the record alongside the data. The key is not exported to the target, but it identifies the transactions to flag afterwards.
-
Press Refresh. The query returns an empty result set, because no order has
Exportedset toNoyet. -
Create a sales order in Sage 200. It picks up the default value,
No.Do this before you build the rest of the chain
A transform copies its parent's records when you connect it, and never again. If you connect the Map or either writer while the reader still returns nothing, that transform keeps an empty dataset for good. Its field list arrives, every Refresh reports Completed and no file is written. No error is raised. The only fix is to delete the transform and drop a new one.
-
Press the Field Mapping tab and rename the transaction to
Orderswith the pencil beside it in the Transaction panel. The rename changes only the display name. The id beside it staysroot.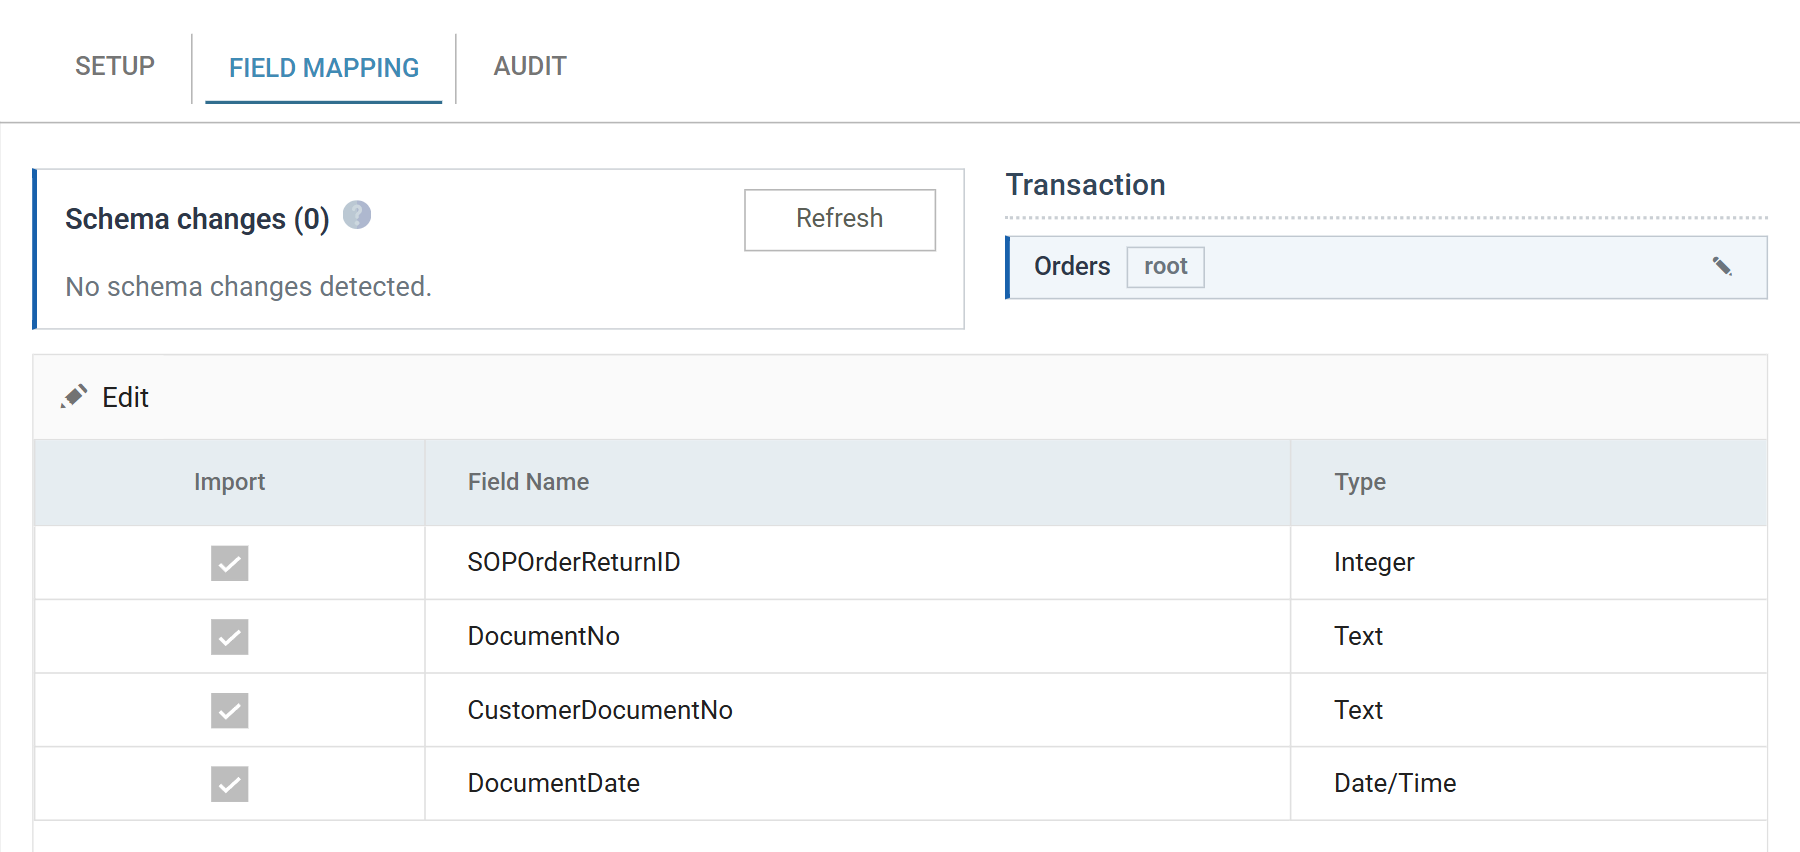
-
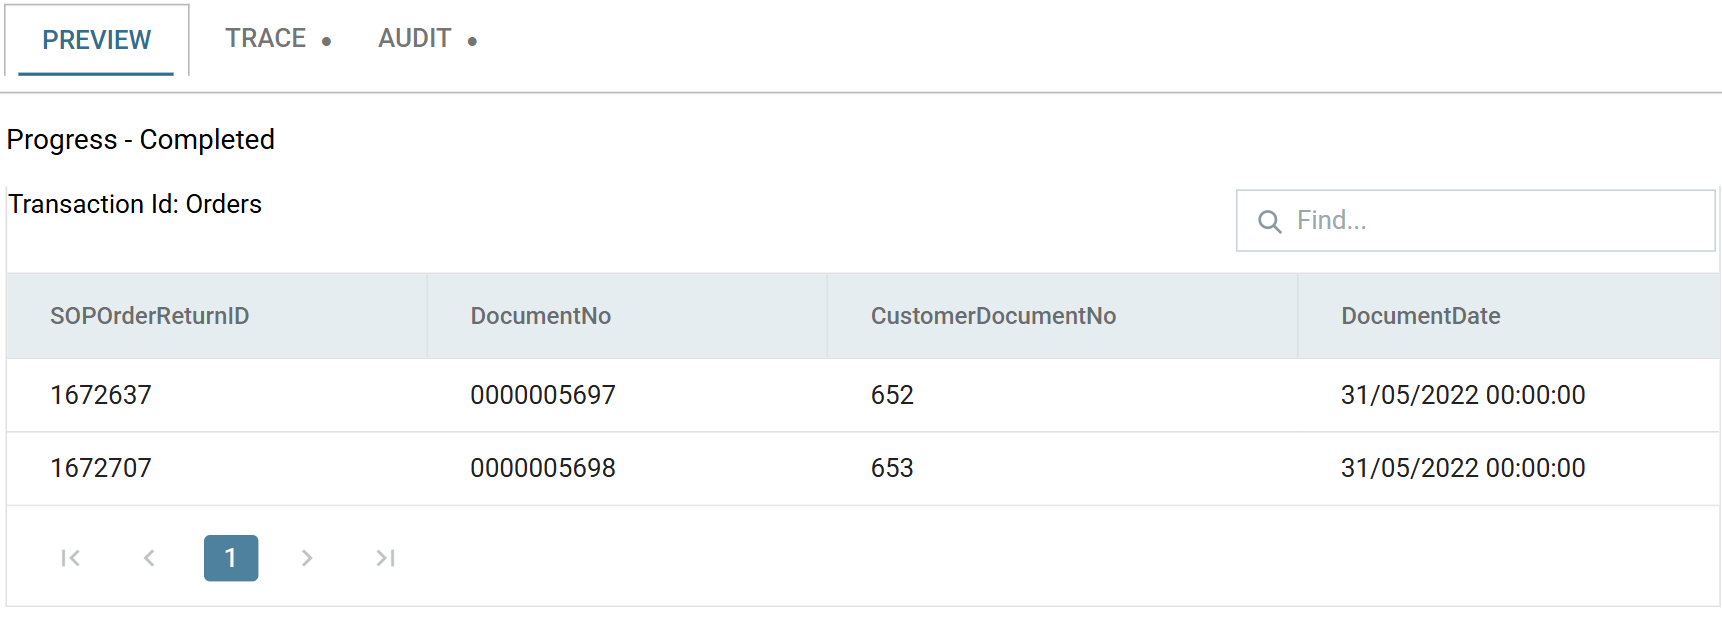
Go back to the Setup tab and press Refresh. The query returns the order, under the new transaction name:
-
Press Close. A transform pane has no Save of its own. Closing it commits the pane to the integration, and the integration's own Save then stores it.
Add the Map Transform
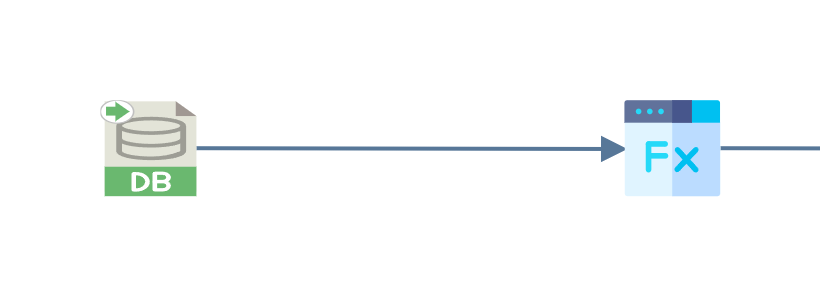
- Drag a Map transform onto the integration and connect it to the Read transform.
- Double-click it to open it, which initialises the transform setup, then close it immediately.
-
You will come back to this transform later.
Add the CSV Writer
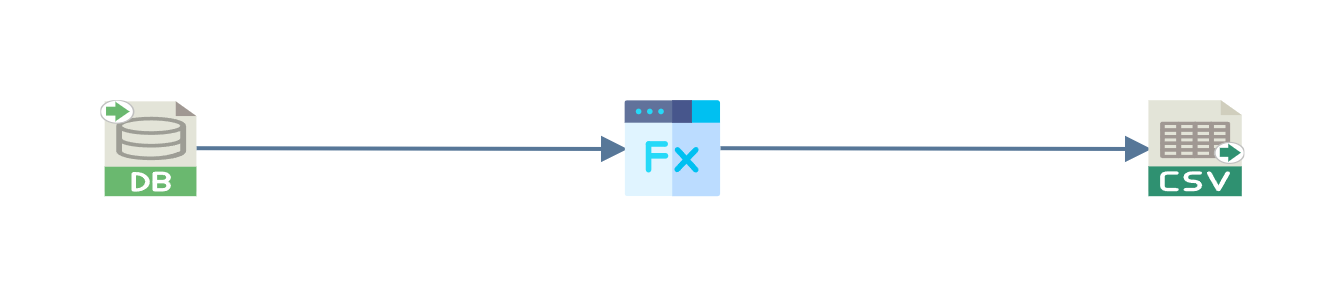
- Add a CSV Writer to the integration and connect it to the Map transform.
-
Double-click it to open.
-
Under Target, set the File Path and File Name.
Field Value Target The destination of the file. For training, select File File Path C:\IMan\OutputDataFile Name Orders.csv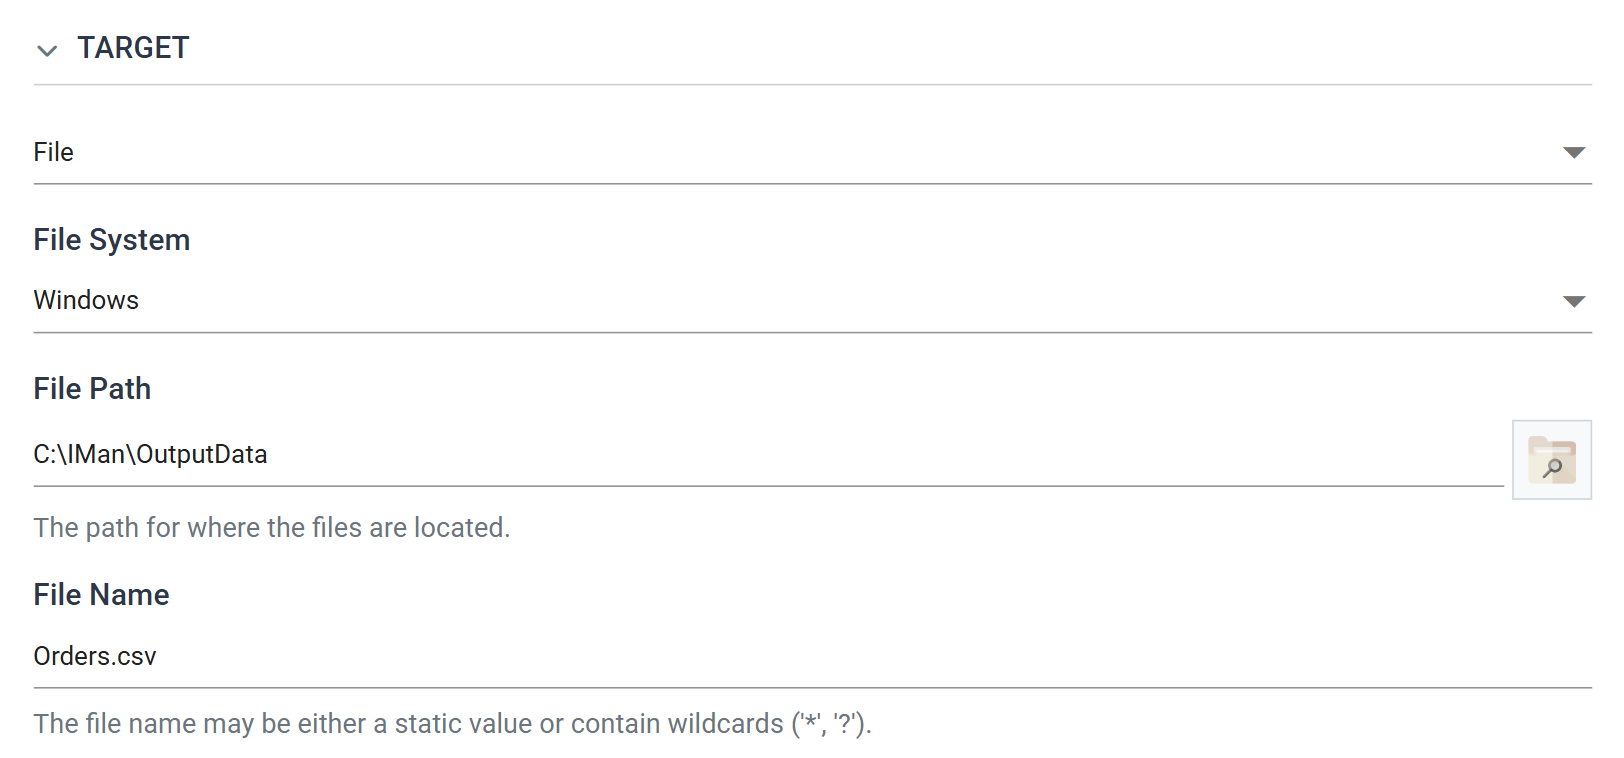
-
Under Options, leave the Field Delimiter as a single comma, set Quote Text Fields to
QuoteAndEscape, and tick Write Header Rows.Quote Text Fields is a choice, not a tick
It offers
NoQuotes,QuoteAndEscapeandQuoteDoNotEscape. UseQuoteAndEscapeunless you know the data contains no quotation marks of its own. It quotes every text field and escapes any quote inside one, so a value containing the delimiter cannot split a row in two.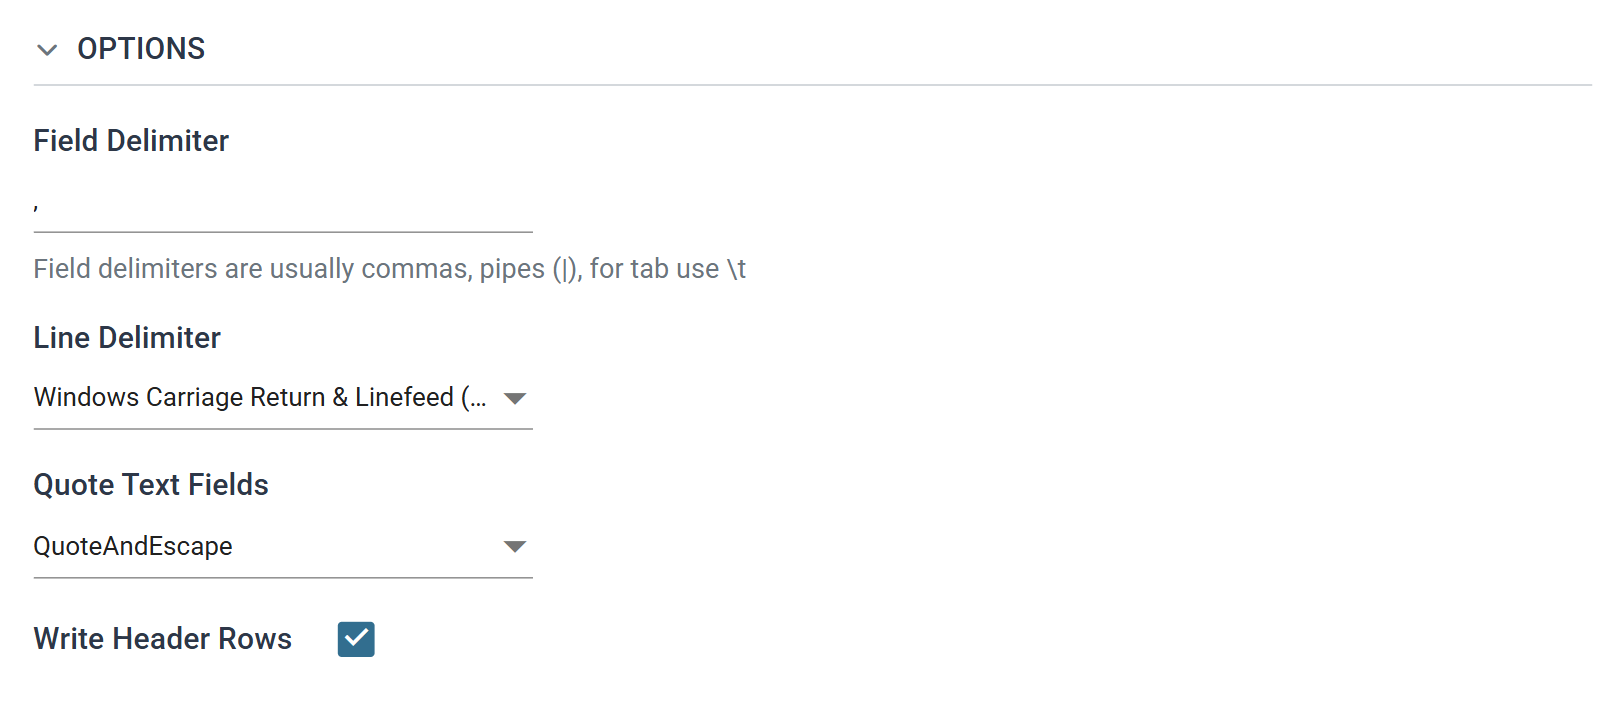
-
Press Refresh and open the file at the File Path and File Name you set.

-
Return to IMan and re-open the Map transform created earlier.
-
On the Field Mapping tab press Add in the toolbar to create a new field:
Field Value New Field Name AnalysisCode5(change to match your setup)Type Text Evaluate Untick Evaluate String YesWith Evaluate unticked, IMan uses the Evaluate String as a literal value, so every record gets the text
Yes. Leave Current Field Name empty. You are creating this field, not renaming one the reader returned.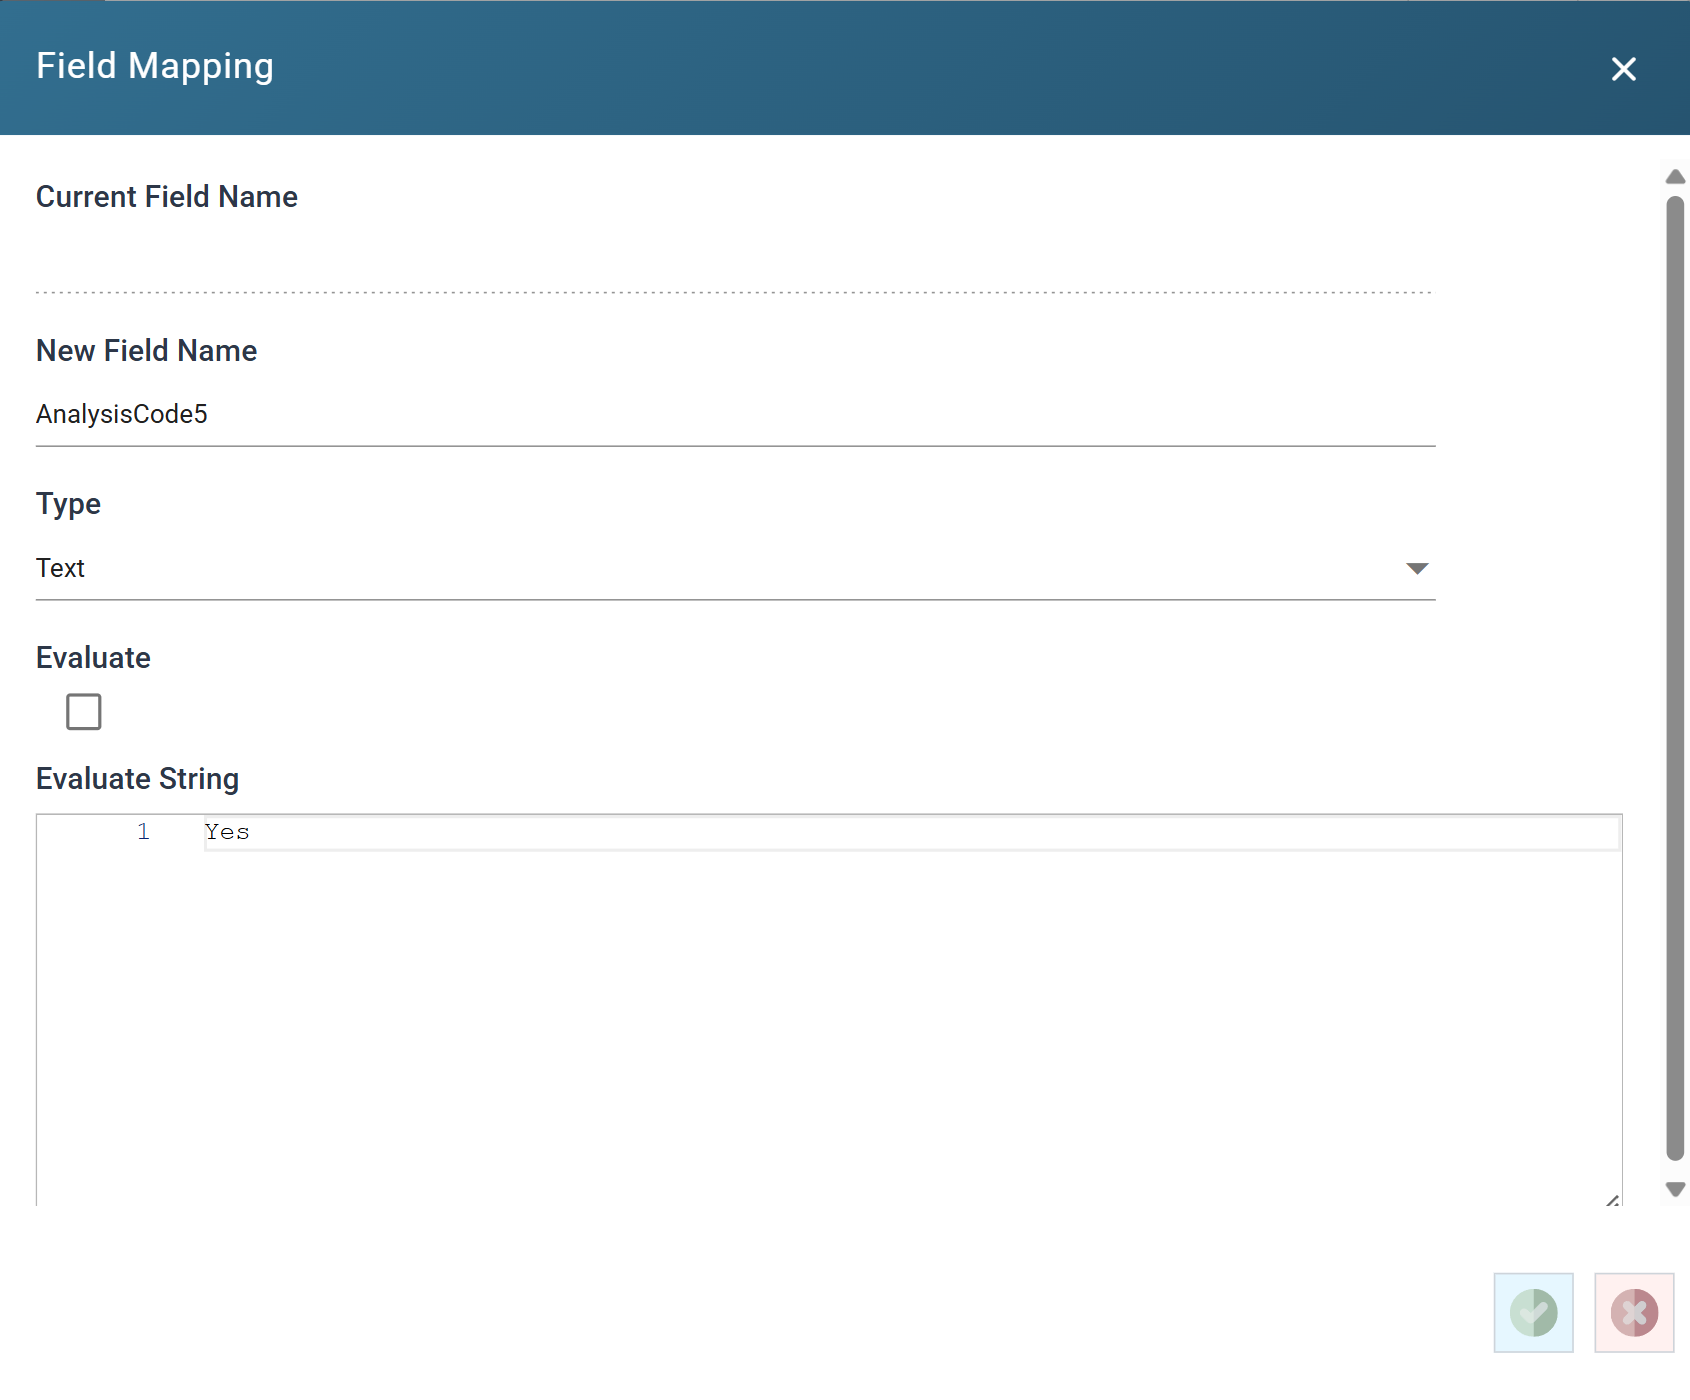
-
Press the green tick to save, then press Refresh. The new column is on every record:
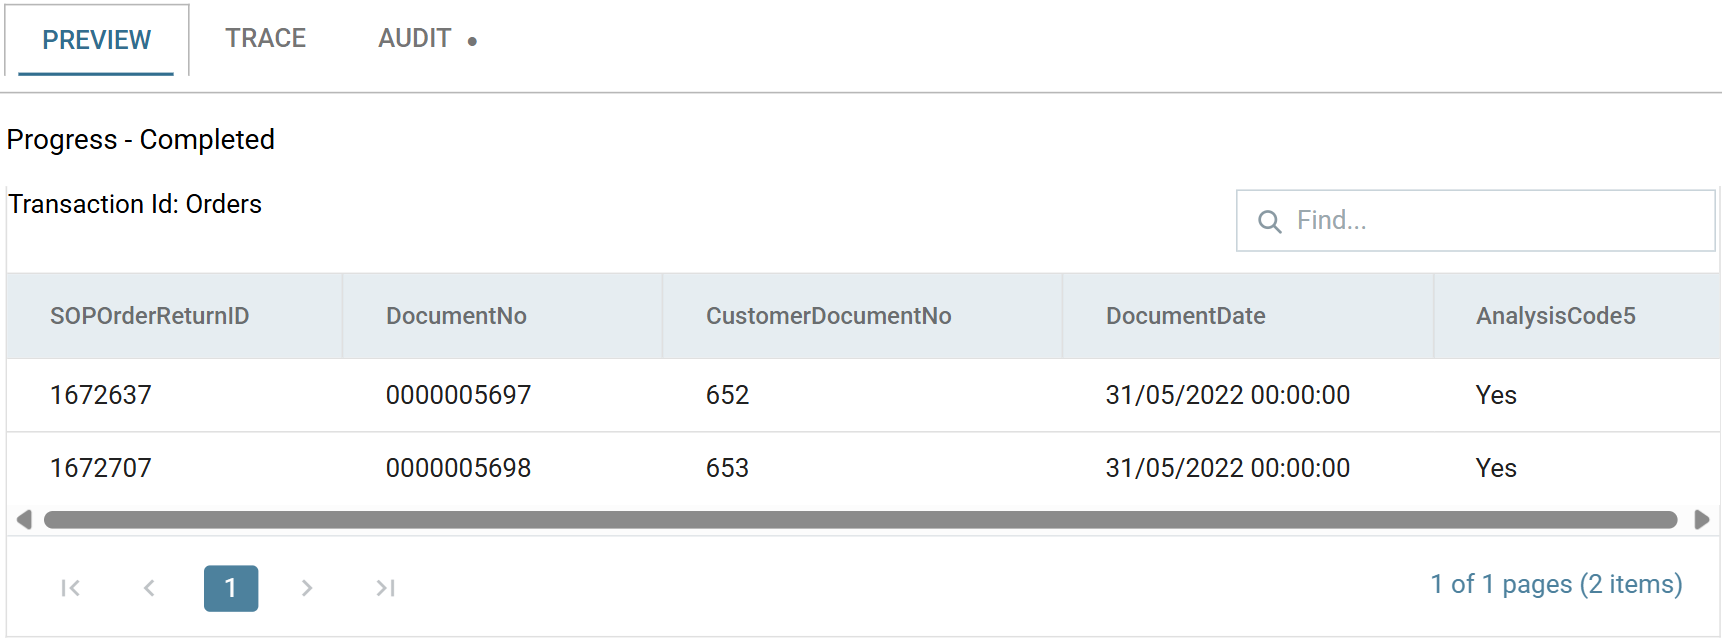
A field added after the writer arrives with Export unticked
The AnalysisCode5 field is not exported to the CSV file. A field added
after you connected the writer arrives in its Field Mapping grid with
Export unticked, so the file keeps the four columns it already had. To
put the field in the file as well, tick Export against it in the CSV
Writer.
Add the Database Writer
-
Add a DB Writer, connect it to the CSV Writer and double-click it to open.

-
Under Target, select the Sage 200 connection from the Database Connection drop-down, and under Options change the SQL Operation from
InserttoUpdate.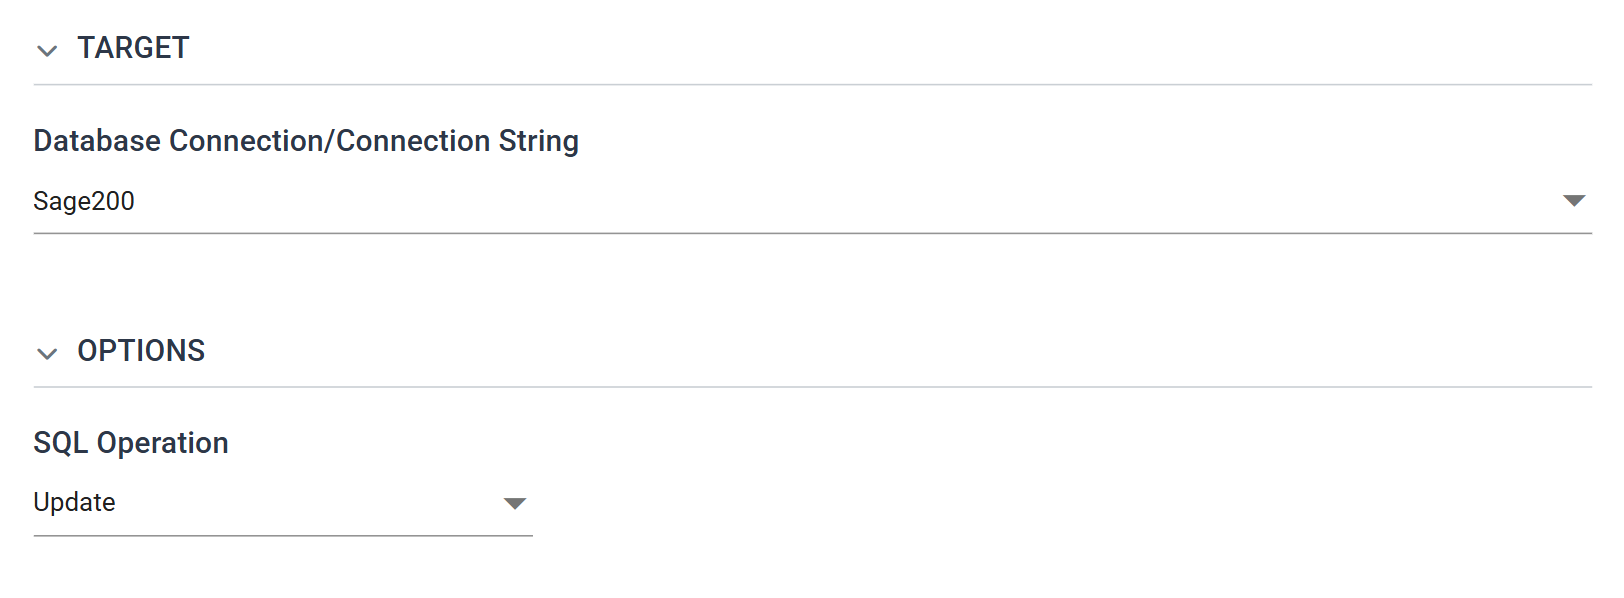
Left on Insert this writes new rows instead of flagging
On Insert, the writer adds new rows to SOPOrderReturn instead of
flagging the existing ones.
- Press the Field Mapping tab.
- Set the Map To Table to
SOPOrderReturn, the table in the Sage 200 database that IMan will update. -
Set the Where Clause to:
For each record in the dataset, IMan replaces
%[Orders.SOPOrderReturnID]with that record'sSOPOrderReturnID. That field is the primary key ofSOPOrderReturn, so IMan updates only the records in the dataset.A field reference has to name its transaction
IMan accepts and saves
%[SOPOrderReturnID]on its own, and reports it in orange underneath as "'%[SOPOrderReturnID]' is an unqualified field reference - merge fields are entered as %[Record.Field]." The transaction here isOrders, so the form that validates is%[Orders.SOPOrderReturnID].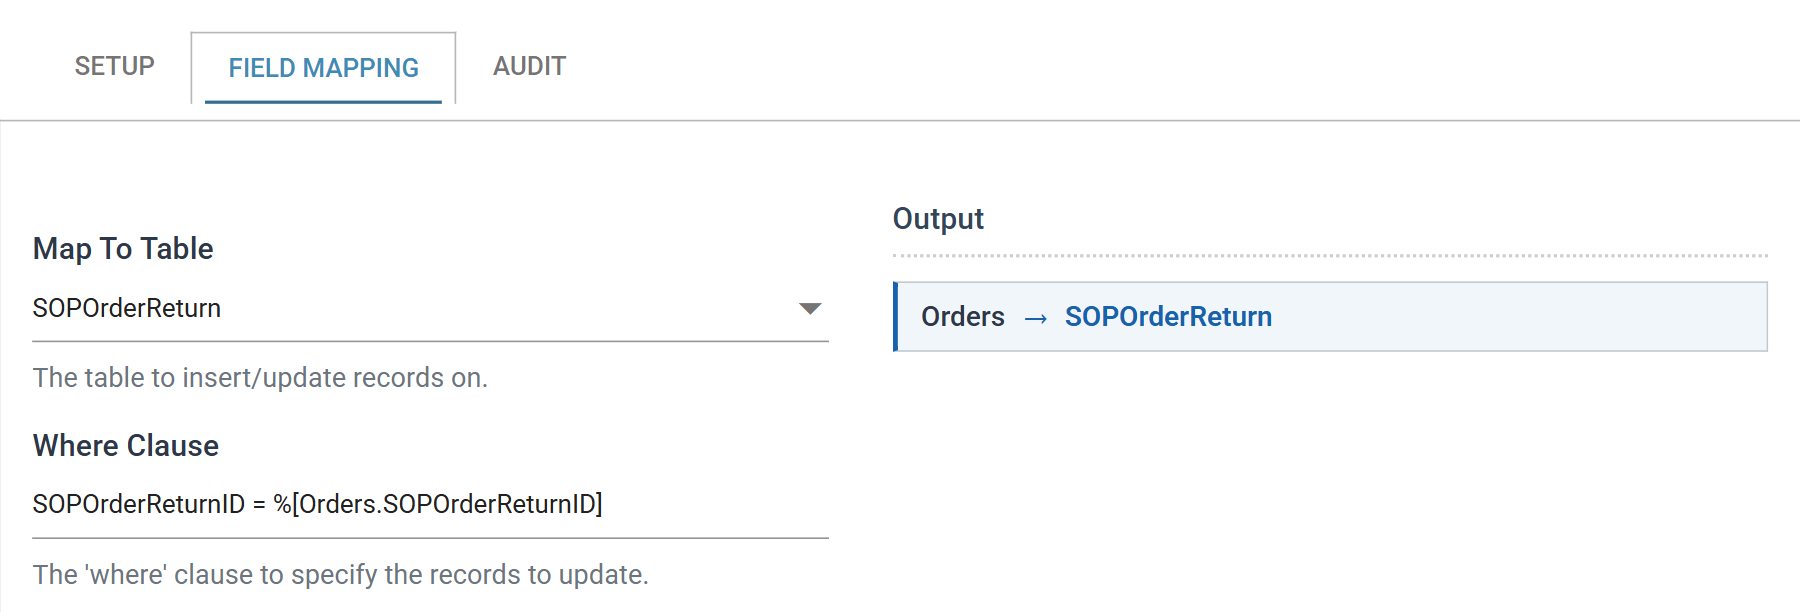
-
Press Edit on the grid, set the Column for
AnalysisCode5toAnalysisCode5, and leave every other row's Column empty.There is no Export column on a Database Writer. The writer writes a field only if it names a Column. Leaving the Column empty keeps the other four fields out of the
UPDATE. The Column list holds every column of the table you mapped to, so type into it to find the one you want.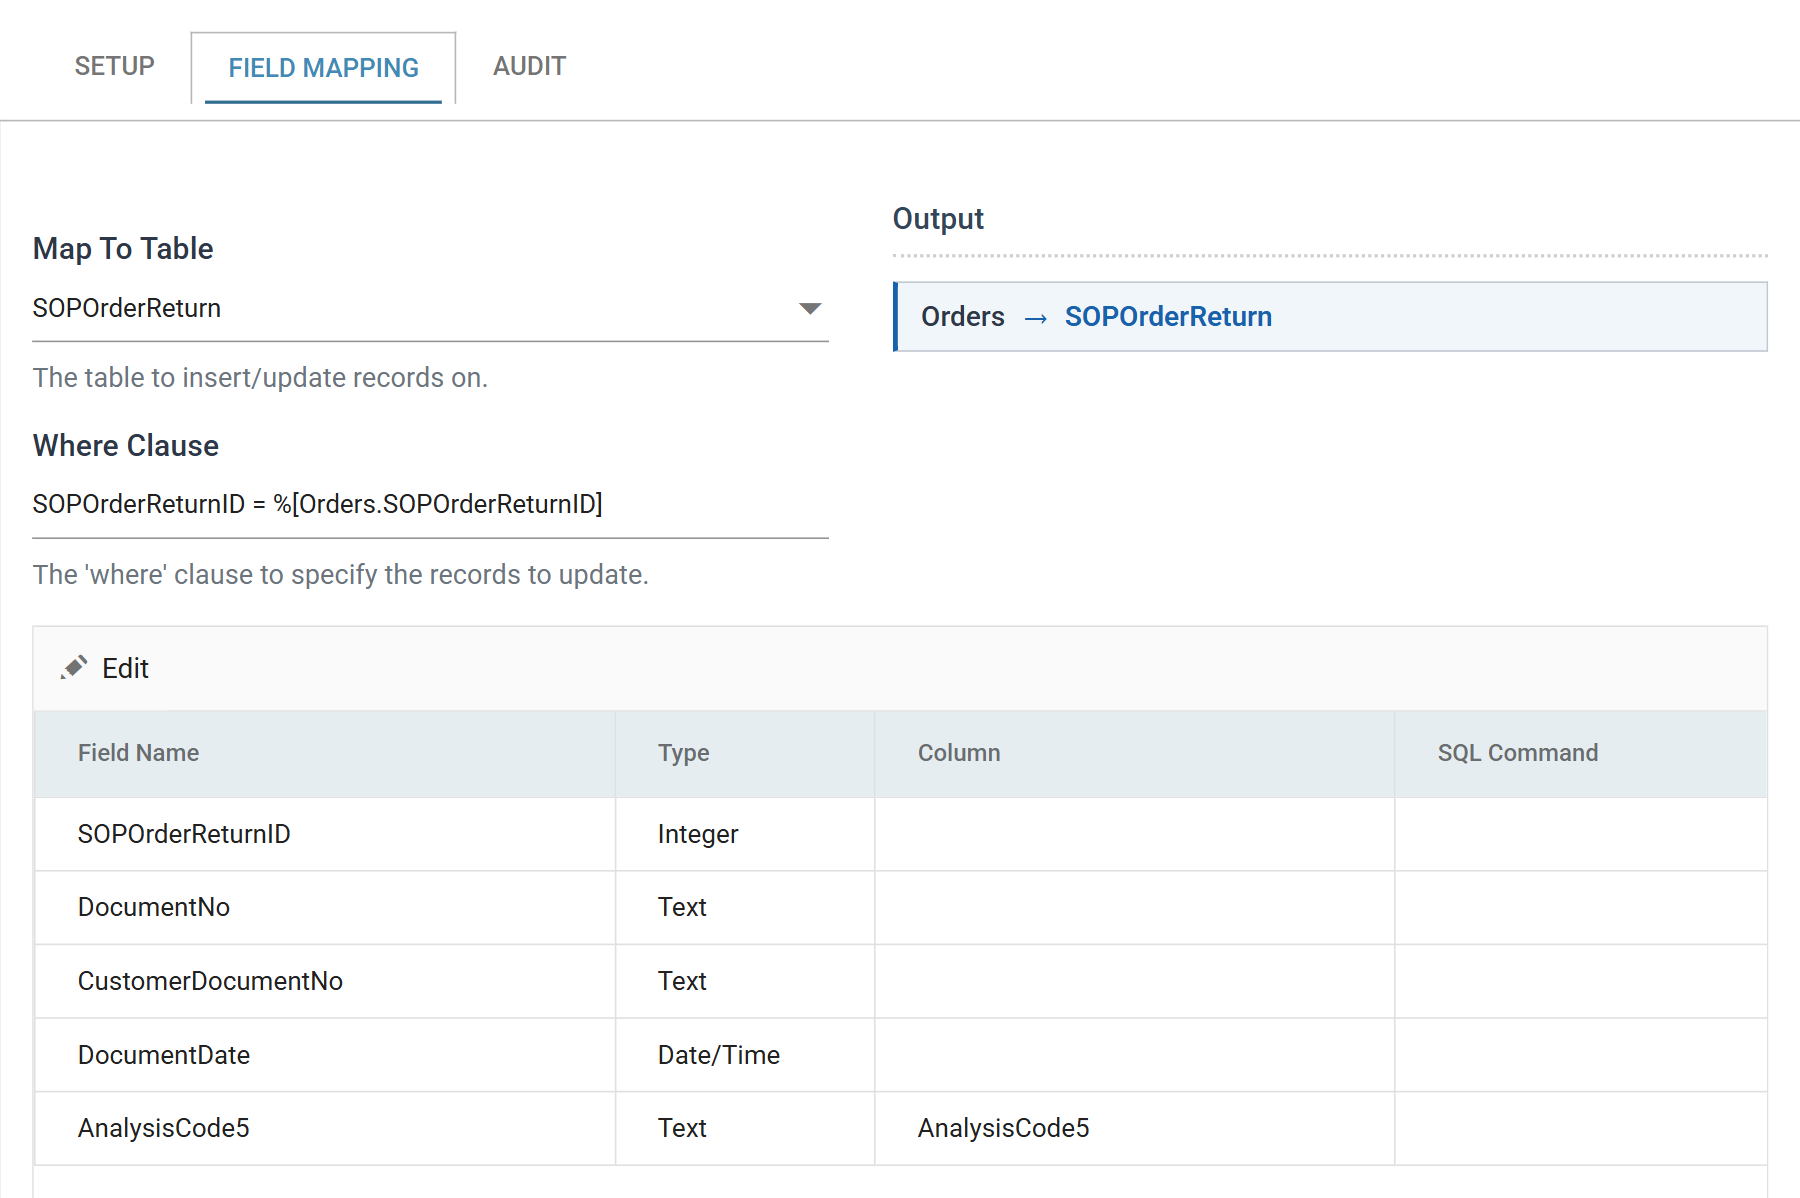
-
Press Save on the grid's toolbar.
-
Press Refresh. This performs the update.
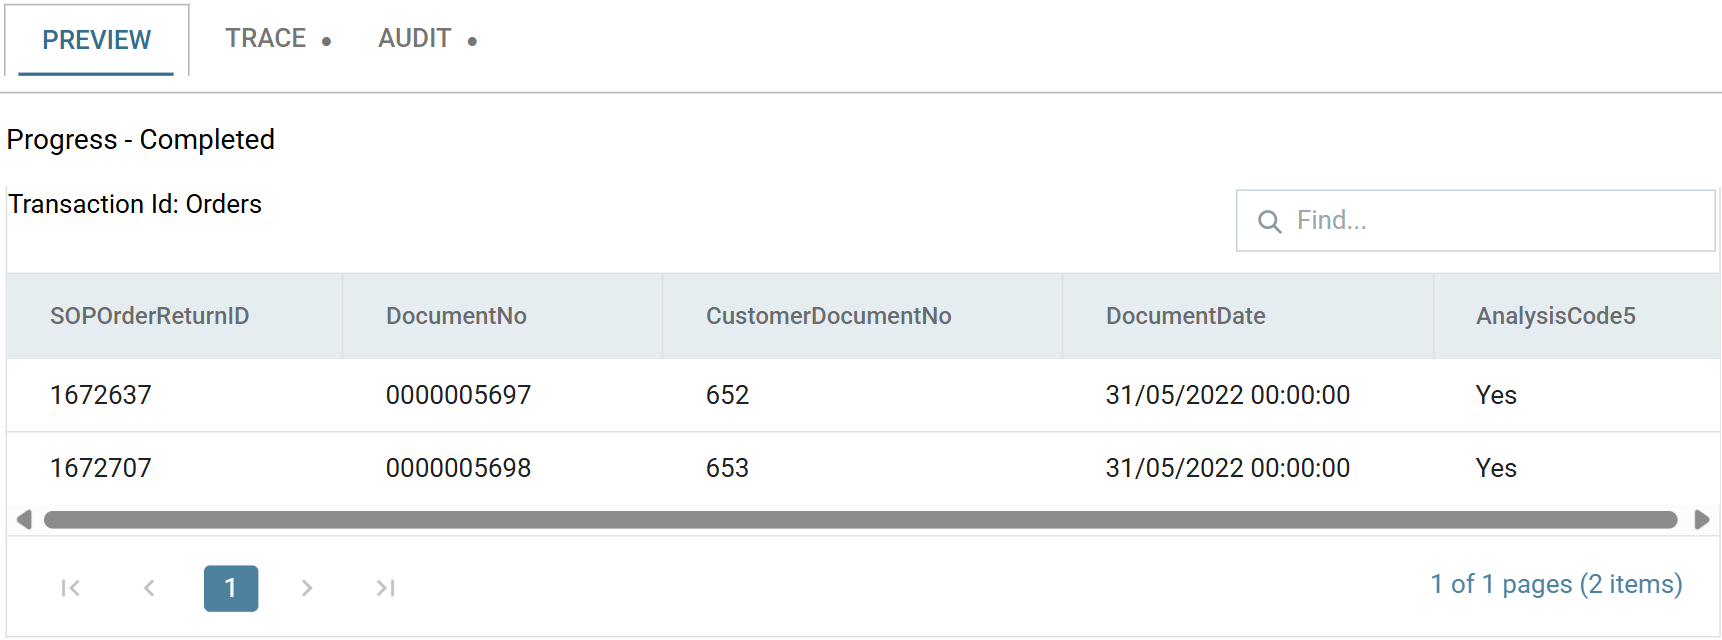
The SQL user needs db_datawriter rights
The SQL user in the connection string needs db_datawriter rights to
perform the update. Without them the transform raises an error.
-
Return to Sage 200 and view the order. The
Exportedanalysis code is now set toYes.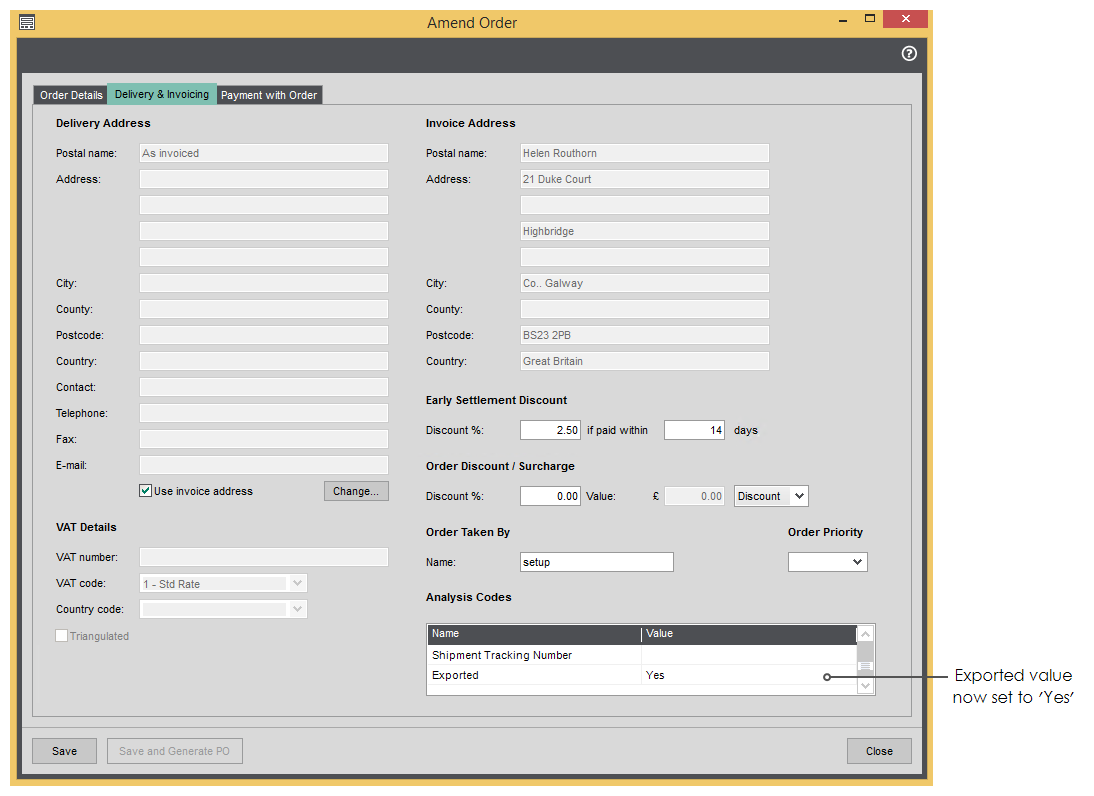
-
Return to the DB Reader and press Refresh. The dataset is now empty, because the order it previously returned no longer matches
AnalysisCode5 = 'No'.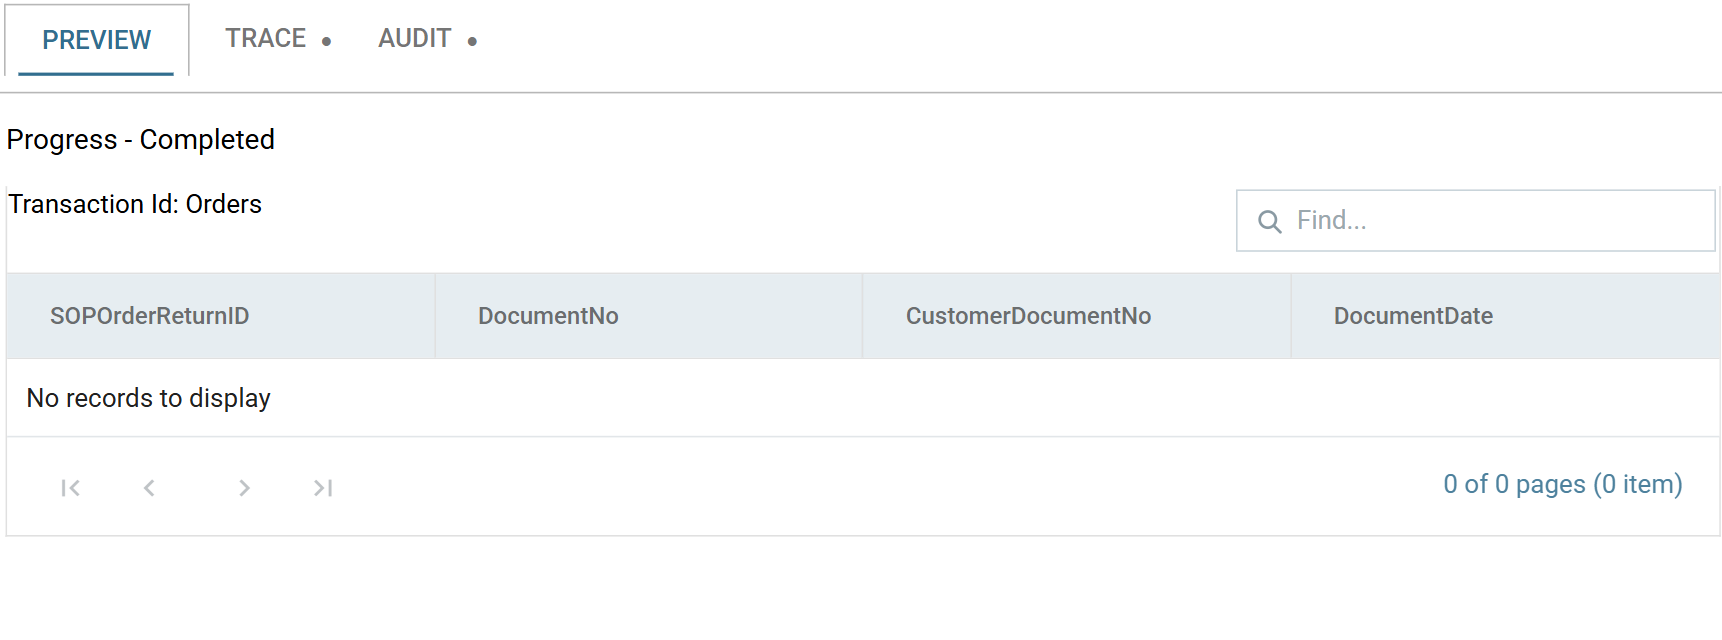
Data Integrity Considerations
Use this method of updating data only in very narrow cases. This example changes a single analysis code value.
Use the IMan Sage 200 connector to update orders if the update involves anything that could affect the data integrity of the Sage 200 database.
Take-on Considerations
Every sales order created before the analysis code was set up has that analysis
code empty in the Sage 200 database. The value is neither Yes nor No, so
neither the export query nor its opposite matches those orders. You may need to
update those existing records to Yes or No as an initial take-on step.
The same applies if the analysis code you picked has been used for something
else, such as a marketplace order id. Those orders hold a value that is neither
Yes nor No, so the export query leaves them alone and the Database Writer
never sees them. Check what is in the column before you choose it: