1. Create Shipments & Invoices
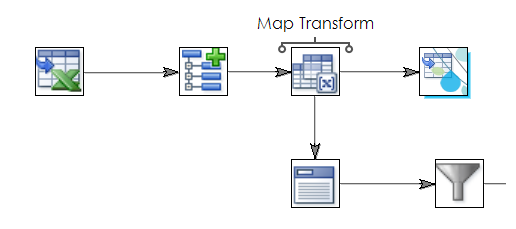
Map Transform
In this step will add an empty field to the dataset which will be mapped to the O/E Order Detail to capture the Line Id generated by Sage300 when the order is created.
- Re-open the integration created in the first section of the training guide
- Click on the Transform Setup tab.
- Open the Map transform.
- Open the Map transform and add a new field to the OrderDetail transaction type.
- Enter new field name.
- For training, enter: Sage300LineId
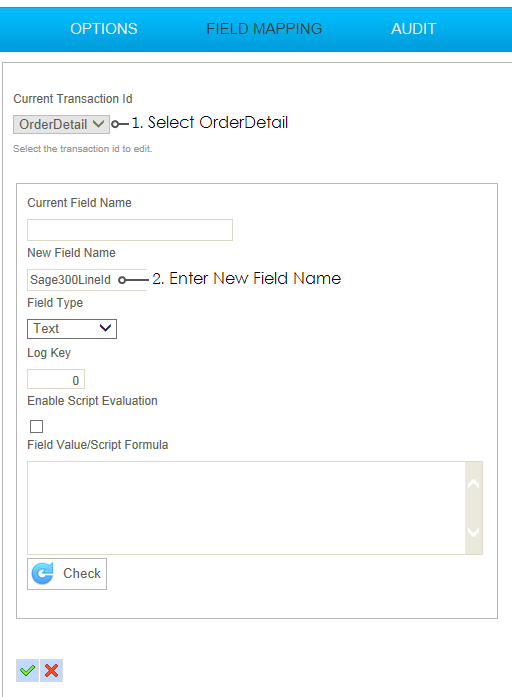
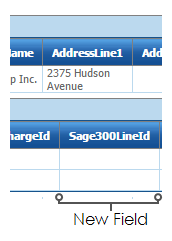
- Press Refresh until you can see the new field.
- Press Apply to save the transform and then Close.
Sage300 Order Connector
The field created in this step will be used to capture the auto-generated Line Id.
- Re-open the Sage300 Order connector.

- Click on the Field Mapping tab and change the Transaction Id to OrderDetail.
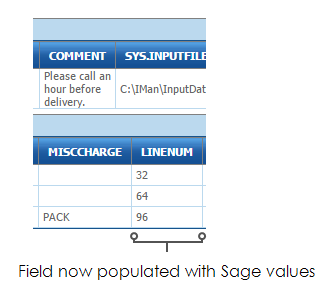
- Edit the field mapping so the field created in the Map transform is mapped to the Line Number field.
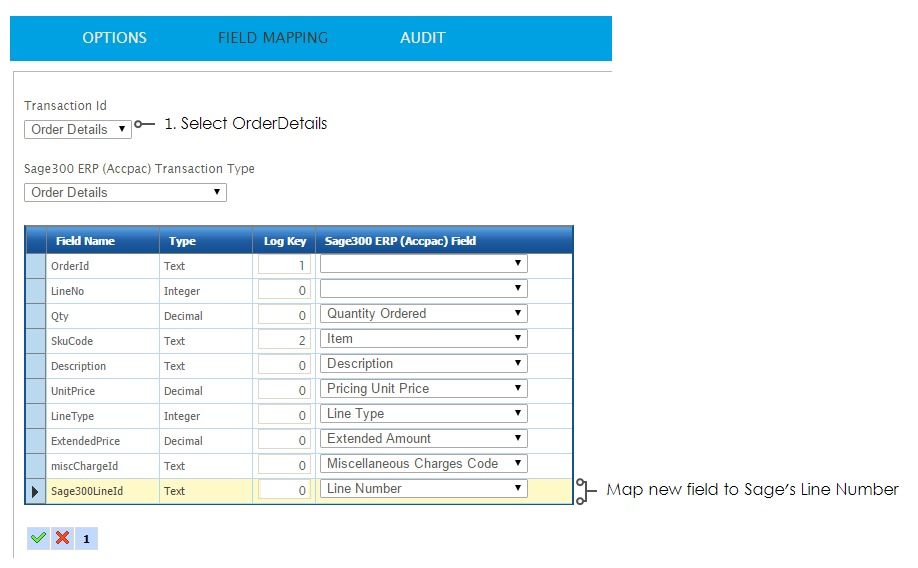
- Save the grid and press Refresh to re-generate the orders.
PostOrderMap
In this step we will add two new fields to the IMan dataset to allow us to capture the auto-generated Shipment & Invoice numbers.
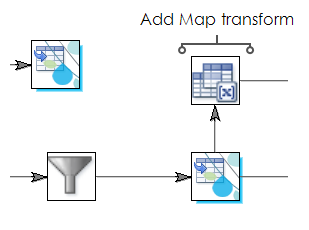
- Add a Map transform to the end of Sage300 Order Connector.
- Click the Field Mapping tab and add three fields to the data set as per the following:
- Name
- ShipmentNumber
- Field Type
- Text
- Enable Script Evaluation
- Unchecked
- Formula
- Empty
- Name
- InvoiceNumber
- Field Type
- Text
- Enable Script Evaluation
- Unchecked.
- Formula
- Empty
- Name
- CreateInvoice
- Field Type
- Boolean
- Enable Script Evaluation
- Checked
- Formula
- True
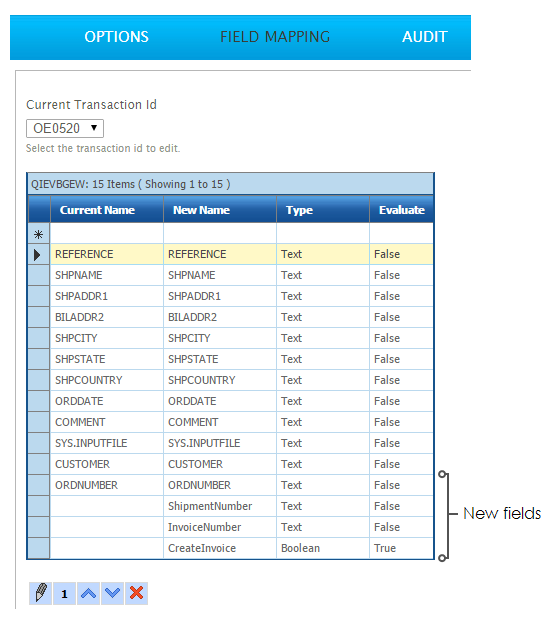
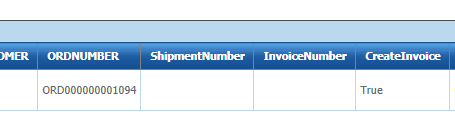
- Press Refresh to generate the new dataset with the fields.
- Press Apply to save then close.
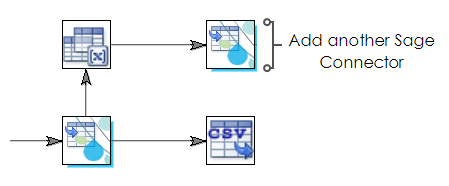
Generating the Shipments & Invoices
In this step you will generate the O/E Shipment and O/E Invoices from Orders.
- Add another Sage300 Connector to the integration and connect it to the Map transform created in the previous step.
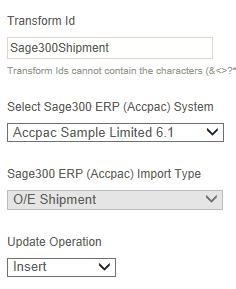
- Open the connector and select the company, and select ‘O/E Shipment’ from the Import Type drop down.
- Click the Field Mapping tab.
- Now you need to map the incoming transaction ‘OE0520’ to the ‘Shipments’.
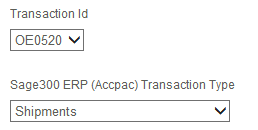
- Click the edit button under the grid to map the Order Header fields.
|
Incoming Field |
Map To Sage300 Field |
|---|---|
|
ORDNUMBER |
Order Number |
|
ShipmentNumber |
Shipment Number |
|
InvoiceNumber |
Invoice Number |
|
CreateInvoice |
Create Invoice from Shipment |
- Press the Green Tick to save the mapping.
- Select the OE0500 from the transaction Id and select the Shipment Details from the Sage300 Transaction Type drop down.
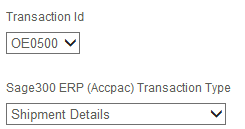
- Click the edit button under the grid to map the Order Detail fields.
|
Incoming Field |
Map To Sage300 Field |
|---|---|
|
QTYORDERED |
Quantity Shipped |
|
LINENUM |
Order Line Number |
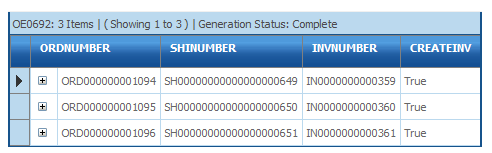
- Press Refresh and if successful the Preview will display the auto-generated shipment and invoice numbers.
- Press Apply to save and then close.
Preparing to Generate the O/E Invoice
This step will simply add a single field to the dataset to allow us to specify the path to export the data to.
- Add a Map transform to the Sage300 Shipment connector created in the previous step.

- Click the Field Mapping tab and add two new fields as per the following:
- Name
- ExportPath
- Field Type
- Text
- Enable Script Evaluation
- Checked
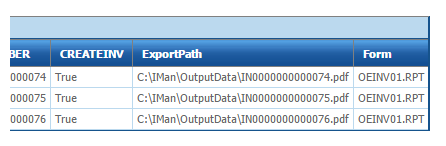
- Formula
- "C:\IMan\OutputData\" & %INVNUMBER & ".pdf"
- Name
- Form
- Field Type
- Text
- Enable Script Evaluation
- Unchecked
- Formula
- OEINV01.RPT
- Press Refresh.
- Press Apply to save then Close.