6.2 - Aggregate Transform
The aggregate transform allows you to:
- Create records which are derivatives of other records in a particular node.
- Create record(s) which are not part of the original dataset.
Examples of use
- Create a Balancing detail line for a POS sales journals which is a negative sum of the other records.
- Create a VAT record which is a sum of other VAT amount fields for the other records.
- Consolidate into a single record many lines of an invoice or journal.
- Create shipping charge or comment lines from values for example located in a header record.
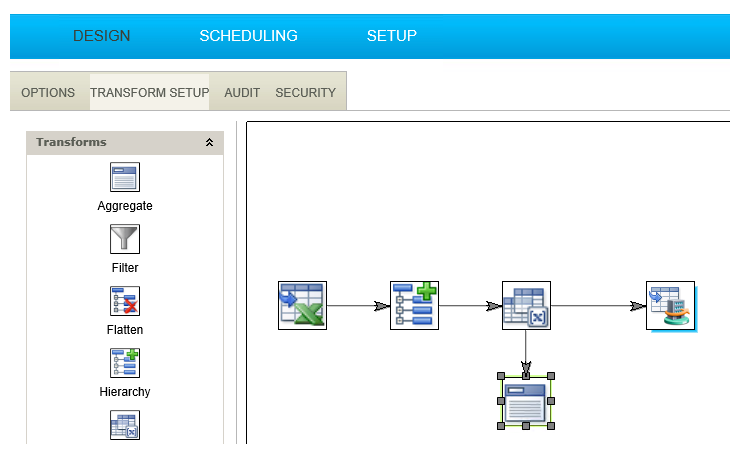
Creating the Aggregate Transform
- Add an Aggregate transform; connect it to the Map transform and; open its setup.
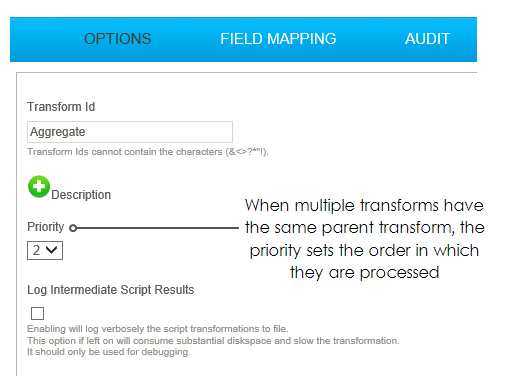
Priority Field
The Priority field is displayed for transforms where there are 2 or more children connected to a parent and is used to control the ordering of processing.
Aggregate > Field Mapping
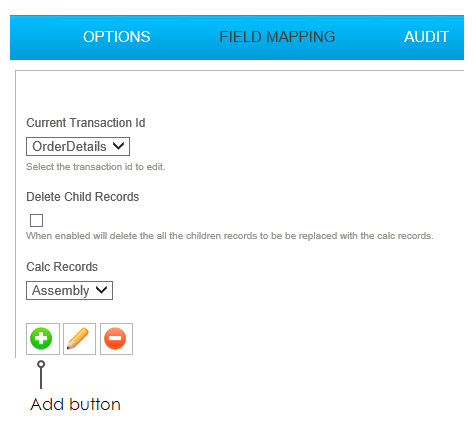
- Open the field mapping tab.
- Change the current transaction Id to OrderDetails.
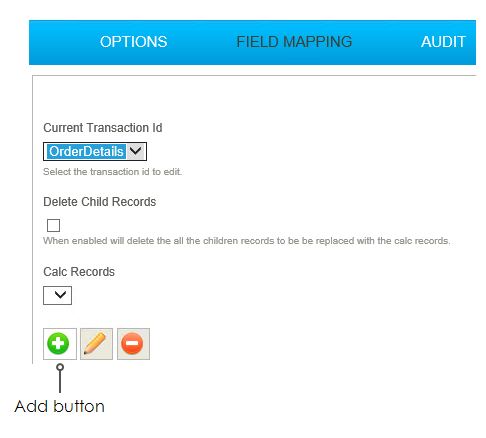
- Press the Add button.
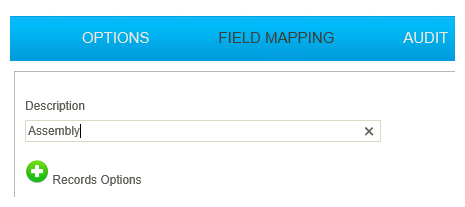
- Assign a friendly name to identify the record (this will appear in the drop down above).
- For training, enter: Assembly
- Set the fields to following values, by double clicking the relevant field in the gird:
- Field Name
- LineType
- Enable Script Evaluation
- Unchecked
- Formula
- 2
- Field Name
- Description
- Enable Script Evaluation
- Unchecked
- Formula
- Assembly
- Field Name
- StoredCharge
- Enable Script Evaluation
- Unchecked
- Formula
- Carriage
- Field Name
- StoredValue
- Enable Script Evaluation
- Checked
- Formula
- GetParent("AssemblyCharge", "Orders")
- Press Apply.
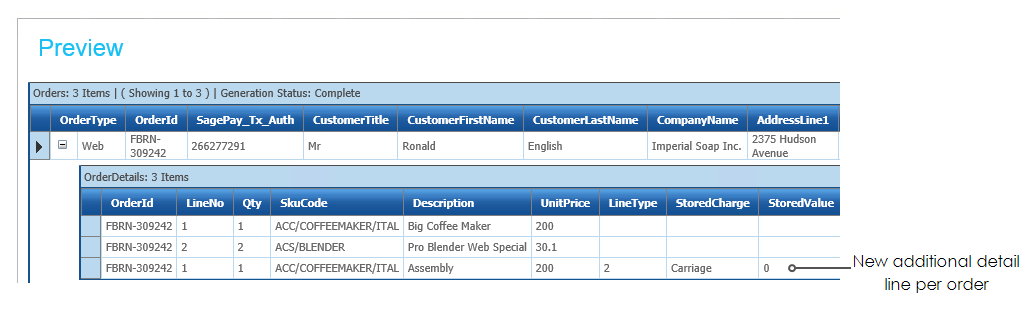
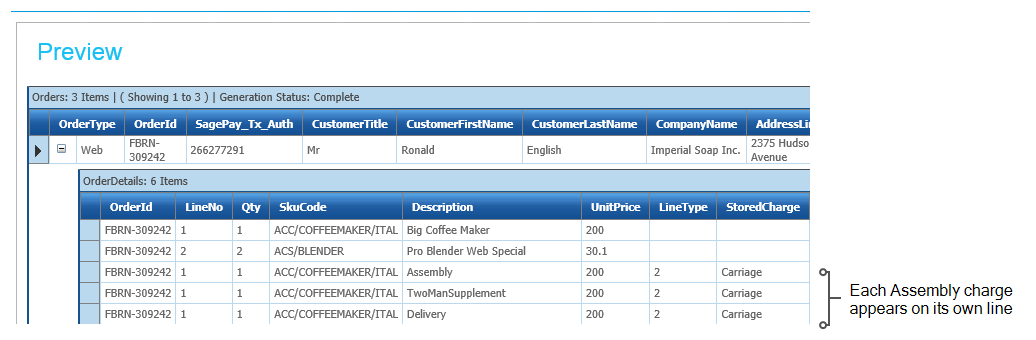
- Press Refresh. Expand an order and you will see an additional detail line per order.
- Now create another Calc Record, by pressing the Add button.
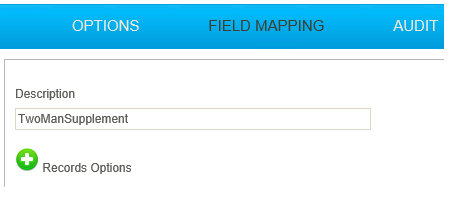
- Assign a friendly name to identify the record.
- For training: TwoManSupplement
- For training: TwoManSupplement
- Set the fields to following values, by double clicking the relevant field in the gird:
- Field Name
- LineType
- Enable Script Evaluation
- Unchecked
- Formula
- 2
- Field Name
- Description
- Enable Script Evaluation
- Unchecked
- Formula
- TwoManSupplement
- Field Name
- StoredCharge
- Enable Script Evaluation
- Unchecked
- Formula
- Carriage
- Field Name
- StoredValue
- Enable Script Evaluation
- Checked
- Formula
- GetParent("TwoManDeliverySupplement", "Orders")
- Press save.
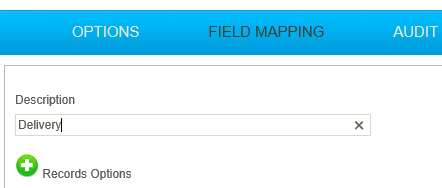
- Finally create the last ‘Calc Record’ for the Delivery charge, by pressing the add button once more and entering a friendly name:
- For training: Delivery.
- Set the fields to following values, by double clicking the relevant field in the gird:
- Field Name
- LineType
- Enable Script Evaluation
- Unchecked
- Formula
- 2
- Field Name
- Description
- Enable Script Evaluation
- Unchecked
- Formula
- Delivery
- Field Name
- StoredCharge
- Enable Script Evaluation
- Unchecked
- Formula
- Carriage
- Field Name
- StoredValue
- Enable Script Evaluation
- Checked
- Formula
- GetParent("Delivery", "Orders")
- Press save.
- Refresh and expand the LAST order.
- Each additional charge now appears on its own line with the corresponding value.
- We now need to create a final ‘Calc’ record to move the Order Comment from the header onto its own detail line.
- Press the Add button, and set the Description field to a recognisable name.
- For training: Comment.
- Set the fields to following values, by double clicking the relevant field in the gird:
- Field Name
- LineType
- Enable Script Evaluation
- Unchecked
- Formula
- 3
- Field Name
- Description
- Enable Script Evaluation
- Checked
- Formula
- GetParent("CustomerComments", "Orders")
- Press save.
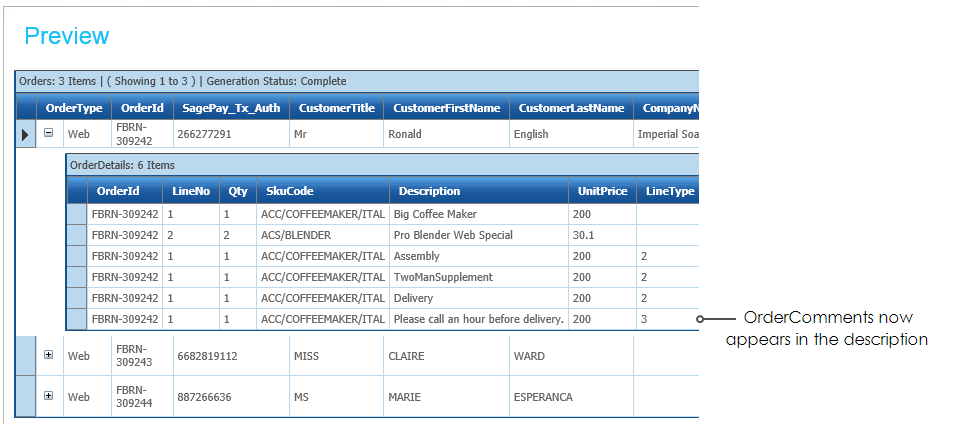
- Press Refresh and there will be another detail line.
- This time the description field equals the value of the OrderComments field in the header.
- This time the description field equals the value of the OrderComments field in the header.
- Save and close the Transform Setup screen.
- Save the integration configuration by pressing the Save button on the bottom-right of the designer.