5 – Sage200 Customer Import
In this step we will import the customers' information into Sage200.
Setup > System Connectors
- Save the integration and click on the Setup tab at the top of the main screen.
- Click on System Connectors item in the left hand menu and double click the top row to create a new record.
- Create a connection to Sage200 as shown below:

- System ID
- Must be populated.
- For Training, enter: ‘Sage200’
- System Type
- Must be selected.
- For Training, choose: Sage 200
- Description
- Always enter a recognisable description.
- Connection String
- Requirements here depend on the connector being used. For information, see System Connectors
- For Training, leave blank.
- Username
- Always enter the Sage200 username.
- Password
- Always enter the accompanying password.
- Company Id
- The Sage200 company name (not the database id) as it appears when you login.
- Return to the designer, load the integration and connect a Sage200 connector to the Map transform; double click to open its setup.
- Select the company from the drop down (or if only 1 exists, click the refresh button).
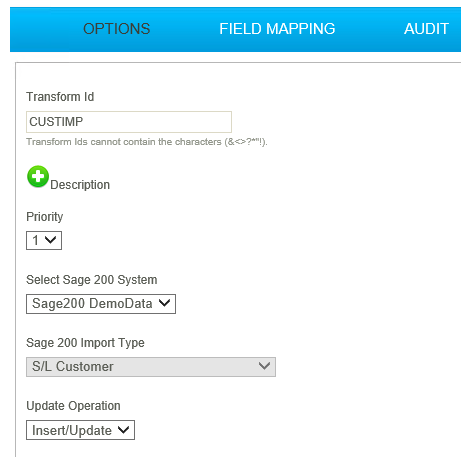
- Select the S/L Customer from the Import Type.
- Go to the Field Mapping tab.
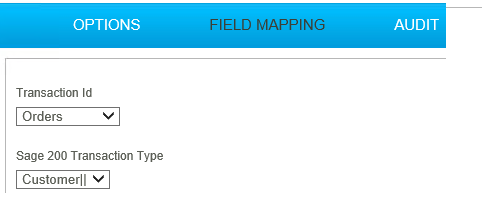
- Map the incoming transaction ‘Orders’ to the ‘Customer’:
- Ensure Orders is selected on the top ‘Transaction Id’ drop down.
- Now select ‘Customer’ from the Sage200 Transaction Type dropdown.
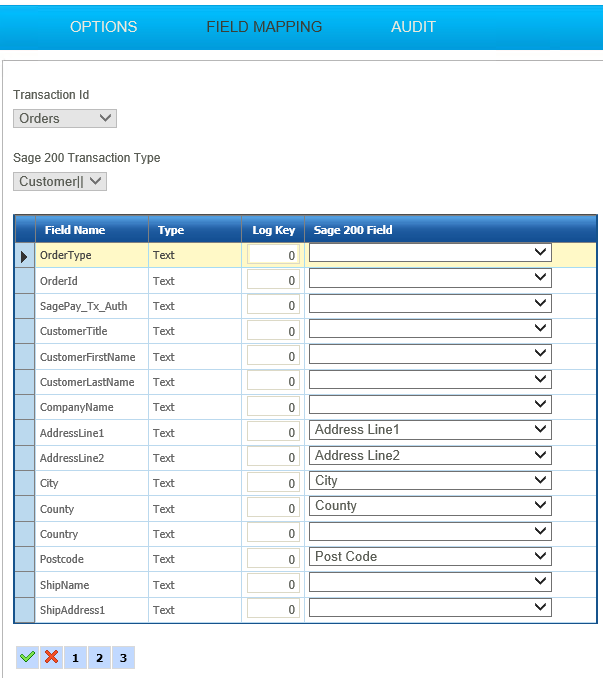
- Press Edit at the bottom of the grid and map the drop down fields to the transform fields (Remember move to pages 2 & 3 as they also contain fields!):
|
Incoming Field |
Map To Sage200 Field |
|---|---|
|
AddressLine1 |
Address Line 1 |
|
AddressLine2 |
Address Line 2 |
|
City |
City |
|
County |
County |
|
Postcode |
Post Code |
|
|
Def Ctc Email |
|
CustomerActualName |
Name |
|
CustomerContact |
Def Ctc Last Name |
|
Ph1TelNo |
Def Ctc Phone Number |
|
Ph1Area |
Def Ctc Phone Area Code |
|
Ph1Country |
Def Ctc Phone Ctry Code |
|
CustomerNo |
Reference |
- Save the grid.
- Press Refresh.
- This may take a little time to process so leave for about 5-10 seconds and press Refresh again. If it the status moves to complete with no errors, the customer records should now be in Sage200.
- Re-open the Map transform.
- Press Refresh.
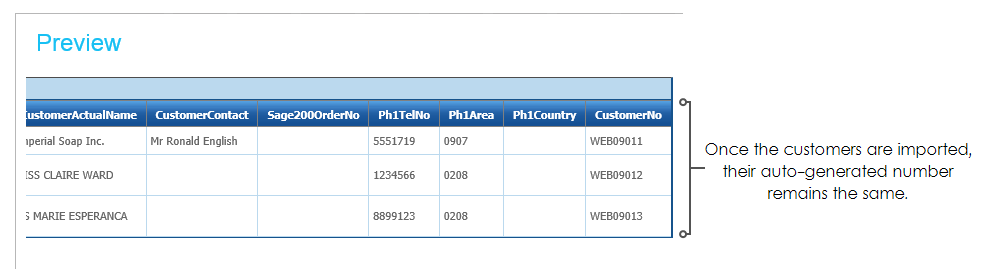
- Instead of generating a new Customer number; it should return the existing id already in the Sage200 database.