3. Email Invoice
Preparing the IMan dataset for Emailing
In this step we will add a number of fields to the IMan dataset so they can be used to dynamically populate contents of the email.
Setup the Customer Lookup
We will create a lookup to retrieve some key customer data from the Customer record.
- Save the integration and go to the Setup area, then click Lookups, and double click the top row to create a new Lookup.
- Enter the values as per the following:
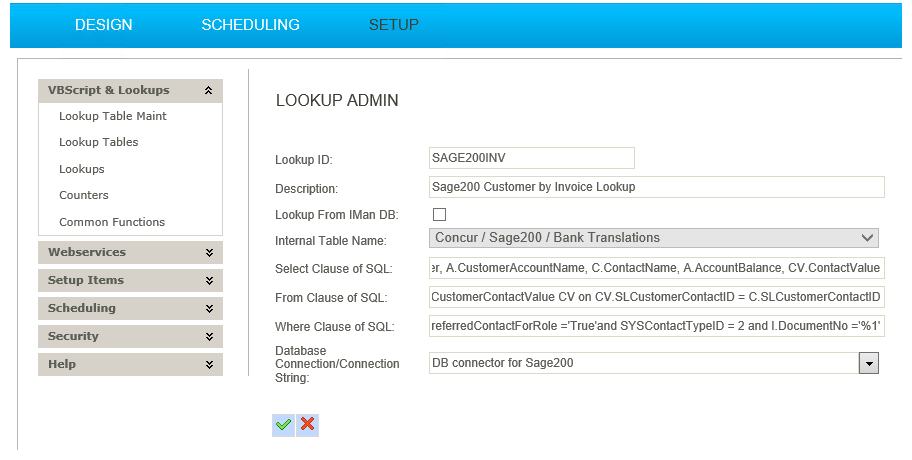
- Lookup ID
- SAGE200INV
- SAGE200INV
- Description
- Sage200 Customer by Invoice Lookup
- Sage200 Customer by Invoice Lookup
- Lookup from IMan DB
- Unchecked
- Unchecked
- Select Clause
- A.CustomerAccountNumber, A.CustomerAccountName, C.ContactName, A.AccountBalance, CV.ContactValue
- From Clause
- SOPInvoiceCredit I innerjoin SLCustomerAccount A on I.CustomerID = A.SLCustomerAccountID innerjoin SLCustomerContact C on A.SLCustomerAccountID = C.SLCustomerAccountID innerjoin SLCustomerContactRole ContRole on ContRole.SLCustomerContactID = C.SLCustomerContactID innerjoin SYSTraderContactRole SYSContRole on SYSContRole.SYSTraderContactRoleID = ContRole.SYSTraderContactRoleID innerjoin SLCustomerContactValue CV on CV.SLCustomerContactID = C.SLCustomerContactID
- Yes, this is long, but it’s the only way to obtain the default contact details.
- Where Clause
- SYSContRole.Role ='Account'and ContRole.IsPreferredContactForRole ='True'and SYSContactTypeID = 2 and I.DocumentNo ='%1'
Setup the Map Transform
- Return to the Designer, load the integration.
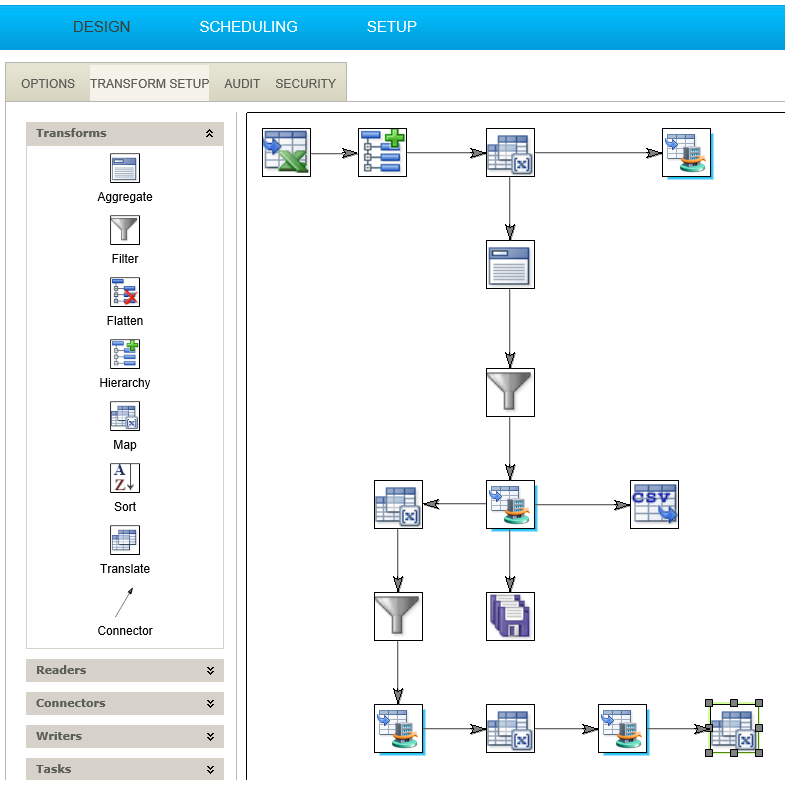
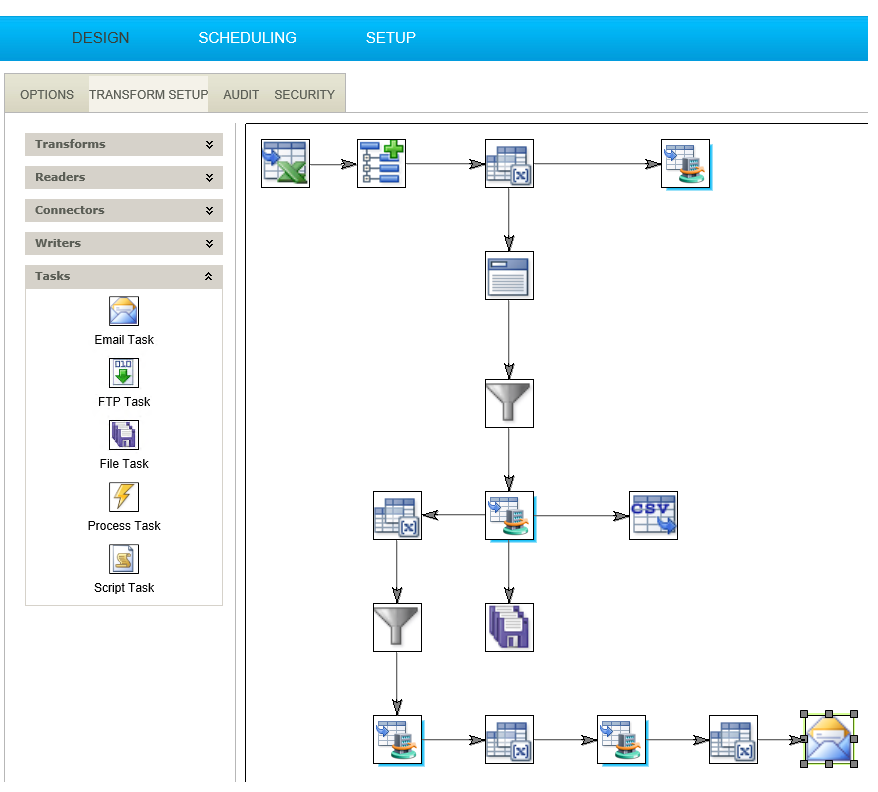
- Open the Transform setup tab.
- Add a Map transform to the SOP Print Post Invoice connector created in the last section.
- Click the Field Mapping tab and add three new fields as per the following:
- Name
- ContactName
- ContactName
- Field Type
- Text
- Text
- Enable Script Evaluation
- Checked
- Checked
- Formula
- Dim Result
Result = Lookup("SAGE200INV", "ContactName", %InvoiceCreditNo, True)
If Result = "" Then
Result = Lookup("SAGE200INV", "CustomerAccountName", %InvoiceCreditNo, True)
End If
Result
- Dim Result
- Name
- Balance
- Balance
- Field Type
- Text
- Text
- Enable Script Evaluation
- Checked
- Checked
- Formula
- Lookup("SAGE200INV", "AccountBalance", %InvoiceCreditNo, True)
- Name
- Email
- Email
- Field Type
- Text
- Text
- Enable Script Evaluation
- Checked
- Checked
- Formula
- Lookup("SAGE200INV", "ContactValue", %InvoiceCreditNo, True)
- Press Refresh.
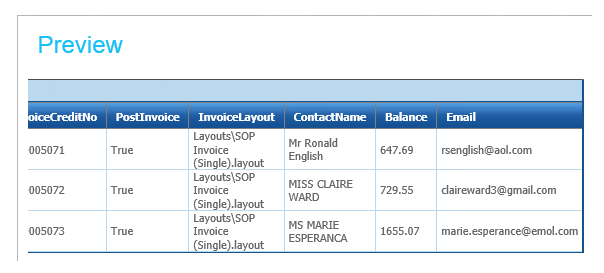
- Press Apply to save then close.
Using the Email Task
In this step you will learn how to setup the email task.
- Click on the Tasks group on the left hand of the designer and connect an Email task to the end of the Map transform.
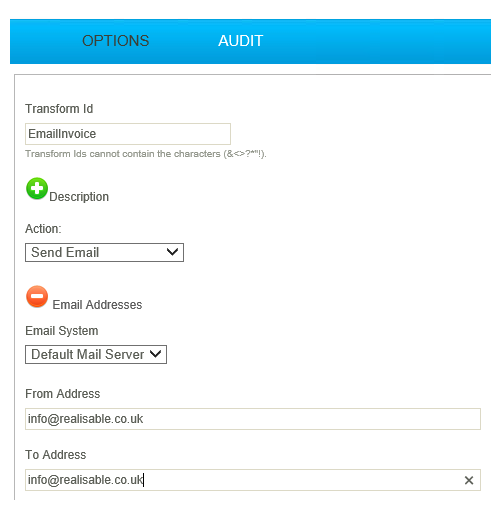
- Expand the Email Addresses group and enter the following:
- From Address
- Replace with your email address.
- To Address
- Enter your address.
- Typically you would dynamically populate this with a value from your dataset, i.e. %INVOICE.Email
- Collapse the Email Addresses group.
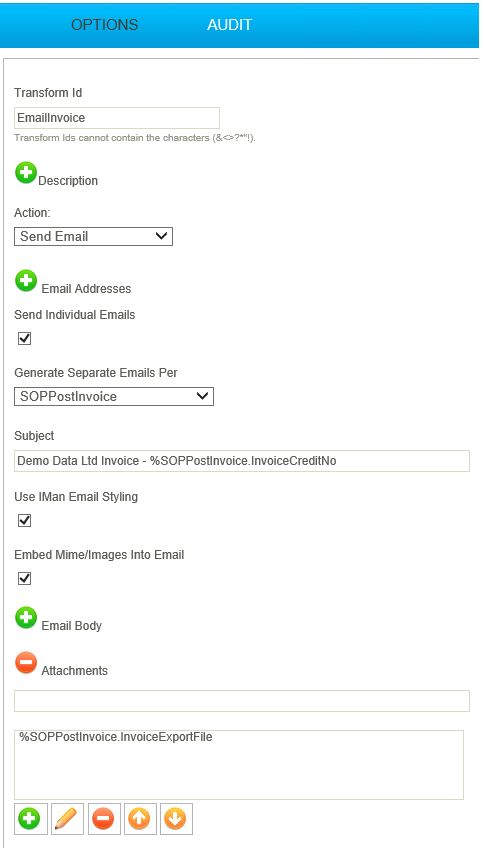
- Enter/select the following values:
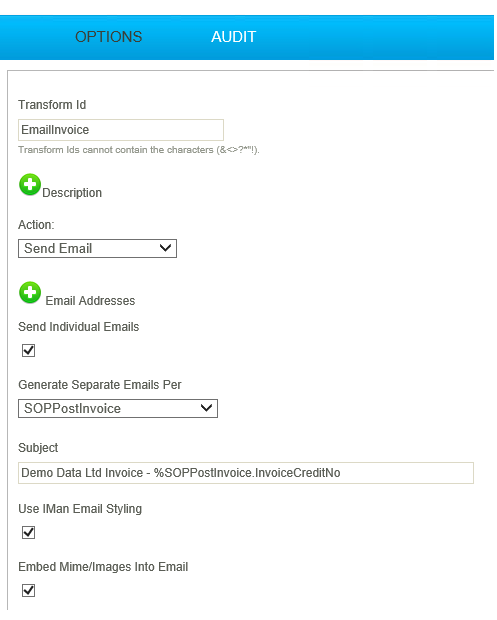
- Send Individual Emails
- Checked
- With this check every address in the To address will send a separate email.
- Generate Separate Emails Per
- SOPPostInvoice
- This will generate an email for each SOPPostInvoice record i.e. for each invoice.
- Subject
- Demo Data Ltd Invoice - %SOPPostInvoice.InvoiceCreditNo
- Use IMan Styling
- Checked
- The email will be formatted using the internal IMan styling used on the audit report. If this is unchecked it allows you to create an email using your own styling and HTML.
- Embed MIME/Images into Email
- Checked
- Any images referenced in the email will be embedded into the contents of the email as opposed to being referenced as an URL or local file path.
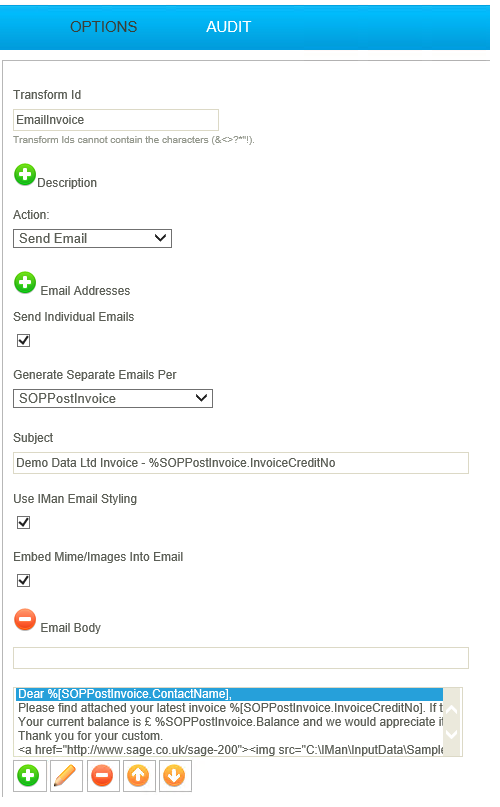
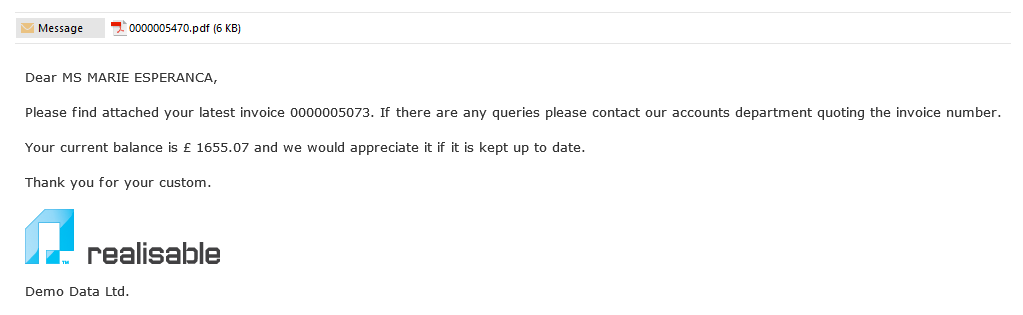
- Expand Email Body options.
- Enter the following; after each line press the Add button:
- Line 1
- Dear %[SOPPostInvoice.ContactName],
- Line 2
- Please find attached your latest invoice %[SOPPostInvoice.InvoiceCreditNo]. If there are any queries please contact our accounts department quoting the invoice number.
- Line 3
- Your current balance is £ %SOPPostInvoice.Balance and we would appreciate it if it is kept up to date.
- Line 4
- Thank you for your custom.
- Line 5 – In this line we add the company’s logo using some html. It is important to replace the path of the logo to the actual path.
- <a href="http://www.sage.co.uk/sage-200"><img src="C:\IMan\InputData\SampleLogo.png" /></a>
- Line 6
- Demo Data Ltd.
- Collapse Email Body and expand Attachments
- Enter the following and press the Add button.
- %SOPPostInvoice.InvoiceExportFile
- Press Refresh to generate the invoices, if successful the Generation Status should go complete and three invoices will appear in your inbox.
- Press Apply to save then close and finally save the integration.