1. SOP Despatch
Map Transform
In this step will be add an empty field to the dataset which in turn will be mapped to the SOP Order Detail to capture the line id generated by Sage200 when the order is created.
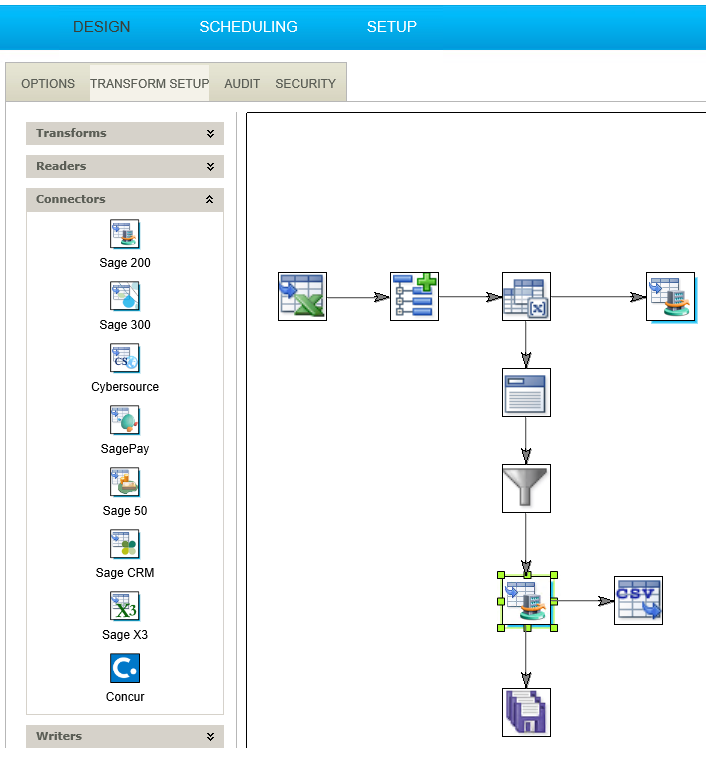
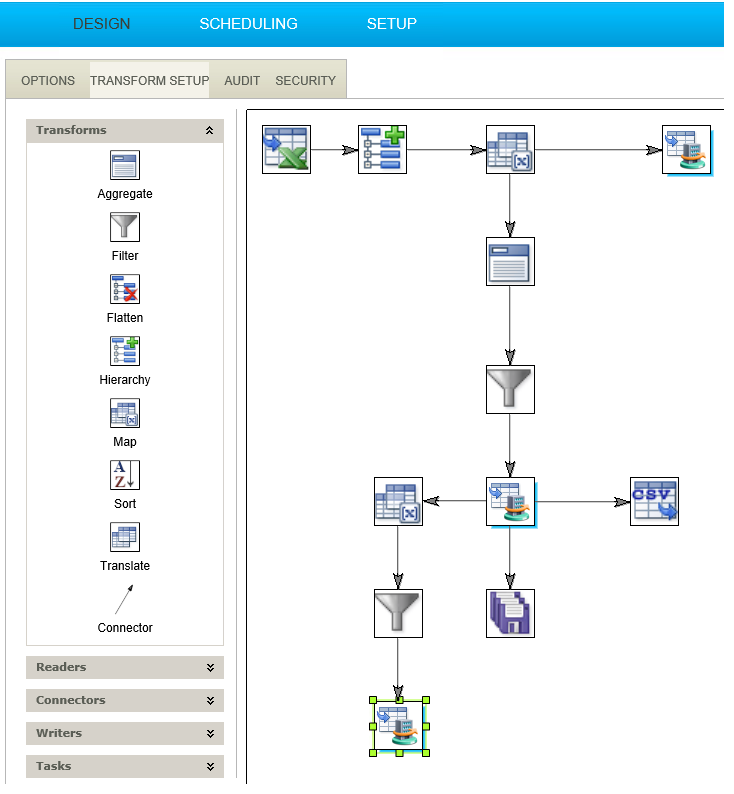
- Re-open the integration created in the first section of the training guide
- Click on the Transform Setup tab.
- Open the Map transform.

- Open the Map transform and add two new fields to the OrderDetail transaction type:
- Name
- Sage200LineId
- Field Type
- Text
- Enable Script Evaluation
- Unchecked
- Formula
- Empty
- Name
- AllocationQty
- Field Type
- Decimal
- Enable Script Evaluation
- Checked
- Formula
- %Qty
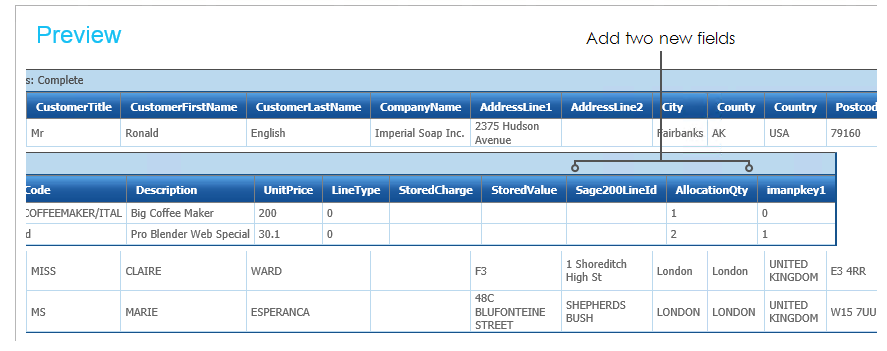
- Press Refresh until you can see the new fields:
- Press Apply to save the transform and then Close.
Sage200 Order Connector
This step will be used to capture the auto-generated Line Id.
- Re-open the Sage200 Order connector.
- Click on the Field Mapping tab and change the Transaction Id to OrderDetails.
- Edit the field mapping so the new detail fields created in the previous step are mapped to the ‘SOPOrder Return Line Id’ and ‘To Allocate Qty’.
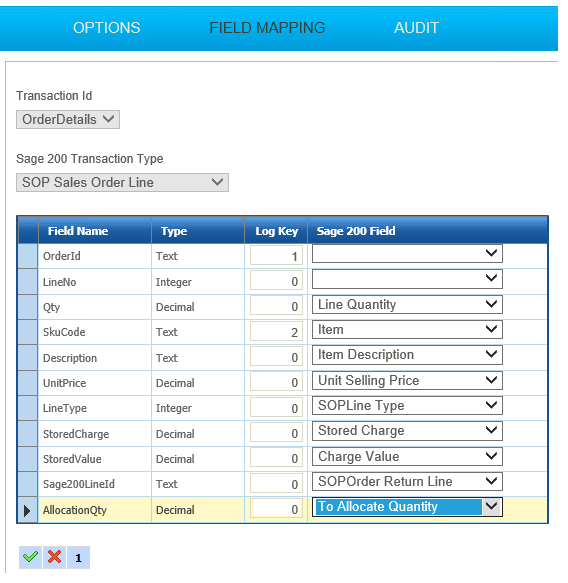
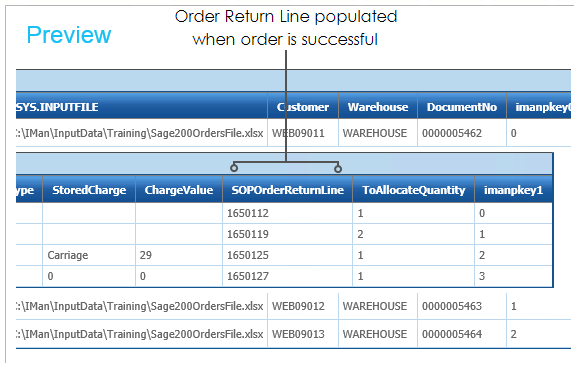
- Save the grid and press Refresh to re-generate the orders.
- If the orders are successfully generated the SOPOrderReturnLine field will be populated with the auto-generated Sage line id.
- This field will be used later to allow us to control which order lines to generate a despatch document with!
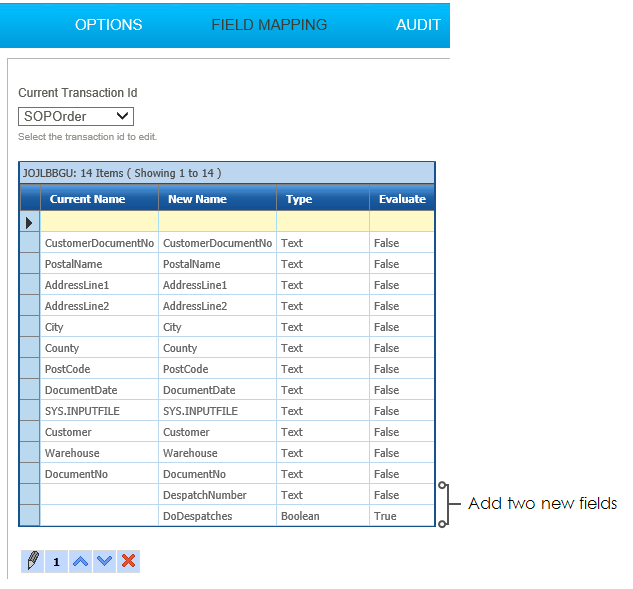
PostOrderMap
In this step we will add two fields to the IMan dataset to allow us to generate the despatch document.
- Add a Map transform to the end of Sage200 Order Connector.
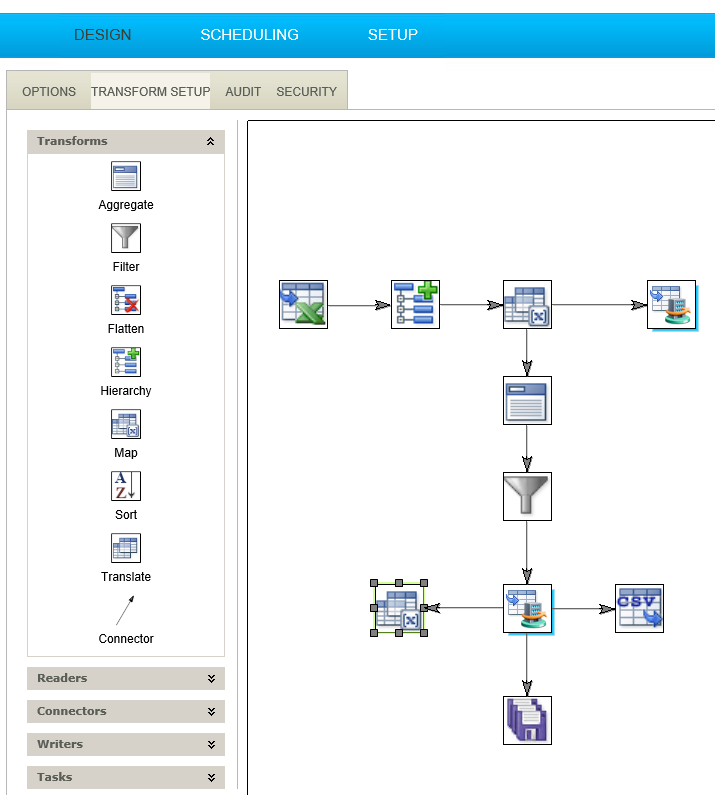
- Click the Field Mapping tab.
- Add two fields to the data set as per the following:
- Name
- DespatchNumber
- DespatchNumber
- Field Type
- Text
- Text
- Enable Script Evaluation
- Unchecked
- Unchecked
- Formula
- Empty
- Name
- DoDespatches
- DoDespatches
- Field Type
- Boolean
- Boolean
- Enable Script Evaluation
- Checked
- Checked
- Formula
- True
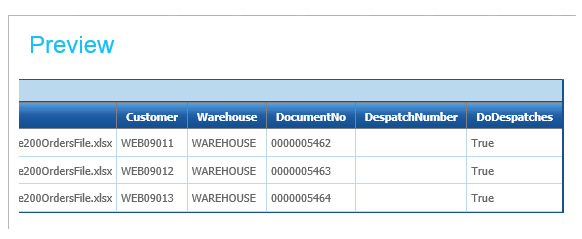
- Press Refresh to generate the new data set with the fields.
- Press Apply to save then close.
Filter the Non-Stock Lines
Before we can create the despatch, the non-stock lines (charges and comments) must be filtered from the dataset otherwise an error will occur since these lines cannot be despatched.
- Add a Filter transform to the Map transform created in the previous step.
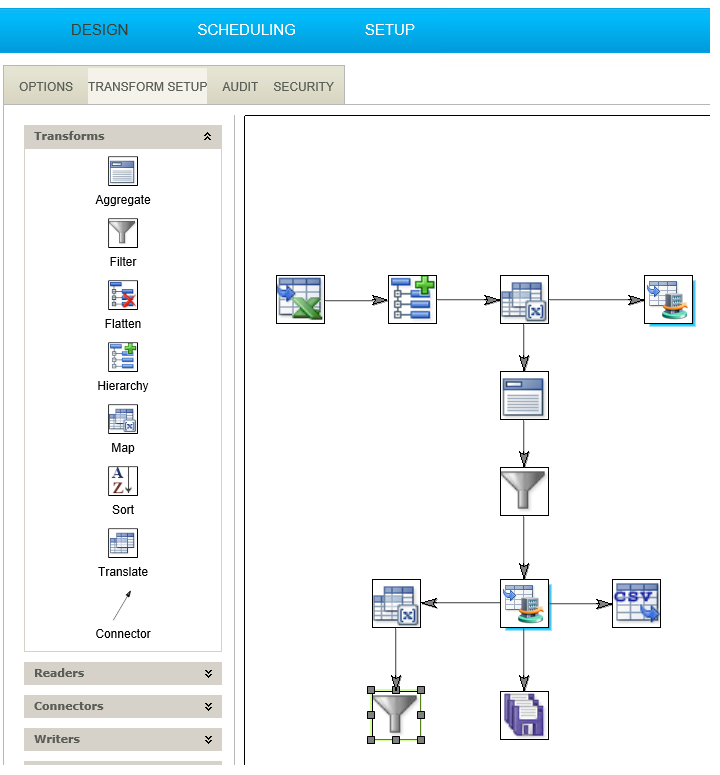
- Click the Field Mapping tab.
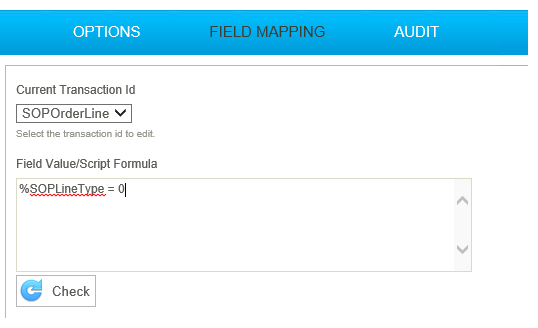
- Change the Transaction Id to SOPOrderLine.
- Enter the formula:
- %SOPLineType = 0
- Press Refresh to check the only the Stock lines remain in the dataset, then press Apply to Save, then close.
Despatch the Order
In this step you will create a despatch against the order.
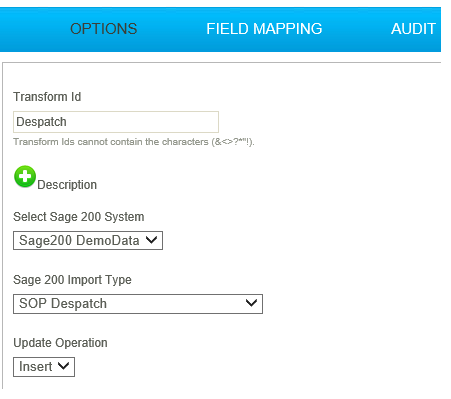
- Add another Sage200 Connector to the integration and connect it to the Filter transform created in the previous step.
- Open the connector and select the company, and select ‘SOP Despatch’ from the Import Type drop down.
- Click the Field Mapping tab.
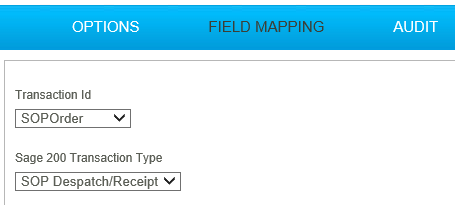
- Map the incoming transaction ‘SOPOrder’ to the ‘SOP Despatch/Receipt’.
- Click the edit button under the grid to map the Order Header fields:
|
Incoming Field |
Map To Sage200 Field |
|---|---|
|
DocumentNo |
Order Return No |
|
DespatchNumber |
Despatch Receipt Number |
|
DoDespatches |
Do Despatches |
- Press the Green Tick to save the grid.
- Select the SOPOrderLine from the Transaction Id drop down.
- Select Line Item from the Sage200 Transaction Type drop down.
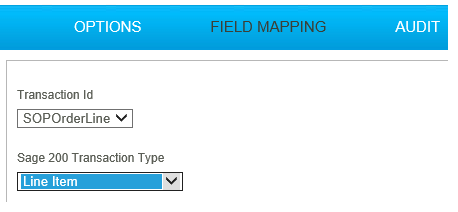
To switch or change the Field Mapping grid being displayed, change theTransaction Id drop down. Changing the Transaction Type drop down alters the Transaction Type to which the top is mapped.
- Click the edit button under the grid to map the Order Detail fields.
| Incoming Field | Map To Sage300 Field |
|---|---|
|
LineQuantity |
Quantity |
|
SOPOrderReturnLine |
SOPOrder Return Line |
The key here is to set the Line Number field from the order to the SOPOrder Return Line field. This will ensure the correct detail is updated with the relevant quantities.
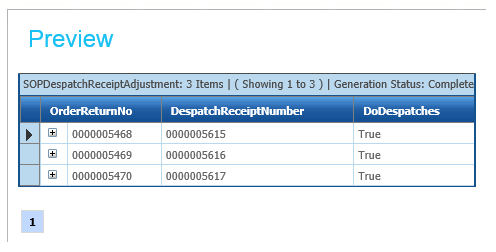
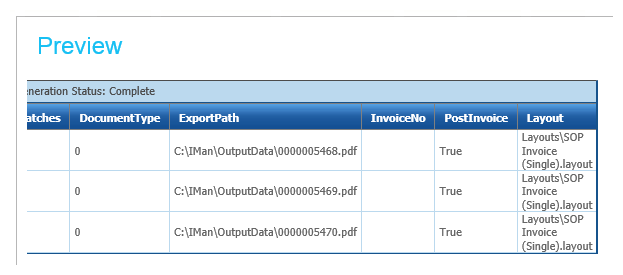
- Press Refresh and if successful the Preview will display the auto-generated despatch number.
- Press Apply to save and then close.
Preparing to Generate the O/E Invoice
This step will simply add a single field to the dataset to allow us to print & post the invoice.
- Add a Map transform to the Sage200 Despatch created in the previous step.
- Click the Field Mapping tab.
- Make sure SOPDespatchReceiptAdjustment is selected from the drop down.
- Add five new fields as per the following:
- Name
- DocumentType
- DocumentType
- Field Type
- Integer
- Integer
- Enable Script Evaluation
- Unchecked
- Unchecked
- Formula
- 0 (Zero, denotes an invoice, as opposed to Credit)
- Name
- ExportPath
- ExportPath
- Field Type
- Text
- Text
- Enable Script Evaluation
- Checked
- Checked
- Formula
- "C:\IMan\OutputData\" & %INVNUMBER & ".pdf"
Replace the first part of the path with the IMan shared data directory.
- Name
- InvoiceNo
- InvoiceNo
- Field Type
- Text
- Text
- Enable Script Evaluation
- Unchecked
- Unchecked
- Formula
- Empty
- Name
- PostInvoice
- PostInvoice
- Field Type
- Boolean
- Boolean
- Enable Script Evaluation
- Unchecked
- Unchecked
- Formula
- True
- Name
- Layout
- Layout
- Field Type
- Text
- Text
- Enable Script Evaluation
- Checked
- Checked
- Formula
- "Layouts\SOP Invoice (Single).layout"
- Press Refresh.
- Press Apply to save then Close.