Integration Designer
There are several pre-designed integrations which are provided to help you understand to how create IMan integrations and highlight some functionality within the product.
This section describes in short each of the sample integrations and how to work with the designer.
Please see the IMan User Guide for a more detailed description, or the application specific training guides for a step by step walk-through of the relevant interface.
Opening the Designer
- Open the ‘Design’ tab at the top of the screen.
- From the ‘Integration Id’ drop down select one of the sample integrations > press the Edit button to load the job.
- Click on the 'Transform Setup' tab to show the graphical design interface.
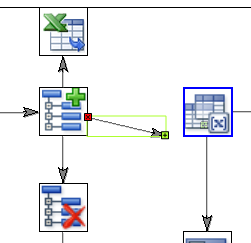
- Located on the left hand side of the design tab is the transform palette. Nodes from the palette are added to a job by dragging the relevant icon onto the design surface.
- The right hand side is the design surface, where the integration is created and maintained; it is also where the relationships between the transformations are defined.
![]()
Opening the Transform Setup Screen
- The first node in an integration is typically a reader or ‘datasource’ > double click on the node to open its setup screen. The setup screen is where various settings pertaining to the node or transforms type are defined.
- Each transform setup screen is divided into two sections:
- Left hand pane – Defines the transform settings of which there are three separate pages (File Layout/Options, Field Mapping, Audit), accessed by the tab options at the top of the screen.
- Right hand pane – The preview area allows you to view on the fly, the results of the transform.
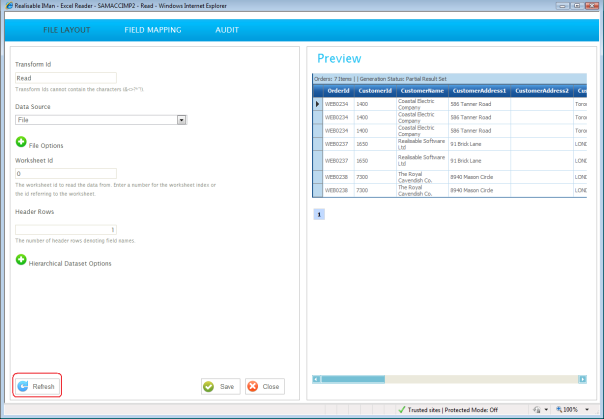
- Press the refresh button to generate the preview dataset on the right. (This may take about 10 seconds or so, on the first refresh)
Connecting Transforms
Transforms are connected through the connector object, located on the Transforms tab.
The connector is an arrow, where the head, indicates the data flow direction.