Appendix 1 – Data Exports (SQL to XML)
Estimated time: 1 Hr
IMan supports not data imports, but also exports!
In this step, an export will be configured by querying the Sage200/Sage300 database for customers and their Delivery addresses, applying some light transformation, before exporting to an Xml File.
Method
- Set Up a Shared Database Connection String
- Create the Export
- Add Hierarchy
- Filter the Dataset
- XML Writer
- Create Child Transaction Types
Set Up a Shared Database Connection String
To export data from Sage200/Sage300 we will query the Sage200/Sage300 database directly via a SQL Query, which requires a Connection String to connect to the database (see the Lookup Setup in the original training for Sage 200 or Sage 300, whichever you are working with).
Shared Connection Strings allow you to define a Connection String once, which can be used in Database Readers, Database Writers & Lookups. This reduces maintenance since the connection string need only be defined once and increases portability if you are moving integrations from one IMan instance to another.
- Go to the Setup Tab and click Database Connections.
- Create a new Database connection:
- Enter a Connection ID.
- Enter a Description.
- Enter the corresponding Connection String.
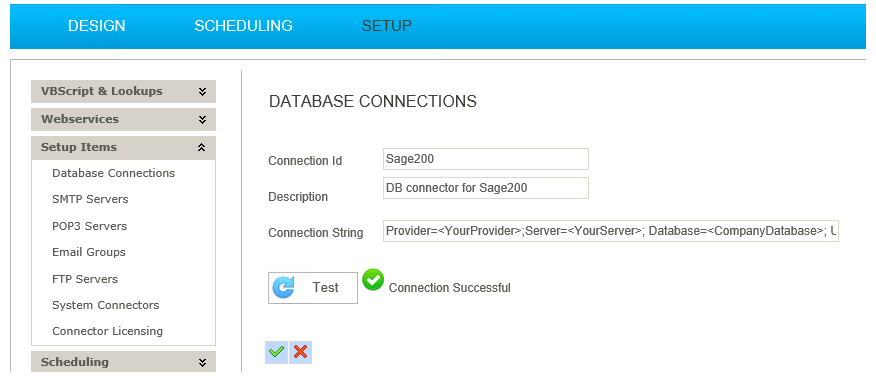
- Press the green tick to save.
- Return to the design tab.
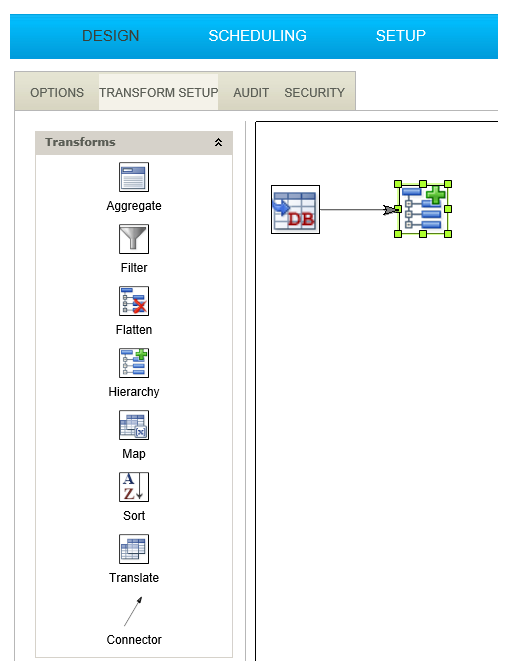
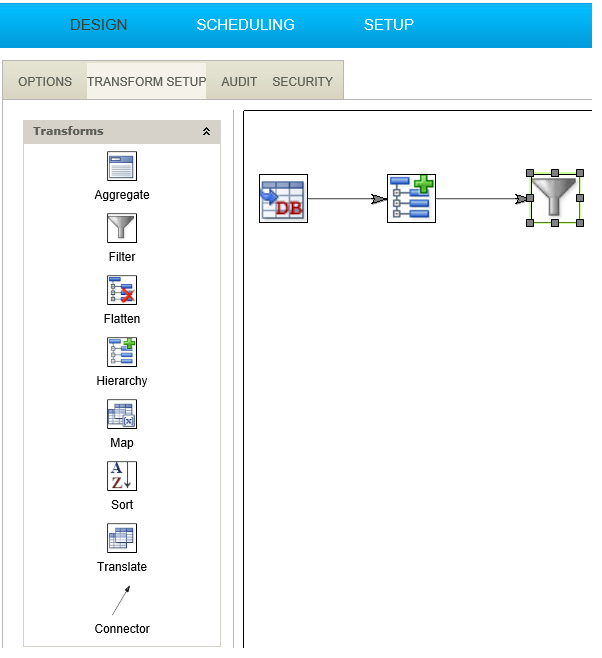
Create the Export
- Create a new integration.
- Drag a DB Read transform onto the integration, double click to open its setup.
- Expand SQL Database Options and select the Connection String from the Database Connection drop down.
Sage 200:
Sage 300: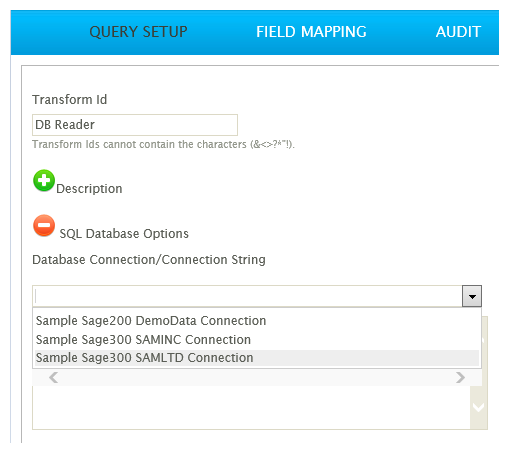
- Enter into the SQL Statement the following:
- For Sage 200:
- select A.CustomerAccountNumber, A.CustomerAccountName, A.CreditLimit, A.AccountBalance, A.DateAccountDetailsLastChanged, D.Description, d.PostalName, D.AddressLine1, D.AddressLine2, D.AddressLine3, D.AddressLine4, D.PostCode, D.TaxNo
from SLCustomerAccount A
leftjoin CustDeliveryAddress D on A.SLCustomerAccountID = D.CustomerID
- select A.CustomerAccountNumber, A.CustomerAccountName, A.CreditLimit, A.AccountBalance, A.DateAccountDetailsLastChanged, D.Description, d.PostalName, D.AddressLine1, D.AddressLine2, D.AddressLine3, D.AddressLine4, D.PostCode, D.TaxNo
- For Sage 300:
- select A.IDCUST, A.NAMECUST, A.TEXTSTRE1, A.TEXTSTRE2, A.TEXTSTRE3, A.TEXTSTRE4, A.NAMECITY, A.CODESTTE, A.CODEPSTL, A.CODECTRY, A.NAMECTAC, P.IDCUSTSHPT, P.NAMELOCN, P.TEXTSTRE1 as SHIPADDR1, P.TEXTSTRE2 as SHIPADDR2, P.TEXTSTRE3 as SHIPADDR3, P.TEXTSTRE4 as SHIPADDR4, P.NAMECITY as SHIPCITY, P.CODESTTE as SHIPSTTE, P.CODEPSTL as SHIPPSTL, P.CODECTRY as SHIPCTRY from ARCUS A left outer join ARCSP P on A.IDCUST = P.IDCUST
- Press Refresh.
Sage 200: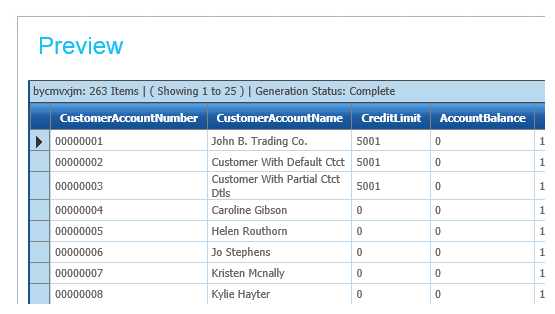
Sage 300: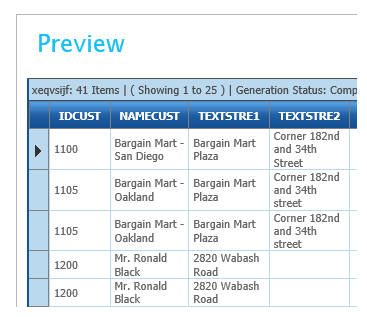
- Click the Field Mapping tab and change the Transaction Id to Customers.
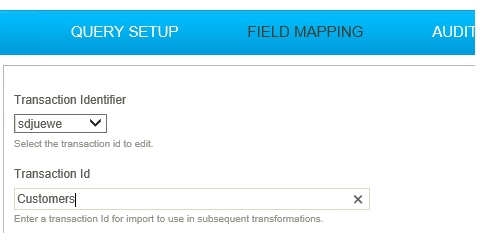
- Go back to the Query Setup tab.
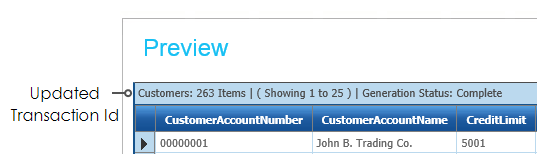
- Press Apply and press Refresh until you see Customers in the Preview:
- Press apply to save the changes
- Close the setup window.
Add Hierarchy
- Drag a Hierarchy transform onto the integration, connect it to the Read transform and double click to open it.
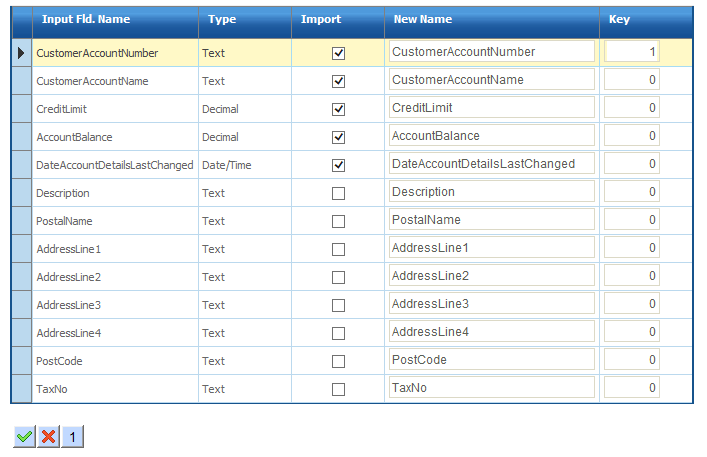
- Click the Field Mapping tab and press the Edit button.
- For Sage 200:
Set key field:
- CustomerAccountNumber
- 1
- Delivery Address fields
- Deselect all (as shown below)
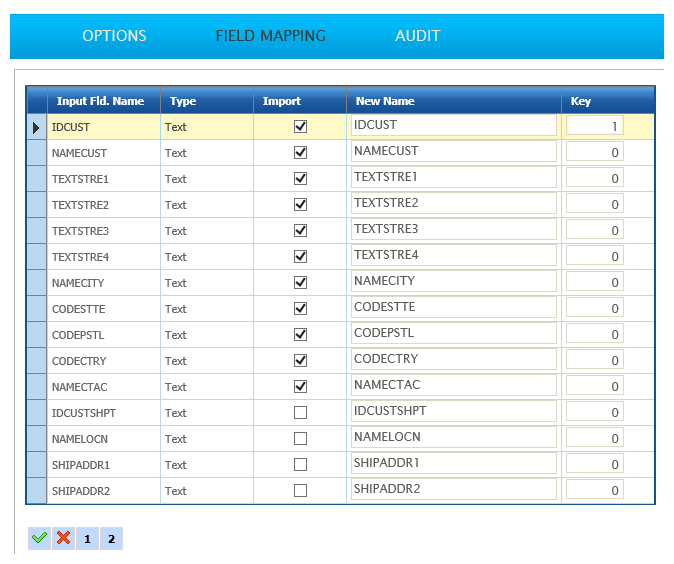
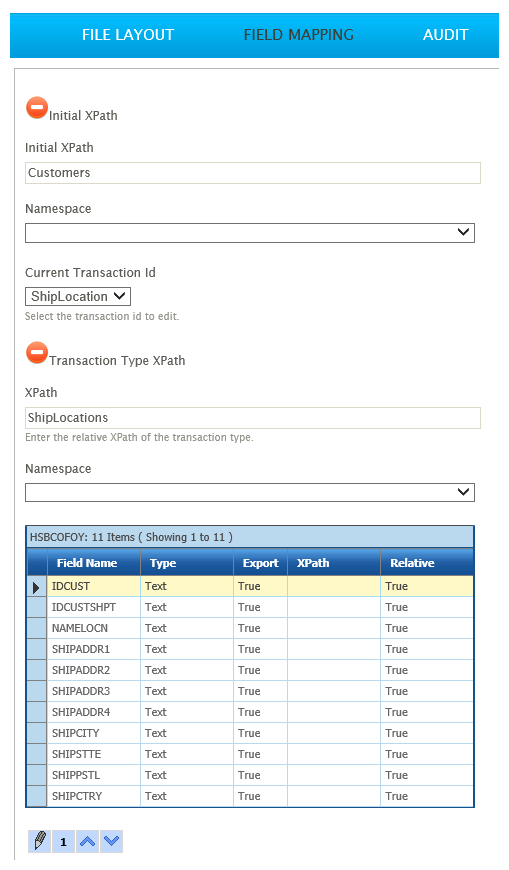
- For Sage 300:
Set key field:
- IDCUST
- 1
Deselect detail fields:
- ship-to field
- Deselect all (on page 2 also)
- Press the green tick to save.
- Sage 200:
- Sage 300:
- In the New Transaction Id textbox enter:
- Sage 200:
- DeliveryAddress
- Sage 300:
- ShipLocation
- Sage 200:
- Press the add button [>]
- Then Edit.
![]()
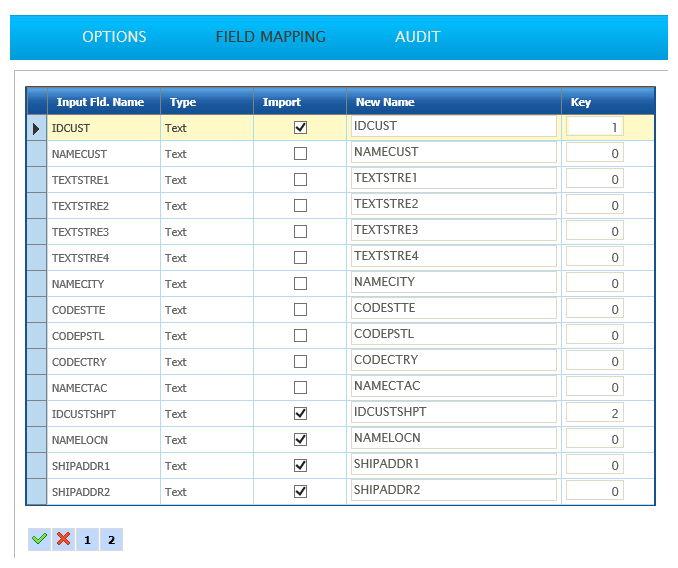
- Sage 200:
- Select detail fields:
- CustomerAccountNumber
- Select
- Delivery Address Fields
- Select All
- Set key fields:
- CustomerAccountNumber
- 1
- Description
- 2
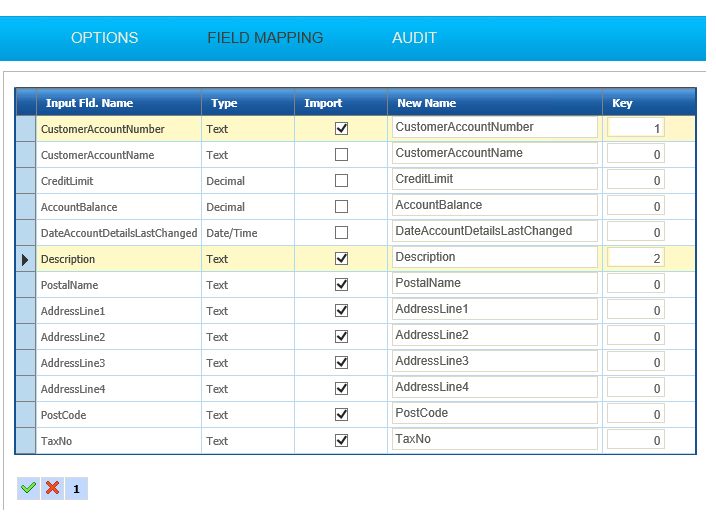
- Sage 300:
- Select detail fields:
- IDCUST
- Select
- Ship-to fields
- Select all
- Set key fields:
- IDCUST
- 1
- IDCUSTSHPT
- 2
- Press green tick to save.
- Press the green tick to save.
- Sage 200:
- Sage 300:
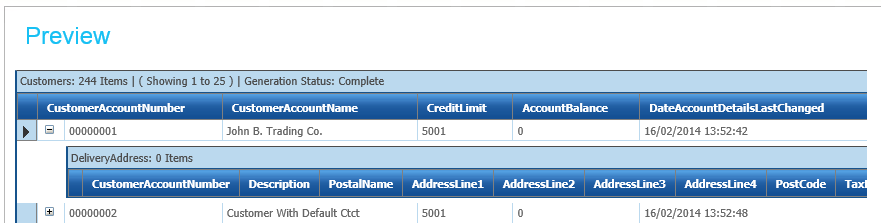
- Press Refresh
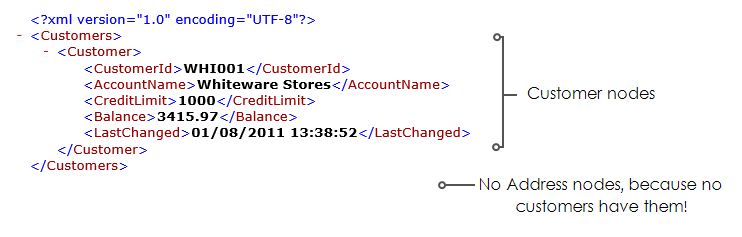
- Expand out some of the records and you will notice that some customers have an empty Delivery Address. This is expected since:
- The SQL Query uses a left outer join.
- Where there are no DeliveryAddress/Ship-To records the Customer record is still returned, but with null/empty values for the DeliveryAddress/Ship-To.
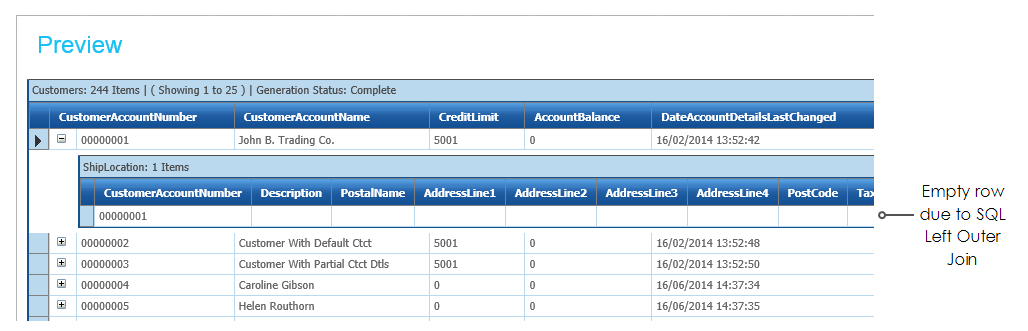
- To remove the empty record, we can use filter transform.
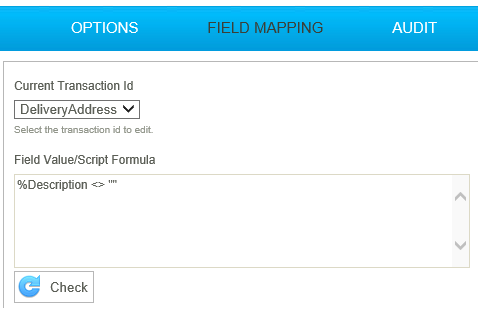
Filter the Dataset
- Add a Filter transform to the integration, connect it to the Hierarchy transform, and double-click to open it.
- Move to the Field Mapping tab, and select the DeliveryAddress transaction.
- Enter into the filter:
- For Sage 200:
- %Description <> ""
- For Sage 300:
- %IDCUSTSHPT <> ""
- %IDCUSTSHPT <> ""
- Press Save, then Refresh.
- The empty rows are deleted!
- The empty rows are deleted!
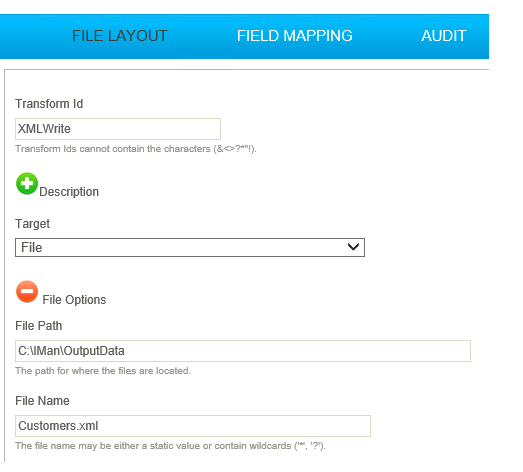
XML Writer
- Add an Xml Writer to the integration, and connect it to the Filter transform.
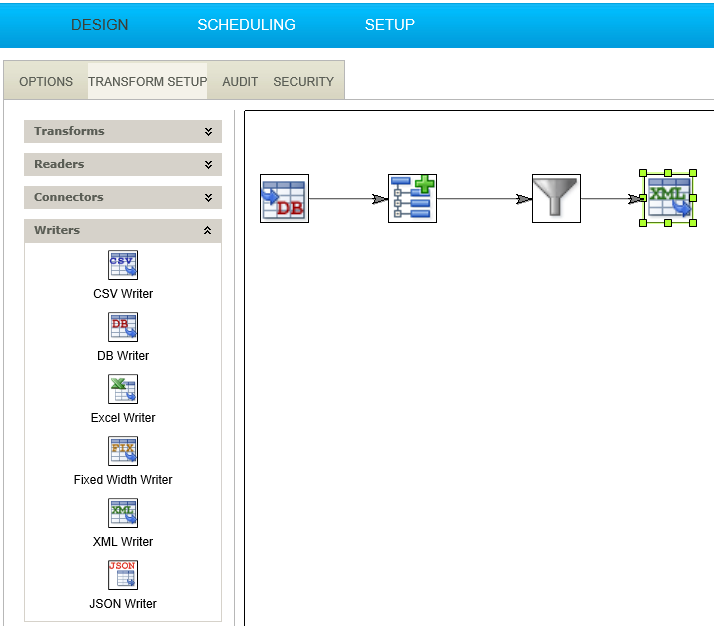
- Double click to open:
- Sage 200:
- Datasource
- Destination of the file.
- For training, select: File
- File Path
- Path to the destination.
- For training: C:\IMan\OutputData
- File Name
- For training: Customers.xml
- Sage 300:
- Target
- Destination of the file.
- For training, select: File
- File Path
- Path to the destination.
- For training: C:\IMan\OutputData
- File Name
- For training: Customers.xml
- Leave the other settings accordingly.
Create Parent Transactions
- Open the Field Mapping tab.
- Expand the Initial XPath
- Sage 200:
- Initial XPath
- /Customers
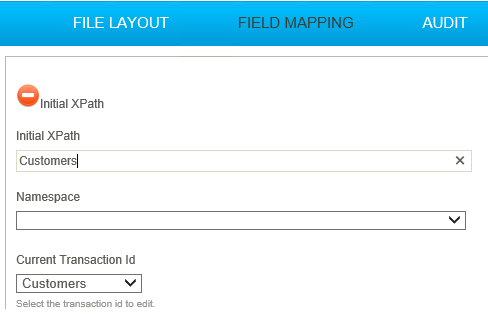
- Sage 300:
- Initial XPath
- /Customers
- Expand Transaction XPath:
- Sage 200:
- XPath
- Customer
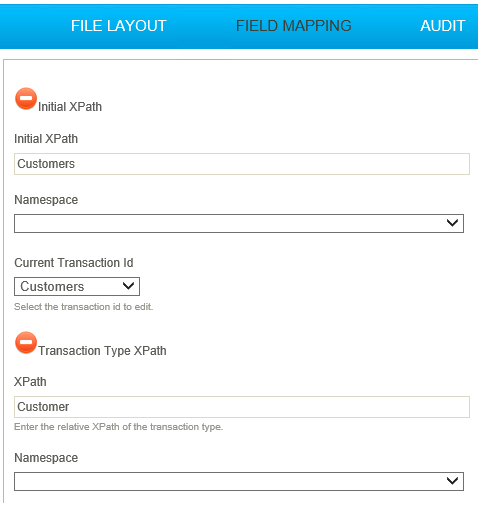
- Sage 300:
- Initial XPath
- /Customers
- Sage 200:
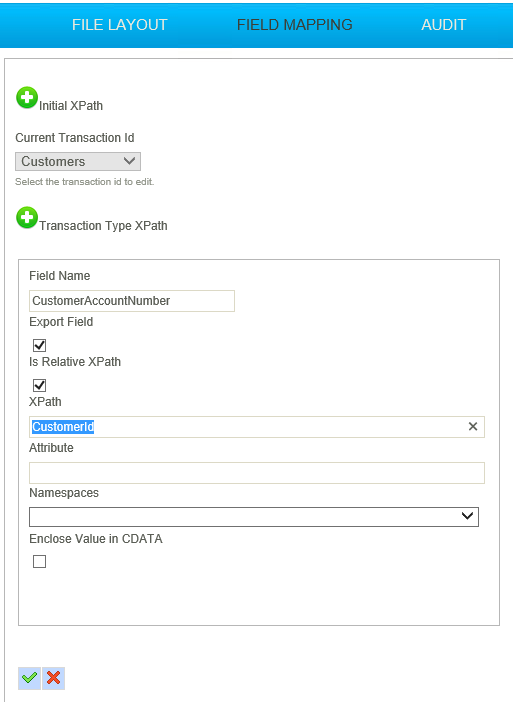
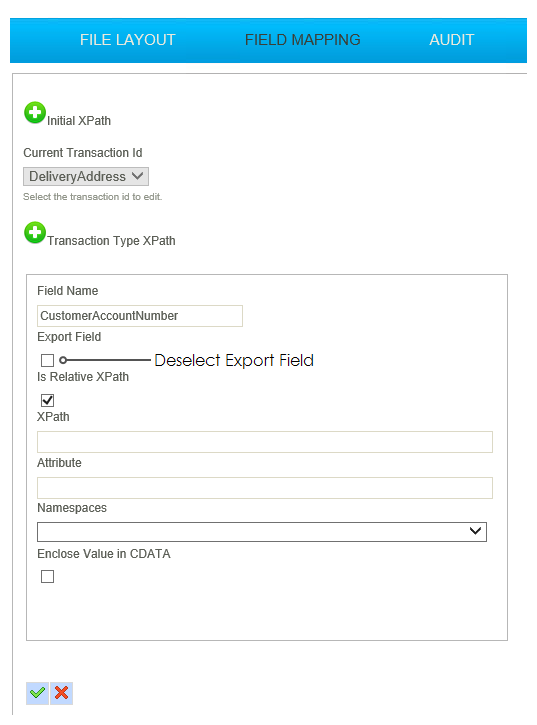
- Double click the CustomerAccountNumber row to edit.
- XPath
- CustomerId
- Sage 300:
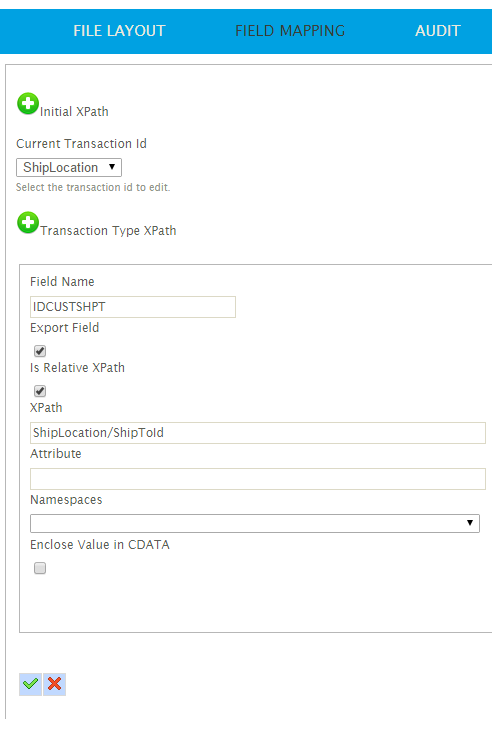
- Double click the IDCUST row to edit:
- XPath
- CustomerId
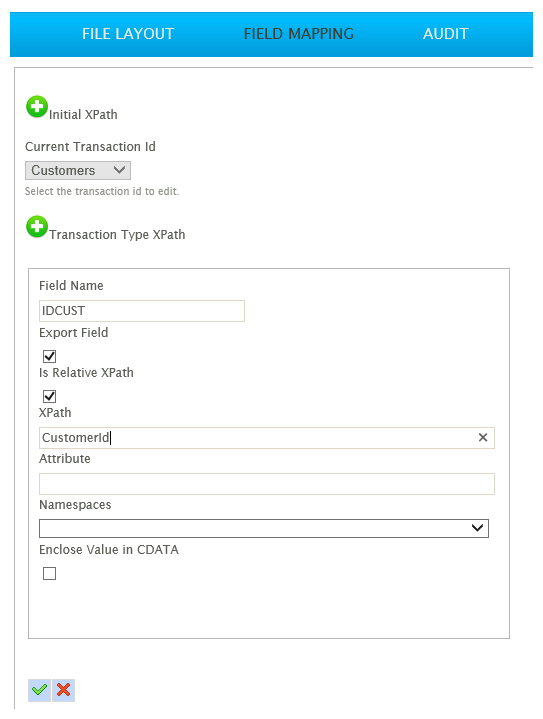
- Press the green tick to Save.
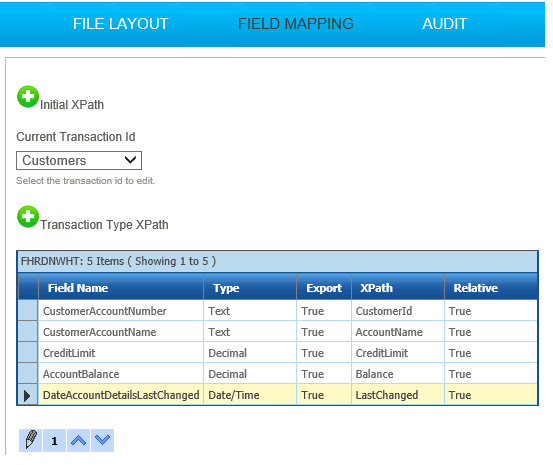
- Repeat the previous steps so the XPath for each of the fields is set as below:
- Sage 200:
|
Field Name |
XPath |
|---|---|
|
CustomerAccountNumber |
CustomerId |
|
CustomerAccountName |
AccountName |
|
CreditLimit |
CreditLimit |
|
AccountBalance |
Balance |
|
DateAccountDetailsLastChanged |
LastChanged |
- Sage 300:
|
Field Name |
XPath |
|---|---|
|
IDCUST |
CustomerId |
|
NAMECUST |
Name |
|
TEXTSTRE1 |
Address1 |
|
TEXTSTRE2 |
Address2 |
|
TEXTSTRE3 |
Address3 |
|
TEXTSTRE4 |
Address4 |
|
NAMECITY |
City |
|
CODESTTE |
State |
|
CODEPSTL |
PostCode |
|
CODECTRY |
Country |
|
NAMECTAC |
Contact |

- Press Apply to save the changes.
DO NOT press refresh yet. You will only get an error.
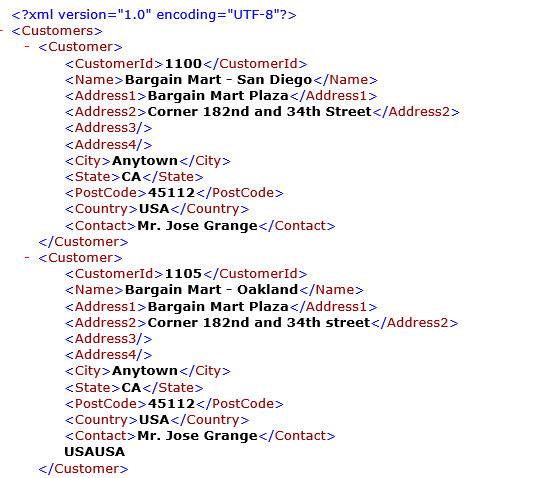
- Open the Xml file pointed to by the Path and File Name on the Options page.
- The file should have a node per customer, with individual nodes per field:
Create Child Transaction Types
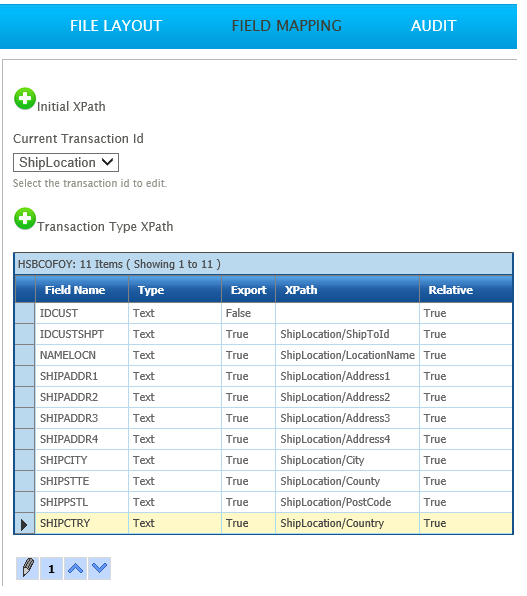
- Select DeliveryAddress/ShipLocation from the Transaction Id drop down.
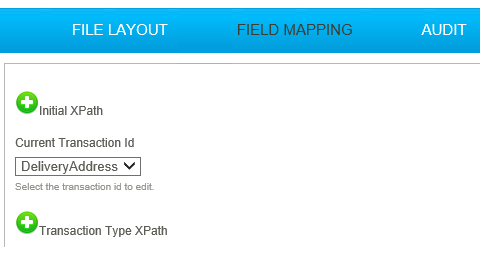
- Sage 200:
- Expand the Transaction XPath:
- Expand the Transaction XPath:
- XPath
- DeliveryAddresses.
- DeliveryAddresses.
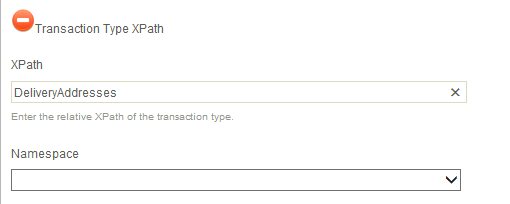
- Sage 300:
- Expand the Transaction XPath.
- XPath
- ShipLocations
- Edit the CustomerAccountNumber/IDCUST field
- Sage 200:
- Export
- Deselect (This will prevent the field from being included in the file.)
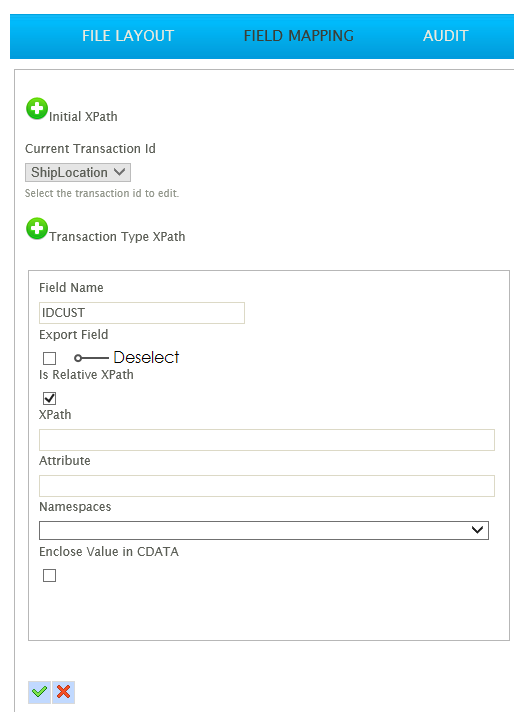
- Sage 300:
- Export
- Deselect (This will prevent the field from being included in the file.)
- For the remaining fields:
- Sage 200:
- Prefix each XPath:
- Address/ (this will create an Address node for each delivery address record.)
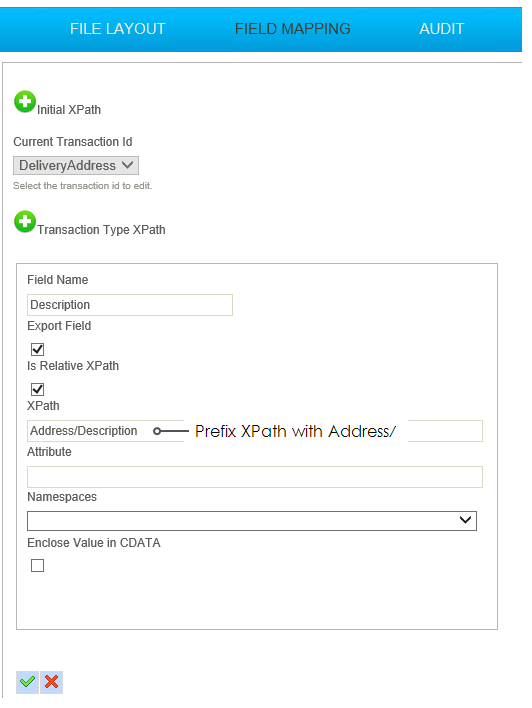
- Sage 300:
- Prefix each XPath:
- ShipLocation/ (this will create a ShipLocation node for each delivery address record.)
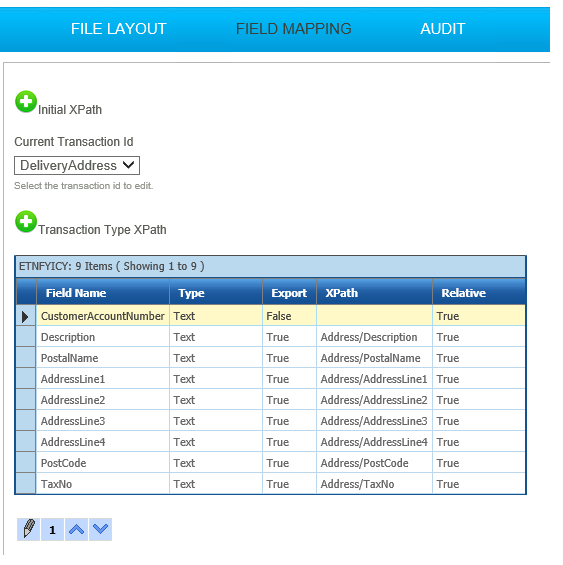
- The resulting Field Mapping grid will look like the below:
- Sage 200:
- Sage 300:
- Press refresh (finally!).
- Open the resultant file (in the file as pointed to by the Path and File Name on the Options page).
- This file will have Delivery Address nodes for the customers with Delivery Addresses, and none for those which do not have delivery addresses:
- Sage 200:
- Sage 300:
