FIELD TO ROW TRANSPOSITION
This example shows how to transpose two or more fields into rows, where the columnar values get transposed onto a single field (or set of fields).
![]()
This is particularly useful for the following scenarios:
- There are net and tax amounts field, but these need to be imported as separate lines.
- A line-level shipping charge needs to be posted a separate line.
This technique demonstrates how to chain together multiple transforms to achieve a desired result.
We recommend you review the Aggregate & Hierarchy transforms as these performs the bulk of the transposition.
The steps described below are described from the second hierarchy transform to the flatten transform.
![]()
PreSetup
The following steps are just here for you to setup a sample dataset so that it can be transposed in the following sections.
Excel Reader Setup
- Download the sample Excel file - This is the sample file used in the steps below.
- Add an Excel Reader, set the File Path and File Name to the place you saved the file. Set the Header Records to 1.
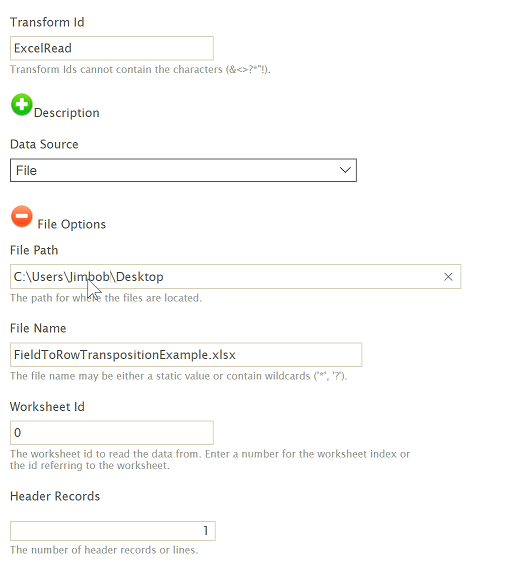
- Press Refresh.
Hierarchy Transform
- Close and add a Hierarchy transform to the integration, click the Field Mapping tab.
- Press the Edit button to show the field list for the Record transaction.
- Set ID & TranNo to keys 1 & 2 respectively; deselect the LineNo, Item, Qty, Amount & Tax fields.
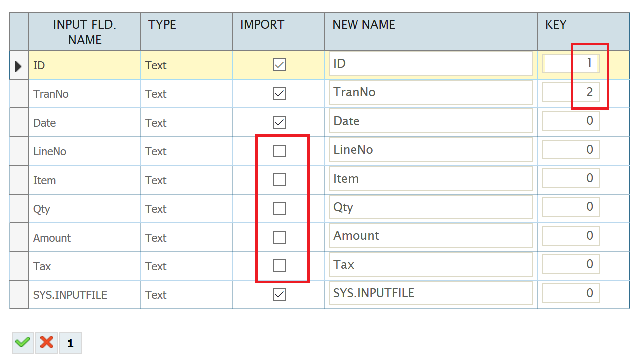
- Press the Green tick to save.
- Create a new Transaction, name it Detail then press Edit.

- Set the ID, TranNo & LineNo to keys 1, 2 & 3 respectively; deselect the Date field.
- Press the Green tick to save.
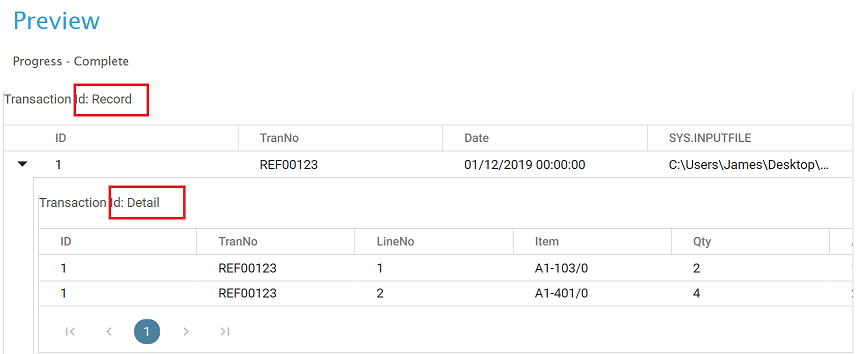
- Press Refresh, and the data should now be in a Header/Detail relationship.
Actual Transposition Setup
HIERARCHY TRANSFORM
This step creates a new transaction which is a child to the existing Detail level. This transform prepares the data for the column-to-row transform since all of the transform will occur on this new transaction, as opposed to the existing Detail level.
Dependent on your input you may be able to create the required hierarchy using an existing hierarchy or you may need to add a new hierarchy.
This example adds a new hierarchy.
-
Add a new Hierarchy, click the Field Mapping tab, and from the Transaction Id to Hierarchise select Detail.
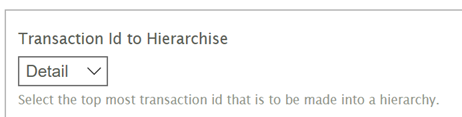
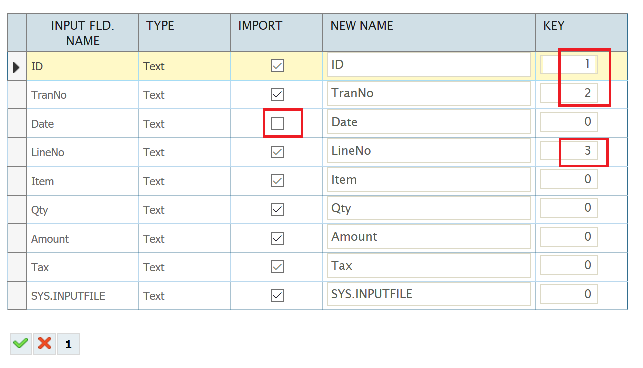
- Press the Edit button to show the field list for the Detail Transaction.
- Deselect the Amount & Tax fields, set the LineNo field to act as the Key.
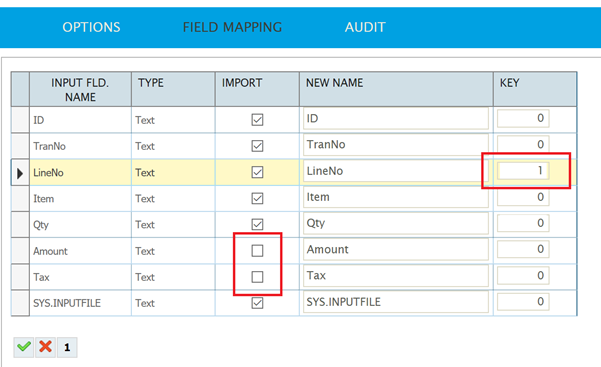
- Press the Green tick to Save.
- Create a new Transaction, name it SubDetail, then press Edit.
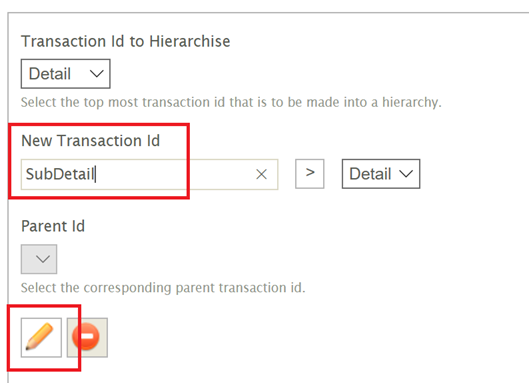
- Deselect the ID, TranNo, Qty, and SYS.INPUTFILE fields; set the Keys to LineNo and Item.
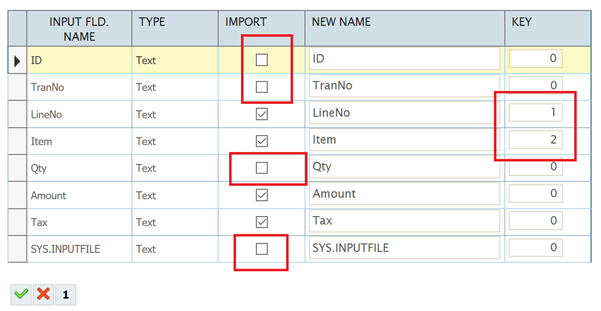
- Press the Green tick to save and then Refresh.
There will now be a third transaction where there is a single record in the bottom most.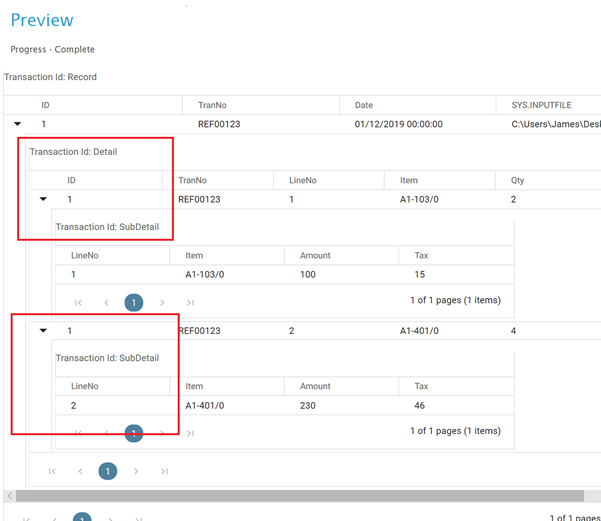
Map Transform
This transform adds a field to the new ‘SubDetail’ transaction. This field will be used to store the column value. If you needed to transform multiple sets of columns you would add a field for each column in the set you need to transform.
-
Add a Map transform, click the Field Mapping, change to the SubDetail transaction, add a new field ‘LineAmount’, leave the Field Value empty and press the Green tick to save.
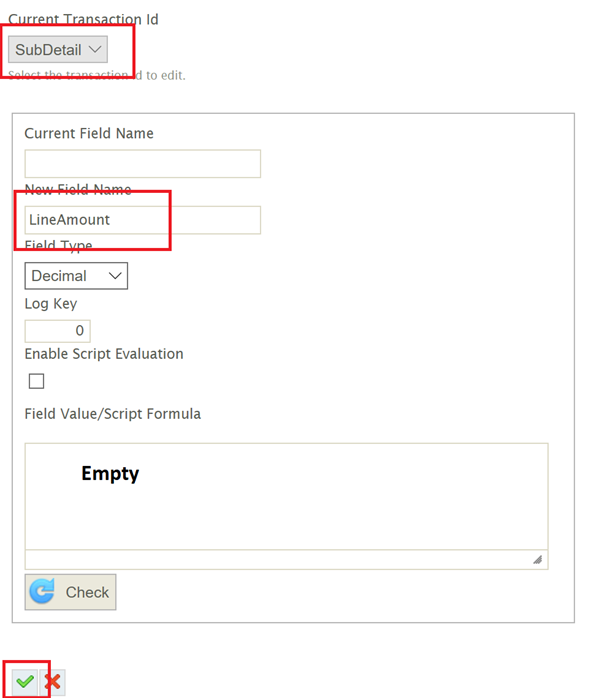

- Press the Refresh button and the LineAmount field will now exist in the SubDetail level.

Aggregate Transform
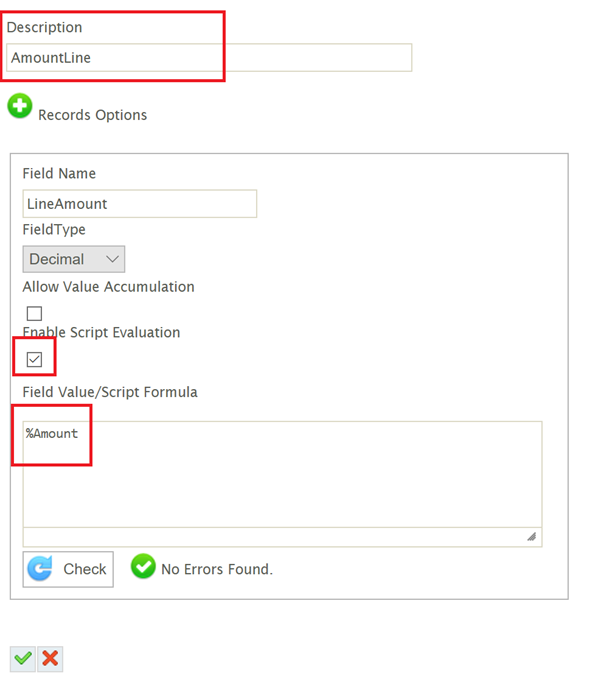
This transform preforms the bulk of the column-to-row transposition. The aggregate transform will add two new ‘Calc’ records to the SubDetail level where each CalcRecord will have specific logic to transpose the Amount & Tax values to the LineAmount field created in the previous step.
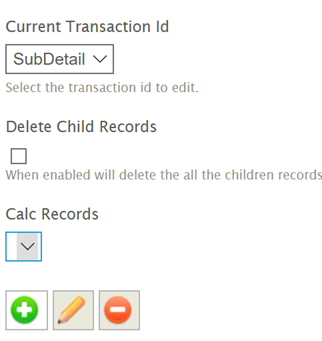
- Add an Aggregate transform, click the Field Mapping tab & change the Current Transaction Id to SubDetail.
- Press the Add button, change the Description to AmountLine, Enable Script Evaluation and set the Field Value to %Amount and press the Green tick to save.
-
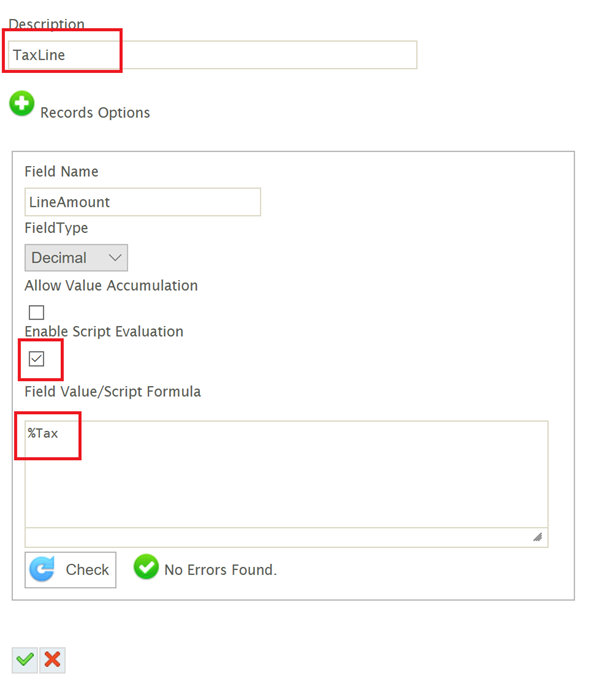
Press the Add button, change the Description to TaxLine, Enable Script Evaluation and set the Field Value to %Tax and press the Green tick to save.
- When returned back to the Field Mapping tab, check the ‘Delete Child Records’.
This will delete the original line of the SubDetail Transaction, leaving only the two new CalcRecords created in the transform.
An alternative approach would be to copy the Amount field in the previous Map transform and to only create TaxLine record in this step. This however is a little clumsy as the logic is spread across multiple transforms. Conversely, the approach taken here makes the logic clear and isolates the logic to a single transform.
- Press Refresh, expand the transaction so that you can see the SubDetail transaction.

The LineAmount field will now have the Amount and Tax fields transposed.
Flatten Transform
This step will ‘flattens’ the SubDetail so that we only have the Details.
- Add a Flatten transform, click the Field Mapping tab, change the Transaction Id to Flatten to Detail.
Press the Edit button and deselect the LineNo, Item, Amount & Tax fields from the SubDetail Transaction, leaving only the LineAmount field, the press the Green tick to save.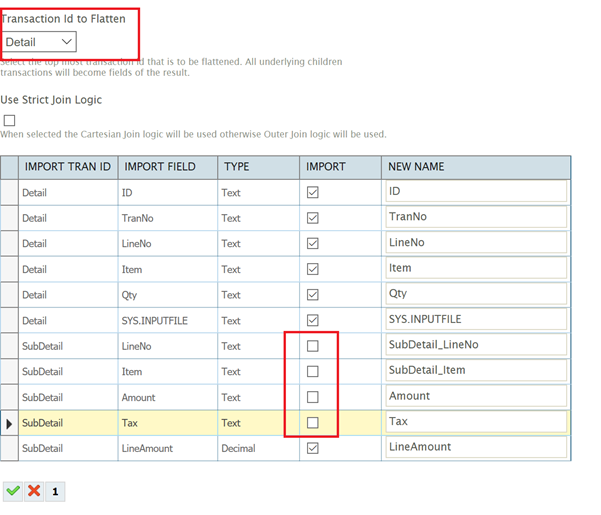
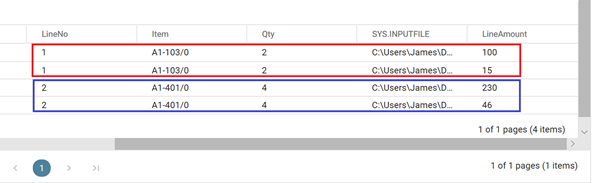
- Press Refresh and expand the grid to show the Detail. You will now see the transposed values in the Red and Blue boxes.
Done!