Hierarchical Data Files
Estimated time: 30 Mins
Hierarchical files are those which have header/detail/sub-detail record types within a file.
Method
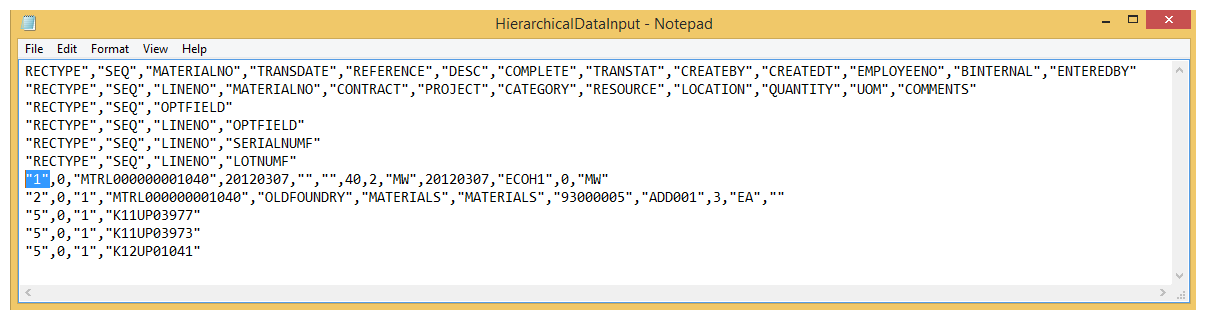
The below screenshot illustrates a hierarchical file, where the first column denotes the record ‘type’ .
Import Hierarchical CSV File
- Create a new integration, drag a CSV Read transform onto the integration, double click to open it.
- Set the various options in File Options:
- File Path
- C:\IMan\InputData\Training
- File Name
- HierarchicalDataInput.csv
- Field Delimiter
- ,
- Header Records
- 6
- Mapping Style
- By Position
Set Hierarchical Dataset Options
- Expand the Hierarchical Dataset Options:
- Hierarchical Dataset
- Select an option from the Hierarchical Dataset drop-down to enable hierarchical data read.
- For training, select: Keyed Fields
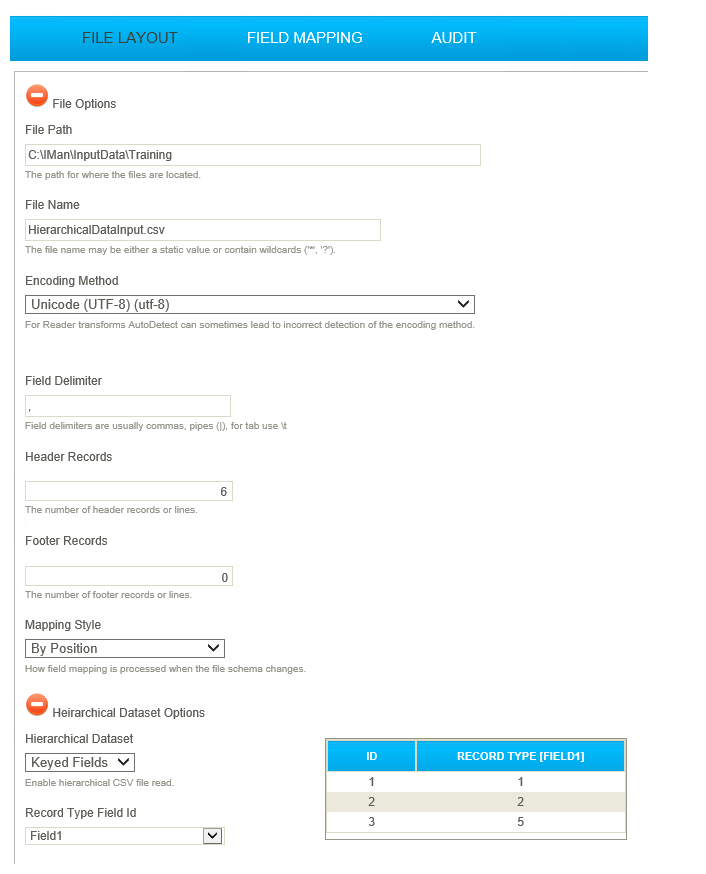
- Press Refresh, and the table will be populated with the values it could find to denote the record type.
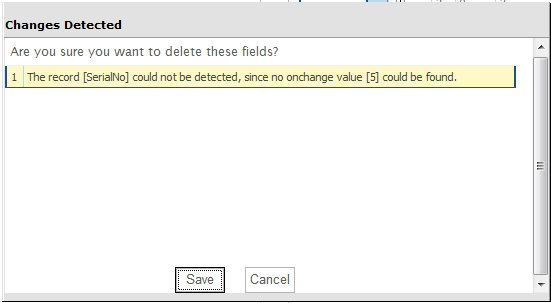
When setting up a hierarchical dataset, you must have a file which includes all expected record types.
- If you have a file which does not have a record type, a prompt to delete the type will be displayed:
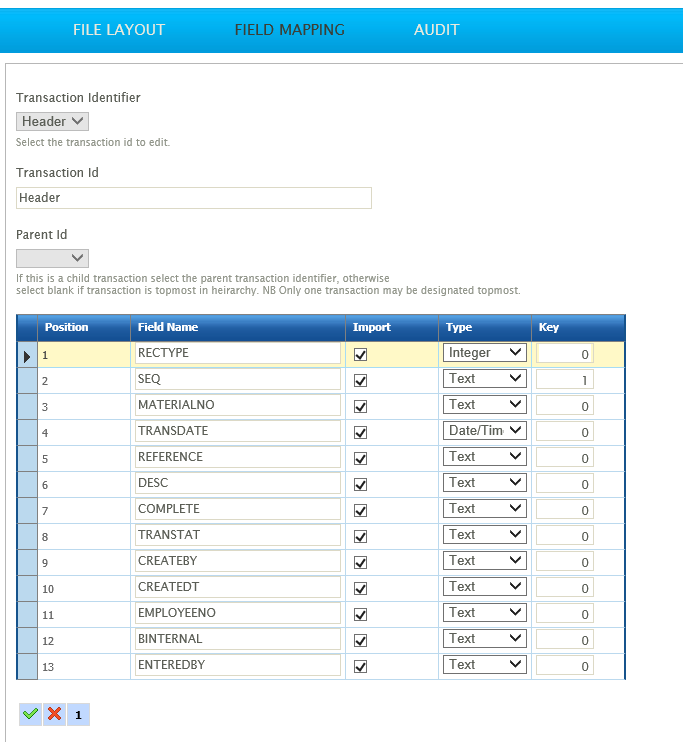
Organise the Hierarchy
- Click the Field Mapping tab.
- Rename Transaction Id:
- Header
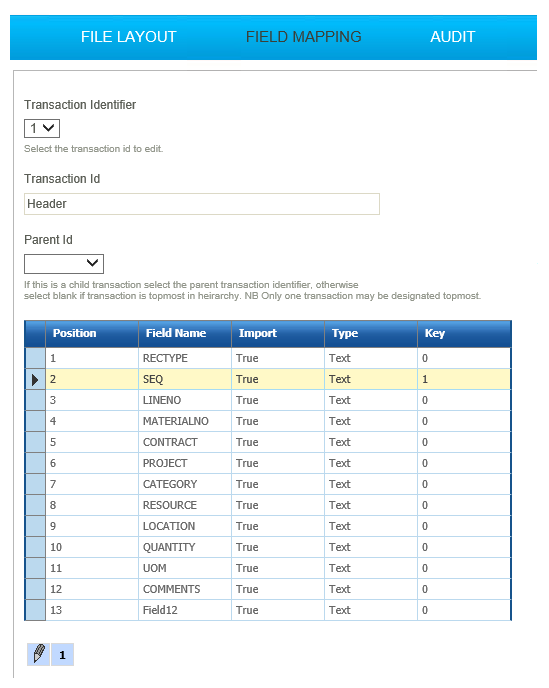
- Press the edit button to configure the Header fields:
- Field Name
- For training: RECTYPE
- Import
- Select to import the field
- For training: all selected.
- Type
- Select appropriate field type.
- For training: Integer
- Key
- To define the relationships between records.
- For training: Leave as 0
- Repeat for all header fields, using the appropriate settings.
Ensure the Key value for SEQ field is set to 1- this is the field with which the data is associated.
- When done, select '2' from the transaction identifier drop down.
- Rename the Transaction Id
- Detail (or Material).
- Change the Parent Id to Header.
- Enter the detail fields in the same way as for the header fields.
- Set key values:
- SEQ
- 1
- LINENO
- 2
This Key value denotes the field that defines the hierarchical relationship. See Key Fields for more information.
![]()
- Select '5' from the transaction identifier drop down.
- Rename the Transaction Id
- SerialNo
- Change the Parent Id to Detail
- Enter the SerialNo fields, in the same way as for the detail and header fields.
- Set the key values:
- SEQ
- 1
- LINENO
- 2
- SERIALNUMF
- 3
![]()
- Press Refresh; the preview Grid should look something like below:
![]()