Concur Security
Two steps to enable your App for basic configurations (a guide taken from Concur).
Step 1: Create & Transfer Credentials
This step can either be completed by your own authorized Concur Administrator or you can log a ticket with the Concur Helpdesk to have this step completed for you by our support team.
It is important that this Web Services Admin User Profile is not the same as any actual user of the system. If an actual user’s credentials are utilized for this purpose and they leave the company, the applications will no longer function.
Create a WS Admin User Profile in Concur Standard Edition
- Click Administration and then Setup.
- Select Users from the menu on the left and click Create /Edit User.
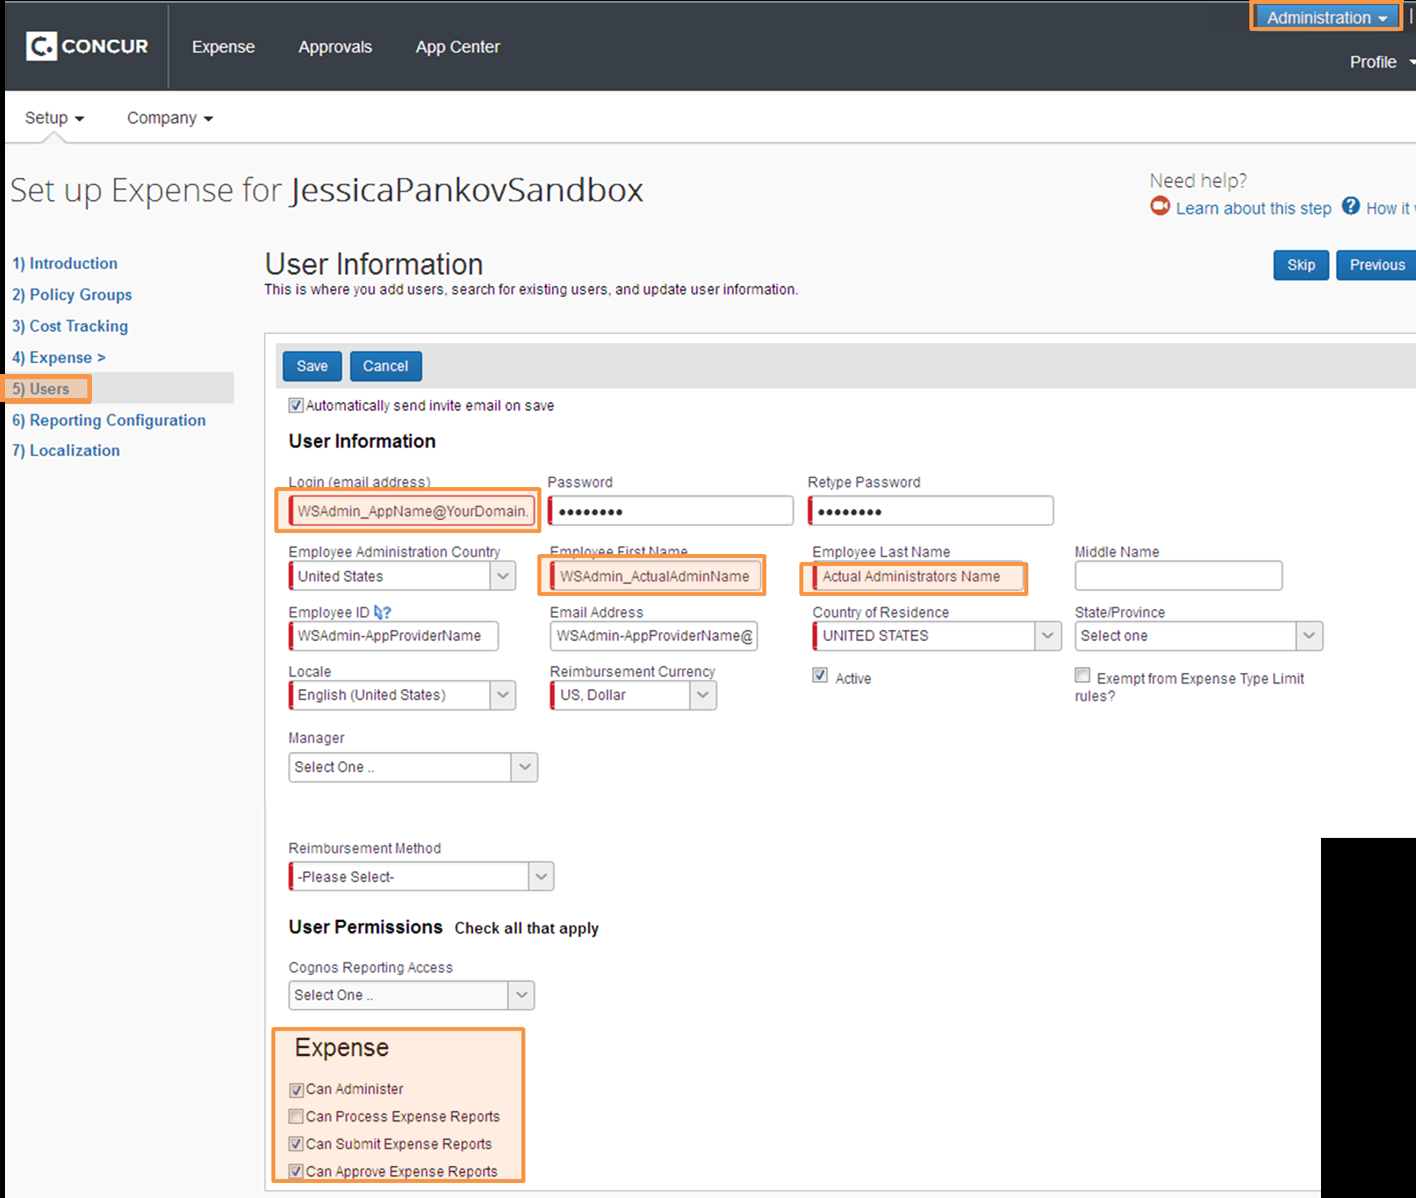
- The new WS Admin User Profile in Concur Standard Edition should have the following attributes:
- LoginID
- Include WSAdmin and the name of the application as the login id like this: [email protected]
- First Name
- To easily identify this user profile later and also indicate who the authorized user was that enabled the application, use a combination of “WSAdmin” and the first name of the actual administrator who is authorizing the application. Example: WSADMIN_John Last Name: Insert the actual last name of the authorized administrator who will enable the application.
- Password
- Create a unique and secure password for the user.
- Permissions
- Select "Can Administer" check box
- Select "Can Submit Expense Reports", "Can Book Travel" and/or "Is Invoice AP User" check boxes based on what type of data is needed for the application. The system will grant the relevant data access based on the roles that are assigned to this user.
For example, if the app needs to access Travel data and the WS Admin User Profile does not have access to travel, the app will not access travel data.
- Click “Save” and then login to Concur with these new user credentials once to activate the account.
- Securely send the Login ID and Password to your app provider.
Create a WS Admin User Profile in Concur Professional Edition
- Click into the Administration tab & then click into the Company Admin menu.
- Click Add New User.
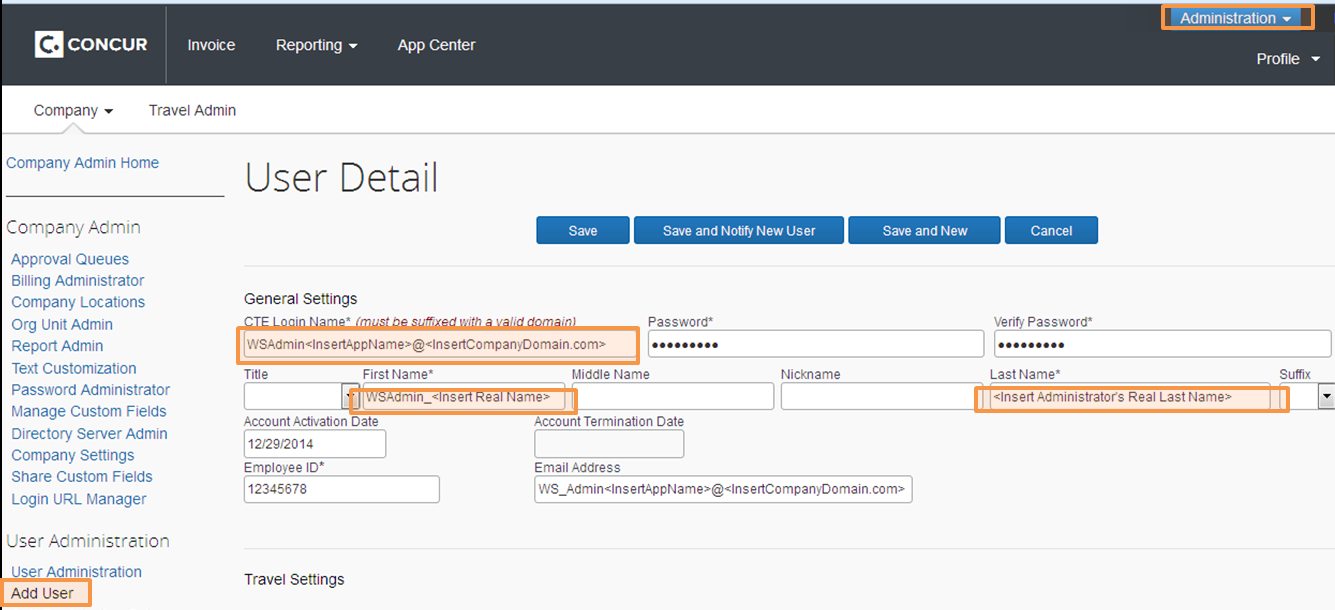
The new WS Admin User Profile in Concur Professional Edition should have the following attributes:
- LoginID
- Include WSAdmin and the name of the application as the login id like this: [email protected] Password: Create a unique and secure password for the user.
- First Name
- To easily identify this user profile later and also indicate who the authorized user was that enabled the application, use a combination of “WSAdmin” and the first name of the actual administrator who is authorizing the application. Example: WSADMIN_John Last Name: Insert the actual last name of the authorized administrator who will enable the application.
- Email Address
- Use the actual email address of the authorized administrator
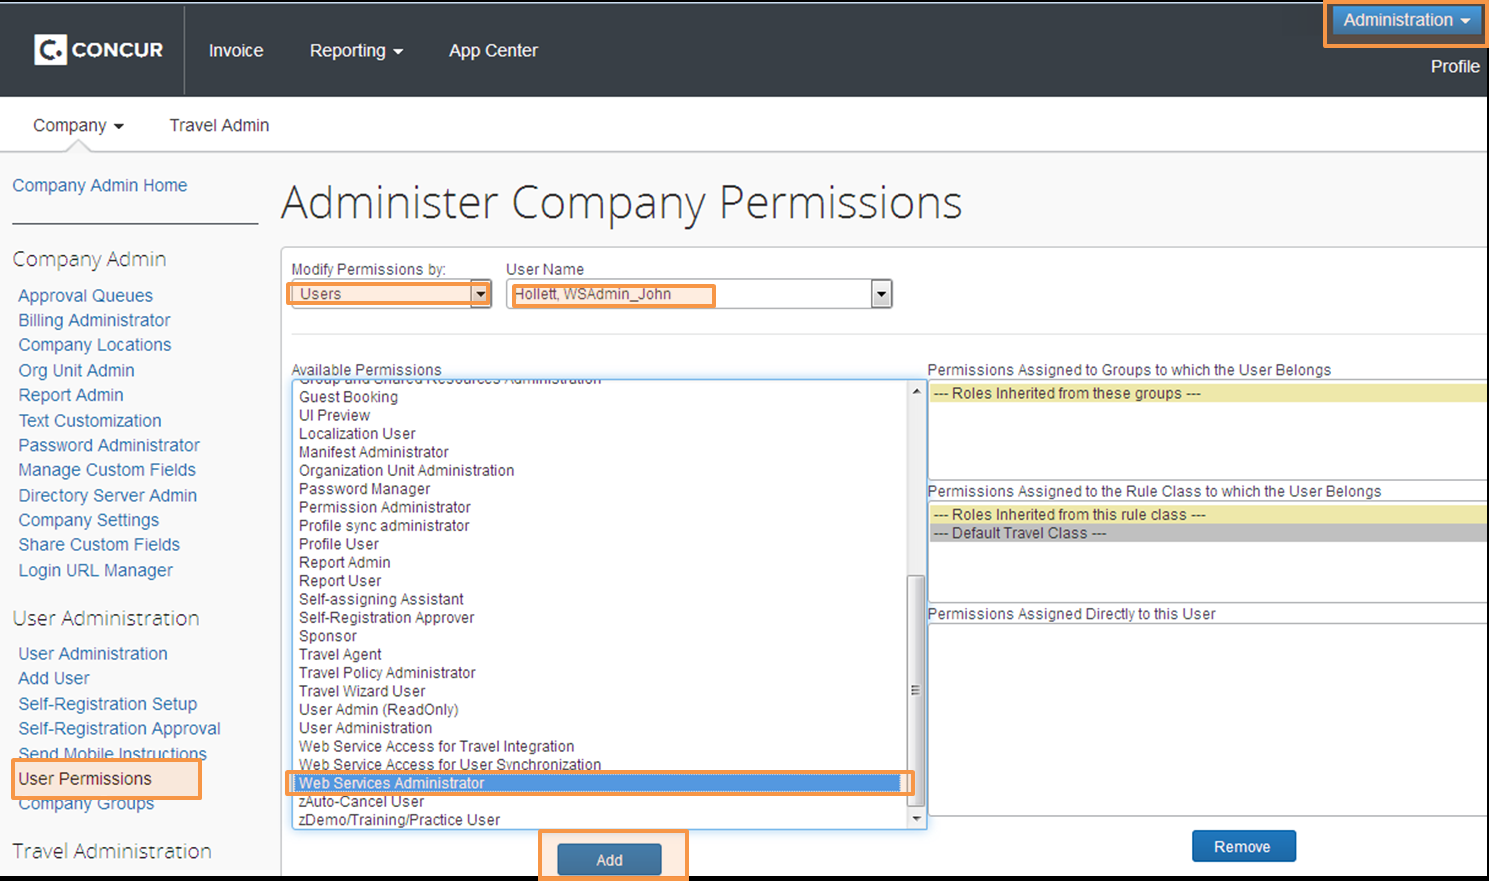
- Next, while still in the Administration area, click User Permissions.
- Find the new WSAdmin User and select Add to grant Web Services Administrator Permission.
- Ensure the WSAdmin profile also has the Expense User, Travel User, & Invoice User permissions or roles for apps integrating with Expense, Travel, and/or Invoice Services respectively. The system will grant the relevant data access based on the roles that are assigned to this user.
For example, if the app needs to access Travel data and the WS Admin User Profile does not have access to book travel, the app will not be able to access the necessary travel data.
- Once your new user profile has been created you must login to Concur with these credentials once to activate the account. Securely send the Login ID and Password to your app provider.
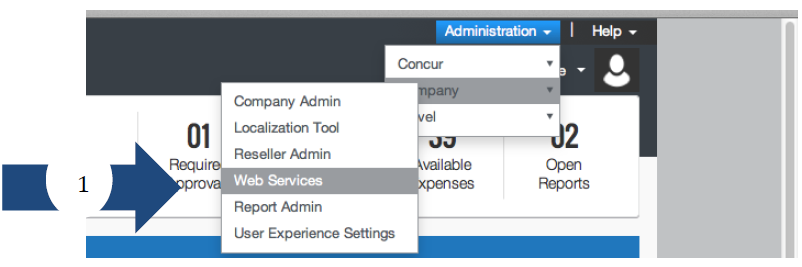
Step 2: Enable the App
- The Concur administrator who has been named in the newly created WS Admin Profile logs into Concur with the new credentials.
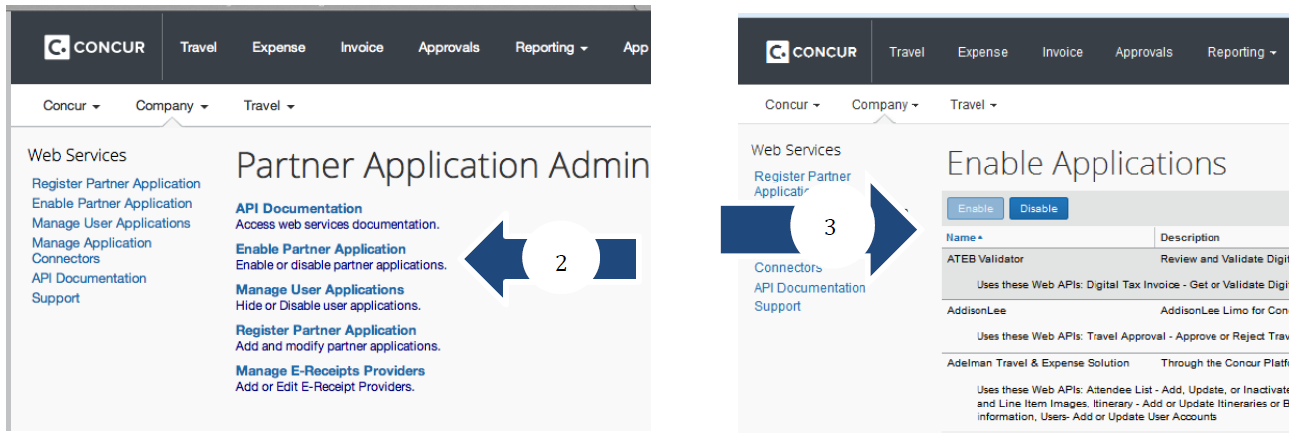
- Then go to to Administration > Company > Web Services > Enable Partner Application and find the app.
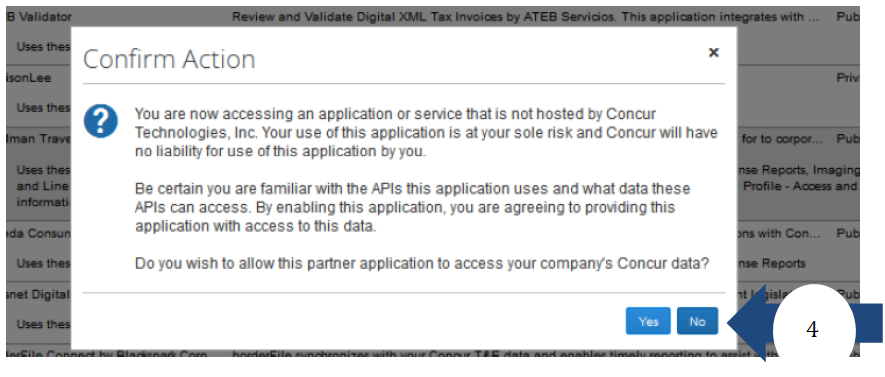
- Finally, click “Enable” and confirm the sharing of data.